 夜雨聆风
夜雨聆风


使用Sphinx构建软件说明书(4):整合完整项目
使用Sphinx构建软件说明书(4):整合完整项目
微信公众号:生信小知识
关注可了解更多的生物信息学教程及知识。问题或建议,请公众号留言;
目录
前言1. 下载模板文件2. 定义文档结构3. 生产文档后记
前言
我决定使用Sphinx对开发的软件包写一个说明书,这里记录我学习Sphinx的记录。
所有知识来源:
-
https://www.osgeo.cn/sphinx-note/intro.html -
Sphinx 1.3.1 中文手册 (推荐查看)
已发布教程:
前面的教程,已经让我们掌握了构建工具的使用方法。接下来我们试着将多个原始文档进行整理,制作成一个完整的项目~
Sphinx 使用 reStructuredText 作为默认标记语言。我们可以在 source 目录下添加 chapter1.rst、chapter2.rst 等源文件,用于撰写文档的不同章节,并使用 index.rst 对所有的 rst 文件进行组织管理。
1. 下载模板文件
我们后面将学习如何使用 reStructuredText 语言语言来编写文档,在此之前,我们先使用模板文件 chapter1.rst、chapter2.rst 来跟随着构建一个完整的项目吧。
我们在 ./source/ 下新建2个文件,并将文件名分别修改为 chapter1.rst、chapter2.rst,而后我们将内容进行填充。
chapter1.rst 内容:
.. _getting_started:


***************
Getting started
***************

.. _installing-docdir:

Installing your doc directory
=============================

You may already have sphinx `sphinx <http://sphinx.pocoo.org/>`_
installed -- you can check by doing::

  python -c 'import sphinx'

If that fails grab the latest version of and install it with::

  > sudo easy_install -U Sphinx

Now you are ready to build a template for your docs, using
sphinx-quickstart::

  > sphinx-quickstart

accepting most of the defaults.  I choose "sampledoc" as the name of my
project.  cd into your new directory and check the contents::

  home:~/tmp/sampledoc> ls
  Makefile    _static     conf.py
  build        _templates  index.rst

The index.rst is the master ReST for your project, but before adding
anything, let's see if we can build some html::

  make html

If you now point your browser to :file:`build/html/index.html`, you
should see a basic sphinx site.

.. image:: images/basic_screenshot.png

.. _fetching-the-data:

Fetching the data
-----------------

Now we will start to customize out docs.  Grab a couple of files from
the `web site <https://github.com/matplotlib/sampledoc>`_
or git.  You will need :file:`getting_started.rst` and
:file:`images/basic_screenshot.png`.  All of the files live in the
"completed" version of this tutorial, but since this is a tutorial,
we'll just grab them one at a time, so you can learn what needs to be
changed where.  Since we have more files to come, I'm going to grab
the whole git directory and just copy the files I need over for now.
First, I'll cd up back into the directory containing my project, check
out the "finished" product from git, and then copy in just the files I
need into my :file:`sampledoc` directory::

  home:~/tmp/sampledoc> pwd
  /Users/jdhunter/tmp/sampledoc
  home:~/tmp/sampledoc> cd ..
  home:~/tmp> git clone https://github.com/matplotlib/sampledoc.git tutorial
  Cloning into 'tutorial'...
  remote: Counting objects: 87, done.
  remote: Compressing objects: 100% (43/43), done.
  remote: Total 87 (delta 45), reused 83 (delta 41)
  Unpacking objects: 100% (87/87), done.
  Checking connectivity... done
  home:~/tmp> cp tutorial/getting_started.rst sampledoc/
  home:~/tmp> cp tutorial/_static/images/basic_screenshot.png sampledoc/_static/

The last step is to modify :file:`index.rst` to include the
:file:`getting_started.rst` file (be careful with the indentation, the
"g" in "getting_started" should line up with the ':' in ``:maxdepth``::

  Contents:

  .. toctree::
     :maxdepth: 2

     getting_started.rst

and then rebuild the docs::

  cd sampledoc
  make html


When you reload the page by refreshing your browser pointing to
:file:`build/html/index.html`, you should see a link to the
"Getting Started" docs, and in there this page with the screenshot.
`Voila!`

We can also use the image directive in :file:`index.rst` to include to the screenshot above
with::

  .. image::
     images/basic_screenshot.png


Next we'll customize the look and feel of our site to give it a logo,
some custom css, and update the navigation panels to look more like
the `sphinx <http://sphinx.pocoo.org/>`_ site itself -- see
:ref:`custom_look`.
chapter2.rst 内容:
.. _extensions:

****************************************************
Sphinx extensions for embedded plots, math and more
****************************************************

Sphinx is written in python, and supports the ability to write custom
extensions.  We've written a few for the matplotlib documentation,
some of which are part of matplotlib itself in the
matplotlib.sphinxext module, some of which are included only in the
sphinx doc directory, and there are other extensions written by other
groups, eg numpy and ipython.  We're collecting these in this tutorial
and showing you how to install and use them for your own project.
First let's grab the python extension files from the :file:`sphinxext`
directory from git (see :ref:`fetching-the-data`), and install them in
our :file:`sampledoc` project :file:`sphinxext` directory::

    home:~/tmp/sampledoc> mkdir sphinxext
    home:~/tmp/sampledoc> cp ../sampledoc_tut/sphinxext/*.py sphinxext/
    home:~/tmp/sampledoc> ls sphinxext/
    apigen.py  docscrape.py  docscrape_sphinx.py  numpydoc.py

In addition to the builtin matplotlib extensions for embedding pyplot
plots and rendering math with matplotlib's native math engine, we also
have extensions for syntax highlighting ipython sessions, making
inhertiance diagrams, and more.

We need to inform sphinx of our new extensions in the :file:`conf.py`
file by adding the following.  First we tell it where to find the extensions::

    # If your extensions are in another directory, add it here. If the
    # directory is relative to the documentation root, use
    # os.path.abspath to make it absolute, like shown here.
    sys.path.append(os.path.abspath('sphinxext'))

And then we tell it what extensions to load::

    # Add any Sphinx extension module names here, as strings. They can be extensions
    # coming with Sphinx (named 'sphinx.ext.*') or your custom ones.
    extensions = ['matplotlib.sphinxext.only_directives',
                  'matplotlib.sphinxext.plot_directive',
                  'IPython.sphinxext.ipython_directive',
                  'IPython.sphinxext.ipython_console_highlighting',
                  'sphinx.ext.mathjax',
                  'sphinx.ext.autodoc',
                  'sphinx.ext.doctest',
                  'sphinx.ext.inheritance_diagram',
                  'numpydoc']

Now let's look at some of these in action.  You can see the literal
source for this file at :ref:`extensions-literal`.

.. _ipython-highlighting:

ipython sessions
================

Michael Droettboom contributed a sphinx extension which does `pygments
<http://pygments.org>`_ syntax highlighting on `ipython
<http://ipython.scipy.org>`_ sessions.  Just use ipython as the
language in the ``sourcecode`` directive::

    .. sourcecode:: ipython

        In [69]: lines = plot([1,2,3])

        In [70]: setp(lines)
          alpha: float
          animated: [True | False]
          antialiased or aa: [True | False]
          ...snip


and you will get the syntax highlighted output below.

.. sourcecode:: ipython

    In [69]: lines = plot([1,2,3])

    In [70]: setp(lines)
      alpha: float
      animated: [True | False]
      antialiased or aa: [True | False]
      ...snip

This support is included in this template, but will also be included
in a future version of Pygments by default.

.. _using-math:

Using math
==========

In sphinx you can include inline math :math:`x\leftarrow y\ x\forall
y\ x-y` or display math

.. math::

  W^{3\beta}_{\delta_1 \rho_1 \sigma_2} = U^{3\beta}_{\delta_1 \rho_1} + \frac{1}{8 \pi 2} \int^{\alpha_2}_{\alpha_2} d \alpha^\prime_2 \left[\frac{ U^{2\beta}_{\delta_1 \rho_1} - \alpha^\prime_2U^{1\beta}_{\rho_1 \sigma_2} }{U^{0\beta}_{\rho_1 \sigma_2}}\right]

To include math in your document, just use the math directive; here is
a simpler equation::

    .. math::

      W^{3\beta}_{\delta_1 \rho_1 \sigma_2} \approx U^{3\beta}_{\delta_1 \rho_1}

which is rendered as

.. math::

   W^{3\beta}_{\delta_1 \rho_1 \sigma_2} \approx U^{3\beta}_{\delta_1 \rho_1}

Recent versions of Sphinx include built-in support for math.
There are three flavors:

  - sphinx.ext.imgmath: uses dvipng to render the equation

  - sphinx.ext.mathjax: renders the math in the browser using Javascript

  - sphinx.ext.jsmath: it's an older code, but it checks out

Additionally, matplotlib has its own math support:

  - matplotlib.sphinxext.mathmpl

See the matplotlib `mathtext guide
<https://matplotlib.org/users/mathtext.html>`_ for lots
more information on writing mathematical expressions in matplotlib.

.. _pyplots:

Inserting matplotlib plots
==========================

Inserting automatically-generated plots is easy.  Simply put the
script to generate the plot in the :file:`pyplots` directory, and
refer to it using the ``plot`` directive.  First make a
:file:`pyplots` directory at the top level of your project (next to
:``conf.py``) and copy the :file:`ellipses.py`` file into it::

    home:~/tmp/sampledoc> mkdir pyplots
    home:~/tmp/sampledoc> cp ../sampledoc_tut/pyplots/ellipses.py pyplots/


You can refer to this file in your sphinx documentation; by default it
will just inline the plot with links to the source and PF and high
resolution PNGS.  To also include the source code for the plot in the
document, pass the ``include-source`` parameter::

  .. plot:: pyplots/ellipses.py
     :include-source:

In the HTML version of the document, the plot includes links to the
original source code, a high-resolution PNG and a PDF.  In the PDF
version of the document, the plot is included as a scalable PDF.

.. plot:: pyplots/ellipses.py
   :include-source:


You can also inline code for plots directly, and the code will be
executed at documentation build time and the figure inserted into your
docs; the following code::

   .. plot::

      import matplotlib.pyplot as plt
      import numpy as np
      x = np.random.randn(1000)
      plt.hist( x, 20)
      plt.grid()
      plt.title(r'Normal: $\mu=%.2f, \sigma=%.2f$'%(x.mean(), x.std()))
      plt.show()

produces this output:

.. plot::

    import matplotlib.pyplot as plt
    import numpy as np
    x = np.random.randn(1000)
    plt.hist( x, 20)
    plt.grid()
    plt.title(r'Normal: $\mu=%.2f, \sigma=%.2f$'%(x.mean(), x.std()))
    plt.show()


See the matplotlib `pyplot tutorial
<https://matplotlib.org/users/pyplot_tutorial.html>`_ and
the `gallery <https://matplotlib.org/gallery.html>`_ for
lots of examples of matplotlib plots.

Inheritance diagrams
====================

Inheritance diagrams can be inserted directly into the document by
providing a list of class or module names to the
``inheritance-diagram`` directive.

For example::

  .. inheritance-diagram:: codecs

produces:

.. inheritance-diagram:: codecs


See the :ref:`ipython_directive` for a tutorial on embedding stateful,
matplotlib aware ipython sessions into your rest docs with multiline
and doctest support.

.. _extensions-literal:

This file
=========

.. literalinclude:: extensions.rst
此外,我们将下面的图片放到 ./source/images/basic_screenshot.png 下。

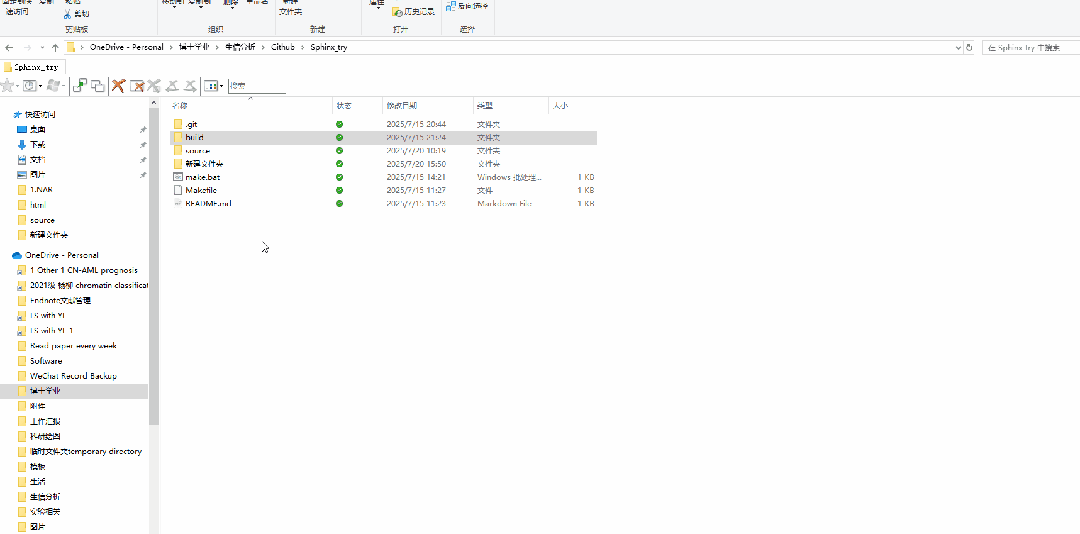
到此,我们的文件存放应该如下所示:
.
├─ make.bat   # Window下的编译脚本
├─ Makefile   # Linux下的Makefile文件
├─ build      # make编译后产生的导出文件目录
└─ source     # 文档源码目录
    ├─ _static         # 用于存放参与编译的静态文件
    ├─ _templates      # 用于存放项目的主题模板文件
    │
    ├─ images          # 用于存放文档中需插入的图片
    │    basic_screenshot.png  # 图片文件
    │
    ├─ chapter1.rst    # 第一章文档源文件
    ├─ chapter2.rst    # 第二章文档源文件
    │
    ├─ conf.py         # 项目配置文件
    └─ index.rst       # 文档源文件入口
2. 定义文档结构
完成添加 chapter1.rst,chapter2.rst 等文件后,我们还需要在 index.rst 中将这些文件包含进来,并定义我们的文档结构。
原本的 index.rst 内容如下:
.. Try Sphinx documentation master file, created by
   sphinx-quickstart on Tue Jul 15 11:27:30 2025.
   You can adapt this file completely to your liking, but it should at least
   contain the root `toctree` directive.

Try Sphinx documentation
========================

Add your content using ``reStructuredText`` syntax. See the
`reStructuredText <https://www.sphinx-doc.org/en/master/usage/restructuredtext/index.html>`_
documentation for details.


.. toctree::
   :maxdepth: 2
   :caption: Contents:
我们需要在此基础上,在内容后面追加几行内容:
   :numbered:

   chapter1.rst
   chapter2.rst
其中:
-
toctree用来于产生目录表
-
maxdepth表示目录中只显示几层标题 -
numbered表示章节编号 -
numbered之后空一行,在下面列出各.rst子文档
3. 生产文档
修改完成后,我们再一次在终端中使用 ./make.bat html 命令。
然后使用浏览器打开 ./build/html/index.html
可以看到,通过index文件打开后,所有的文档已经被组织好,并且所有文件也进行了编号。已经和deepTools工具的说明书有点像了!
后记
这里我们生成了完成的文档,并将文章不同章节进行了整理归纳,至此我们已经完整掌握了具体构建工具的使用,接下来我们即将学习rst语言的语法,以方便我们来撰写说明文档~
