夜雨聆风
夜雨聆风


[免费|干货]CAD二次开发插件源码分享:C#精准定位!“右侧回溯法”获取字符笔画重心
在处理 CAD 文字时,我们经常遇到这种棘手的“微操”需求:
🎯 场景: 给文字 “A.1” 中的小数点 “.” 画一个圈。
😫 痛点: 字间距(Kerning)很难算准。简单的“字符宽度累加”会忽略 CAD 字体渲染时的重叠调整。
今天分享一种“右侧回溯算法”:利用 CAD 渲染引擎计算出的绝对右边界,反向推算字符中心,精度达到像素级。
为了彻底消除字间距带来的累积误差,我们采用以下策略:
- 获取绝对右边界 (MaxX):
创建一个临时文字,内容包含 当前字符及之前的所有字符。测量它的最右侧 X 坐标。这是该字符在整行文字中绝对准确的结束位置。 - 获取自身宽度 (Width):
单独创建一个 目标字符,测量其实际笔画宽度。 - X轴回溯:
中心X
= 绝对右边界 – (自身宽度 / 2) - Y轴独立:
中心Y
= (独立字符MinY + 独立字符MaxY) / 2
(使用独立字符高度,确保”.”的中心在底部,而不是悬在半空)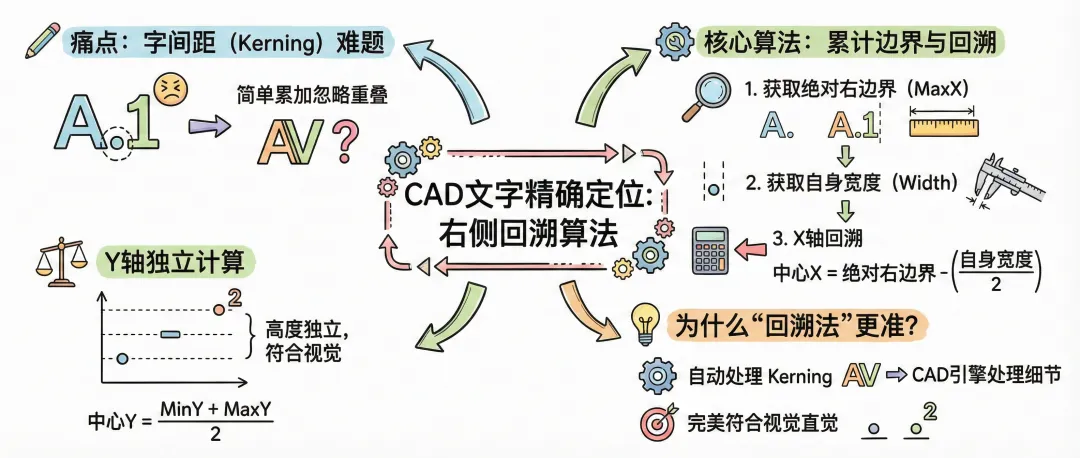
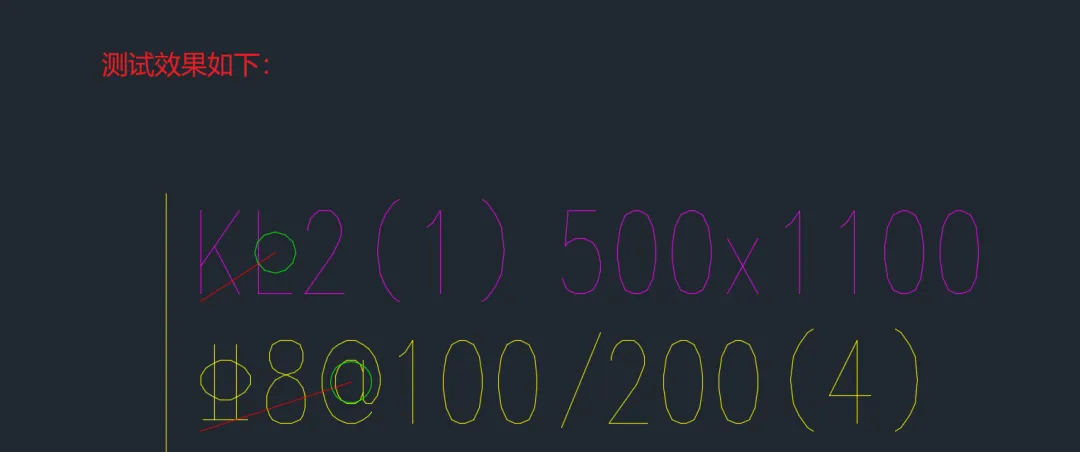
新建类 CharMeasureCmd,加载后使用命令 MEASURECHAR。程序会自动画出目标字符的中心点连线和包围圈。
using System;using Autodesk.AutoCAD.Runtime;using Autodesk.AutoCAD.ApplicationServices;using Autodesk.AutoCAD.DatabaseServices;using Autodesk.AutoCAD.EditorInput;using Autodesk.AutoCAD.Geometry;namespace CADDevTools{public static class CharMeasureCmd{[CommandMethod("MEASURECHAR")]public static void MeasureCharDistance(){Document doc = Application.DocumentManager.MdiActiveDocument;Database db = doc.Database;Editor ed = doc.Editor;// 1. 选择文字PromptEntityOptions peo = new PromptEntityOptions("\n请选择单行文字(DBText): ");peo.SetRejectMessage("\n需选择DBText");peo.AddAllowedClass(typeof(DBText), true);var per = ed.GetEntity(peo);if (per.Status != PromptStatus.OK) return;// 2. 输入索引PromptIntegerOptions pio = new PromptIntegerOptions("\n请输入目标字符索引 (从0开始): ");pio.AllowNegative = false;var pir = ed.GetInteger(pio);if (pir.Status != PromptStatus.OK) return;using (Transaction tr = db.TransactionManager.StartTransaction()){DBText textEnt = tr.GetObject(per.ObjectId, OpenMode.ForRead) as DBText;int index = pir.Value;if (index >= textEnt.TextString.Length){ed.WriteMessage("\n❌ 索引超出文字长度!");return;}// --- 核心调用 ---Point3d charCenter = GetTrueStrokeCenter(textEnt, index);// 获取插入点用于连线展示// 仅用于视觉参考,不影响计算Point3d insertPt = (textEnt.HorizontalMode == TextHorizontalMode.TextLeft &&textEnt.VerticalMode == TextVerticalMode.TextBase)? textEnt.Position : textEnt.AlignmentPoint;// 3. 可视化绘制 (画红线和绿圈)BlockTableRecord btr = (BlockTableRecord)tr.GetObject(db.CurrentSpaceId, OpenMode.ForWrite);Line line = new Line(insertPt, charCenter);line.ColorIndex = 1; // 红线连接btr.AppendEntity(line);tr.AddNewlyCreatedDBObject(line, true);// 画一个小圈标记重心// 半径取字高的0.2倍,方便观察Circle circle = new Circle(charCenter, Vector3d.ZAxis, textEnt.Height * 0.2);circle.ColorIndex = 3; // 绿圈btr.AppendEntity(circle);tr.AddNewlyCreatedDBObject(circle, true);tr.Commit();}}////// [核心算法] 获取指定字符的“实际笔画重心” (世界坐标)///public static Point3d GetTrueStrokeCenter(DBText sourceText, int index){string content = sourceText.TextString;// 字符串A: "当前字符及之前的所有字符" (用于计算绝对右边界)string strCombined = content.Substring(0, index + 1);// 字符串B: "目标字符" (用于计算自身宽高和Y重心)string strTarget = content.Substring(index, 1);// 1. 创建虚拟文字 (内存对象) 用于测量// 关键:强制归零(左对齐、0角度、原点位置),构建纯净的局部坐标系using (DBText tempCombined = new DBText())using (DBText tempTarget = new DBText()){CopyStyle(sourceText, tempCombined);CopyStyle(sourceText, tempTarget);tempCombined.TextString = strCombined;tempTarget.TextString = strTarget;// 2. 测量几何尺寸 (AABB)Extents3d extComb = tempCombined.GeometricExtents;Extents3d extTar = tempTarget.GeometricExtents;// 【步骤A - 确定X坐标】// 利用 combined 的 MaxPoint.X,这是包含所有字间距的绝对右边缘double absoluteRightX = extComb.MaxPoint.X;// 计算目标字符自身的宽度double charWidth = extTar.MaxPoint.X - extTar.MinPoint.X;// 回溯计算中心 X = 绝对右边缘 - 半个字宽double localCenterX = absoluteRightX - (charWidth / 2.0);// 【步骤B - 确定Y坐标】// 利用 target 自己的边界计算 Y 重心// 这样 "." 的重心在底部,"1" 的重心在中间,互不干扰double localCenterY = (extTar.MinPoint.Y + extTar.MaxPoint.Y) / 2.0;Point3d localCenter = new Point3d(localCenterX, localCenterY, 0);// 3. 矩阵变换:从局部坐标 -> 世界坐标// 变换顺序:先旋转 -> 再移动到位置Point3d basePoint = sourceText.Position;Matrix3d matRot = Matrix3d.Rotation(sourceText.Rotation, sourceText.Normal, Point3d.Origin);Matrix3d matMov = Matrix3d.Displacement(basePoint.GetAsVector());// 应用变换return localCenter.TransformBy(matRot).TransformBy(matMov);}}// 辅助:复制样式 (确保测量环境与原图一致)private static void CopyStyle(DBText source, DBText target){target.SetDatabaseDefaults();target.TextStyleId = source.TextStyleId;target.Height = source.Height;target.WidthFactor = source.WidthFactor;target.Oblique = source.Oblique;// 强制设为左对齐、原点,方便数学计算target.HorizontalMode = TextHorizontalMode.TextLeft;target.VerticalMode = TextVerticalMode.TextBase;target.Position = Point3d.Origin;target.Rotation = 0;}}}
🔥 自动处理 Kerning (字距调整)
在某些字体中,”AV” 两个字母会靠得非常近(重叠)。如果简单地把 “A” 的宽加上 “V” 的宽,算出来的坐标会偏大。
使用 tempCombined 直接测量 “AV” 的总长,CAD 引擎会自动处理这些复杂的字距细节,得到的右边界是绝对准确的。
🔥 高度独立性
Y 坐标完全依赖 tempTarget (单个字符) 的边界。这意味着:
👉 对于句号 “.”,中心点就在脚下。
👉 对于连字符 “-“,中心点在中间。
👉 对于上标 “²”,中心点在头顶。
完美符合视觉直觉!
📌 总结
这个“右侧回溯 + 高度独立”的混合算法,是解决 CAD 文字定位问题的终极方案。它既照顾了水平方向的排版规则,又保留了垂直方向的笔画特征。
📚 往期推荐