 夜雨聆风
夜雨聆风


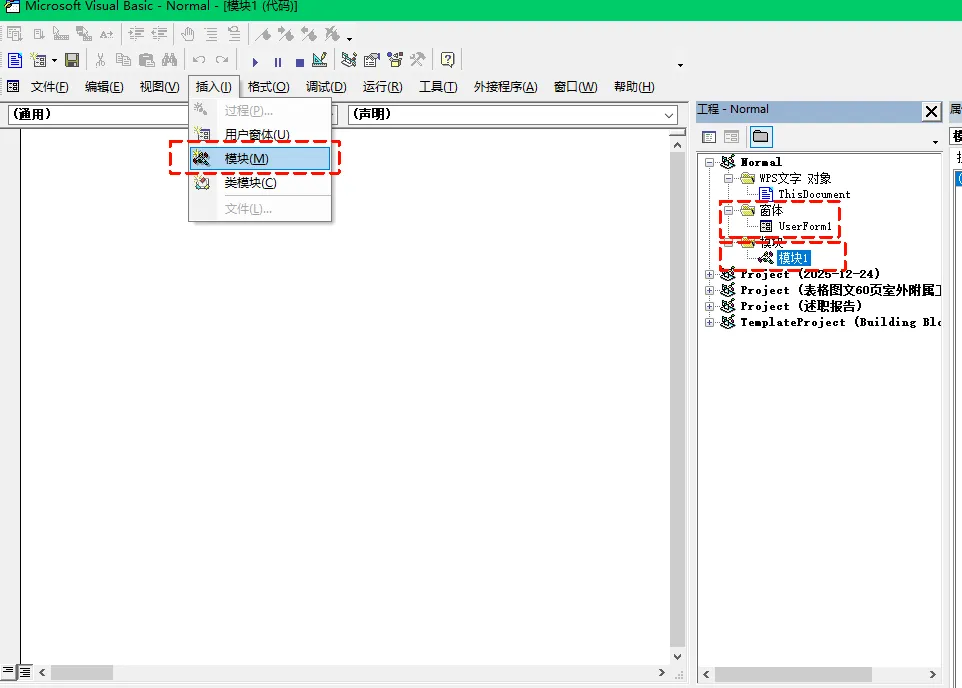
如何在wps里使用宏代码,批量操作图片大小
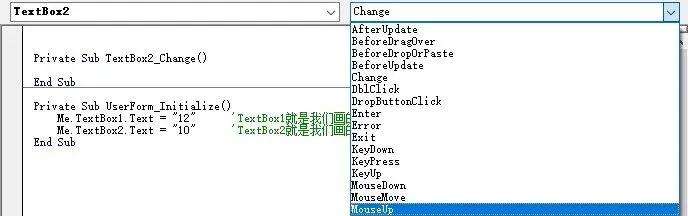
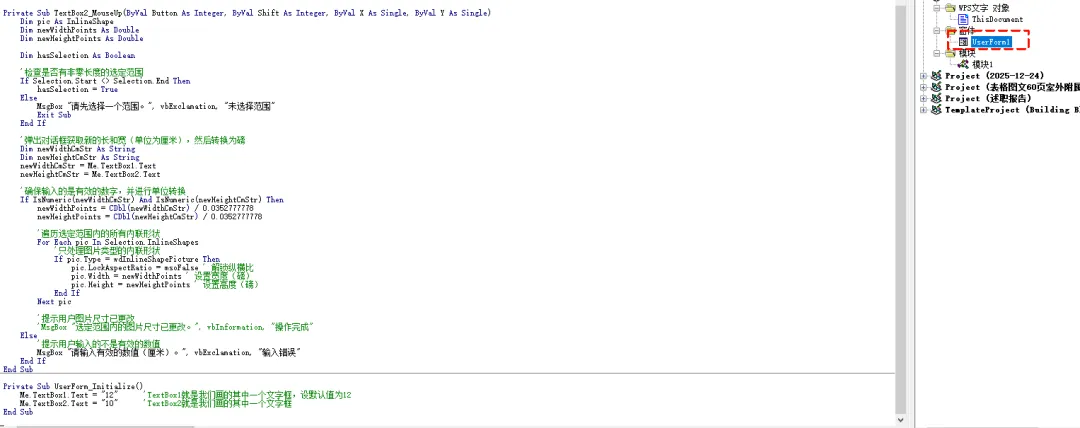
Private Sub UserForm_Initialize()
Me.TextBox1.Text = “12” ‘TextBox1就是我们画的其中一个文字框,设默认值为12,这代表图片的宽度,单位cm
Me.TextBox2.Text = “10” ‘TextBox2就是我们画的其中一个文字框,这代表图片的高度,单位cm
End Sub
Private Sub TextBox2_MouseUp(ByVal Button As Integer, ByVal Shift As Integer, ByVal X As Single, ByVal Y As Single)
Dim pic As InlineShape
Dim shp As Shape
Dim newWidthPoints As Double
Dim newHeightPoints As Double
‘ 检查是否有文本选择(非零长度范围)
If Selection.Start = Selection.End Then
MsgBox “请先选择包含图片的文本范围,或直接选中浮动图片。”, vbExclamation, “未选择范围”
Exit Sub
End If
‘ 获取用户输入(厘米→磅)
Dim newWidthCmStr As String, newHeightCmStr As String
newWidthCmStr = Me.TextBox1.Text
newHeightCmStr = Me.TextBox2.Text
If Not (IsNumeric(newWidthCmStr) And IsNumeric(newHeightCmStr)) Then
MsgBox “请输入有效的数值(厘米)。”, vbExclamation, “输入错误”
Exit Sub
End If
newWidthPoints = CDbl(newWidthCmStr) / 0.0352777778
newHeightPoints = CDbl(newHeightCmStr) / 0.0352777778
For Each pic In Selection.InlineShapes
If pic.Type = wdInlineShapePicture Then
pic.LockAspectRatio = msoFalse
pic.Width = newWidthPoints
pic.Height = newHeightPoints
End If
Next pic
On Error Resume Next ‘ 避免无Shape选中时报错
For Each shp In Selection.ShapeRange
‘ 兼容WPS:同时判断常量和数值(msoPicture=7)
If shp.Type = 7 Or shp.Type = msoPicture Then
shp.LockAspectRatio = msoFalse
shp.Width = newWidthPoints
shp.Height = newHeightPoints
End If
Next shp
On Error GoTo 0
MsgBox “选定范围内的内嵌图片及选中的浮动图片尺寸已调整。”, vbInformation, “操作完成”
End Sub
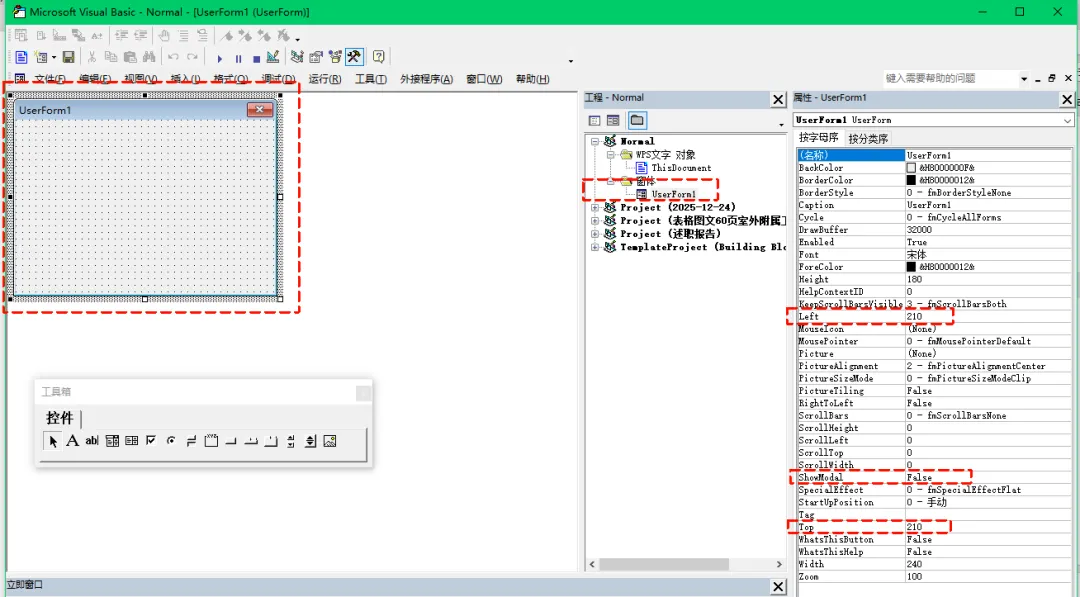
到这里核心代码就完了,这就成功了,整体如下图
选中“模块1”,按F7进入代码视图,粘贴代码
Sub 图片窗体()
UserForm1.Show 0
End Sub

现在是如何使用了。
找到这个名字=图片窗体,的宏,把它放在选项卡上,单击就能运行这个窗体。可以参考这个文章设置(利用宏,批量处理word文档图片大小)
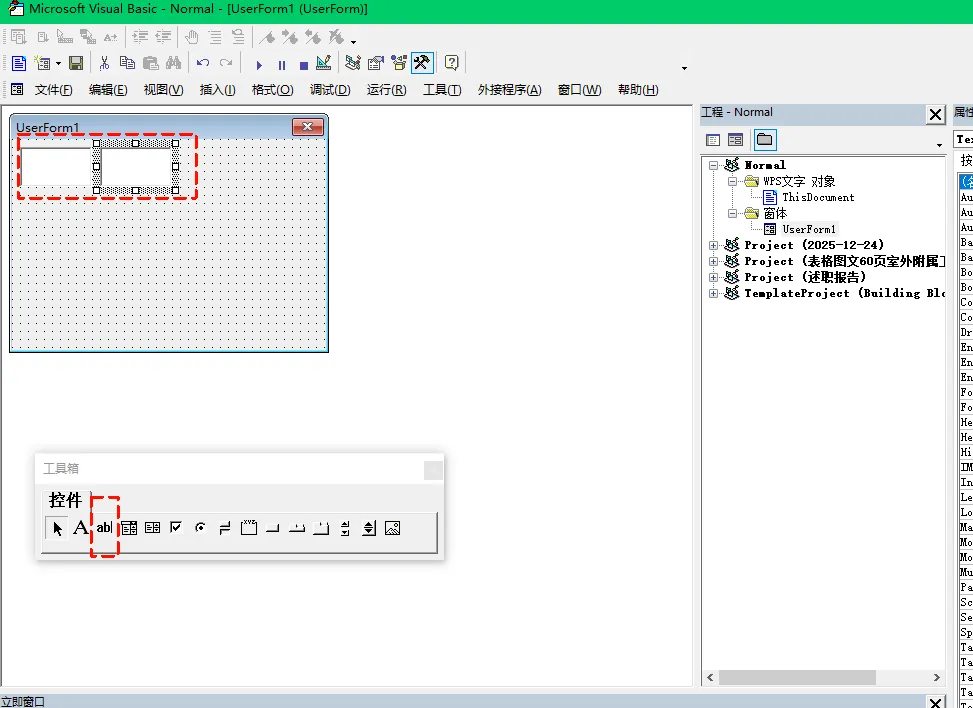
选中所有图片后,在窗体控件上输入图片宽,图片高后,单击第二个文字框,图片大小就会重新调整
