 夜雨聆风
夜雨聆风


.NET Core 插件黑科技!AssemblyLoadContext 让应用热插拔成为可能
引言
插件系统是现代软件的核心特性之一,从 Visual Studio 到 Unity 游戏引擎,都依赖插件实现功能扩展。
传统 .NET Framework 存在程序集无法卸载、版本冲突难以解决等限制,严重制约了插件系统的灵活性。.NET Core 引入的 AssemblyLoadContext 为解决这些问题提供了全新方案。
本文将深入探讨AssemblyLoadContext 的工作原理与实际应用。
什么是 AssemblyLoadContext?
AssemblyLoadContext 是 .NET Core 引入的一个核心类型,位于 System.Runtime.Loader 命名空间中,专门用于管理程序集的加载和卸载。它就像一个独立的容器,可以隔离不同的程序集,解决了传统 .NET Framework 中程序集加载的诸多限制。
为什么需要AssemblyLoadContext?
想象一下这样的场景:
你开发了一个大型应用,支持用户通过插件扩展功能。但每次用户安装或卸载插件时,都需要重启整个应用程序。更糟糕的是,如果两个插件依赖于同一库的不同版本,就会导致冲突,使应用崩溃。
这就是传统 .NET Framework 的痛点:
-
1. 内存泄漏:程序集一旦加载就无法卸载,即使插件不再使用 -
2. 版本冲突:同一程序集的不同版本无法共存 -
3. 插件系统受限:无法实现真正的热插拔
AssemblyLoadContext 的出现彻底解决了这些问题,它带来了三大革命性功能:
-
• 程序集隔离:就像给每个插件一个独立的房间,它们可以使用自己的依赖版本 -
• 程序集卸载:插件不用时,占用的内存会被自动回收 -
• 自定义加载逻辑:你可以控制程序集从哪里加载,如何解析依赖
AssemblyLoadContext 的核心概念
1. 默认加载上下文:应用程序的主房间
每个 .NET 应用程序都有一个默认的 AssemblyLoadContext,就像应用程序的主房间,用于加载主程序集及其核心依赖项。这是系统自动创建的,你通常不需要直接操作它。
2. 自定义加载上下文:插件的专属空间
你可以通过继承 AssemblyLoadContext 类来创建自定义的加载上下文,为每个插件或模块提供独立的空间。这样,不同插件的依赖就不会互相干扰。
3. 程序集解析:智能的依赖查找
当 AssemblyLoadContext 需要加载一个程序集时,它会尝试在预设位置查找。如果找不到,就会触发 Resolving 事件,允许你自定义查找逻辑,比如从网络或特定目录加载。
4. 程序集卸载:自动清理垃圾
当一个 AssemblyLoadContext 不再被任何代码引用时,它会被垃圾回收器回收,同时释放它加载的所有程序集占用的内存。这就像一个自动清理的房间,离开时会把所有东西都带走。
实战演练:构建插件
现在,让我们通过实际代码来感受 AssemblyLoadContext 的强大功能。我们将创建一个完整的插件系统,包含以下组件:
-
1. 插件接口:定义插件的统一规范 -
2. 具体插件:实现插件接口的示例插件 -
3. 主机应用:使用 AssemblyLoadContext 加载和管理插件
第一步:定义插件接口
首先,我们创建一个插件接口,所有插件都需要实现这个接口:
namespace PluginInterface{ public interface IPlugin { string Name { get; }void Execute(); }}第二步:创建基本插件加载上下文
接下来,我们创建一个自定义的 AssemblyLoadContext,用于加载插件:
using System;using System.IO;using System.Reflection;using System.Runtime.Loader;// 基本插件加载上下文class PluginLoadContext : AssemblyLoadContext{ private string _pluginPath; // 构造函数,设置 isCollectible 为 true 以支持卸载public PluginLoadContext(string pluginPath) : base(true) { _pluginPath = pluginPath; Console.WriteLine("创建基本插件加载上下文"); } // 重写 Load 方法,自定义程序集加载逻辑protected override Assembly Load(AssemblyName assemblyName) { string assemblyPath = Path.Combine(_pluginPath, $"{assemblyName.Name}.dll"); if (File.Exists(assemblyPath)) { Console.WriteLine("加载程序集: " + assemblyName.Name); return LoadFromAssemblyPath(assemblyPath); } return null; // 找不到则返回 null,让系统继续查找 }}第三步:创建具体插件
现在,我们创建两个简单的插件来测试我们的系统:
PluginA.cs
using PluginInterface;namespace PluginA{ public class Plugin : IPlugin { public string Name => "Plugin A";public void Execute() { System.Console.WriteLine($"{Name} 执行中..."); } }}PluginB.cs
using PluginInterface;namespace PluginB{ public class Plugin : IPlugin { public string Name => "Plugin B";public void Execute() { System.Console.WriteLine($"{Name} 执行中..."); } }}第四步:创建主机应用程序
最后,我们创建一个主机应用程序,用于加载和管理插件:
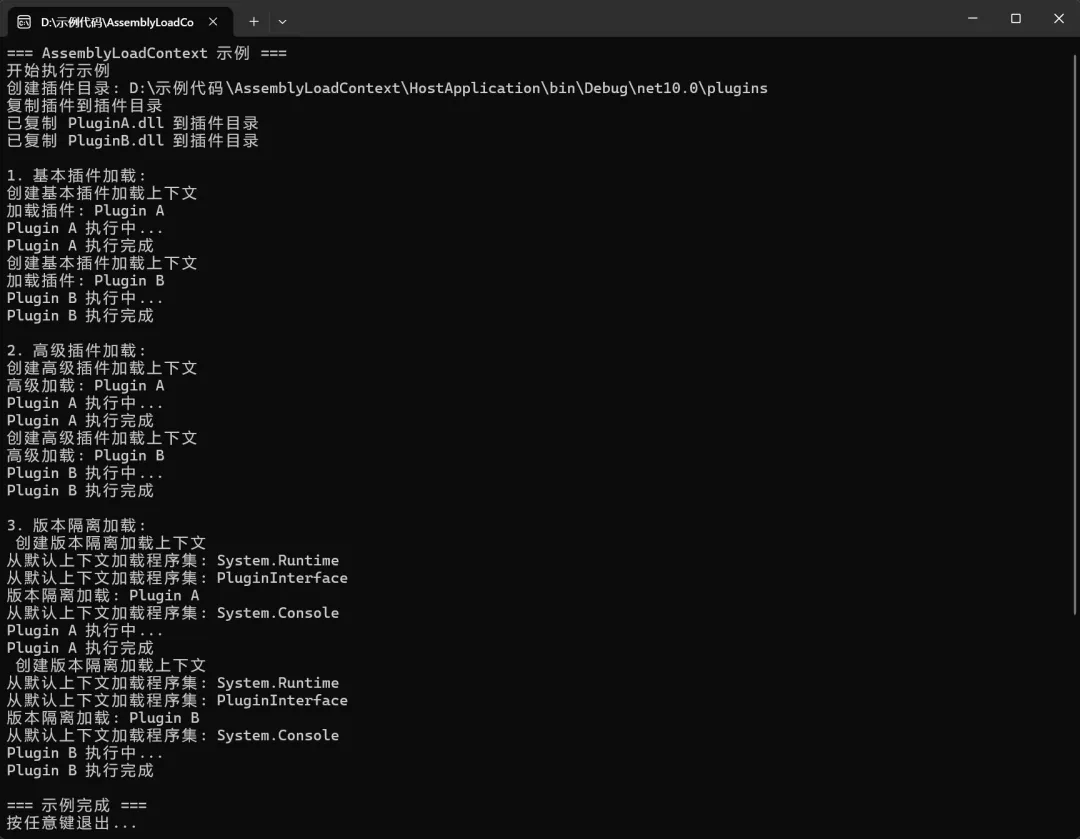
using System;using System.IO;using System.Reflection;using System.Runtime.Loader;using PluginInterface;class Program{static void Main(string[] args) { Console.WriteLine("=== AssemblyLoadContext 示例 ==="); Console.WriteLine("开始执行示例"); // 创建插件目录 string pluginsDir = Path.Combine(AppContext.BaseDirectory, "plugins"); Directory.CreateDirectory(pluginsDir); Console.WriteLine("创建插件目录: " + pluginsDir); // 复制插件到插件目录 Console.WriteLine("复制插件到插件目录"); CopyPluginsToDirectory(pluginsDir); // 示例 1: 基本插件加载 Console.WriteLine("\n1. 基本插件加载:"); LoadPluginsWithBasicContext(pluginsDir); // 示例 2: 高级插件加载 Console.WriteLine("\n2. 高级插件加载:"); LoadPluginsWithAdvancedContext(pluginsDir); // 示例 3: 版本隔离加载 Console.WriteLine("\n3. 版本隔离加载:"); LoadPluginsWithVersionIsolatedContext(pluginsDir); Console.WriteLine("\n=== 示例完成 ==="); Console.WriteLine("所有插件执行完成,AssemblyLoadContext 示例运行成功!"); Console.WriteLine("按任意键退出..."); Console.ReadKey(); } // 复制插件到插件目录static void CopyPluginsToDirectory(string targetDir) { string[] pluginProjects = { "PluginA", "PluginB" }; foreach (var plugin in pluginProjects) { string sourcePath = Path.Combine(AppContext.BaseDirectory,"..", "..", "..", "..", plugin, "bin", "Debug", "net10.0", $"{plugin}.dll"); string targetPath = Path.Combine(targetDir, $"{plugin}.dll"); if (File.Exists(sourcePath)) { File.Copy(sourcePath, targetPath, true); Console.WriteLine("已复制 " + plugin + ".dll 到插件目录"); } else { Console.WriteLine("警告: 找不到 " + sourcePath); } } } // 使用基本加载上下文加载插件static void LoadPluginsWithBasicContext(string pluginsDir) { foreach (var pluginFile in Directory.GetFiles(pluginsDir, "*.dll")) { var context = new PluginLoadContext(pluginsDir); var assembly = context.LoadFromAssemblyPath(pluginFile); foreach (var type in assembly.GetTypes()) { if (typeof(IPlugin).IsAssignableFrom(type) && !type.IsAbstract) { var plugin = (IPlugin)Activator.CreateInstance(type); Console.WriteLine($"加载插件: {plugin.Name}"); plugin.Execute(); Console.WriteLine($"{plugin.Name} 执行完成"); } } } } // 高级插件加载上下文 class AdvancedPluginLoadContext : AssemblyLoadContext { private string _pluginPath; private AssemblyDependencyResolver _resolver;public AdvancedPluginLoadContext(string pluginPath) : base(true) { _pluginPath = pluginPath; _resolver = new AssemblyDependencyResolver(pluginPath); Console.WriteLine("创建高级插件加载上下文"); }protected override Assembly Load(AssemblyName assemblyName) { string assemblyPath = _resolver.ResolveAssemblyToPath(assemblyName); if (assemblyPath != null) { Console.WriteLine("解析并加载程序集: " + assemblyName.Name); return LoadFromAssemblyPath(assemblyPath); } return null; }protected override IntPtr LoadUnmanagedDll(string unmanagedDllName) { string libraryPath = _resolver.ResolveUnmanagedDllToPath(unmanagedDllName); if (libraryPath != null) { Console.WriteLine("加载非托管 DLL: " + unmanagedDllName); return LoadUnmanagedDllFromPath(libraryPath); } return IntPtr.Zero; } } // 使用高级加载上下文加载插件static void LoadPluginsWithAdvancedContext(string pluginsDir) { foreach (var pluginFile in Directory.GetFiles(pluginsDir, "*.dll")) { var context = new AdvancedPluginLoadContext(pluginFile); var assembly = context.LoadFromAssemblyPath(pluginFile); foreach (var type in assembly.GetTypes()) { if (typeof(IPlugin).IsAssignableFrom(type) && !type.IsAbstract) { var plugin = (IPlugin)Activator.CreateInstance(type); Console.WriteLine($"高级加载: {plugin.Name}"); plugin.Execute(); Console.WriteLine($"{plugin.Name} 执行完成"); } } } } // 版本隔离加载上下文 class VersionIsolatedLoadContext : AssemblyLoadContext { private string _basePath;public VersionIsolatedLoadContext(string basePath) : base($"VersionIsolated_{Guid.NewGuid()}", true) { _basePath = basePath; Console.WriteLine("创建版本隔离加载上下文"); }protected override Assembly Load(AssemblyName assemblyName) { // 优先从本地目录加载 string assemblyPath = Path.Combine(_basePath, $"{assemblyName.Name}.dll"); if (File.Exists(assemblyPath)) { Console.WriteLine("从本地目录加载程序集: " + assemblyName.Name); return LoadFromAssemblyPath(assemblyPath); } // 回退到默认加载上下文 Console.WriteLine("从默认上下文加载程序集: " + assemblyName.Name); return Default.LoadFromAssemblyName(assemblyName); } } // 使用版本隔离加载上下文加载插件static void LoadPluginsWithVersionIsolatedContext(string pluginsDir) { foreach (var pluginFile in Directory.GetFiles(pluginsDir, "*.dll")) { var context = new VersionIsolatedLoadContext(pluginsDir); var assembly = context.LoadFromAssemblyPath(pluginFile); foreach (var type in assembly.GetTypes()) { if (typeof(IPlugin).IsAssignableFrom(type) && !type.IsAbstract) { var plugin = (IPlugin)Activator.CreateInstance(type); Console.WriteLine($"版本隔离加载: {plugin.Name}"); plugin.Execute(); Console.WriteLine($"{plugin.Name} 执行完成"); } } } }}代码运行结果如下:
最佳实践
-
1. 实现可卸载:在构造函数中设置 isCollectible: true以支持卸载 -
2. 合理管理依赖:使用 AssemblyDependencyResolver来处理依赖项 -
3. 避免内存泄漏:确保释放所有对加载上下文和程序集的引用 -
4. 错误处理:在加载过程中添加适当的错误处理 -
5. 添加日志输出:在关键操作点添加详细的日志输出,便于调试和监控
常见问题
1. 程序集无法卸载
原因:
-
• 加载上下文被引用 -
• 程序集中的类型被使用 -
• 静态变量未释放
解决方法:
-
• 确保所有引用都被释放 -
• 避免使用静态变量 -
• 使用 WeakReference来跟踪加载上下文
2. 依赖项解析失败
原因:
-
• 依赖项不在预期位置 -
• 依赖项版本不匹配
解决方法:
-
• 使用 AssemblyDependencyResolver -
• 实现自定义的依赖项解析逻辑
3. 类型转换失败
原因:
-
• 同一类型在不同加载上下文中被加载
解决方法:
-
• 将共享类型放在单独的程序集中 -
• 确保共享程序集在默认加载上下文中加载
总结
AssemblyLoadContext 是 .NET Core 中一个强大的功能,它解决了传统 .NET Framework 中程序集加载的诸多限制,为插件系统、版本管理等场景提供了更好的支持。
