 夜雨聆风
夜雨聆风1.LM Studio 介绍
LM Studio 是一款功能强大的本地部署大模型的工具。LMStudio 强调本地化操作,确保数据隐私和安全,特别适合处理敏感数据的场景。它支持跨平台使用,能够在 Windows、macOS 和 Linux 系统上运行,满足不同用户的需求。无论是初学者还是资深开发者,LM Studio 都能提供灵活的工具和便捷的操作体验,助力机器学习项目的快速推进。
2.LM Studio 下载安装
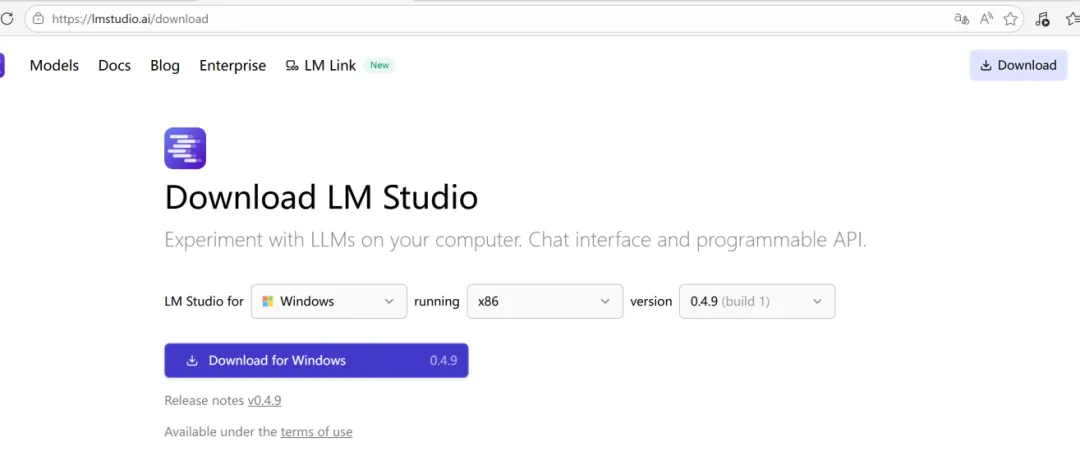
从LMStudio官网下载安装包,支持Windows、Linux、MacOS
地址:Download LM Studio - Mac, Linux, Windows
建议选择最新版
安装步骤:直接按默认步骤安装即可
3.gemma-4安装配置
3.1 模型选择与下载
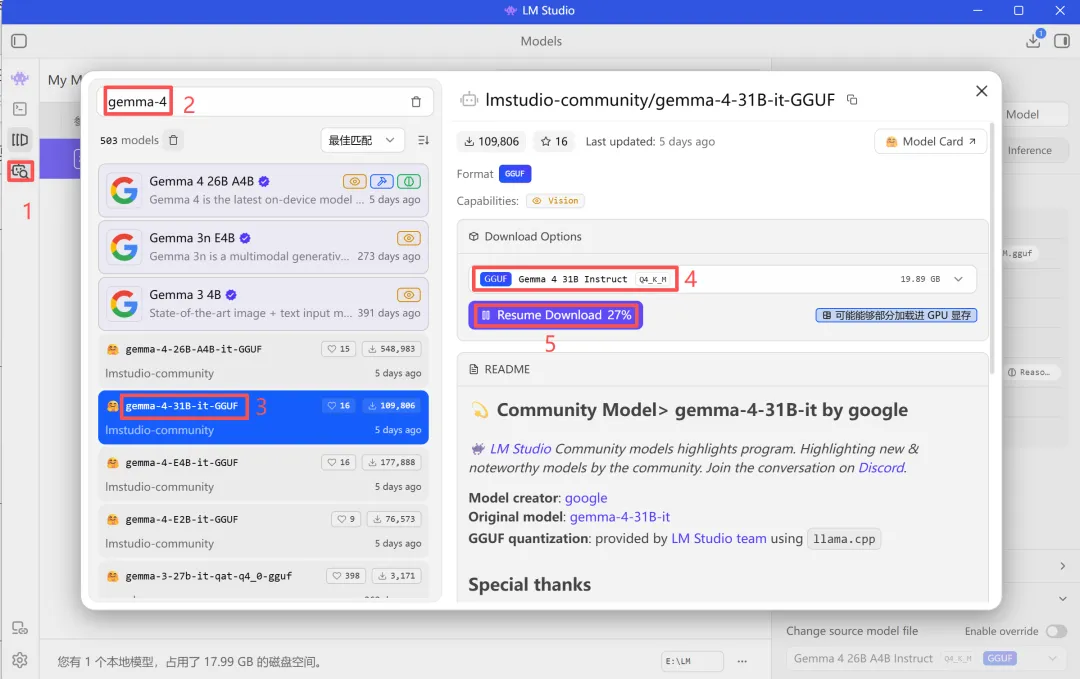
方法1:直接在LM Studio中下载模型
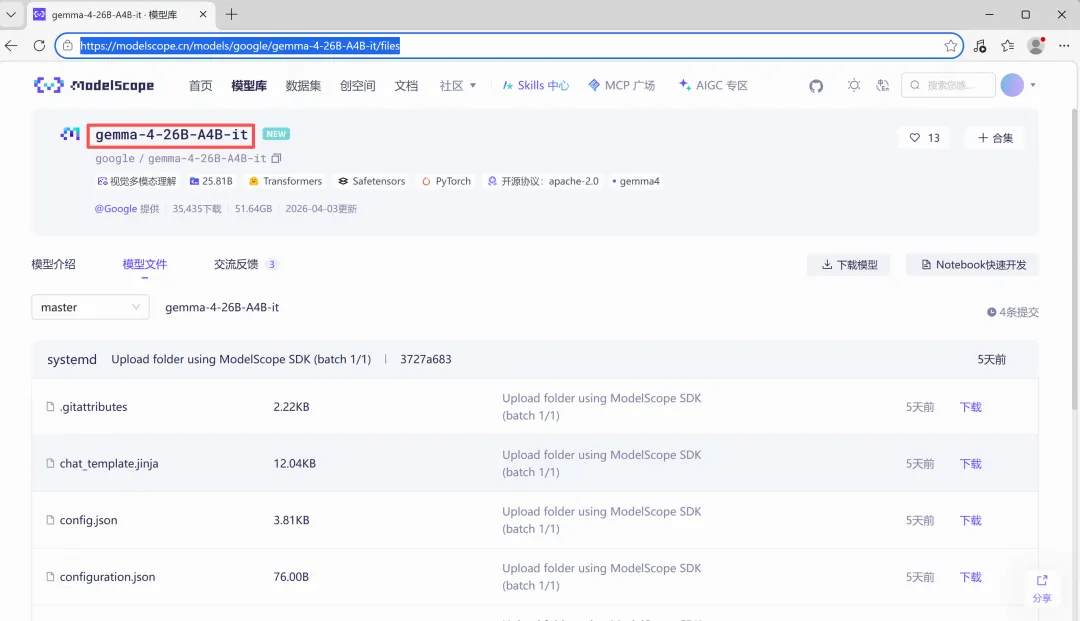
方法2:通过魔搭社区下载模型
gemma-4-26B-A4B-it · 模型库
3.2将模型移动到 LM Studio 目录
打开LMStudio模型存储位置
注意:使用LM Studio下载的模型会自动存在相应目录中,不需要处理
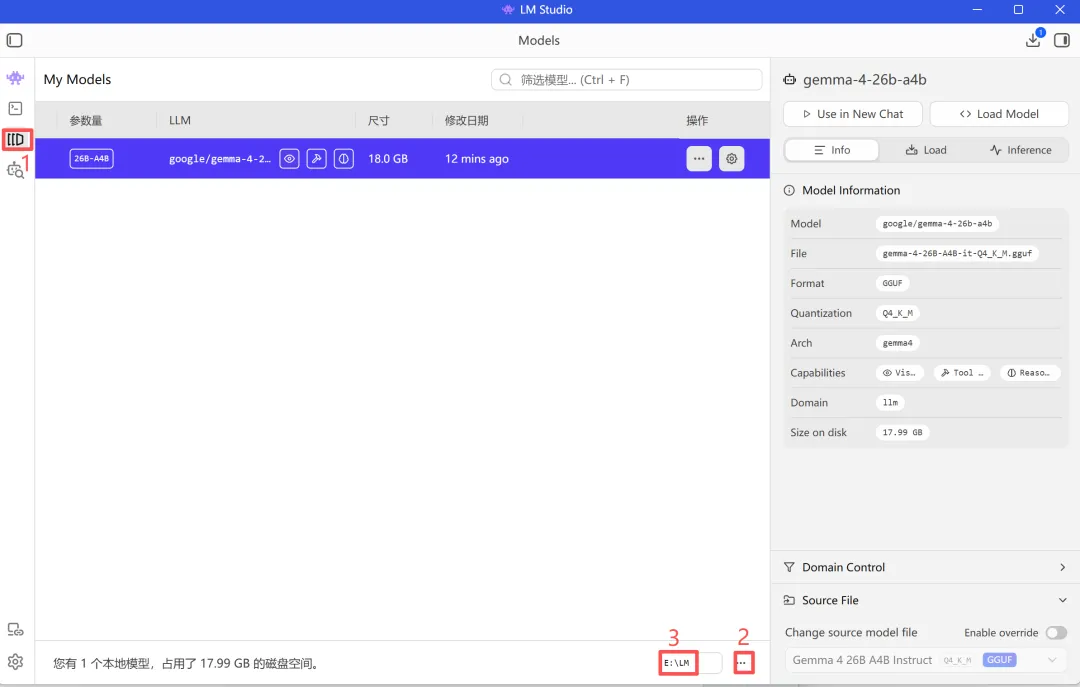
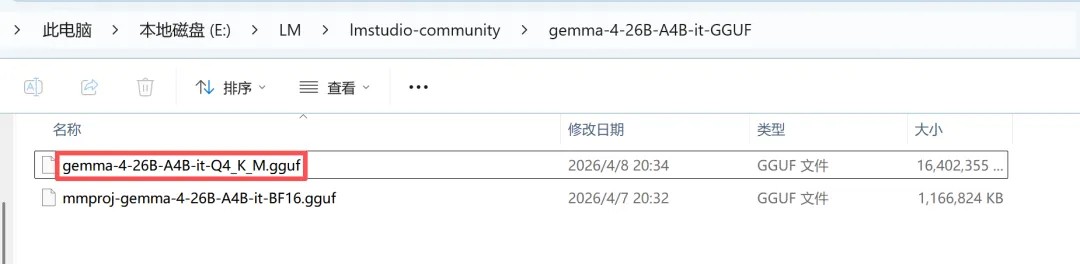
创建两级目录,将下载的GGUF文件移入
~
└── LM/
└── gemma-4-26B-A4B-it-GGUF/
└── gemma-4-26B-A4B-it-Q4_K_M.gguf.gguf
默认生成的 Prompt Template 有问题,需要修改
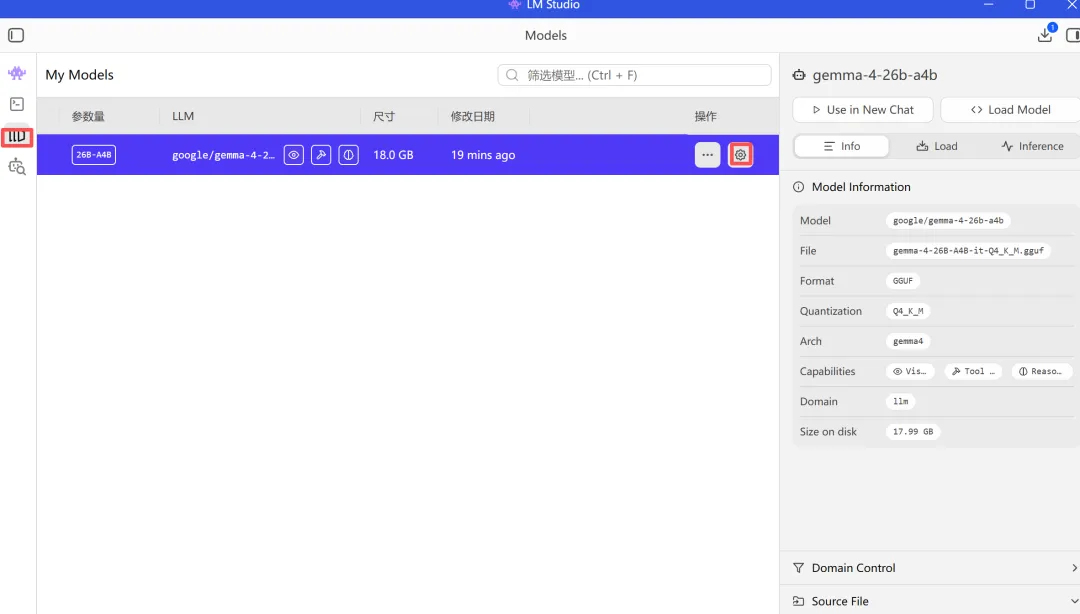
点击模型后方的设置按钮
在弹出的页面中,选择 Prompt
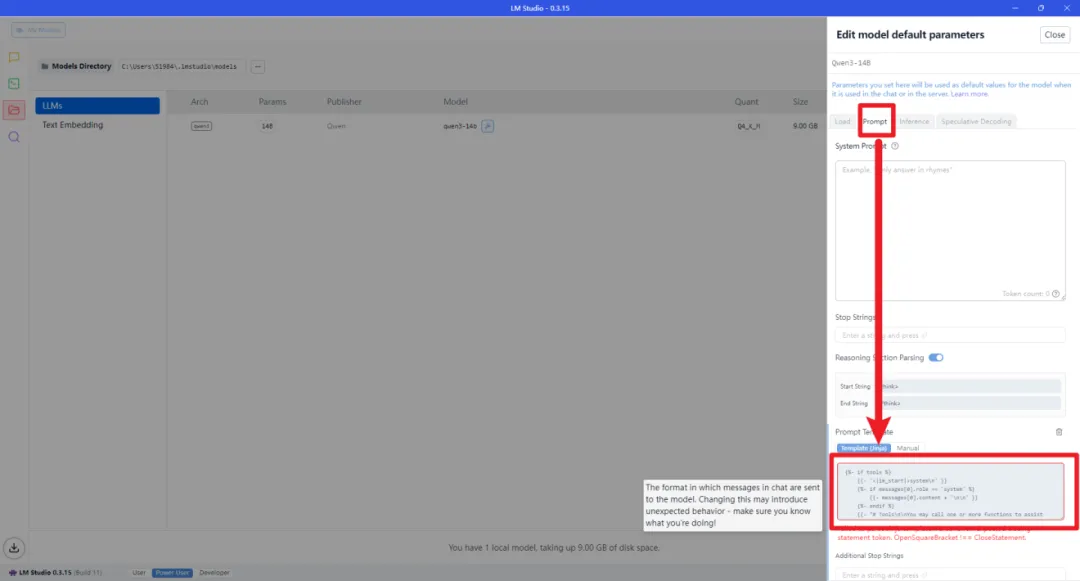
将上图框中的内容替换为以下代码(可以在评论区置顶留言中领取相关代码)
{%- if tools %}
{{-'<|im_start|>system\n' }}
{%-if messages[0].role == 'system' %}
{{-messages[0].content + '\n\n' }}
{%-endif %}
{{-"# Tools\n\nYou may call one or more functions to assist with the user query.\n\nYou are provided with function signatures within
{%-for tool in tools %}
{{-"\n" }}
{{-tool | tojson }}
{%-endfor %}
{{-"\n\n\nFor each function call, return a json object with function name and arguments within
{%- else %}
{%-if messages[0].role == 'system' %}
{{-'<|im_start|>system\n' + messages[0].content + '<|im_end|>\n' }}
{%-endif %}
{%- endif %}
{%- set ns = namespace(multi_step_tool=true, last_query_index=messages|length - 1) %}
{%- for message in messages[::-1] %}
{%-set index = (messages|length - 1) - loop.index0 %}
{%-set tool_start = "
{%-set tool_start_length = tool_start|length %}
{%-set start_of_message = message.content[:tool_start_length] %}
{%-set tool_end = "" %}
{%-set tool_end_length = tool_end|length %}
{%-set start_pos = (message.content|length) - tool_end_length %}
{%-if start_pos < 0 %}
{%-set start_pos = 0 %}
{%-endif %}
{%-set end_of_message = message.content[start_pos:] %}
{%-if ns.multi_step_tool and message.role == "user" and not(start_of_message == tool_start and end_of_message == tool_end) %}
{%-set ns.multi_step_tool = false %}
{%-set ns.last_query_index = index %}
{%-endif %}
{%- endfor %}
{%- for message in messages %}
{%-if (message.role == "user") or (message.role == "system" and not loop.first) %}
{{-'<|im_start|>' + message.role + '\n' + message.content + '<|im_end|>' + '\n' }}
{%-elif message.role == "assistant" %}
{%-set content = message.content %}
{%-set reasoning_content = '' %}
{%-if message.reasoning_content is defined and message.reasoning_content is not none %}
{%-set reasoning_content = message.reasoning_content %}
{%-else %}
{%-if '' in message.content %}
{%-set content = (message.content.split('')|last).lstrip('\n') %}
{%-set reasoning_content = (message.content.split('')|first).rstrip('\n') %}
{%-set reasoning_content = (reasoning_content.split('
{%-endif %}
{%-endif %}
{%-if loop.index0 > ns.last_query_index %}
{%-if loop.last or (not loop.last and reasoning_content) %}
{{-'<|im_start|>' + message.role + '\n
{%-else %}
{{-'<|im_start|>' + message.role + '\n' + content }}
{%-endif %}
{%-else %}
{{-'<|im_start|>' + message.role + '\n' + content }}
{%-endif %}
{%-if message.tool_calls %}
{%-for tool_call in message.tool_calls %}
{%-if (loop.first and content) or (not loop.first) %}
{{-'\n' }}
{%-endif %}
{%-if tool_call.function %}
{%-set tool_call = tool_call.function %}
{%-endif %}
{{-'
{{-tool_call.name }}
{{-'", "arguments": ' }}
{%-if tool_call.arguments is string %}
{{-tool_call.arguments }}
{%-else %}
{{-tool_call.arguments | tojson }}
{%-endif %}
{{-'}\n' }}
{%-endfor %}
{%-endif %}
{{-'<|im_end|>\n' }}
{%-elif message.role == "tool" %}
{%-if loop.first or (messages[loop.index0 - 1].role != "tool") %}
{{-'<|im_start|>user' }}
{%-endif %}
{{-'\n
{{-message.content }}
{{-'\n' }}
{%-if loop.last or (messages[loop.index0 + 1].role != "tool") %}
{{-'<|im_end|>\n' }}
{%-endif %}
{%-endif %}
{%- endfor %}
{%- if add_generation_prompt %}
{{-'<|im_start|>assistant\n' }}
{%-if enable_thinking is defined and enable_thinking is false %}
{{-'
{%-endif %}
{%- endif %}
3.4优化模型参数
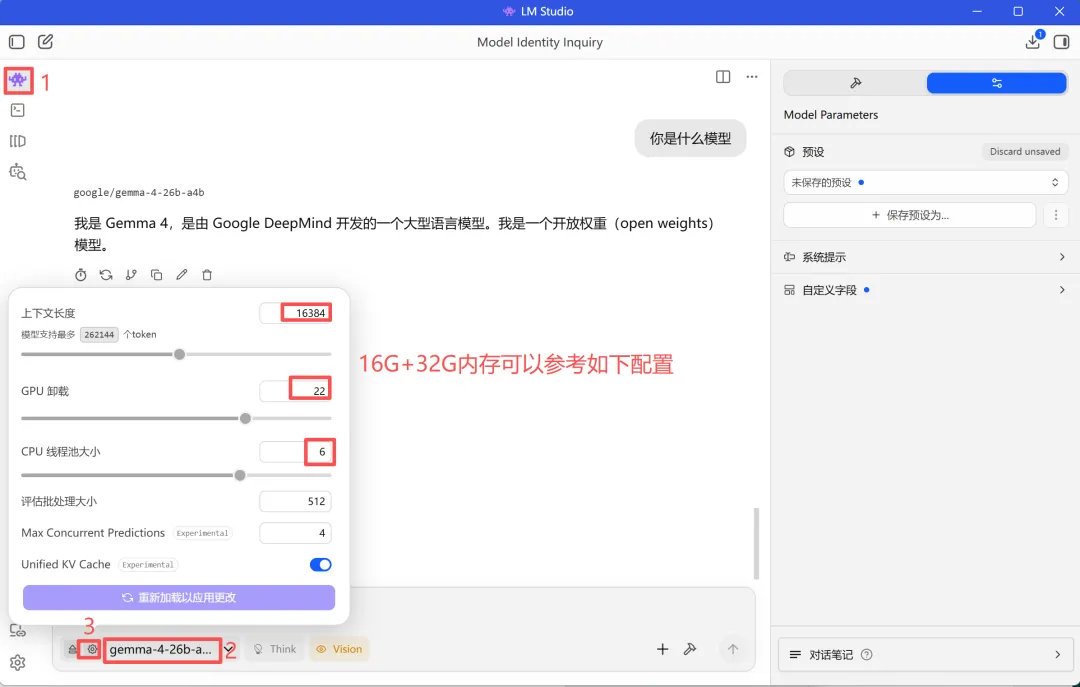
根据自身硬件条件配置,经过调参测试,16G显存+32G内存,上面的配置效果最优
3.5模型测试
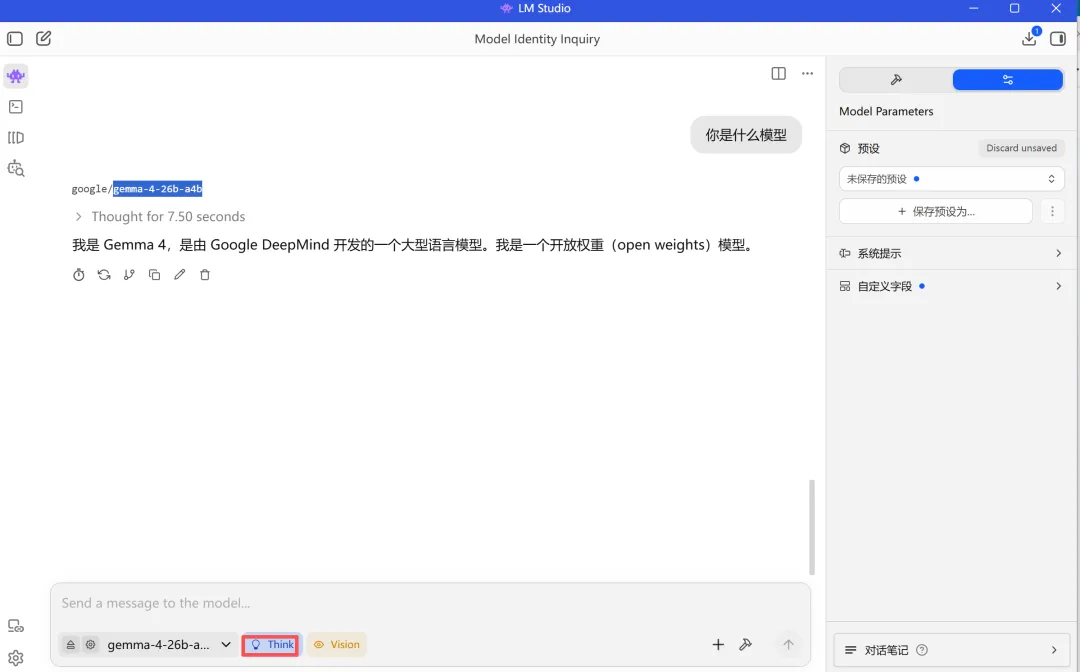
gemma-4 引入了“思考模式”和“非思考模式”,默认“思考模式”,我们可以在消息中使用点击think按钮进行切换。
3.6设置api服务
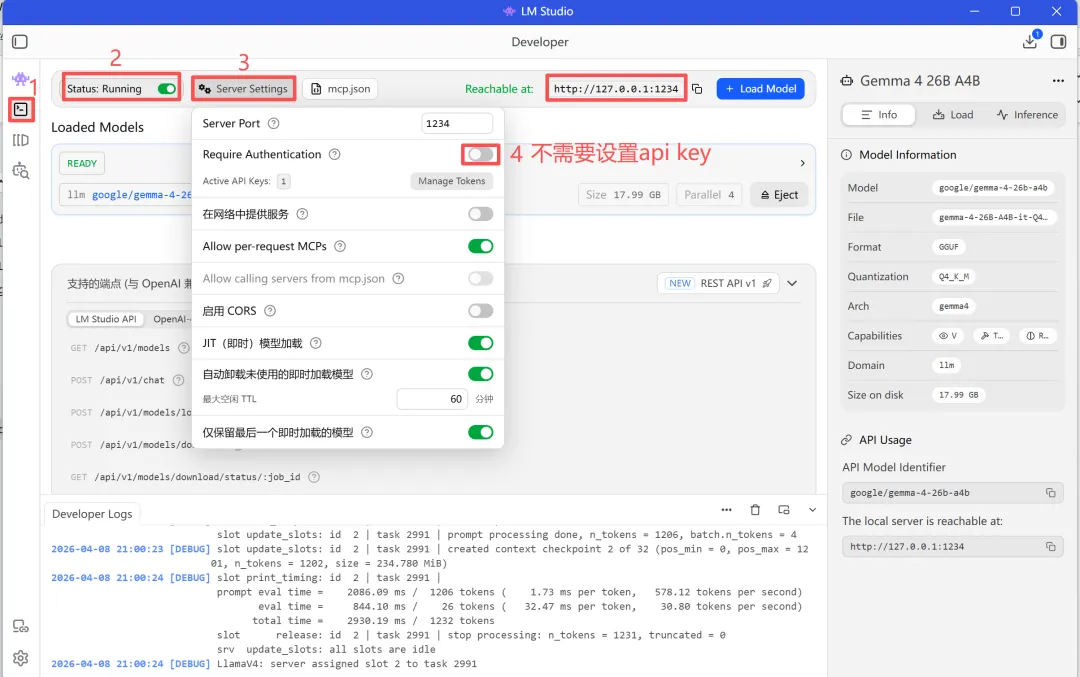
记住Api url后面用得到: http://127.0.0.1:1234
4.openclaw配置
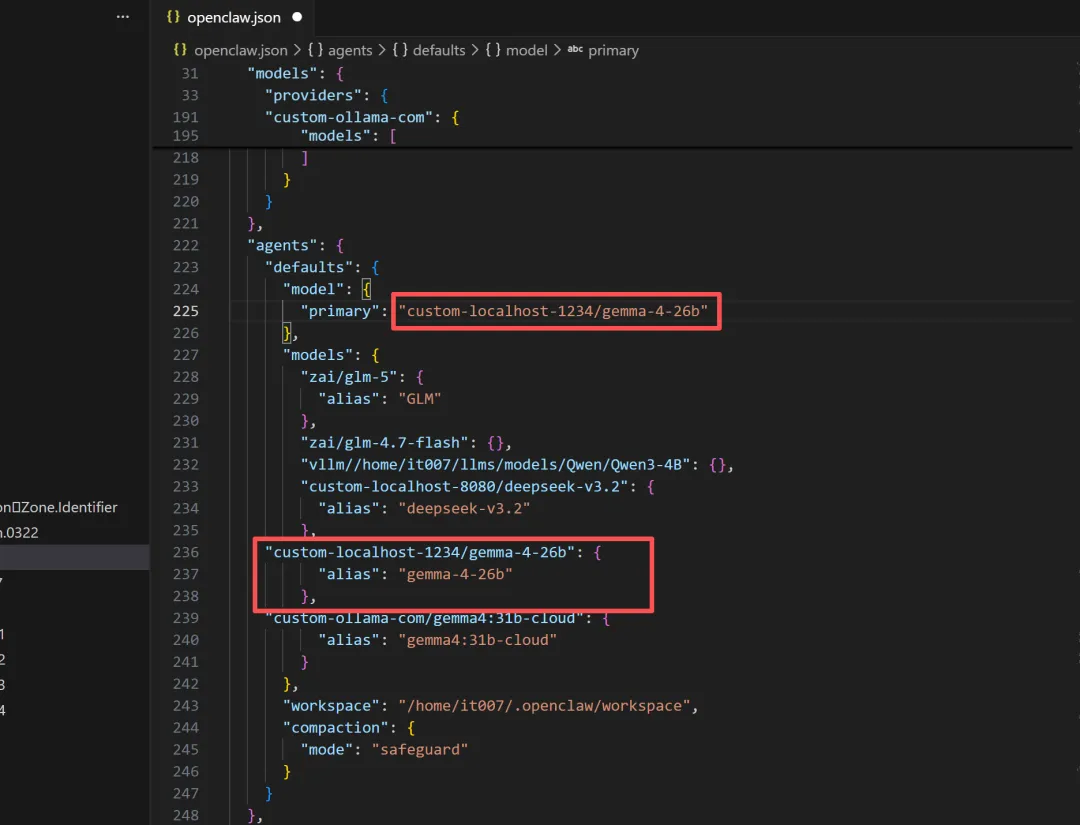
4.1配置openclaw.json
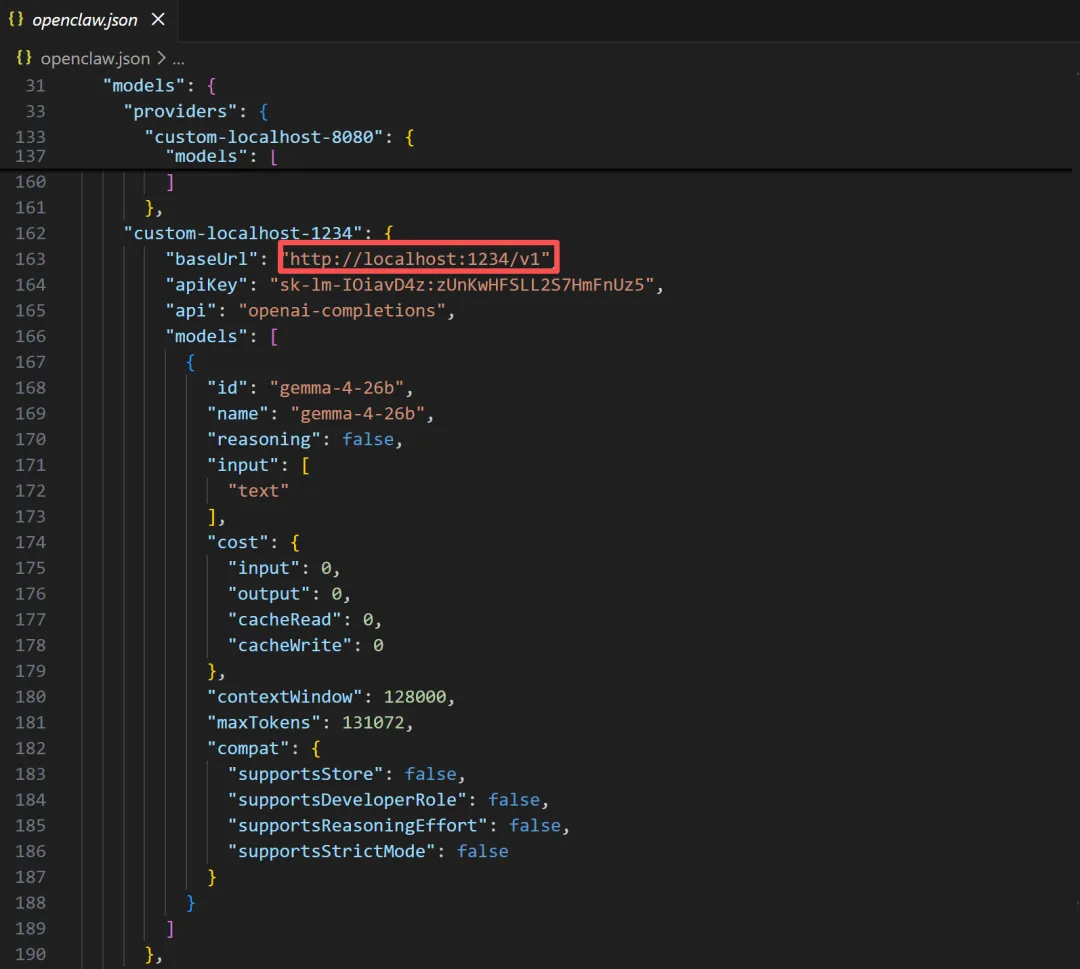
代码如下:
"custom-ollama-com": {
"baseUrl":"https://ollama.com/v1",
"apiKey":"03db4c0625744ada918858b6OUBpspmyvqyR",
"api":"openai-completions",
"models":[
{
"id":"gemma4:31b-cloud",
"name":"gemma4:31b-cloud",
"reasoning":false,
"input":[
"text"
],
"cost":{
"input":0,
"output":0,
"cacheRead":0,
"cacheWrite":0
},
"contextWindow":128000,
"maxTokens":131072,
"compat":{
"supportsStore":false,
"supportsDeveloperRole":false,
"supportsReasoningEffort":false,
"supportsStrictMode":false
}
}
]
}
4.2重启openclaw的网关服务
Openclaw gateway restart

5.openclaw验证测试
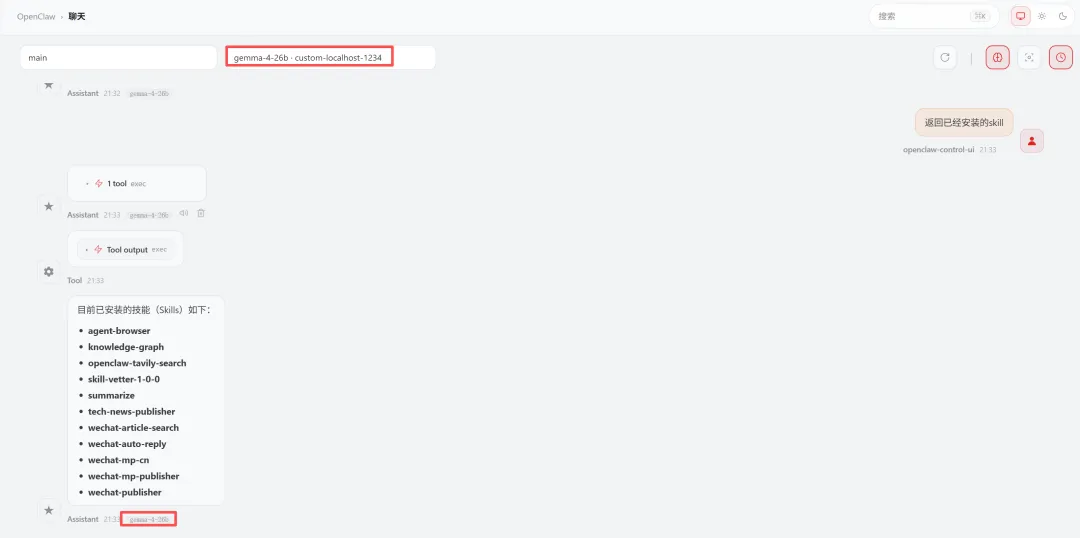
经测试gemma-4-26b-a4b体验效果还不错
