 夜雨聆风
夜雨聆风


行人摔倒检测系统 – 前端文档(2)
-
项目概述
-
技术栈
-
目录结构
-
界面设计原则
-
核心文件解读
-
页面架构
-
API 请求规范
-
组件说明
-
开发指南
1.项目概述
行人摔倒检测系统是一个基于 Electron + FastAPI 的桌面应用程序,用于实时检测图像和视频中的行人摔倒行为。前端采用原生 JavaScript 开发,无框架依赖,界面采用 Material Design 设计语言。
主要功能
-
图像摔倒检测
-
视频摔倒检测
-
系统日志管理
-
资源下载管理
-
数据可视化大屏
-
系统监控
-
数据分析
-
模型管理
-
大模型聊天
6.页面架构
1. 图像摔倒检测页面 (ImageDetectionPage)
功能:
-
图像上传(拖拽/点击)
-
单个图像检测
-
批量图像检测
-
图像预览
-
图像下载
-
图像删除
核心方法:
{ render() // 渲染页面 bindEvents() // 绑定上传事件 uploadFiles(files) // 上传文件 loadImages() // 加载图像列表 renderImages() // 渲染图像网格 toggleSelect() // 切换选中状态 selectAll() // 全选/取消全选 detect(filename) // 单个检测 detectSelected() // 批量检测 download(filename) // 单个下载 downloadSelected() // 批量下载 delete(filename) // 单个删除 preview(filename) // 预览图像 }
2. 视频摔倒检测页面 (VideoDetectionPage)
功能:
-
视频上传
-
单个视频检测
-
视频预览
-
视频下载
-
视频删除
3. 系统日志页面 (SystemLogsPage)
功能:
-
日志列表展示
-
日志预览
-
日志下载
-
日志删除
核心方法:
{ render() // 渲染页面 loadLogs() // 加载日志列表 renderLogs() // 渲染日志表格 preview(filename) // 预览日志内容 download(filename) // 下载日志 downloadSelected() // 批量下载 delete(filename) // 删除日志 }
4. 图像资源下载页面 (ImageResourcesPage)
功能:
-
已上传图像管理
-
检测结果图像管理
-
标签页切换
-
批量下载
5. 视频资源下载页面 (VideoResourcesPage)
功能:
-
已上传视频管理
-
检测结果视频管理
-
视频对比功能
-
批量下载
6. 数据可视化大屏页面 (DashboardPage)
功能:
-
统计卡片展示
-
数据分布饼图
-
检测结果分布
-
检测趋势折线图
-
摔倒检测统计柱状图
-
最近检测记录表格
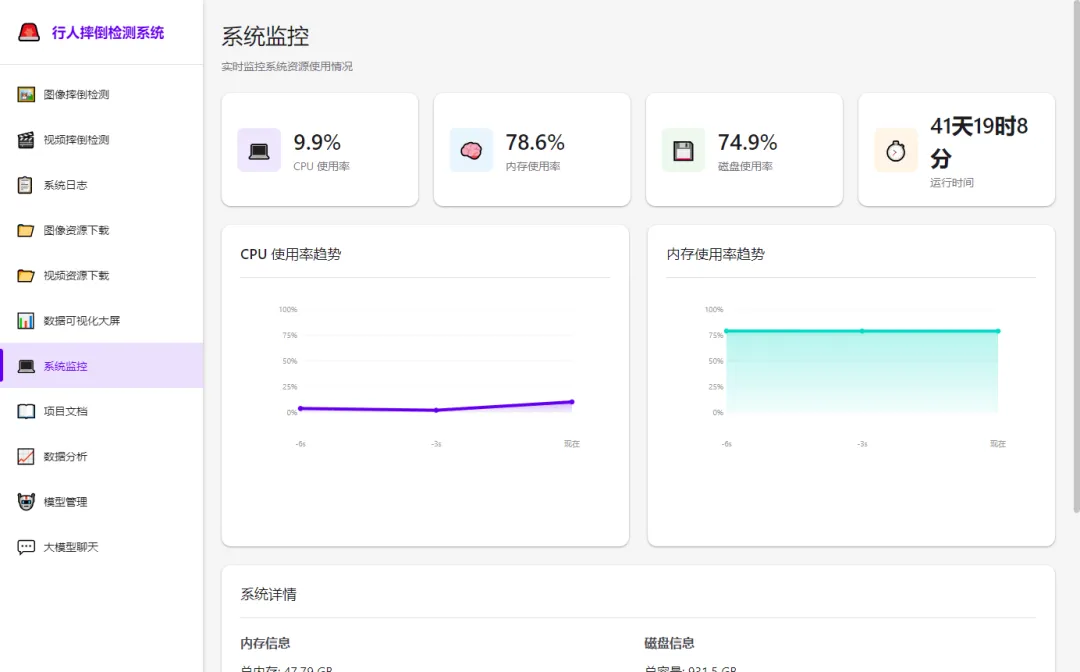
7. 系统监控页面 (SystemMonitorPage)
功能:
-
CPU 使用率实时监控
-
内存使用率实时监控
-
磁盘使用率监控
-
系统运行时间
-
网络流量统计
-
自动刷新(3秒间隔)
8. 数据分析页面 (DataAnalysisPage)
功能:
-
摔倒场景分布分析
-
检测置信度分布
-
每日检测量趋势
-
检测耗时分析
-
场景排行榜
9. 模型管理页面 (ModelManagementPage)
功能:
-
模型列表展示
-
模型上传
-
模型切换
-
模型下载
-
模型删除
-
当前模型状态
10. 大模型聊天页面 (LLMChatPage)
功能:
-
与大语言模型对话
-
消息历史记录
-
Markdown 渲染
-
代码高亮
7.API 请求规范
1. API 基础配置
const API_BASE = 'http://localhost:10077';
2. 请求封装
const Utils = { async request(url, options = {}) { try { const response = await fetch(`${API_BASE}${url}`, { ...options, headers: { ...options.headers, } }); // 处理 Blob 响应(文件下载) if (options.responseType === 'blob') { return response.blob(); } // 处理 JSON 响应 const data = await response.json(); return data; } catch (error) { console.error('API Error:', error); throw error; } } }
3. API 端点列表
3.1 图像管理 API
| 方法 | 端点 | 说明 | 请求体 | 响应 |
|---|---|---|---|---|
| POST | /api/images/upload/{filename} |
上传图像 | FormData | {code, message, data} |
| GET | /api/images/list |
获取图像列表 | – | {code, message, data: []} |
| GET | /api/images/detectedlist |
获取检测结果列表 | – | {code, message, data: []} |
| POST | /api/images/detect/{filename} |
检测图像 | – | {code, message, data: {detections}} |
| GET | /api/images/download/{filename} |
下载图像 | – | Blob |
| POST | /api/images/download/batch |
批量下载图像 | ["file1", "file2"] |
Blob (ZIP) |
| DELETE | /api/images/delete/{filename} |
删除图像 | – | {code, message} |
| DELETE | /api/images/delete/batch |
批量删除图像 | ["file1", "file2"] |
{code, message} |
3.2 视频管理 API
| 方法 | 端点 | 说明 | 请求体 | 响应 |
|---|---|---|---|---|
| POST | /api/videos/upload/{filename} |
上传视频 | FormData | {code, message, data} |
| GET | /api/videos/list |
获取视频列表 | – | {code, message, data: []} |
| GET | /api/videos/detected/list |
获取检测结果列表 | – | {code, message, data: []} |
| POST | /api/videos/detect |
检测视频 | {filename} |
{code, message, data} |
| GET | /api/videos/download/{filename} |
下载视频 | – | Blob |
| GET | /api/videos/detected/download/{filename} |
下载检测结果 | – | Blob |
| POST | /api/videos/download/batch/{filenames} |
批量下载视频 | – | Blob (ZIP) |
| POST | /api/videos/detected/download/batch |
批量下载检测结果 | ["file1"] |
Blob (ZIP) |
| DELETE | /api/videos/delete/{filename} |
删除视频 | – | {code, message} |
| DELETE | /api/videos/detected/delete/{filename} |
删除检测结果 | – | {code, message} |
3.3 日志管理 API
| 方法 | 端点 | 说明 | 请求体 | 响应 |
|---|---|---|---|---|
| GET | /api/logs/list |
获取日志列表 | – | {code, message, data: []} |
| GET | /api/logs/preview/{filename}?lines=200 |
预览日志 | – | {code, message, data: {content}} |
| GET | /api/logs/download/{filename} |
下载日志 | – | Blob |
| POST | /api/logs/download/batch/{filenames} |
批量下载日志 | – | Blob (ZIP) |
| DELETE | /api/logs/{filename} |
删除日志 | – | {code, message} |
3.4 系统监控 API
| 方法 | 端点 | 说明 | 请求体 | 响应 |
|---|---|---|---|---|
| GET | /api/systems/status |
获取系统状态 | – | {code, message, data: {...}} |
3.5 数据可视化 API
| 方法 | 端点 | 说明 | 响应 |
|---|---|---|---|
| GET | /api/dashboard/stats |
获取统计数据 | {totalImages, totalVideos, totalDetections, totalTargets} |
| GET | /api/dashboard/data-distribution |
获取数据分布 | [{name, value}] |
| GET | /api/dashboard/detection-results |
获取检测结果分布 | [{name, value}] |
| GET | /api/dashboard/detection-trend |
获取检测趋势 | [{xAxisData, yAxisData}] |
| GET | /api/dashboard/target-stats |
获取目标统计 | [{xAxisData, yAxisData}] |
| GET | /api/dashboard/recent-detections |
获取最近检测 | [{filename, type, targets, confidence, time}] |
3.6 模型管理 API
| 方法 | 端点 | 说明 | 请求体 | 响应 |
|---|---|---|---|---|
| GET | /api/models/list |
获取模型列表 | – | {code, message, data: []} |
| GET | /api/models/current |
获取当前模型 | – | {code, message, data: {filename}} |
| POST | /api/models/upload/{filename} |
上传模型 | FormData | {code, message} |
| POST | /api/models/switch/{filename} |
切换模型 | – | {code, message} |
| GET | /api/models/download/{filename} |
下载模型 | – | Blob |
| DELETE | /api/models/delete/{filename} |
删除模型 | – | {code, message} |
3.7 大模型聊天 API
| 方法 | 端点 | 说明 | 请求体 | 响应 |
|---|---|---|---|---|
| POST | /api/llm/chat |
发送消息 | {message, history} |
{code, message, data: {response}} |
4. 响应格式规范
所有 API 响应都遵循统一格式:
{ "code": 200, // 状态码:200 成功,其他失败 "message": "操作成功", // 提示信息 "data": {} // 响应数据(可选) }
5. 请求示例
5.1 上传图像
async uploadFiles(files) { for (const file of files) { const formData = new FormData(); formData.append('file', file); try { const result = await fetch(`${API_BASE}/api/images/upload/${file.name}`, { method: 'POST', body: formData }).then(r => r.json()); if (result.code === 200) { Utils.toast(`${file.name} 上传成功`, 'success'); } else { Utils.toast(`${file.name} 上传失败: ${result.message}`, 'error'); } } catch (error) { Utils.toast(`${file.name} 上传失败`, 'error'); } } await this.loadImages(); }
6.组件说明
1. Toast 通知组件
使用方法:
Utils.toast('操作成功', 'success'); // 成功提示 Utils.toast('操作失败', 'error'); // 错误提示 Utils.toast('请注意', 'warning'); // 警告提示 Utils.toast('提示信息', 'info'); // 信息提示
2. Modal 模态框组件
使用方法:
// 创建模态框 Utils.createModal( '标题', '<p>内容</p>', '<button onclick="Utils.closeModal()">关闭</button>' ); // 关闭模态框 Utils.closeModal();
3. 文件上传组件
拖拽上传:
uploadArea.addEventListener('dragover', (e) => { e.preventDefault(); uploadArea.classList.add('dragover'); }); uploadArea.addEventListener('drop', (e) => { e.preventDefault(); uploadArea.classList.remove('dragover'); this.uploadFiles(e.dataTransfer.files); });
4. 图表组件
4.1 饼图
renderPieChart(containerId, data) { const total = data.reduce((sum, item) => sum + item.value, 0); const colors = ['#6200EE', '#03DAC6', '#FF9800', '#4CAF50', '#E91E63']; // 使用 SVG 绘制饼图 let startAngle = 0; data.forEach((item, index) => { const angle = (item.value / total) * 360; const endAngle = startAngle + angle; // ... 绘制扇形 }); }
4.2 折线图
renderLineChart(containerId, data) { const maxValue = Math.max(...data.yAxisData, 1); const width = 100; const height = 40; // 计算点坐标 let points = data.yAxisData.map((v, i) => { const x = (i / (data.yAxisData.length - 1)) * width; const y = height - (v / maxValue) * height; return `${x},${y}`; }).join(' '); // 使用 SVG 绘制折线图 // 包含渐变填充、数据点、坐标轴 }
4.3 柱状图
renderBarChart(containerId, data) { const maxValue = Math.max(...data.yAxisData); // 计算柱子高度 data.xAxisData.forEach((label, i) => { const height = (data.yAxisData[i] / maxValue) * 180; // 渲染柱子 }); }
5. 选择器组件
全选功能:
selectAll() { if (this.selectedImages.size === this.images.length) { this.selectedImages.clear(); // 取消全选 } else { this.images.forEach(img => this.selectedImages.add(img.filename)); // 全选 } this.renderImages(); }
单选功能:
toggleSelect(filename, event) { event.stopPropagation(); if (this.selectedImages.has(filename)) { this.selectedImages.delete(filename); } else { this.selectedImages.add(filename); } this.renderImages(); }
8.开发指南
1. 添加新页面
步骤 1: 在 index.html 添加导航项
<li class="nav-item" data-page="new-page"> <span class="nav-icon">🆕</span> <span class="nav-text">新页面</span> </li>
步骤 2: 在 renderer.js 创建页面类
function NewPage() { this.data = []; } NewPage.prototype = { async render() { const container = document.getElementById('page-container'); container.innerHTML = ` <div class="page-header"> <h1 class="page-title">新页面</h1> <p class="page-subtitle">页面描述</p> </div> <div class="card"> <div class="card-header"> <span class="card-title">卡片标题</span> </div> <!-- 页面内容 --> </div> `; await this.loadData(); window.newPage = this; }, async loadData() { // 加载数据 }, destroy() { window.newPage = null; } }
步骤 3: 在 PageManager 注册页面
const PageManager = { pages: { // ... 其他页面 'new-page': NewPage } }
2. 添加新 API
步骤 1: 在后端添加路由
# backend/routers/new_router.py @router.get("/api/new/data") async def get_data(): return success_response(data, "获取成功")
步骤 2: 在前端调用
async loadData() { try { const result = await Utils.request('/api/new/data'); if (result.code === 200) { this.data = result.data; this.renderData(); } } catch (error) { Utils.toast('加载失败', 'error'); } }
3. 样式开发规范
使用 CSS Variables
.my-component { background: var(--surface-color); color: var(--on-surface); border-radius: var(--radius-md); box-shadow: var(--shadow-2); transition: var(--transition-normal); }
响应式设计
.grid { display: grid; gap: 20px; } .grid-2 { grid-template-columns: repeat(2, 1fr); } .grid-3 { grid-template-columns: repeat(3, 1fr); } .grid-4 { grid-template-columns: repeat(4, 1fr); }
4. 错误处理
API 错误处理
try { const result = await Utils.request('/api/endpoint'); if (result.code === 200) { // 成功处理 } else { Utils.toast(`操作失败: ${result.message}`, 'error'); } } catch (error) { console.error('Error:', error); Utils.toast('网络错误', 'error'); }
5. 打包发布
开发模式运行
npm start # 或 npm run dev
打包应用
# Windows npm run build:win # macOS npm run build:mac # Linux npm run build:linux # 所有平台 npm run build
打包后的文件在 dist/ 目录下。
6. 常见问题
Q1: API 请求失败?
原因: 后端服务未启动或端口不匹配
解决:
-
确保后端服务运行在
http://localhost:10077 -
检查
renderer.js中的API_BASE配置
9.总结
本文档详细介绍了行人摔倒检测系统的前端架构、设计原则、核心文件、API 规范和开发指南。
核心特点
-
原生 JavaScript: 无框架依赖,轻量高效
-
Material Design: 现代化的界面设计
-
模块化架构: 清晰的代码组织
-
统一规范: API、样式、组件统一规范
-
安全可靠: Electron 安全最佳实践
技术亮点
-
单页应用架构
-
原生 SVG 图表
-
拖拽上传
-
实时监控
-
批量操作
-
模态框和 Toast
-
响应式布局
持续改进
-
添加单元测试
-
优化性能
-
增强错误处理
-
完善文档
-
用户反馈收集
