 夜雨聆风
夜雨聆风


AI智能打印文件助手
【背景】
还是有一部分人为怎么打印文件而烦恼,去到打印店或者公司不会如何快速打印,针对这个问题,小编用一个小时做了一个简单的exe,双击即可使用。
【成品展示】
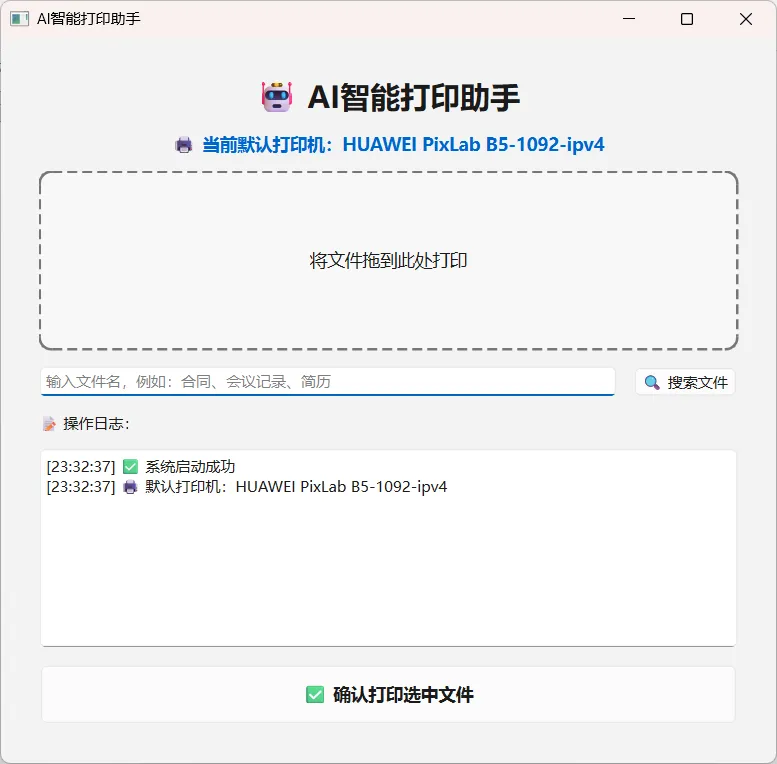
【使用方式一】
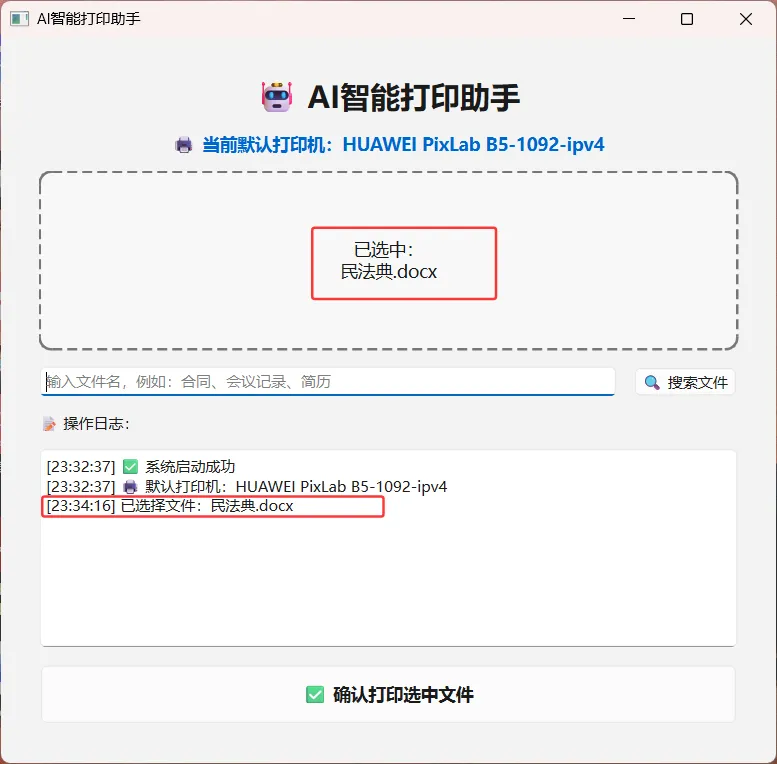
1 拖动需要打印的文件
2 点击确认打印选中的文件
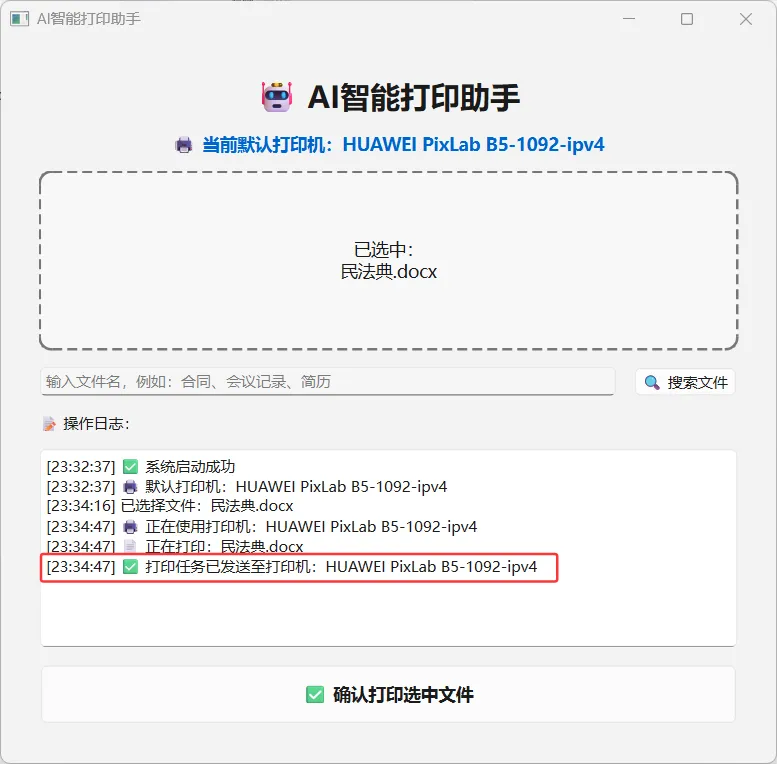
打印文件结束,拿走打印好的文件就完事啦!
【使用方式二】
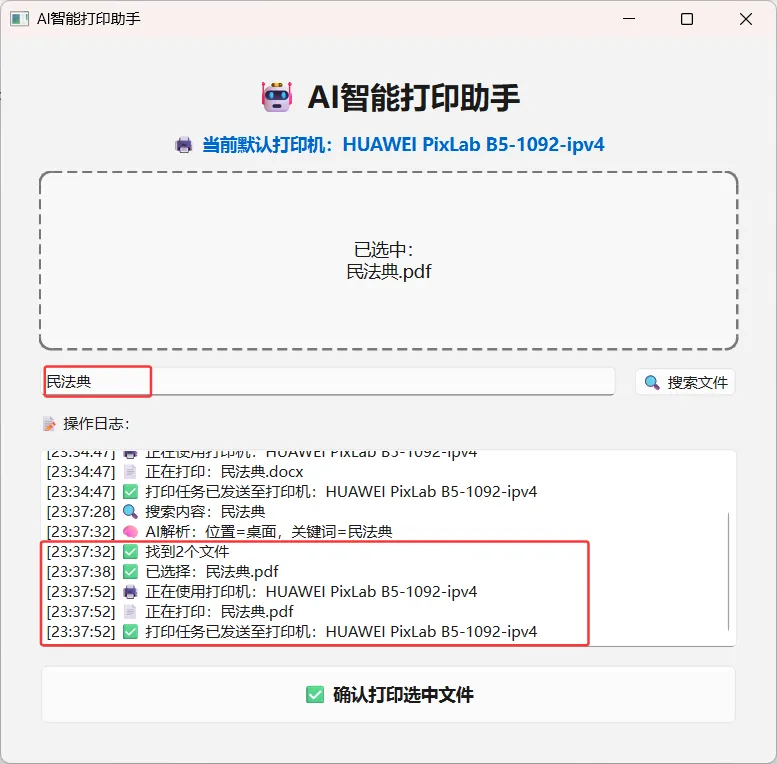
通过输入文件名称,进行搜索确认后进行打印。
【使用方式三】
同时按win+H键,进行语音录入
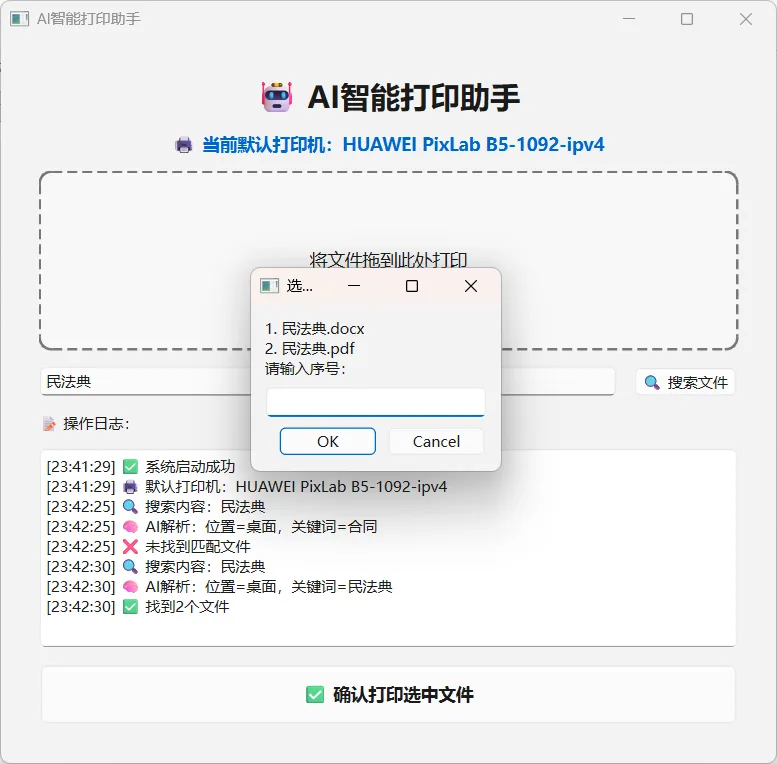
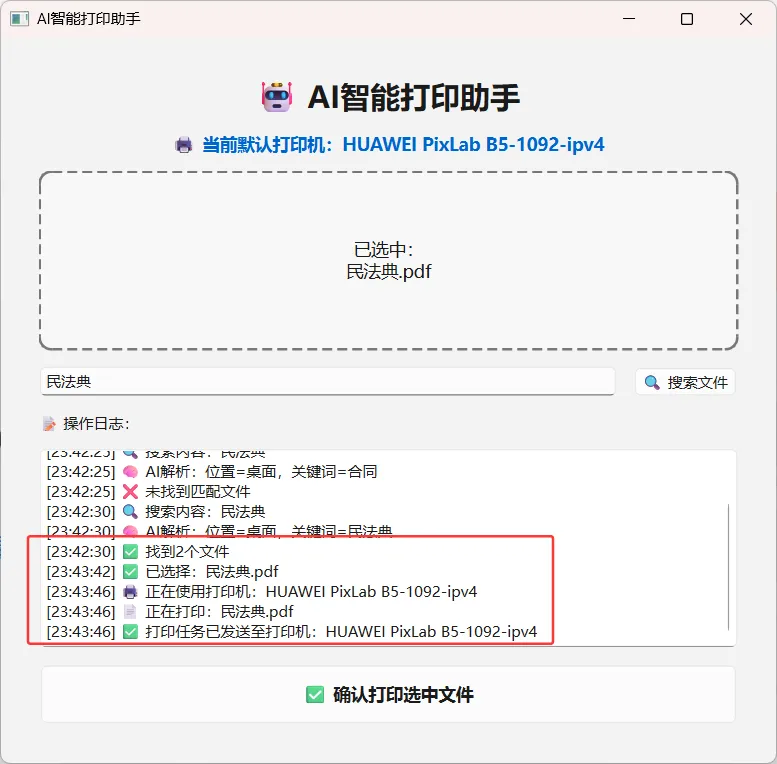
输入你想要打印文件的序号,然后点击确认打印选中文件,进行打印
代码实现
import sysimport osimport jsonimport datetimeimport requestsimport pythoncomimport win32printimport win32apifrom difflib import SequenceMatcherfrom PyQt6.QtWidgets import *from PyQt6.QtCore import *from PyQt6.QtGui import *# ===================== 配置 =====================OLLAMA_API = "http://127.0.0.1:11434/api/generate"OLLAMA_MODEL = "qwen:0.5b"# ===================== 系统语音播报 =====================def speak(text):try:pythoncom.CoInitialize()voice = pythoncom.Dispatch("SAPI.SpVoice")voice.Speak(text)except:return# ===================== 获取当前默认打印机 =====================def get_default_printer():try:return win32print.GetDefaultPrinter()except:return "未找到默认打印机"# ===================== AI 解析(防报错) =====================def parse_print_intent(user_text):prompt = f'''你是打印助手,只输出标准JSON,不要多余文字。必须输出3个字段:filepath: 桌面、文档、下载、全部 选一个keyword: 文件名关键词action: print用户输入:{user_text}输出格式:{{"filepath":"桌面","keyword":"合同","action":"print"}}'''.strip()try:res = requests.post(OLLAMA_API, json={"model": OLLAMA_MODEL,"prompt": prompt,"stream": False,"temperature": 0.0}, timeout=10).json()data = json.loads(res["response"].strip())return {"filepath": data.get("filepath", "桌面"),"keyword": data.get("keyword", user_text),"action": data.get("action", "print")}except:return {"filepath": "桌面", "keyword": user_text, "action": "print"}# ===================== 搜索文件 =====================def find_files(location, keyword):base = os.path.expanduser("~")paths = {"桌面": os.path.join(base, "Desktop"),"文档": os.path.join(base, "Documents"),"下载": os.path.join(base, "Downloads"),"全部": base}root = paths.get(location, base)exts = (".pdf", ".docx", ".doc", ".txt", ".jpg", ".png", ".rtf")matches = []if not os.path.exists(root):return matchesfor folder, _, files in os.walk(root):for f in files:if f.lower().endswith(exts):name = os.path.splitext(f)[0].lower()k = keyword.lower()if k in name or SequenceMatcher(None, name, k).ratio() > 0.5:matches.append((os.path.join(folder, f), f))if len(matches) >= 5:return matchesreturn matches# ===================== 打印执行 =====================def print_file(path):try:printer = get_default_printer()win32api.ShellExecute(0, "print", path, f'/d:"{printer}"', ".", 0)return True, printerexcept Exception as e:print(e)return False, get_default_printer()# ===================== 主界面 =====================class PrintWindow(QMainWindow):def __init__(self):super().__init__()self.setWindowTitle("AI智能打印助手")self.setFixedSize(620, 580)self.current_file = ""self.current_printer = get_default_printer()# 主界面central = QWidget()self.setCentralWidget(central)lay = QVBoxLayout(central)lay.setSpacing(12)lay.setContentsMargins(30,30,30,30)# 标题title = QLabel("🤖 AI智能打印助手")title.setAlignment(Qt.AlignmentFlag.AlignCenter)title.setFont(QFont("Microsoft YaHei", 18, QFont.Weight.Bold))lay.addWidget(title)# ===================== 【新增】显示当前打印机 =====================self.printer_label = QLabel(f"🖨️ 当前默认打印机:{self.current_printer}")self.printer_label.setAlignment(Qt.AlignmentFlag.AlignCenter)self.printer_label.setStyleSheet("color: #0066cc; font-size:14px; font-weight:bold;")lay.addWidget(self.printer_label)# 拖放区self.drop_label = QLabel("将文件拖到此处打印")self.drop_label.setAlignment(Qt.AlignmentFlag.AlignCenter)self.drop_label.setStyleSheet("""QLabel{border:2px dashed #777;border-radius:10px;min-height:140px;background:#f8f8f8; font-size:14px;}""")lay.addWidget(self.drop_label)self.setAcceptDrops(True)# 搜索输入框row = QHBoxLayout()self.edit = QLineEdit()self.edit.setPlaceholderText("输入文件名,例如:合同、会议记录、简历")self.btn_search = QPushButton("🔍 搜索文件")row.addWidget(self.edit)row.addWidget(self.btn_search)lay.addLayout(row)# 日志lay.addWidget(QLabel("📝 操作日志:"))self.log = QTextEdit()self.log.setReadOnly(True)lay.addWidget(self.log)# 打印按钮(大号)self.btn_do = QPushButton("✅ 确认打印选中文件")self.btn_do.setFixedHeight(50)self.btn_do.setStyleSheet("font-size:14px; font-weight:bold;")lay.addWidget(self.btn_do)# 绑定事件self.btn_search.clicked.connect(self.on_search)self.btn_do.clicked.connect(self.on_do_print)# 启动提示self.log_line("✅ 系统启动成功")self.log_line(f"🖨️ 默认打印机:{self.current_printer}")speak(f"打印助手已启动,当前打印机为{self.current_printer}")def log_line(self, msg):t = datetime.datetime.now().strftime("%H:%M:%S")self.log.append(f"[{t}] {msg}")# 拖放def dragEnterEvent(self, e):if e.mimeData().hasUrls():e.accept()def dropEvent(self, e):u = e.mimeData().urls()[0]self.current_file = u.toLocalFile()name = os.path.basename(self.current_file)self.drop_label.setText(f"已选中:\n{name}")self.log_line(f"已选择文件:{name}")speak("已选择文件,请点击确认打印")# 搜索def on_search(self):text = self.edit.text().strip()if not text:speak("请输入文件名")returnself.log_line(f"🔍 搜索内容:{text}")intent = parse_print_intent(text)loc = intent.get("filepath", "桌面")kw = intent.get("keyword", text)self.log_line(f"🧠 AI解析:位置={loc},关键词={kw}")files = find_files(loc, kw)if not files:self.log_line("❌ 未找到匹配文件")speak("未找到相关文件")returnself.log_line(f"✅ 找到{len(files)}个文件")speak(f"找到{len(files)}个文件")msg = ""for i, (p, name) in enumerate(files, 1):msg += f"{i}. {name}\n"speak(f"第{i}个,{name}")num, ok = QInputDialog.getText(self, "选择文件", msg + "请输入序号:")if not ok:returntry:idx = int(num)-1if 0 <= idx < len(files):self.current_file, sel = files[idx]self.drop_label.setText(f"已选中:\n{sel}")self.log_line(f"✅ 已选择:{sel}")speak("已选择文件,请确认打印")except:speak("输入无效,请输入数字")# 打印(显示打印机)def on_do_print(self):if not self.current_file:speak("请先选择文件")returnfilename = os.path.basename(self.current_file)printer_name = self.current_printerself.log_line(f"🖨️ 正在使用打印机:{printer_name}")self.log_line(f"📄 正在打印:{filename}")speak(f"正在使用打印机{printer_name}打印文件{filename}")ok, used_printer = print_file(self.current_file)if ok:self.log_line(f"✅ 打印任务已发送至打印机:{used_printer}")speak("打印成功,任务已发送")else:self.log_line("❌ 打印失败,请检查打印机连接")speak("打印失败,请检查打印机")# ===================== 启动 =====================if __name__ == "__main__":app = QApplication(sys.argv)win = PrintWindow()win.show()sys.exit(app.exec())
打包命令
PS D:\autoprint> pyinstaller -F --noconsole --strip --exclude-module numpy --exclude-module scipy --exclude-module matplotlib --name AI打印助手 main.pyAI 打印助手 一键部署步骤
-
安装 Python 3.11(64 位) -
安装 Ollama -
执行 3 条命令:
pip install requests pyqt6 pywin32ollama pull qwen:0.5bollama serve
-
运行:python main.py
只实现了基础功能,有想法的宝子可以自由发挥,
比如添加选择打印机的功能
比如添加语音识别功能
比如添加因打印机故障(缺纸,缺墨等故障的回显功能)
有好的想法,可以评论区留言,我们一起头脑风暴吧!
点赞 关注
关注 分享
分享 宝子们如果觉得还OK,可以动动可爱的小手分享给身边的好朋友!我们一起进步,每一个点赞关注分享都是小编前进的动力!
【往期回顾】