 夜雨聆风
夜雨聆风
前言
随着企业对数据安全、私有化部署和智能化运营的需求不断攀升,开源、可控且功能完备的 AI 智能体平台正成为企业数字化转型的关键基础设施。OpenClaw 凭借其开源透明的架构、强大的扩展能力和企业级特性,在众多智能体平台中脱颖而出,成为私有化 AI 落地的首选方案。
采用 Docker-compose 进行部署,不仅能够实现环境的一致性和可复制性,还能通过声明式配置完成服务的一键编排与运维,显著降低企业的部署门槛和运营成本。
本文基于最新版 OpenClaw,提供一套经过实践验证、简洁高效、可直接用于生产环境的 Docker-compose 部署方案,帮助企业快速搭建安全可控的 AI 智能体平台。
步骤 1:创建工作目录
创建基本工作目录结构:mkdir -p ~/openclaw/nginx/{conf,cert}cd ~/openclaw
步骤 2:获取 OpenClaw 初始化配置文件
# 临时启动容器提取配置文件docker run -itd --name openclaw-wclwcw ghcr.io/openclaw/openclaw:latestdocker cp openclaw-wclwcw:/home/node/.openclaw ./chmod 777 -R .openclaw# 清理临时容器docker stop openclaw-wclwcwdocker rm openclaw-wclwcw
步骤 3:配置 HTTPS 证书
OpenClaw 要求通过 HTTPS 访问,需先配置 SSL 证书。
3.1 生成自签名证书
cd ~/openclaw/nginx/certopenssl req -x509 -newkey rsa:2048 -keyout example.key -out example.crt -days 365 -nodes -subj "/CN=example.com"
💡 生产环境建议使用正式 CA 签发的证书
3.2 创建 Nginx 配置文件
cd ~/openclaw/nginx/confvim nginx.confworker_processes 1;pid /var/run/nginx.pid;events {worker_connections 1024;}http {include mime.types;default_type application/octet-stream;sendfile on;keepalive_timeout 65;client_max_body_size 1024m;server_tokens off;server {listen 443 http2 ssl;server_name localhost;ssl_certificate /etc/nginx/cert/example.crt;ssl_certificate_key /etc/nginx/cert/example.key;ssl_session_cache shared:SSL:1m;ssl_session_timeout 5m;ssl_protocols TLSv1 TLSv1.1 TLSv1.2;ssl_prefer_server_ciphers on;ssl_ciphers ECDHE-ECDSA-AES128-GCM-SHA256:ECDHE-RSA-AES128-GCM-SHA256:ECDHE-ECDSA-AES256-GCM-SHA384:ECDHE-RSA-AES256-GCM-SHA384;add_header Strict-Transport-Security "max-age=31536000";location / {proxy_pass http://openclaw-gateway:18789;proxy_http_version 1.1;proxy_set_header Upgrade $http_upgrade;proxy_set_header Connection "upgrade";proxy_set_header Host $host;proxy_set_header X-Nginx-Proxy true;proxy_set_header X-Forwarded-Proto $scheme;proxy_set_header X-Real-IP $remote_addr;proxy_set_header X-Forwarded-For $proxy_add_x_forwarded_for;proxy_connect_timeout 7d;proxy_send_timeout 7d;proxy_read_timeout 7d;}error_page 401 403;error_page 500 502 503 504 /50x.html;location = /50x.html {root html;}}}
步骤 4:创建 Docker-compose 配置文件
cd ~/openclawvim docker-compose.yamlversion: "3.8"services:openclaw-gateway:image: ghcr.io/openclaw/openclaw:latestcontainer_name: openclawrestart: unless-stoppedvolumes:- ./.openclaw:/home/node/.openclawenvironment:- TZ=Asia/Shanghaimem_limit: 2glogging:driver: json-fileoptions:max-size: "10m"max-file: "3"openclaw-nginx:image: nginx:1.23.4container_name: openclaw-nginxrestart: alwaysports:- 443:443volumes:- ./nginx/conf/nginx.conf:/etc/nginx/nginx.conf- ./nginx/cert:/etc/nginx/certprivileged: truedepends_on:- openclaw-gateway启动服务docker-compose up -d
步骤 5:执行初始化配置
docker exec -it openclaw /bin/bashopenclaw onboard
初始化向导配置参考
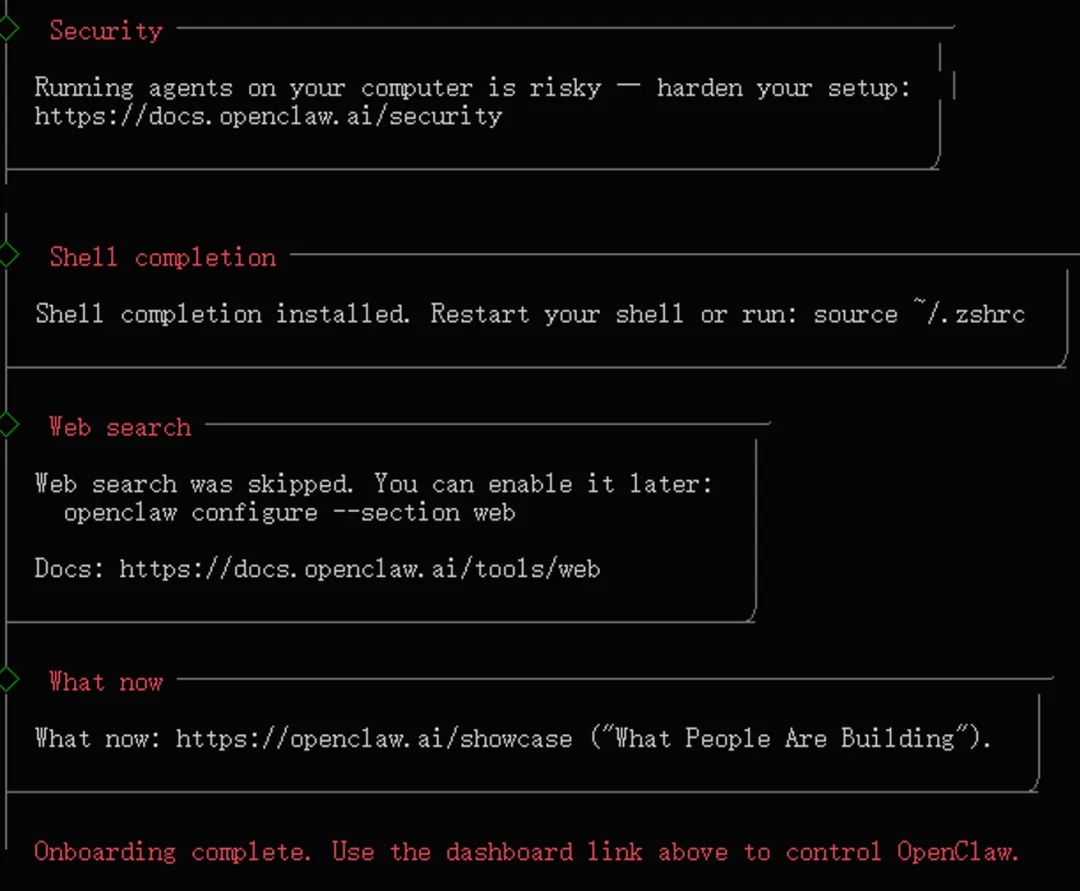
◆ I understand this is personal-by-default and shared/multi-user use requires lock-down. Continue?│ ● Yes◆ Onboarding mode│ ● QuickStart◆ Config handling│ ● Use existing values◆ Model/auth provider│ ● Volcano Engine (API key)◆ How do you want to provide this API key?│ ● Paste API key now◆ Enter Volcano Engine API key│ 123456 (临时占位值)◆ Default model│ ● volcengine/deepseek-v3-2-251201◆ Select channel (QuickStart)│ ● Skip for now◆ Search provider│ ● Skip for now◆ Configure skills now? (recommended)│ ● No◆ Enable hooks?│ ◼ Skip for now◆ How do you want to hatch your bot?│ ● Do this later
完成初始化后,执行 exit 退出容器。
步骤 6:配置局域网访问
vim ~/openclaw/.openclaw/openclaw.json{"gateway": {"port": 18789,"mode": "local","bind": "lan","controlUi": {"allowedOrigins": ["http://localhost:18789","http://127.0.0.1:18789","https://宿主机 IP"]},"auth": {"mode": "token","token": "e5VidO5PiSxNCrZKPYYZzniwa16X"},"tailscale": {"mode": "off","resetOnExit": false}}}
⚠️ 请将 https://宿主机 IP 替换为实际的服务器 IP 地址
重启服务使配置生效
docker-compose restart步骤 7:访问 OpenClaw 管理界面
配置完成后,在浏览器中访问:https://宿主机 IP
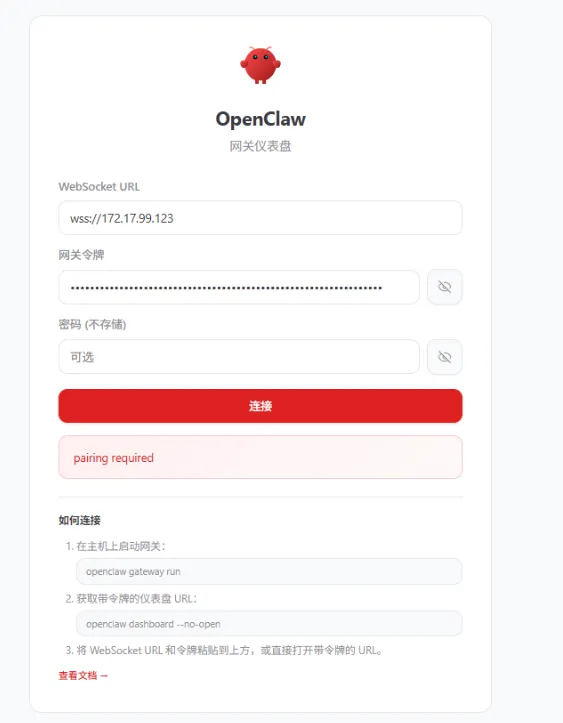
点击 pairing required 获取 token
首次登录需使用配置文件中设置的 token 进行身份验证。
docker exec -it openclaw /bin/bashopenclaw devices listopenclaw devices approve 8eadb326-b016-4dv3-8154-710c0c757487 # 刚刚查到的 Request IDexit
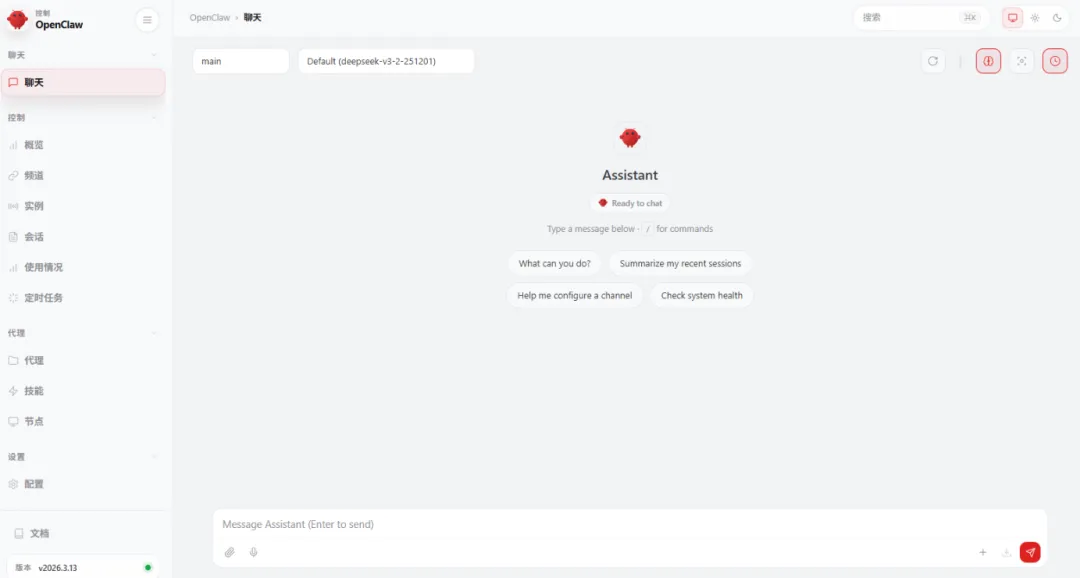
添加完白名单再次点击链接就可以进来了
步骤 8:添加大模型:阿里千问(国内主流第一)
vim ~/openclaw/.openclaw/openclaw.json"models": {"mode": "merge","providers": {"bailian": {"baseUrl": "https://dashscope.aliyuncs.com/compatible-mode/v1","apiKey": "sk-643fd378sdfs341ab0dfsgdsg066922d55","api": "openai-completions","models": [{"id": "qwen3.5-plus","name": "通义千问 3.5 Plus","reasoning": false,"input": ["text", "image"],"cost": {"input": 0.001,"output": 0.002,"cacheRead": 0,"cacheWrite": 0},"contextWindow": 128000,"maxTokens": 4096}]}}},"agents": {"defaults": {"model": {"primary": "bailian/qwen3.5-plus"},"models": {"bailian/qwen3.5-plus": {"alias": "Qwen3.5原生视觉语言系列Plus模型"}},"compaction": {"mode": "safeguard"}}},
重启 OpenClaw
docker-compose restart验证部署
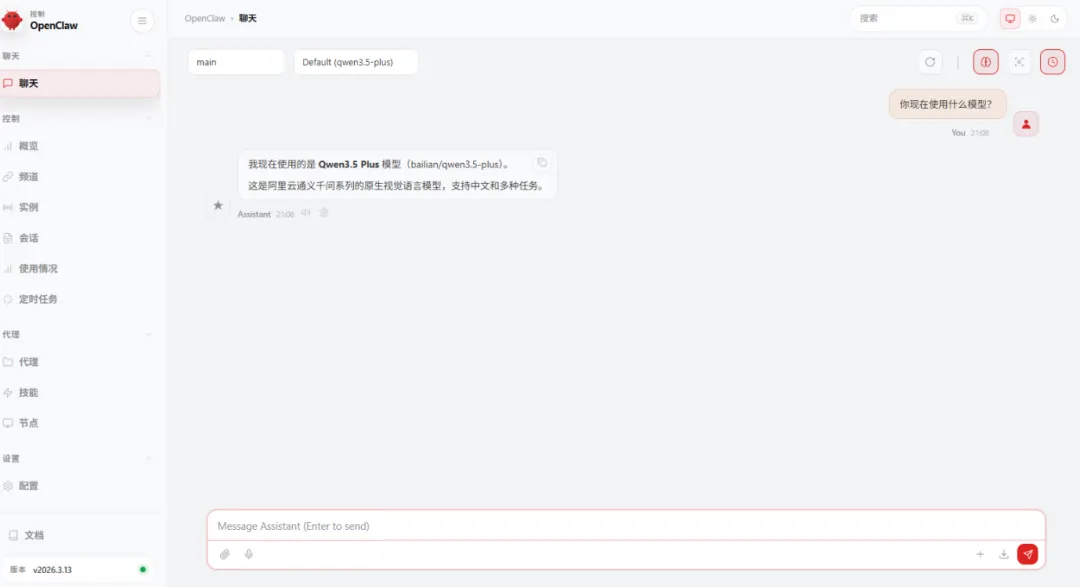
部署完成!现在你已经拥有一套完整的企业级 OpenClaw 私有化部署环境。
