 夜雨聆风
夜雨聆风如何顺利地开发你的第一款IDEA 插件

首先需要一个好的网络环境,必须解决gradle 下载以及镜像源配置等问题,有好的网络环境可以省去一大半的功夫。
环境准备
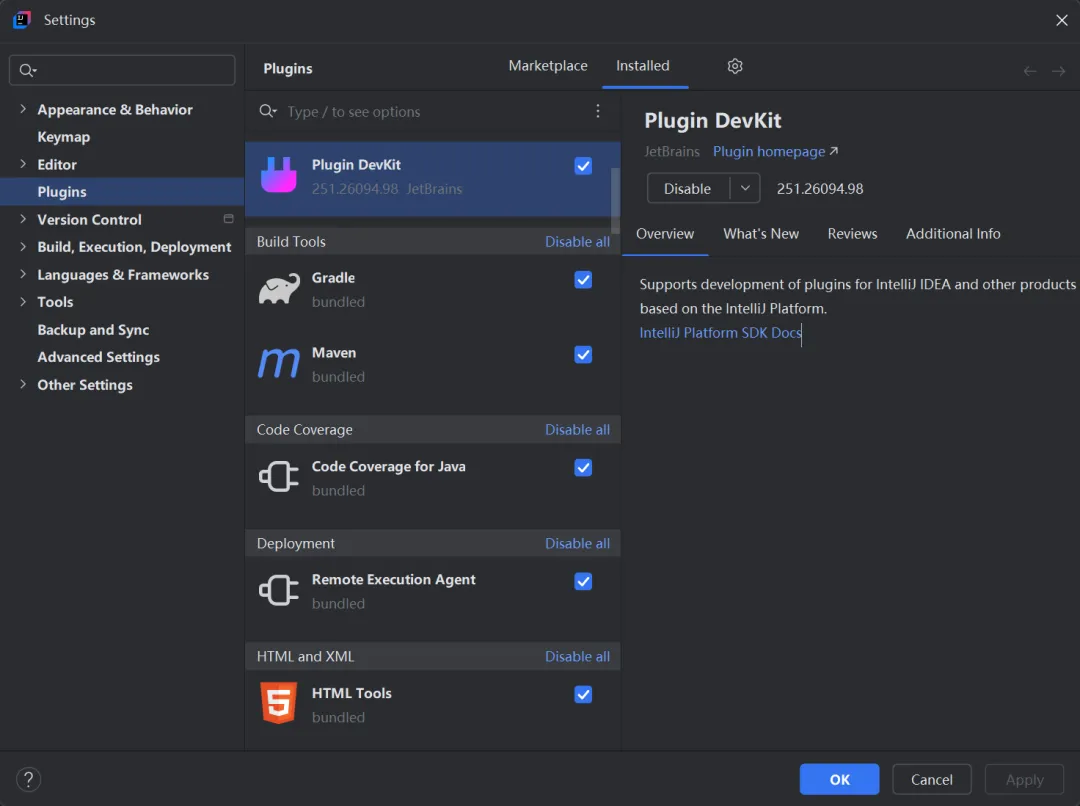
安装Plugin Devkit
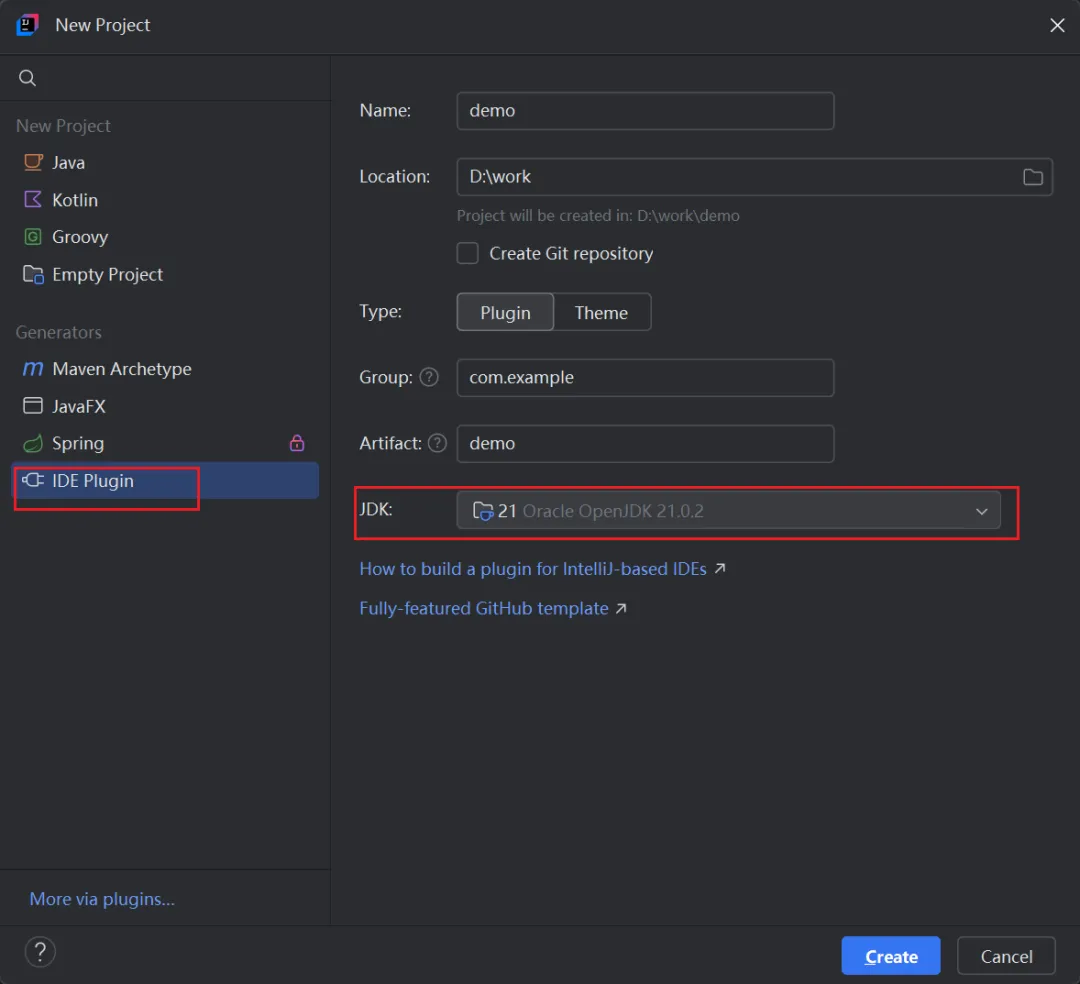
使用官方的Plugin Devkit,类似使用archtype 一样,特别方便地创建一个项目。
新建一个plugin项目
创建项目的时候选择IDE Plugin,JDK 版本建议17以上。
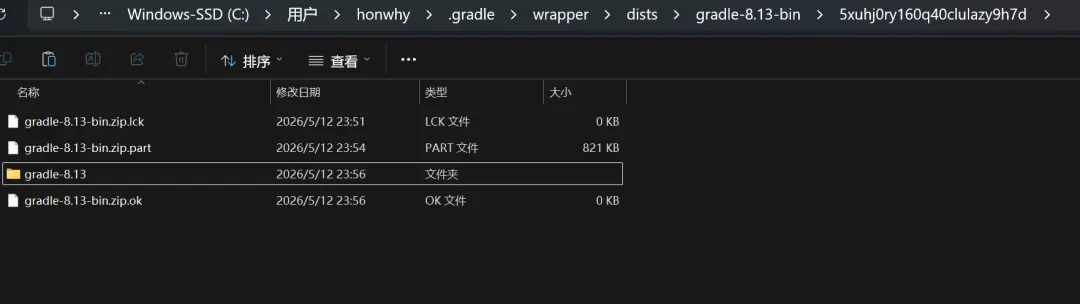
手工下载gradle-bin
这个generator 生成的项目是一个gradle的项目,主要开发语言是kotlin。
在构建的时候需要首先下载gradle,这个会很耗时而且容易超时。
建议从镜像源网页直接下载。
1)找到gradle/wrapper/gradle-wrapper.properties 配置文件确定需要下载的gradle 版本号
distributionBase=GRADLE_USER_HOME
distributionPath=wrapper/dists
distributionUrl=https\://services.gradle.org/distributions/gradle-8.13-bin.zip
zipStoreBase=GRADLE_USER_HOME
zipStorePath=wrapper/dists
2)下载和手工处理
下载地址:https://mirrors.aliyun.com/github/releases/gradle/gradle-distributions/v8.13.0/
下载对应的8.13.0-bin.zip文件,放在准确的目录下,不用解压
认识插件开发
基本情况
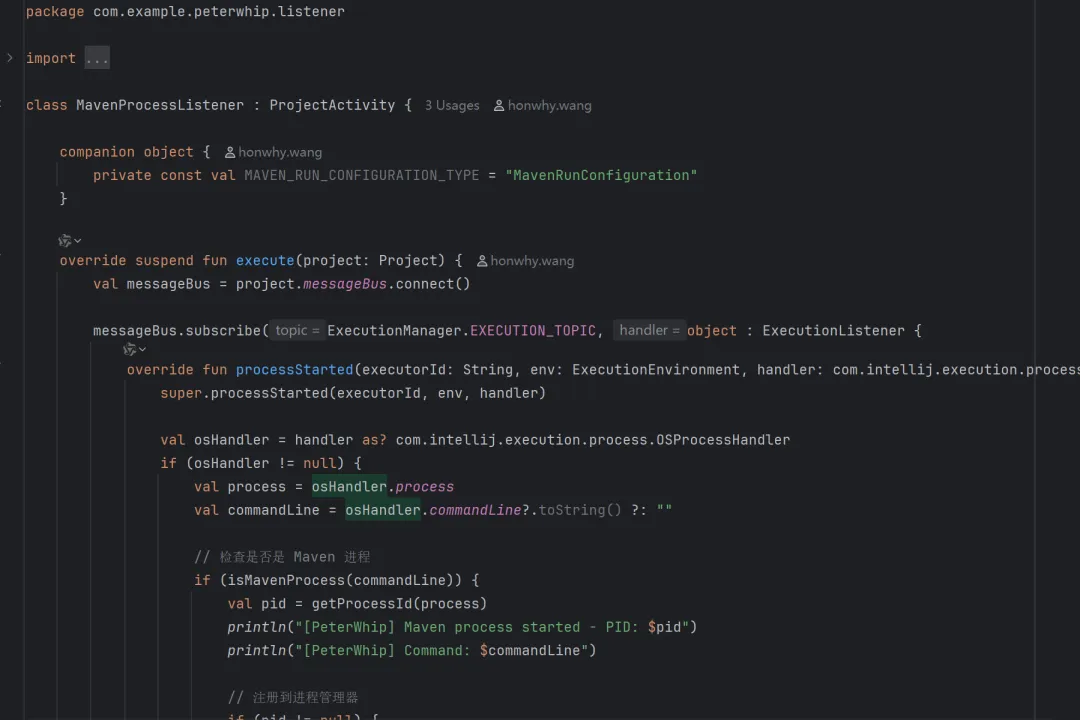
首先我开发好的一个项目,目录结构如下
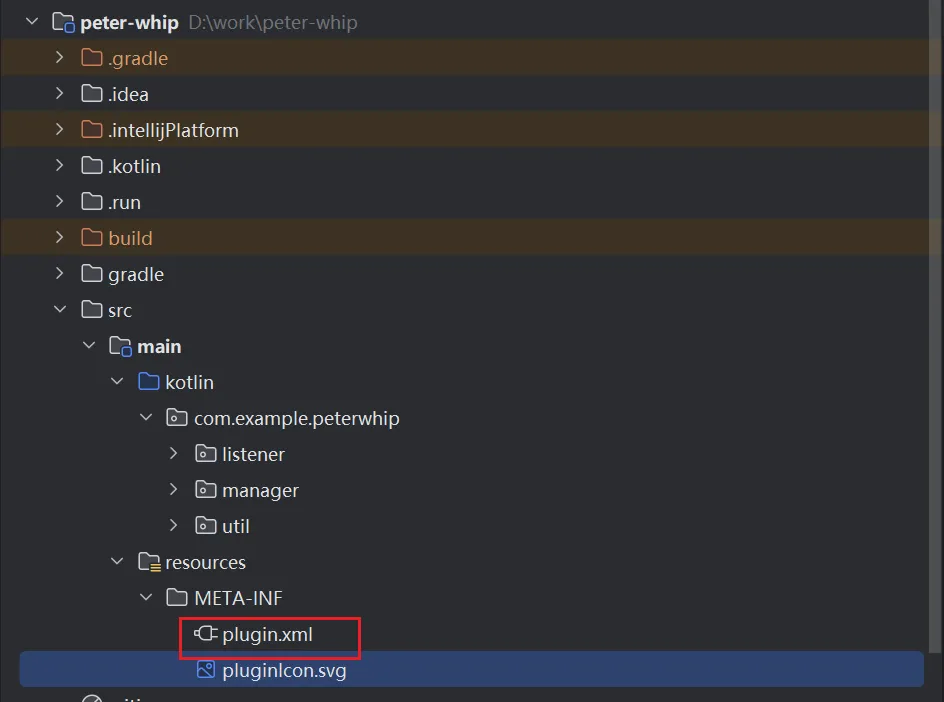
入口文件:src/main/resources/META-INF/plugin.xml
主要内容是,
<!-- Plugin Configuration File. Read more: https://plugins.jetbrains.com/docs/intellij/plugin-configuration-file.html -->
<idea-plugin>
    <!-- Unique identifier of the plugin. It should be FQN. It cannot be changed between the plugin versions. -->
    <id>com.example.peter-whip</id>

    <!-- Public plugin name should be written in Title Case.
         Guidelines: https://plugins.jetbrains.com/docs/marketplace/plugin-overview-page.html#plugin-name -->
    <name>peter-whip</name>

    <!-- A displayed Vendor name or Organization ID displayed on the Plugins Page. -->
    <vendor url="https://honwhy.wang">honwhy</vendor>

    <!-- Description of the plugin displayed on the Plugin Page and IDE Plugin Manager.
         Guidelines: https://plugins.jetbrains.com/docs/marketplace/plugin-overview-page.html#plugin-description -->
    <description><![CDATA[
    Plugin to monitor and capture Java process IDs from Maven/Gradle builds and Java run/debug configurations.
  ]]></description>

    <!-- Product and plugin compatibility requirements.
         Read more: https://plugins.jetbrains.com/docs/intellij/plugin-compatibility.html -->
    <depends>com.intellij.modules.platform</depends>
    <depends>com.intellij.java</depends>

    <!-- Extension points defined by the plugin.
         Read more: https://plugins.jetbrains.com/docs/intellij/plugin-extension-points.html -->
    <extensions defaultExtensionNs="com.intellij">
        <postStartupActivity implementation="com.example.peterwhip.listener.MavenProcessListener"/>
        <postStartupActivity implementation="com.example.peterwhip.listener.GradleProcessListener"/>
        <postStartupActivity implementation="com.example.peterwhip.listener.JavaProcessListener"/>
    </extensions>
</idea-plugin>
以我这个项目为例,正在做IDEA的maven/gradle编译构建时,java项目启动时监听获取他们的进程ID并 修改进程优先级。
所以重要的功能是,
    <extensions defaultExtensionNs="com.intellij">
        <postStartupActivity implementation="com.example.peterwhip.listener.MavenProcessListener"/>
        <postStartupActivity implementation="com.example.peterwhip.listener.GradleProcessListener"/>
        <postStartupActivity implementation="com.example.peterwhip.listener.JavaProcessListener"/>
    </extensions>
比如Maven这个处理。
调整优化
我希望这个插件可以适配更多的版本,比如从233版本开始直到最新的,
需要调整的是这个文件build.gradle.kts,
结合AI的建议,调整后的配置如下,
intellijPlatform {
    pluginConfiguration {
        ideaVersion {
            // 支持从 2023.3 (build 233) 开始的所有版本
            sinceBuild = "233"
            // untilBuild 留空表示不限制最高版本,支持所有未来的 IDE 版本
            // 这是 JetBrains 官方推荐的做法
        }

        changeNotes = """
      Support for IntelliJ IDEA 2023.3 and all later versions.
      Added process monitoring for Maven, Gradle, and Java applications.
      Automatic priority adjustment on Windows systems.
    """.trimIndent()
    }
}

tasks {
    // Set the JVM compatibility versions
    // 使用 JDK 17 以确保与 IntelliJ IDEA 2023.3+ 的兼容性
    // IDEA 2023.3 使用 JDK 17,2024.1+ 才开始支持 JDK 21
    withType<JavaCompile> {
        sourceCompatibility = "17"
        targetCompatibility = "17"
    }
    withType<org.jetbrains.kotlin.gradle.tasks.KotlinCompile> {
        kotlinOptions.jvmTarget = "17"
    }
}
AI Coding
这次项目全程都是使用IDEA 通义灵码 插件来开发的。
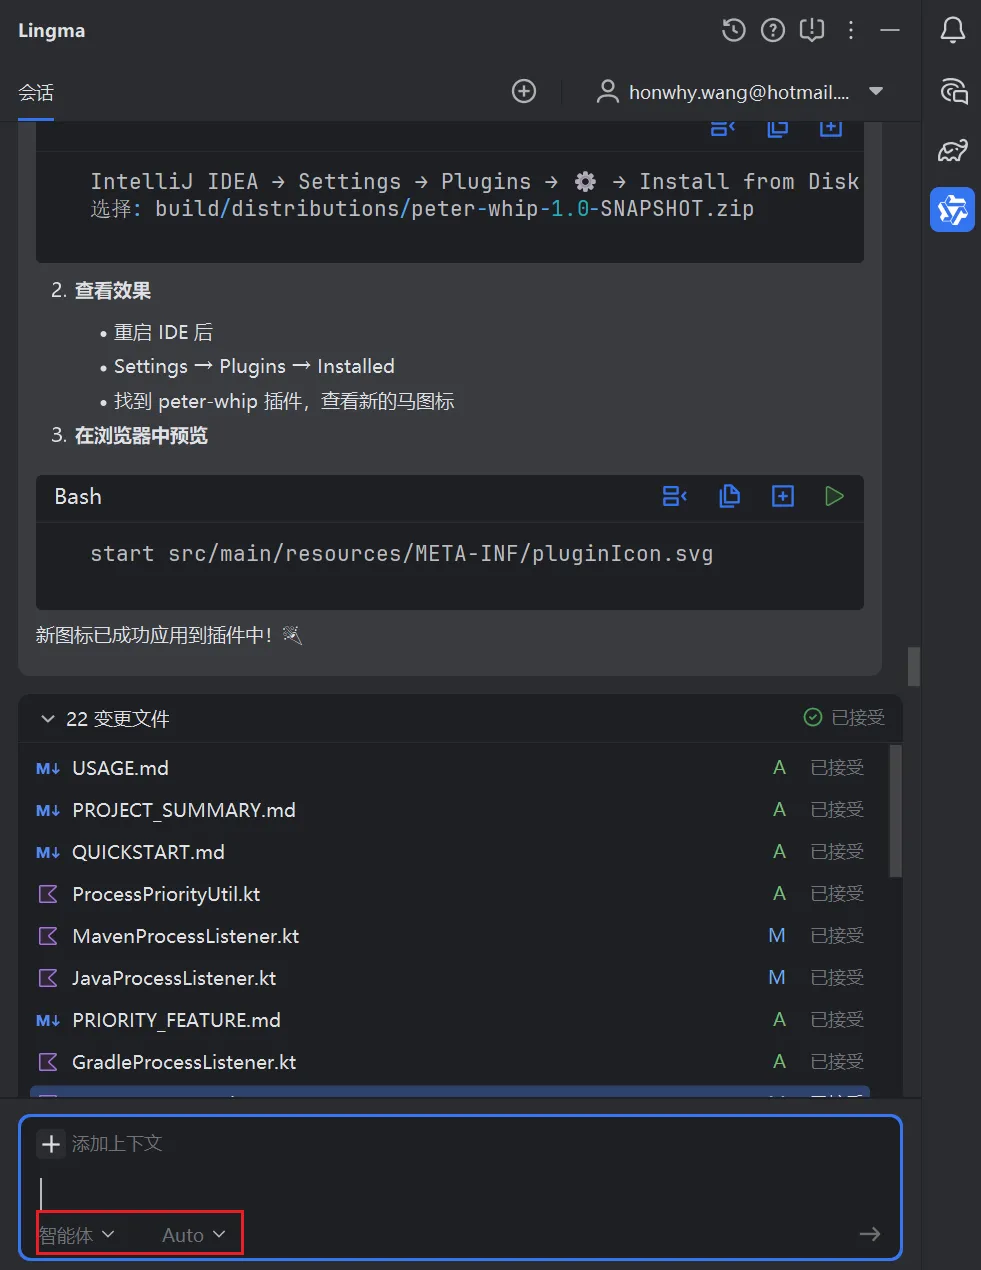
选择的模式是智能体+Auto。
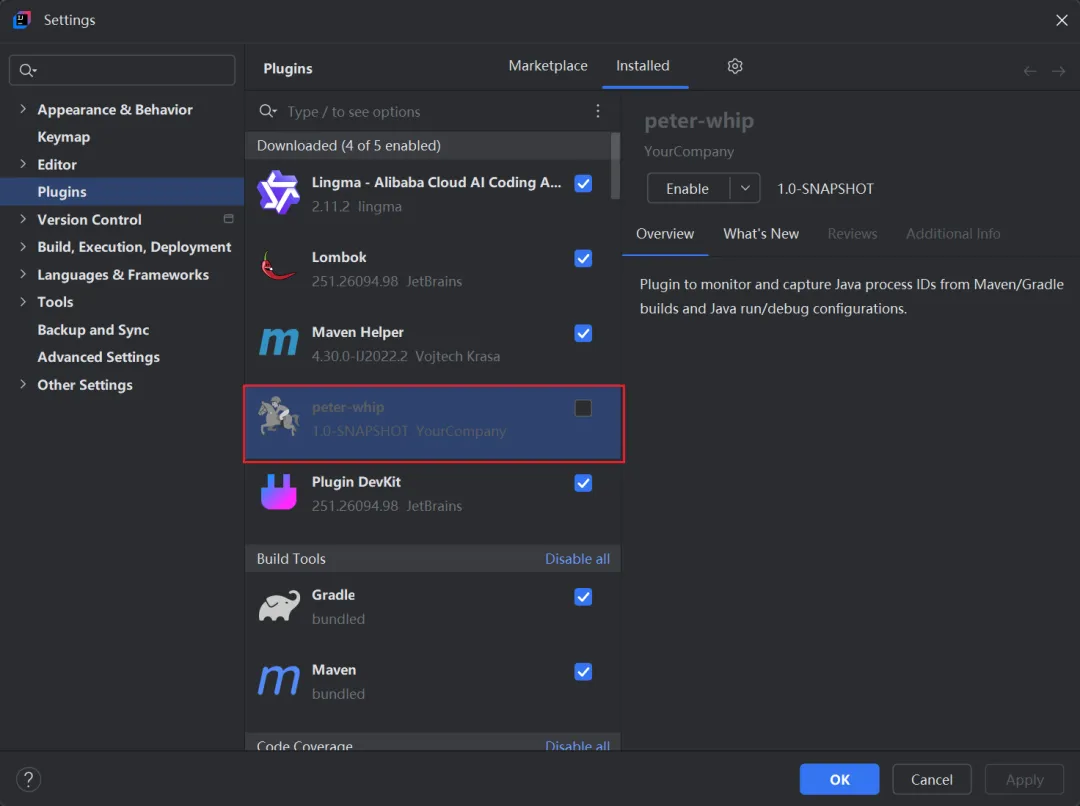
构建后的产物,
完整源码
见 https://github.com/honwhy/peter-whip
