乐于分享
好东西不私藏

OpenClaw 小白安装指南(Windows 版)

OpenClaw 小白安装指南(Windows 版)

💡安装准备

系统要求

Windows 10 或 Windows 11(64位)
能访问 GitHub 的网络环境
建议在备用机或干净的电脑上安装运行。

第一步:安装 Node.js

Node.js 是 OpenClaw 的运行环境,装一次就够了。
⚠️OpenClaw 要求 Node.js 22 或以上,低于这个版本会安装失败。
先检查有没有装过
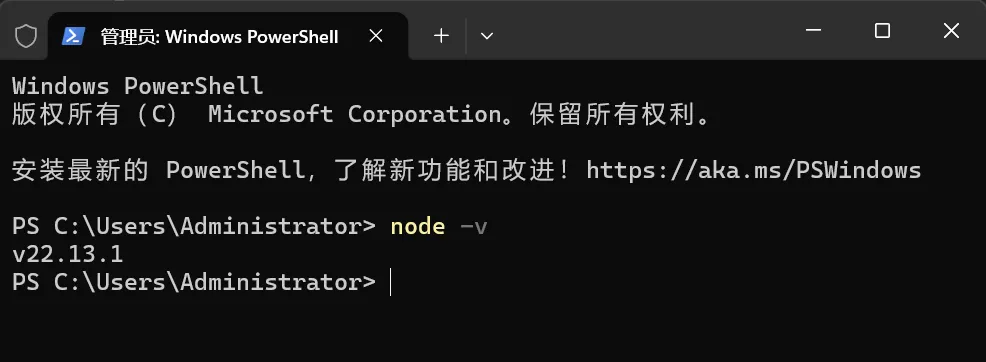
在系统搜索栏搜索PowerShell打开,输入:
node -v
看到v22.x.x或更高 → 已满足要求,直接跳到第二步
看到v20.x.x或更低 → 版本太旧,需要重新安装
提示"找不到命令" → 还没装过,继续往下
官网下载安装包
打开这个链接:👉
下载Windows 安装程序(.msi 文件),然后:
双击打开安装包
勾选同意协议
一路点击Next
点击Install,等待进度条走完
点击Finish
✅ Node.js 安装完成。

第二步:安装 Git

Git 是 OpenClaw 安装脚本拉取依赖时需要用到的工具,无版本硬性要求,装最新版就行。
先检查有没有装过
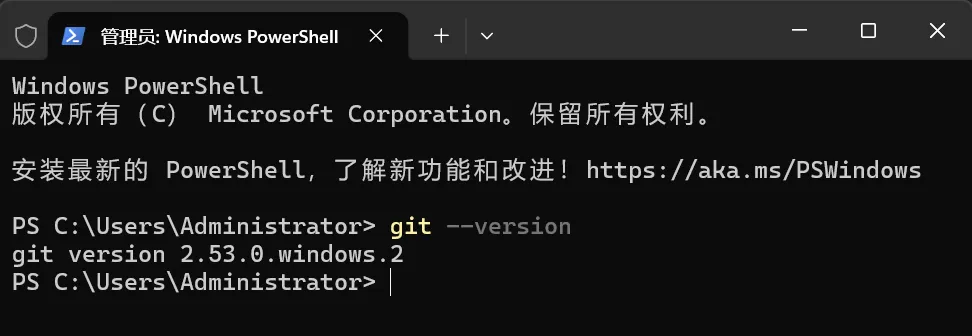
在 PowerShell 里输入:
git --version
看到 git version 2.x.x → 已安装,直接跳到第三步
提示"找不到命令" → 还没装过,继续往下
官网下载安装包
打开这个链接:👉 https://git-scm.com/install/windows
下载Windows 安装程序,然后:
双击打开安装包
一路点击Next(所有选项保持默认)
点击Install,等待进度条走完
点击Finish
✅ Git 安装完成。

第三步:安装 OpenClaw

准备安装
在系统搜索栏搜索PowerShell,右键选择以管理员身份运行
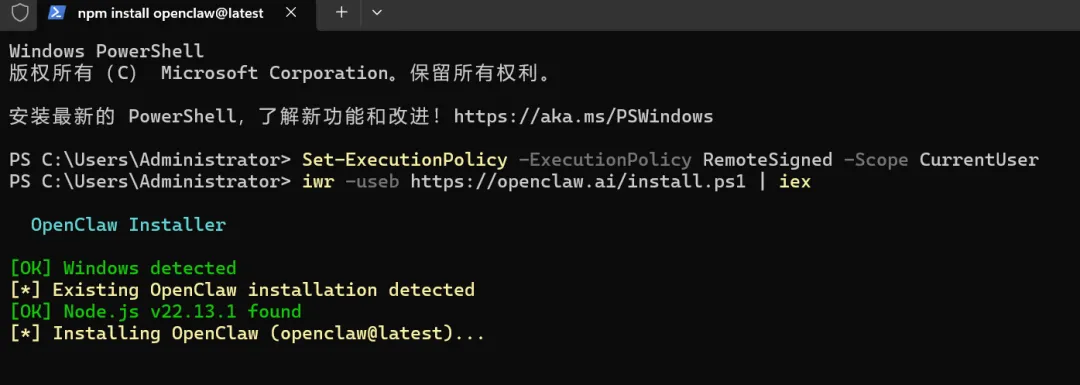
在蓝色窗口里依次输入以下两条命令,每输完一条就按回车
第一条:
Set-ExecutionPolicy -ExecutionPolicy RemoteSigned -Scope CurrentUser
如果出现询问,输入 Y 然后回车。
第二条:
iwr -useb https://openclaw.ai/install.ps1 | iex
等待安装过程,大约需要2-10分钟,速度取决于网络。
跟着向导操作
用键盘上下箭头选择,回车确认:
步骤
看到的问题
推荐选择
说明
截图

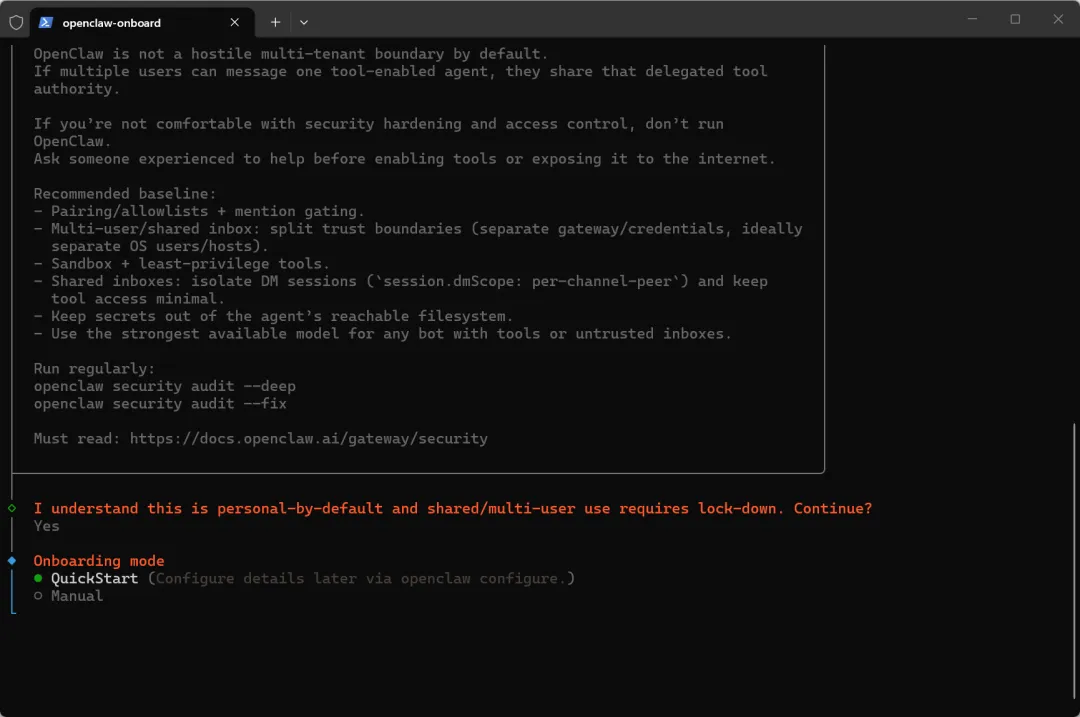
1

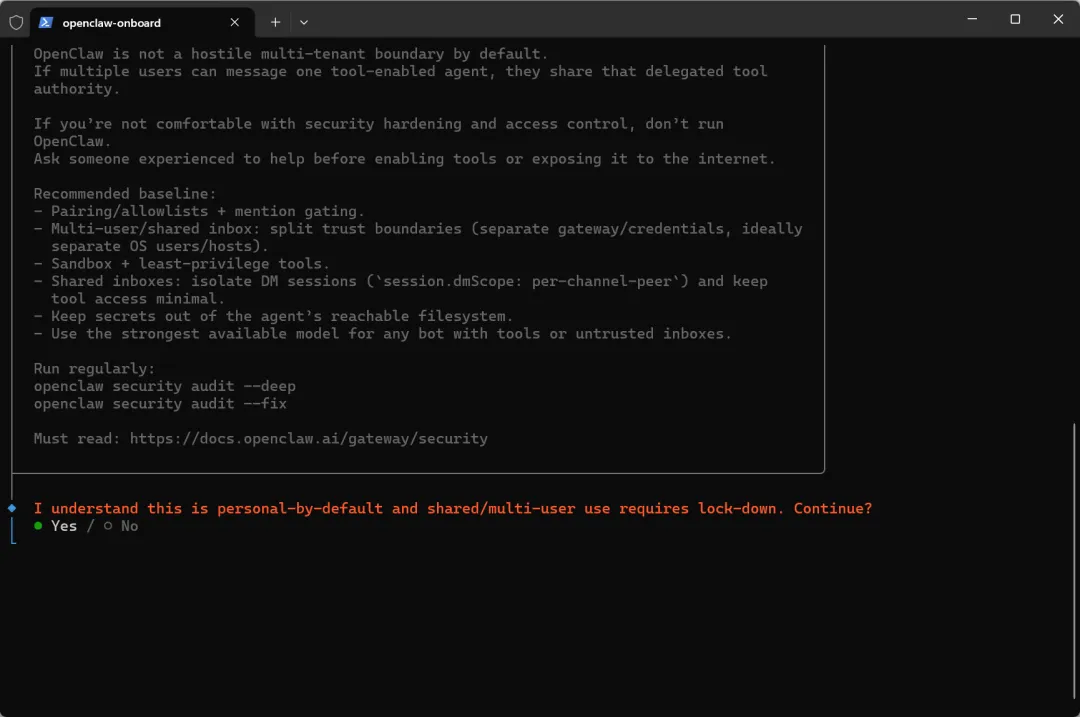
安全警告

Yes

了解风险,继续安装

2

安装模式

QuickStart

快速开始,适合新手

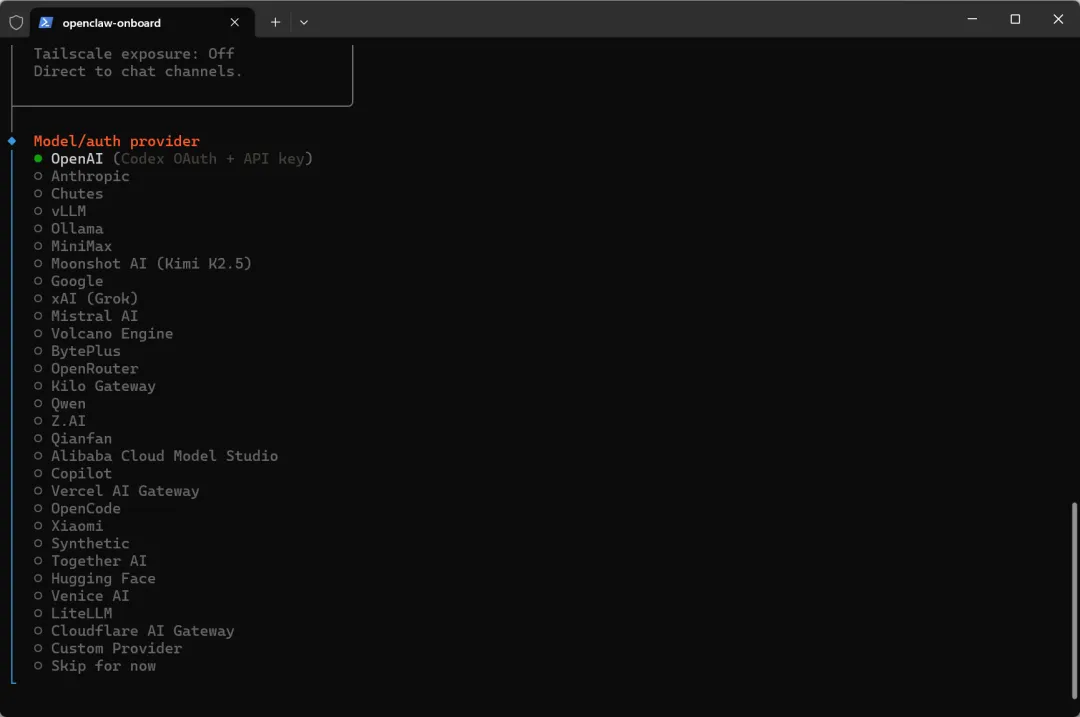
3

选择 AI 模型 +

输入 API Key

/

如没有 API Key 的话,后续就没办法跟 AI 对话

💡后续我们会出一份 API Key 对比文档,帮大家找最划算的选择,也欢迎铁铁们来补充~

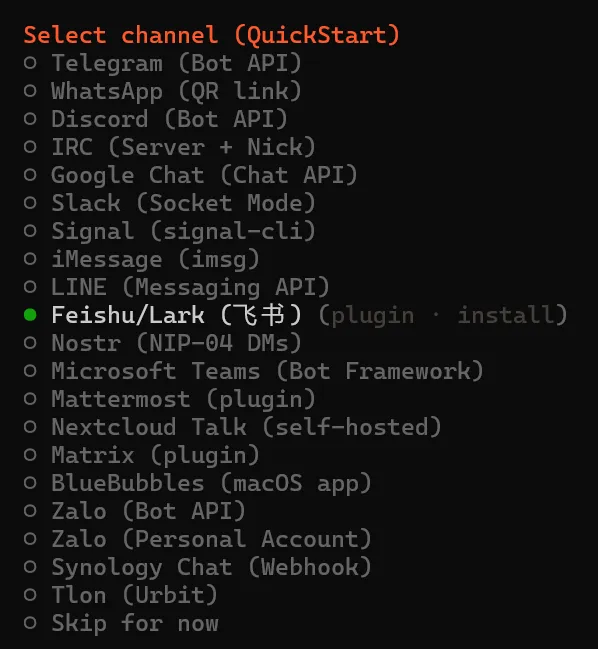
6

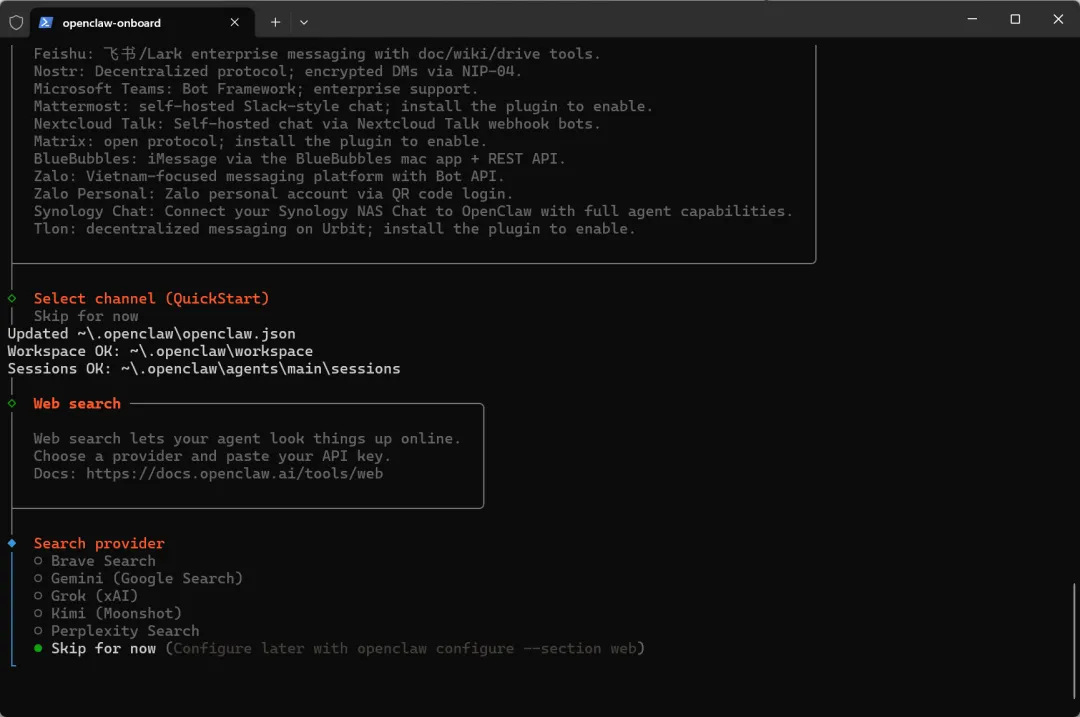
选择聊天渠道

feishu

可以先直接设置飞书,如不选可跳过

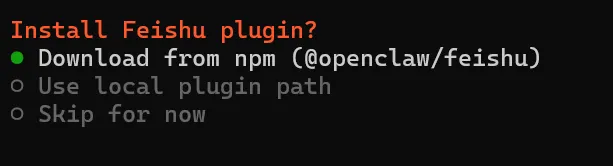
6.1

是否安装飞书插件

Download from npm (@openclaw/feishu)

6.2

提供APP Secret

和APP ID

提供相应信息

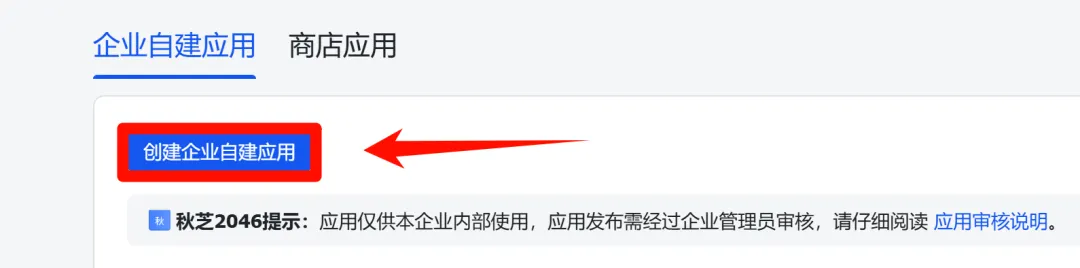
  1. 进入飞书应用中心:开发者后台 - 飞书开放平台

使用飞书账号登录。Lark(国际版)请使用 https://open.larksuite.com/app,并在配置中设置 domain: "lark"。

  1. 创建自建应用

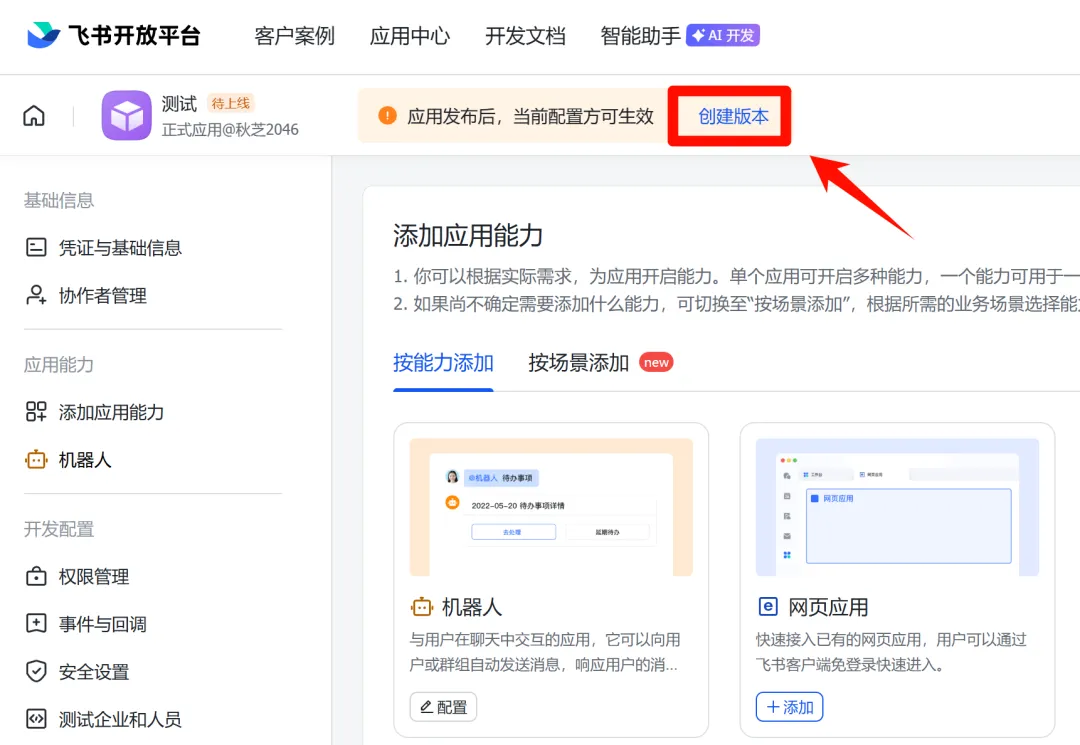
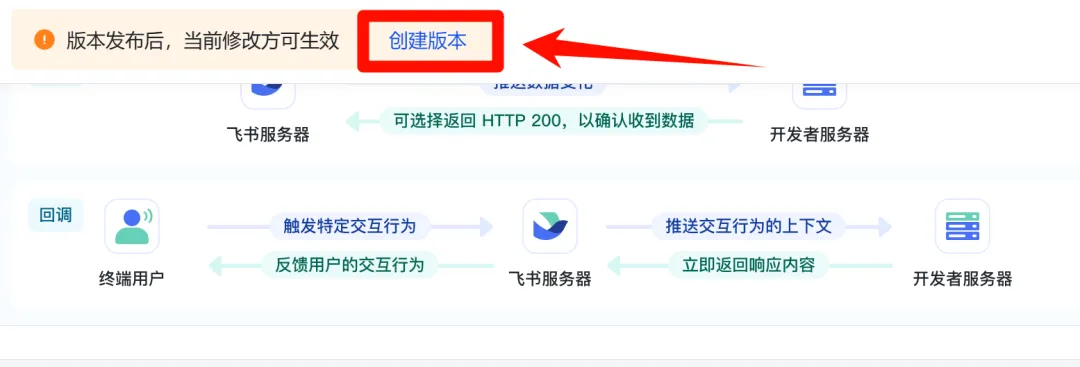
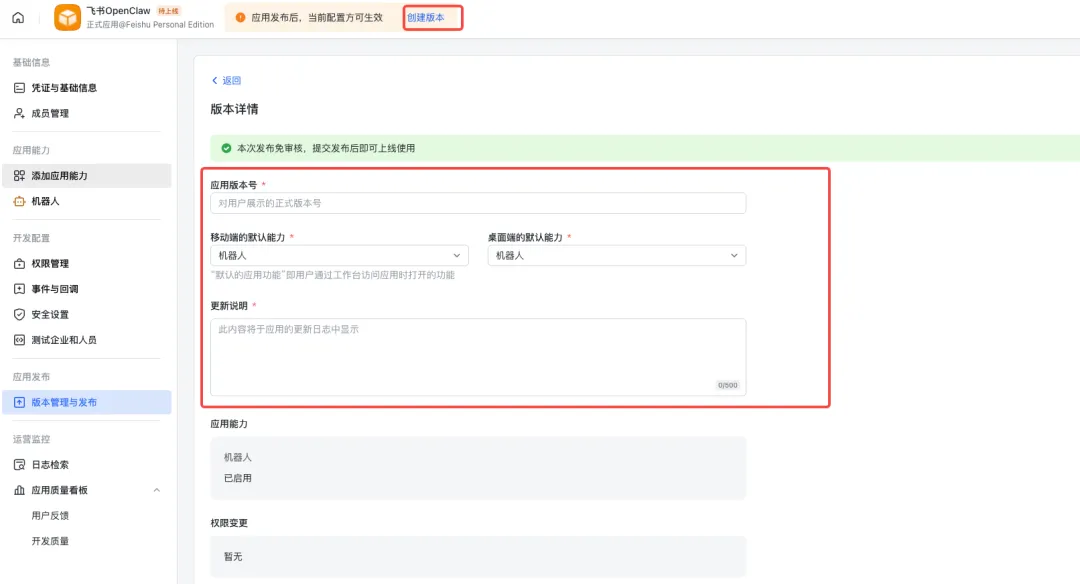
  2. 创建版本

  3. 更新应用 Token

回到 凭证与基础信息 页面,将App ID / App Secret 同步更新到 OpenClaw 配置中。

6.3

连接方式

WebSocket

默认就行,不用改

6.4

群聊响应策略

Open

  1. Allowlist(当前选中) 只在你指定的特定群里响应

  2. Open 在所有群都会响应,但需要有人 @ 它才触发

  3. Disabled 完全不在群里响应,只处理私聊

7

联网搜索

Skip for now

需要额外的API Key,可先跳过

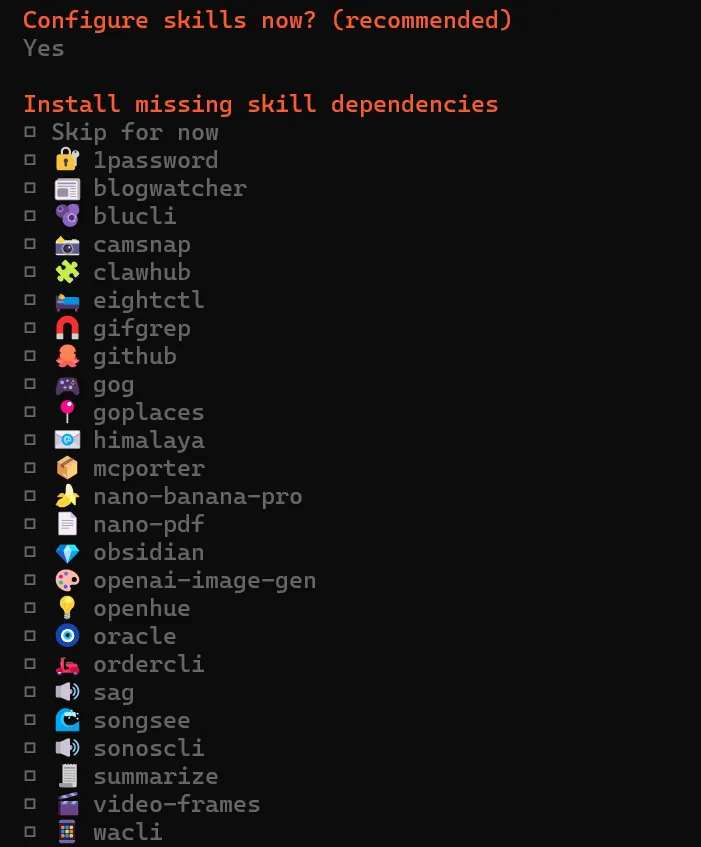
8

配置技能

Yes/No

只想先跑通基础聊天先选 No,后续可以随时安装

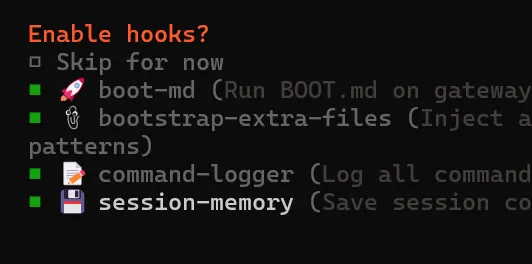
9

hooks(自动化功能)

全选安装

都是非常实用的技能

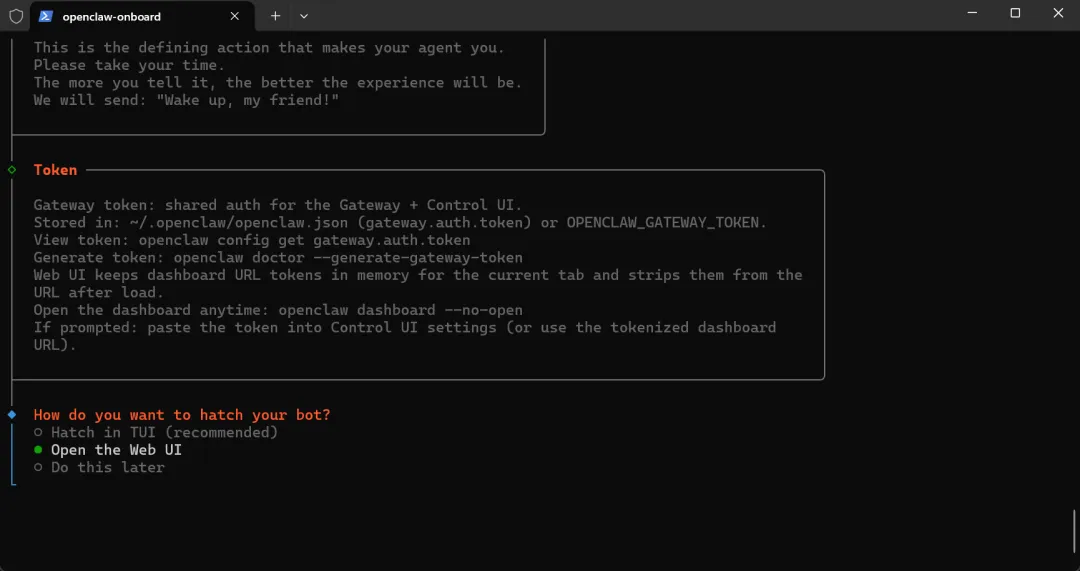
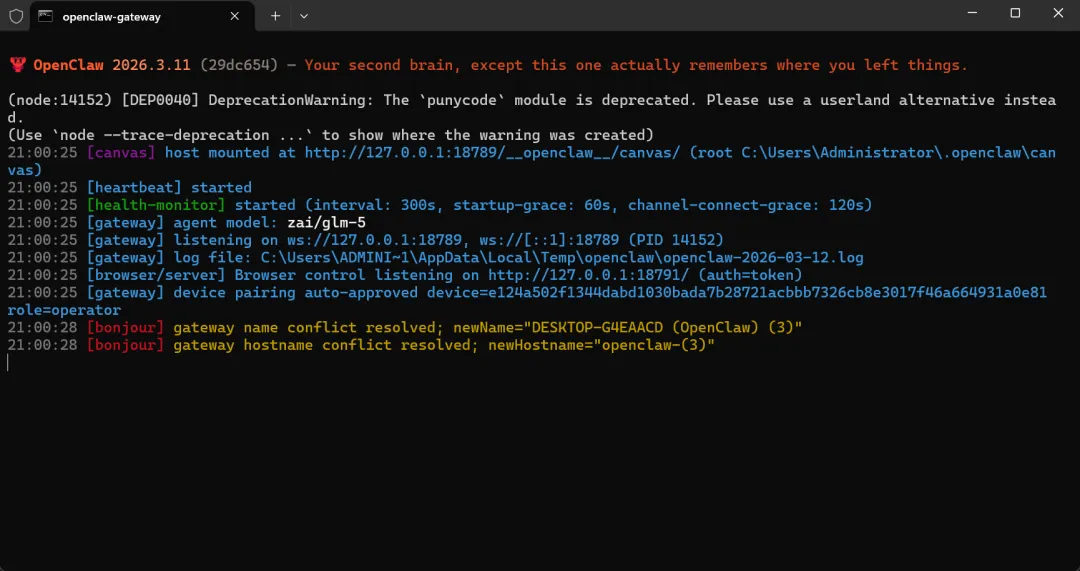
到这里,程序会自动启动网关,屏幕上会弹出一个新的命令窗口。

⚠️ 原先的 PowerShell 窗口和新弹出的窗口都不要关,回到最开始的 PowerShell 窗口继续操作。
10

启动方式

Web UI

网页图形界面会更加直观和操作友好一些

回车后会提示有网页自动打开,进入 http://127.0.0.1:18789/。
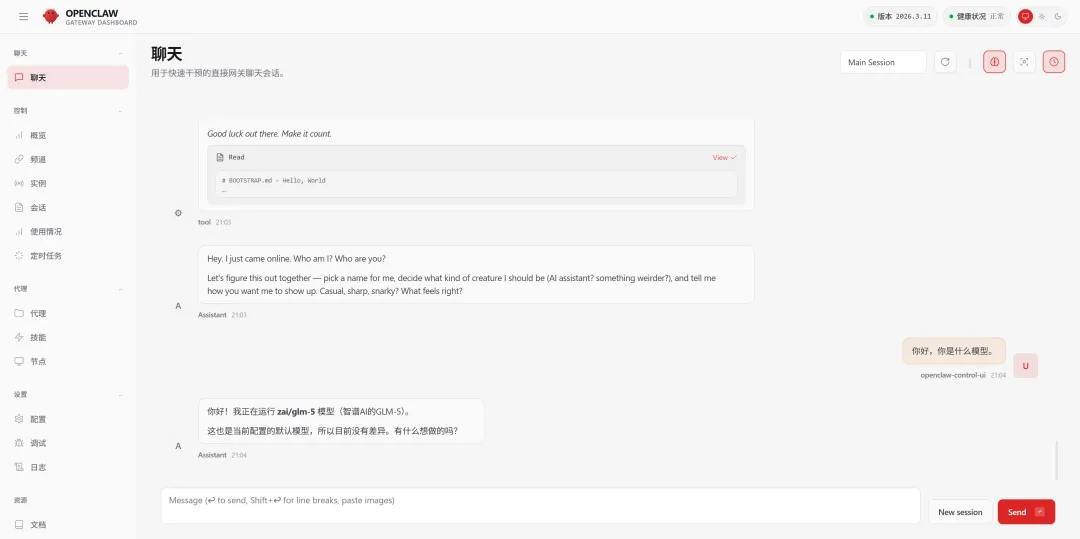
发送消息
在聊天界面发一条消息,收到小龙虾的回复,说明配置完成 🎉

后续打通飞书,在飞书上使用机器人的操作步骤

配置应用权限
进入飞书应用中心
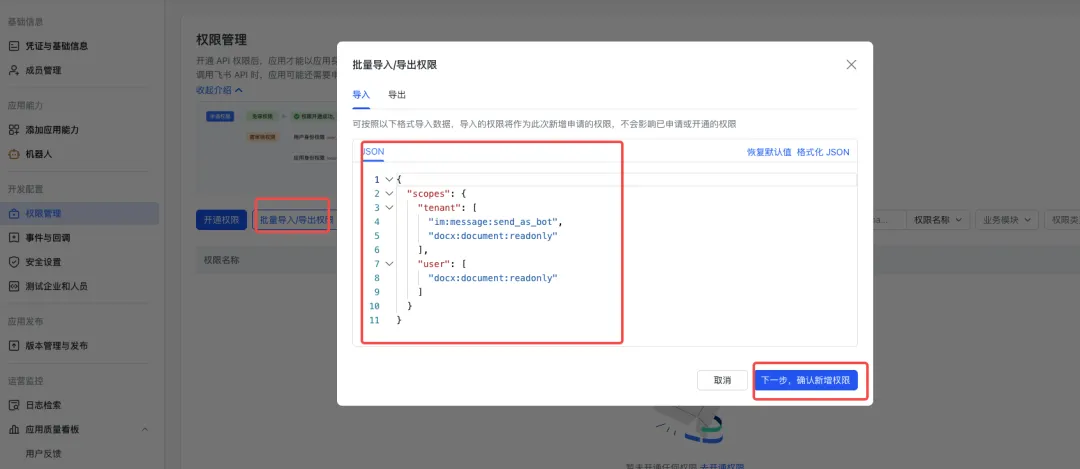
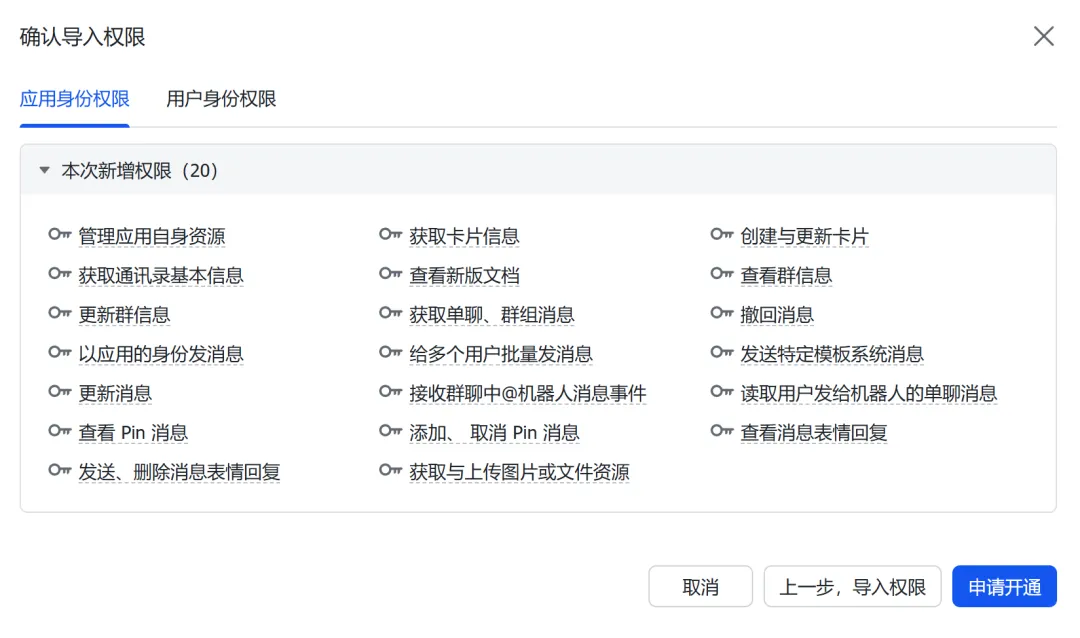
在刚才已有机器人的权限管理页面,点击批量导入按钮,粘贴以下 JSON 配置一键导入所需权限。
{
"scopes": {
"tenant": [
"contact:contact.base:readonly",
"docx:document:readonly",
"im:chat:read",
"im:chat:update",
"im:message.group_at_msg:readonly",
"im:message.p2p_msg:readonly",
"im:message.pins:read",
"im:message.pins:write_only",
"im:message.reactions:read",
"im:message.reactions:write_only",
"im:message:readonly",
"im:message:recall",
"im:message:send_as_bot",
"im:message:send_multi_users",
"im:message:send_sys_msg",
"im:message:update",
"im:resource",
"application:application:self_manage",
"cardkit:card:write",
"cardkit:card:read"
],
"user": [
"contact:user.employee_id:readonly",
"offline_access","base:app:copy",
"base:field:create",
"base:field:delete",
"base:field:read",
"base:field:update",
"base:record:create",
"base:record:delete",
"base:record:retrieve",
"base:record:update",
"base:table:create",
"base:table:delete",
"base:table:read",
"base:table:update",
"base:view:read",
"base:view:write_only",
"base:app:create",
"base:app:update",
"base:app:read",
"board:whiteboard:node:create",
"board:whiteboard:node:read",
"calendar:calendar:read",
"calendar:calendar.event:create",
"calendar:calendar.event:delete",
"calendar:calendar.event:read",
"calendar:calendar.event:reply",
"calendar:calendar.event:update",
"calendar:calendar.free_busy:read",
"contact:contact.base:readonly",
"contact:user.base:readonly",
"contact:user:search",
"docs:document.comment:create",
"docs:document.comment:read",
"docs:document.comment:update",
"docs:document.media:download",
"docs:document:copy",
"docx:document:create",
"docx:document:readonly",
"docx:document:write_only",
"drive:drive.metadata:readonly",
"drive:file:download",
"drive:file:upload",
"im:chat.members:read",
"im:chat:read",
"im:message",
"im:message.group_msg:get_as_user",
"im:message.p2p_msg:get_as_user",
"im:message:readonly",
"search:docs:read",
"search:message",
"space:document:delete",
"space:document:move",
"space:document:retrieve",
"task:comment:read",
"task:comment:write",
"task:task:read",
"task:task:write",
"task:task:writeonly",
"task:tasklist:read",
"task:tasklist:write",
"wiki:node:copy",
"wiki:node:create",
"wiki:node:move",
"wiki:node:read",
"wiki:node:retrieve",
"wiki:space:read",
"wiki:space:retrieve",
"wiki:space:write_only"
]
}
}

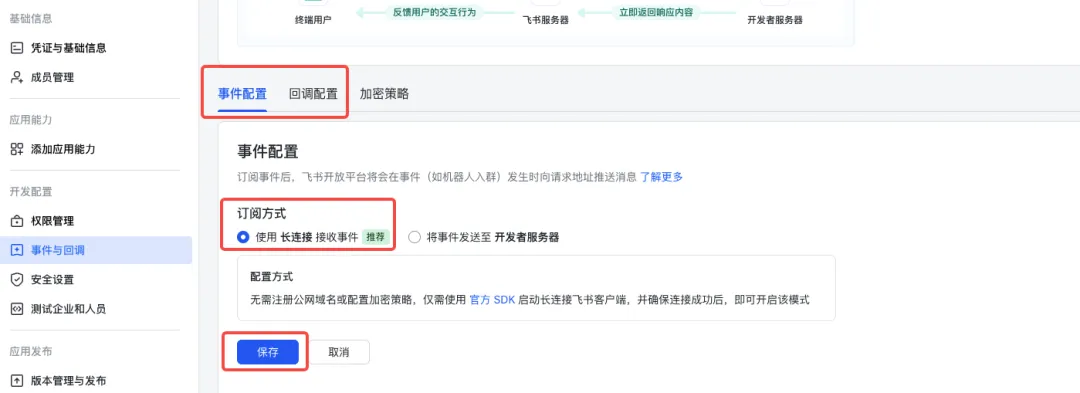
设置事件回调(Callback)

⚠️ 重要提醒:在配置事件订阅前,请务必确保已完成以下步骤:
运行 openclaw channels add 添加了 Feishu 渠道
网关处于启动状态(可通过 openclaw gateway status 检查状态)
选择 使用长连接接收事件(WebSocket 模式)
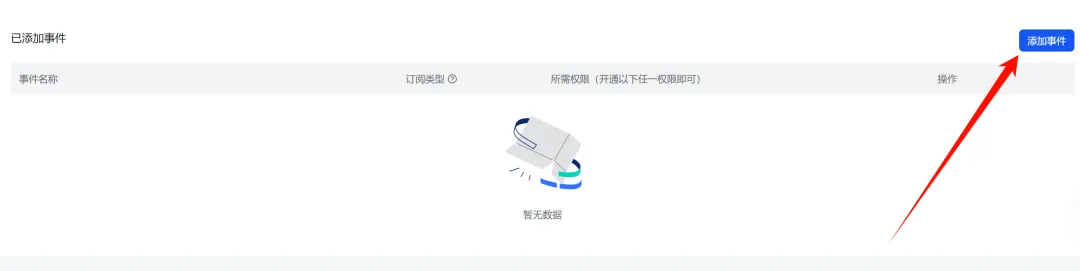
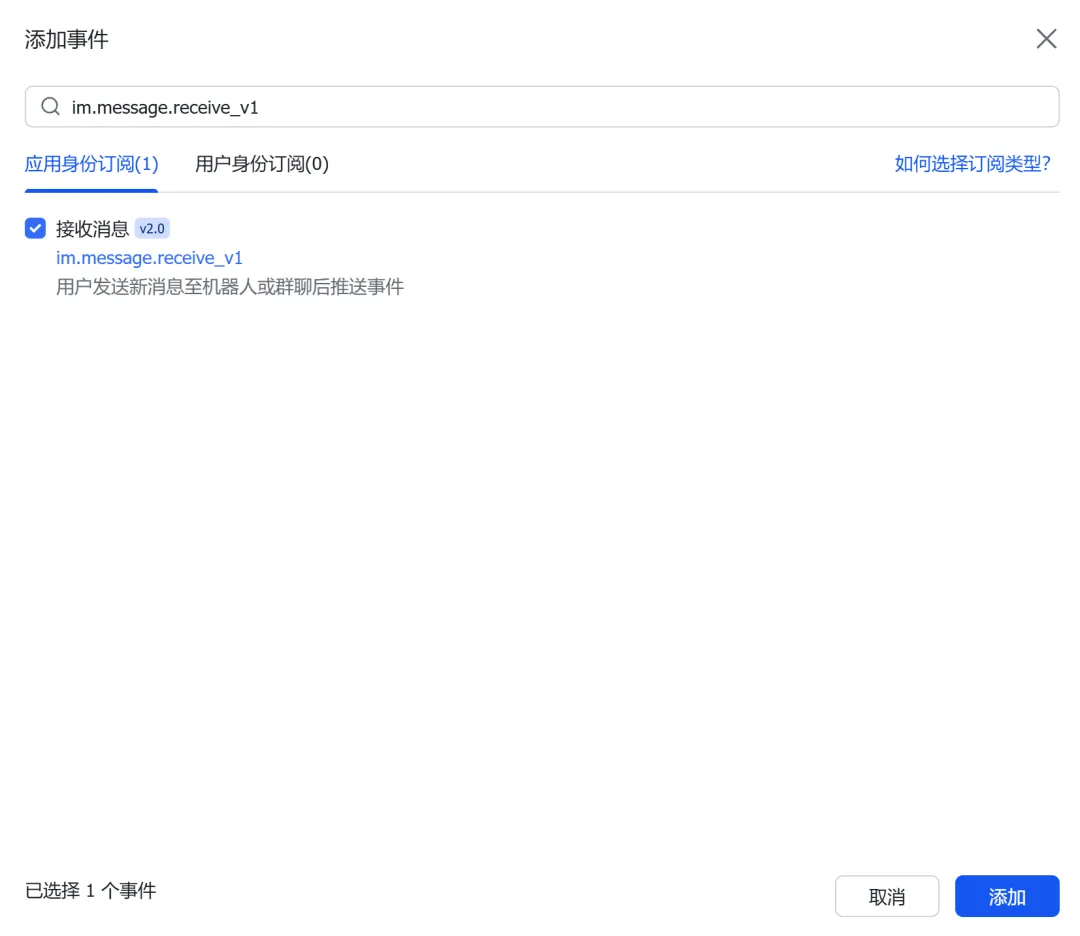
添加事件:im.message.receive_v1(接收消息)

发布应用

创建新版本

提交审核并发布

等待管理员审批(企业自建应用通常自动通过)

发送测试消息

审批通过后,在飞书中搜索我们刚创建好的机器人的名字,发送一条消息。

配对授权

默认情况下,机器人会回复一个配对码。你需要批准此代码(此时已经可以在 WebUI 中直接和🦞对话,让它帮忙完成这步):
openclaw pairing approve feishu <配对码>
批准后即可正常对话啦!

❗ 常见问题

Q:电脑重启后怎么打开 OpenClaw?
打开PowerShell,输入:
openclaw gateway start
然后再访问 http://127.0.0.1:18789/ 即可。
想让它以后开机自动启动,运行:
openclaw onboard --install-daemon
之后重启就不用手动开了。
Q:提示「Node.js 版本过低」?
到下载 22 及以上版本,安装后重开 PowerShell 再试。

Q:这个安全吗?会不会偷我的 API Key?
OpenClaw 是开源软件,代码完全公开可查。API Key 只保存在你本地电脑的加密文件里,不会上传到任何地方。

Q:怎么完全卸载Openclaw?
在以管理员身份运行的PowerShell里执行:
第一步——卸载服务和数据
openclaw uninstall --all --yes
第二步——删除 npm 包本体:
npm uninstall -g openclaw
第三步——清理残留目录(PowerShell 管理员身份运行):
Remove-Item -Recurse -Force $env:USERPROFILE\.openclaw
Remove-Item -Recurse -Force $env:USERPROFILE\.clawdbot
只跑 npm uninstall 会把命令删掉,但后台服务还在,重启后可能还会自动拉起。