 夜雨聆风
夜雨聆风用视觉语言模型 Gemma 4 将 PDF 渲染为图像进行零样本结构化提取,无需 OCR 和布局解析器,全程本地运行。
📖 引言
用 pdfplumber 解析一份扫描发票——什么也提取不到。用它解析一篇多栏研究论文——你会得到一段丧失了所有排版空间关系的文本流。用它解析一份已填写的 PDF 表单——你会得到按阅读顺序拼接的字段标签和值,根本无法区分谁属于谁。
文本提取工具内嵌了一个假设:PDF 具有可选择的文本层。一旦这个假设不成立——扫描文档、纯图像 PDF、复杂表单布局、任何包含合并单元格的表格——工具就会静默失败。你得到的要么是空输出,要么是乱码文本,而失败模式不会给你任何信号告诉你哪里出了问题。
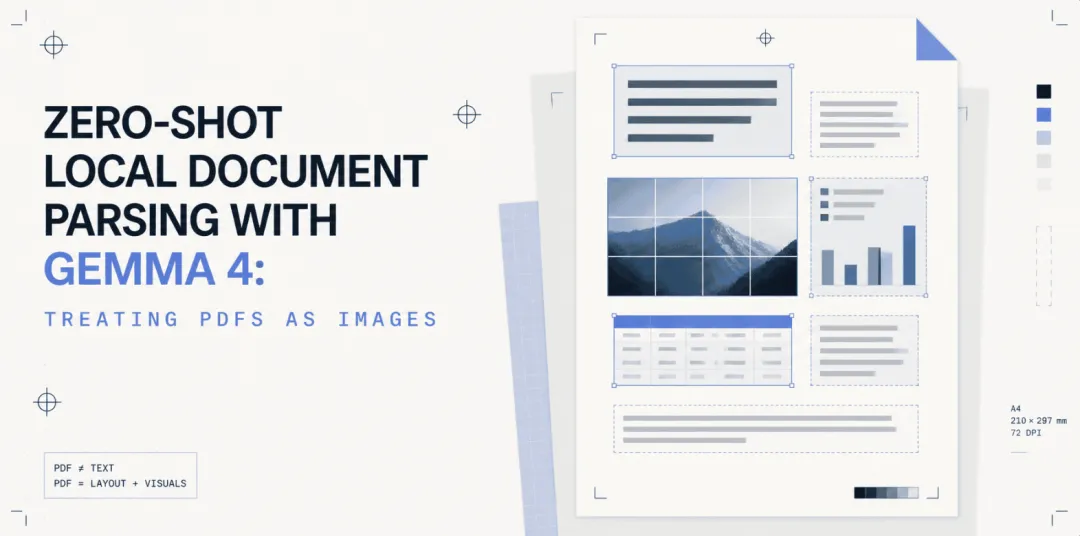
🚀 图像方法完全绕过了这个问题。 将每个 PDF 页面渲染为高分辨率图像,将图像喂给视觉语言模型,用自然语言直接询问你需要什么。无需 OCR 流水线,无需布局解析器,无需针对每种文档类型的模板匹配。模型像人类阅读印刷页面一样阅读这一页。
Gemma 4 由 Google DeepMind 于 2026 年 4 月 2 日发布,采用完整的 Apache 2.0 许可证,明确将文档/PDF 解析列为核心能力之一,同时还包括 OCR、图表理解、手写识别和屏幕理解。它完全在本地运行——无需 API 密钥、无需云端调用、数据不离开你的服务器。
💡 本文贯穿的项目是一条本地文档处理流水线:处理供应商发票,提取供应商名称、发票号、明细项、总额和到期日,输出结构化 JSON。扫描 PDF 和数字 PDF 均适用。
🔍 为什么把 PDF 当作图像?
PDF 有两个截然不同的世界,而大多数文档处理工具只在一个世界里工作。
数字 PDF 具有内嵌的文本层;文本可选择、可搜索、可提取。
pdfplumber、PyPDF2、pdfminer等工具在这里可以工作。给它们一份干净的、机器生成的 PDF,它们会按阅读顺序返回文本。对于简单的单栏文档,这通常足够了。扫描 PDF 是保存在 PDF 容器中的图像。没有文本层,每个词都是像素数据。
pdfplumber返回空字符串,PyMuPDF 的文本提取也返回空。读取内容的唯一方式就是读取图像。
这就是图像方法的第一个论点:它统一了两个世界。无论内容来自扫描仪、打印机还是 PDF 生成器,渲染页面后你总能得到一张图像。模型永远不需要知道它在处理哪种 PDF。
第二个论点是布局。即使对于有可选择文本的数字 PDF,提取工具也是按文档顺序返回文本,这会破坏结构。一张左列为明细项、右列为总额的双栏发票,会被返回为交替的片段——左栏文本、右栏文本——以破坏后续解析的方式交错。合并单元格的表格更糟,提取的文本丢失了所有行列上下文。
视觉语言模型将图像作为视觉工件来阅读。它把表格看作表格,把列看作列,把表单看作表单。 它逐行读取明细项,因为它能看到行。
🔧 视觉 Token 预算
Gemma 4 支持可变的视觉 token 预算:每张图像 70、140、280、560 和 1120 个 token,这为你提供了精度与速度权衡的直接旋钮。对于包含细粒度明细项的密集文档解析,使用 1120;用于快速页面分类或单字段提取,280 就很好且显著更快。你可以按调用设置,而非全局设置。
📊 模型尺寸对比
Gemma 4 提供四种尺寸,选择主要是硬件问题。
OmniDocBench 1.5 是文档解析基准;编辑距离越低越好。31B 得分最高,但对于大多数发票和表单解析任务,E4B-it 以极低的硬件需求交付了生产可用的结果。本文全程使用 google/gemma-4-E4B-it,但所有代码示例同样适用于其他尺寸,只需更改模型 ID。
🧠 两大架构特性
两个架构特性使 Gemma 4 在文档理解方面特别强大。
1. 二维旋转位置编码 (2D RoPE):标准 Transformer 在一个维度上编码位置——token 序列顺序。Gemma 4 独立地旋转 x 轴和 y 轴的注意力头维度,赋予模型真正的空间理解能力。它知道视觉意义上的"上方"、"下方"、"左侧"和"右侧"是什么意思。在双栏发票上,这意味着模型独立阅读每一列而非混淆;在表格上,它逐行读取行。
2. 逐层嵌入 (PLE):Gemma 4 不依赖输入端单一共享的 token 嵌入,而是将辅助残差信号注入每个解码器层。这种架构(用于 E2B 和 E4B 模型)允许较小的有效参数量在结构化视觉任务上发挥超出其体量的能力。E2B (0.290) 和 E4B (0.181) 之间的 OmniDocBench 差距反映了 PLE 对更高参数效率的贡献有多大。
⚙️ 前置条件
硬件需求
⚠️ 仅 CPU 推理可以工作但速度很慢;根据 token 预算和机器配置,每页预计 30–90 秒。如果没有本地 GPU,可以使用 Google Colab 的免费 T4 GPU(15 GB VRAM)。
Hugging Face 访问
Gemma 4 模型是门控模型。需要在 huggingface.co 创建免费账户,访问 google/gemma-4-E4B-it 或 google/gemma-4-E2B-it 并接受模型条款,然后在 huggingface.co/settings/tokens 生成读取令牌。
安装依赖
# 需要 Python 3.10+python --version# 创建虚拟环境python -m venv gemma4-envsource gemma4-env/bin/activate # macOS / Linuxgemma4-env\Scripts\activate # Windows# 安装包pip install \ "transformers>=4.51.0" \ "torch>=2.3.0" \ "accelerate>=0.30.0" \ "pymupdf>=1.24.0" \ "Pillow>=10.0.0" \ "bitsandbytes>=0.43.0"# 登录 Hugging Face(按提示粘贴读取令牌)pip install huggingface_hubhuggingface-cli login验证环境
# device_check.py# 在加载 Gemma 4 之前运行此脚本以确认计算环境。# 保存为 device_check.py 并运行: python device_check.pydef detect_device(): """ 检测最佳可用计算设备。 返回 (device_str, dtype, load_kwargs) 用于 from_pretrained。 """ try: import torch except ImportError: raise RuntimeError("PyTorch not found. Install: pip install torch") if torch.cuda.is_available(): name = torch.cuda.get_device_name(0) vram = torch.cuda.get_device_properties(0).total_memory / 1e9 print(f"CUDA GPU: {name} ({vram:.1f} GB VRAM)") return "cuda", torch.bfloat16, {"device_map": "auto", "torch_dtype": torch.bfloat16} elif hasattr(torch.backends, "mps") and torch.backends.mps.is_available(): print("Apple Silicon MPS detected") return "mps", torch.float16, {"device_map": "mps", "torch_dtype": torch.float16} else: print("No GPU found -- CPU fallback (slow but functional)") return "cpu", None, {"device_map": "cpu"}if __name__ == "__main__": device, dtype, kwargs = detect_device() print(f"Device : {device}") print(f"Dtype : {dtype}") print(f"Ready for Gemma 4 loading with: {kwargs}")🖼️ 使用 PyMuPDF 将 PDF 页面渲染为图像
PyMuPDF(导入为 pymupdf 或 fitz)是 PDF 转图像步骤的正确工具。它没有外部依赖——不需要 Poppler、不需要 Ghostscript——可以按任意 DPI 渲染页面,并产生与 Gemma 4 的处理器直接兼容的 PIL 输出。
💡 DPI 的影响比你想象的大。 PyMuPDF 默认以 72 DPI(屏幕分辨率)渲染。在 72 DPI 下,密集发票中的小字会变成亚像素伪影;200 DPI 下一切清晰可读;300 DPI 下对于手写内容和多语言小字体文档可获得扫描仪级别的质量。代价是图像按比例增大,消耗 Gemma 4 上下文窗口中更多的视觉 token。
# pdf_renderer.py# 前置条件: pip install pymupdf Pillow# 用法: 导入并实例化 PDFRenderer; 调用 render_page() 或 render_all()import pymupdffrom PIL import Imagefrom pathlib import Pathclass PDFRenderer: """ 将 PDF 页面转换为 PIL 图像,用于下游 VLM 推理。 除 PyMuPDF 外无外部依赖 -- 不需要 Poppler,不需要 Ghostscript。 输出图像为 RGB 模式,可直接用于 Gemma 4 的 AutoProcessor。 """ def __init__(self, dpi: int = 200): self.dpi = dpi self._zoom = dpi / 72.0 self._matrix = pymupdf.Matrix(self._zoom, self._zoom) def render_page(self, pdf_path: str, page_index: int = 0) -> Image.Image: path = Path(pdf_path) if not path.exists(): raise FileNotFoundError(f"PDF not found: {pdf_path}") doc = pymupdf.open(str(path)) if page_index >= len(doc): doc.close() raise IndexError(f"Page index {page_index} out of range") page = doc[page_index] pix = page.get_pixmap(matrix=self._matrix) doc.close() return Image.frombytes("RGB", [pix.width, pix.height], pix.samples) def render_all(self, pdf_path: str) -> list[Image.Image]: doc = pymupdf.open(pdf_path) images = [] for i in range(len(doc)): pix = doc[i].get_pixmap(matrix=self._matrix) images.append(Image.frombytes("RGB", [pix.width, pix.height], pix.samples)) doc.close() return images def render_range(self, pdf_path: str, start: int, end: int) -> list[Image.Image]: doc = pymupdf.open(pdf_path) images = [] end = min(end, len(doc)) for i in range(start, end): pix = doc[i].get_pixmap(matrix=self._matrix) images.append(Image.frombytes("RGB", [pix.width, pix.height], pix.samples)) doc.close() return images def page_count(self, pdf_path: str) -> int: doc = pymupdf.open(pdf_path) count = len(doc) doc.close() return count🚀 加载 Gemma 4 并进行首次文档推理
渲染器确认后,以下是完整的加载和查询模式。Gemma 4 使用 Gemma4ForConditionalGeneration 作为模型类,AutoProcessor 作为组合的分词器和图像处理器。
⚠️ 官方模型卡中有一个重要的排序规则:在提示中将图像内容放在文本之前。当你遵循消息格式时,处理器会自动处理这一点,但如果手动构建提示,图像放前面。
# gemma4_loader.pyimport reimport torchfrom PIL import Imagefrom transformers import AutoProcessor, Gemma4ForConditionalGenerationMODEL_ID = "google/gemma-4-E4B-it"def load_model(model_id: str = MODEL_ID): print(f"Loading {model_id}...") processor = AutoProcessor.from_pretrained(model_id) model = Gemma4ForConditionalGeneration.from_pretrained( model_id, torch_dtype=torch.bfloat16, device_map="auto", ) model.eval() print(f"Model ready on: {model.device}") return model, processordef query_document_page( model, processor, page_image: Image.Image, prompt: str, token_budget: int = 1120, enable_thinking: bool = False, max_new_tokens: int = 1024,) -> str: messages = [ { "role": "user", "content": [ {"type": "image", "image": page_image}, {"type": "text", "text": prompt}, ], } ] inputs = processor.apply_chat_template( messages, add_generation_prompt=True, tokenize=True, return_dict=True, return_tensors="pt", num_image_tokens=token_budget, enable_thinking=enable_thinking, ).to(model.device) with torch.no_grad(): output_ids = model.generate( **inputs, max_new_tokens=max_new_tokens, temperature=0.1, top_p=0.95, do_sample=True, ) new_tokens = output_ids[0][inputs["input_ids"].shape[-1]:] raw = processor.decode(new_tokens, skip_special_tokens=True).strip() return re.sub(r"<think>.*?</think>", "", raw, flags=re.DOTALL).strip()🏗️ 构建真实世界的发票提取流水线
这是完整的生产级流水线。InvoiceParser 类接受任意 PDF,渲染每一页,用 Gemma 4 运行结构化提取,将 JSON 输出解析为类型化的 ParsedInvoice 数据类,并标记任何提取不确定的字段。
# invoice_parser.pyimport re, json, torchfrom dataclasses import dataclass, fieldfrom pathlib import Pathfrom typing import Optionalfrom PIL import Imagefrom transformers import AutoProcessor, Gemma4ForConditionalGenerationfrom pdf_renderer import PDFRendererfrom gemma4_loader import load_model, query_document_pageMODEL_ID = "google/gemma-4-E4B-it"@dataclassclass LineItem: description: str quantity: Optional[float] unit_price: Optional[str] total: Optional[str]@dataclassclass ParsedInvoice: vendor_name: Optional[str] invoice_number: Optional[str] invoice_date: Optional[str] due_date: Optional[str] line_items: list[LineItem] = field(default_factory=list) subtotal: Optional[str] = None tax: Optional[str] = None total_due: Optional[str] = None currency: Optional[str] = None low_confidence_fields: list[str] = field(default_factory=list) raw_output: str = ""EXTRACTION_PROMPT = """This is a page from a supplier invoice. Extract all available information and return it as a single JSON object.Required JSON format:{ "vendor_name": "string or null", "invoice_number": "string or null", "invoice_date": "string or null", "due_date": "string or null", "line_items": [ { "description": "string", "quantity": number or null, "unit_price": "string or null", "total": "string or null" } ], "subtotal": "string or null", "tax": "string or null", "total_due": "string or null", "currency": "string or null"}Rules:- Return ONLY the JSON object -- no preamble, no explanation, no markdown fences.- If a field is not visible on this page, set it to null.- Do not invent values. If you cannot read a number clearly, set it to null.- Preserve the original currency symbol (e.g. $, €, £, ₦) in monetary fields.- Include ALL line items you can see, even if the table runs off the visible area."""class InvoiceParser: def __init__(self, model_id: str = MODEL_ID, dpi: int = 200): self.model, self.processor = load_model(model_id) self.renderer = PDFRenderer(dpi=dpi) def parse(self, pdf_path: str, token_budget: int = 1120) -> ParsedInvoice: # ... (完整实现包含多页合并逻辑) pass def parse_directory(self, dir_path: str, token_budget: int = 1120) -> dict[str, ParsedInvoice]: # ... (批量处理) pass⚡ 优化多页文档的 Token 预算
一份五页的供应商发票通常分解为:封面页、两页明细项、一页总额与付款页、一页条款与条件页。封面页和条款页没有可提取的结构化数据。在所有五页上运行完整的 1120-token 提取过程,会浪费大约 40% 的推理预算。
💡 两遍模式解决了这个问题:先用快速的 280-token 分类遍来识别哪些页面值得处理,然后仅在那些页面上运行完整的 1120-token 提取遍。
# two_pass_pipeline.pyCLASSIFICATION_PROMPT = """Look at this document page and classify it with a single label.Choose exactly one:- invoice_header (company logos, vendor address, invoice number, date)- line_items (table of products/services with quantities and prices)- totals (subtotals, taxes, grand total, payment instructions)- terms (terms and conditions, legal text, return policy)- cover (title page, table of contents, document cover)- blank (empty or nearly empty page)- other (anything else)Respond with ONLY the label -- no explanation, no punctuation."""EXTRACTABLE_CLASSES = {"invoice_header", "line_items", "totals"}def two_pass_parse(pdf_path: str, model, processor) -> dict: # 第一遍: 以 280-token 预算分类所有页面 # 第二遍: 仅对内容页面以 1120-token 预算进行完整提取 pass在典型的 5 页发票上,两遍方法将昂贵的推理调用从 5 次减少到 3 次,总处理时间减少 35–40%,提取质量零损失。
🧠 为复杂布局启用思考模式
大多数发票足够简单,enable_thinking=False 是正确选择——它更快,输出直接是结构化 JSON。但有些文档确实需要推理步骤:空间关系模糊的双栏布局、手写表单、有旋转或倾斜的扫描文档、包含合并或跨越单元格的表格。
当你在 query_document_page 中设置 enable_thinking=True 开启思考模式时,Gemma 4 会在生成最终答案之前,在 <think>...</think> 标签内生成一条思维链推理轨迹。对于复杂表格,它可能会推理出"表头行似乎横跨两列,下面我看到三行数据……"然后才提交到结构化 JSON。这个推理步骤正是提升困难布局提取准确率的关键。
⚠️ 延迟代价是真实的——思考模式通常在得出答案前生成 2 到 4 倍的 token。实践中效果良好的模式是:先运行 enable_thinking=False,如果结果中的 low_confidence_fields 对关键字段(供应商名称、应付总额、发票号)非空,则对该页重试 enable_thinking=True。这保持了快速路径的速度,仅在第一次提取发出不确定性信号时才付出思考代价。
✅ 验证和后处理结构化输出
invoice_parser.py 中的提取和解析代码已经处理了最常见的失败模式:JSON 解析错误、缺失字段、占位符值。low_confidence_fields 列表就是人工应该查看特定发票的信号。
用于生产环境时,在 ParsedInvoice 之上添加 Pydantic 验证层,以执行模型无法知晓的业务规则:
# validation.pyfrom pydantic import BaseModel, field_validatorfrom typing import Optionalimport reclass InvoiceValidator(BaseModel): vendor_name: Optional[str] invoice_number: Optional[str] invoice_date: Optional[str] due_date: Optional[str] total_due: Optional[str] currency: Optional[str] @field_validator("invoice_number") @classmethod def invoice_number_format(cls, v): if v and not re.match(r"^[A-Z0-9\-\/\.]+$", v.strip()): raise ValueError(f"Unexpected invoice number format: {v!r}") return v @field_validator("total_due") @classmethod def total_due_has_value(cls, v): if not v: raise ValueError("total_due is required for automated processing") return v @field_validator("currency") @classmethod def currency_is_known(cls, v): KNOWN = {"USD", "EUR", "GBP", "NGN", "CAD", "AUD", "JPY", "CNY"} if v and v.upper() not in KNOWN: raise ValueError(f"Unrecognized currency: {v!r}") return v.upper() if v else vdef validate_for_commit(invoice) -> tuple[bool, list[str]]: errors = [] try: InvoiceValidator( vendor_name=invoice.vendor_name, invoice_number=invoice.invoice_number, invoice_date=invoice.invoice_date, due_date=invoice.due_date, total_due=invoice.total_due, currency=invoice.currency, ) except Exception as e: errors = [str(err) for err in e.errors()] if hasattr(e, "errors") else [str(e)] critical = {"vendor_name", "invoice_number", "total_due"} low_critical = critical & set(invoice.low_confidence_fields) if low_critical: errors.append(f"Low-confidence on critical fields: {low_critical}") return len(errors) == 0, errors🎯 三层结果分类
can_commit=True, errors=[]:所有关键字段干净提取,业务规则通过,自动路由到财务系统。can_commit=False, low_confidence_fields 非空:模型标记了不确定性。路由到人工审核队列,原始 PDF 和提取字段并排展示。can_commit=False, validation error:提取数据违反了业务规则。路由到异常处理。
🏁 结语
文本提取工具需要可选择的文本。视觉语言模型需要可读的图像。第一个假设在大约三分之一的真实文档上会失败——扫描发票、拍照收据、印刷表单。第二个假设在所有文档上都成立。
将 PDF 视作图像并将这些图像喂给 Gemma 4,消除了使每条文本提取流水线脆弱不堪的扫描与数字之别。本文的流水线对激光打印的发票和低分辨率的传真扫描件同样工作,两者之间零配置变更。
Gemma 4 的空间位置嵌入和可变 token 预算让你直接控制精度与速度的权衡。从 560 token 和 enable_thinking=False 开始;对多页文档添加两遍分类;当 low_confidence_fields 发出不确定性信号时,针对特定页面升级到思考模式和 1120 token。
该流水线在 Apache 2.0 下完全本地运行。无需 API 密钥,无需使用量计费,数据不离开你的服务器——这对于涉及财务文档的场景至关重要。
🔥 笔者锐评
这篇文章揭示了一个值得深思的趋势:视觉语言模型正在"降维打击"传统文档处理工具链。
过去,文档解析是 OCR + 布局分析 + 模板匹配的重度工程,每个场景一套配置,扫描件和数字件两套方案,维护成本极高。Gemma 4 的做法本质上是用视觉理解能力替代了整个工具链——不是"做得更好",而是"不需要了"。
反观国内,我们在 OCR 领域有百度 PaddleOCR、合合信息等优秀产品,但在视觉语言模型驱动的端到端文档理解方向上,开源生态仍有差距。很多企业的文档处理系统还在走"OCR → NER → 规则引擎"的老路,为每种表单类型写一套模板,维护起来苦不堪言。
Gemma 4 的 2D RoPE 和 PLE 架构创新值得特别关注——空间位置编码不是一个花哨的学术点子,而是文档理解的核心能力。这对中文文档尤为重要:中文排版的竖排、混排、红头文件格式,对传统文本提取工具简直是灾难,但对视觉模型来说只是"另一种图像"。
Apache 2.0 + 全本地运行,意味着数据不出域、无 token 成本、可深度定制。对于需要处理大量发票、合同、报表的国内企业来说,这是真正可以落地到生产环境的方案,而不是又一个需要"等等再看"的技术演示。
求点赞 👍 求关注 ❤️ 求收藏 ⭐️你的支持是我更新的最大动力!