


文档内容
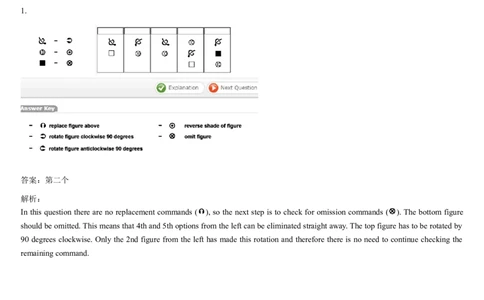
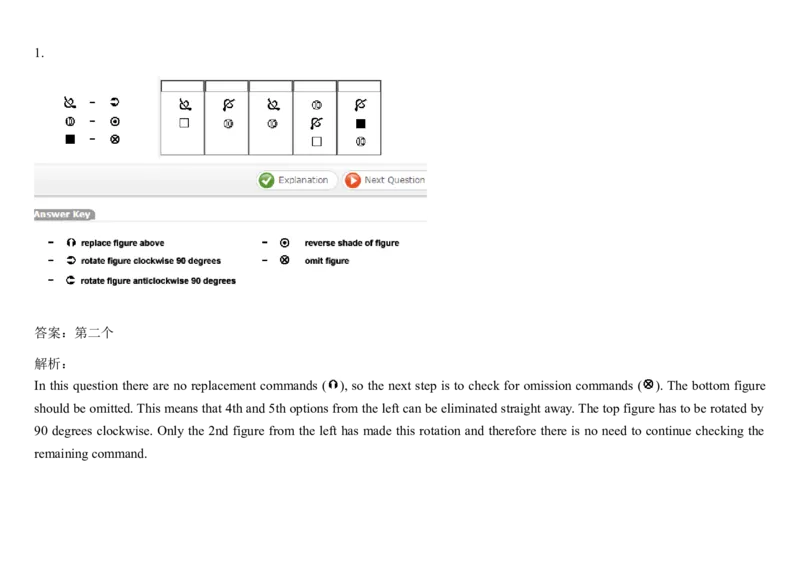
1.
答案:第二个
解析:
In this question there are no replacement commands ( ), so the next step is to check for omission commands ( ). The bottom figure
should be omitted. This means that 4th and 5th options from the left can be eliminated straight away. The top figure has to be rotated by
90 degrees clockwise. Only the 2nd figure from the left has made this rotation and therefore there is no need to continue checking the
remaining command.The answer is -
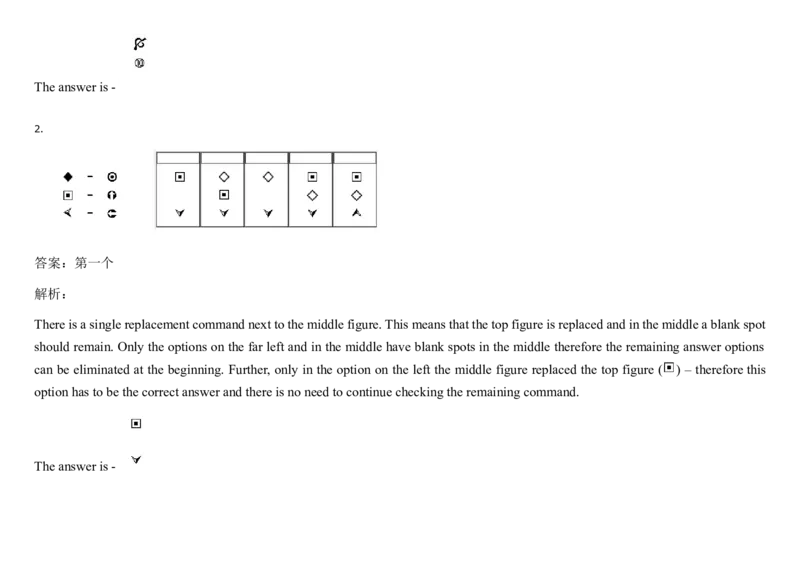
2.
答案:第一个
解析:
There is a single replacement command next to the middle figure. This means that the top figure is replaced and in the middle a blank spot
should remain. Only the options on the far left and in the middle have blank spots in the middle therefore the remaining answer options
can be eliminated at the beginning. Further, only in the option on the left the middle figure replaced the top figure ( ) – therefore this
option has to be the correct answer and there is no need to continue checking the remaining command.
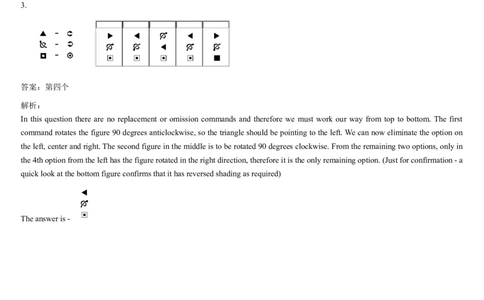
The answer is -3.
答案:第四个
解析:
In this question there are no replacement or omission commands and therefore we must work our way from top to bottom. The first
command rotates the figure 90 degrees anticlockwise, so the triangle should be pointing to the left. We can now eliminate the option on
the left, center and right. The second figure in the middle is to be rotated 90 degrees clockwise. From the remaining two options, only in
the 4th option from the left has the figure rotated in the right direction, therefore it is the only remaining option. (Just for confirmation - a
quick look at the bottom figure confirms that it has reversed shading as required)
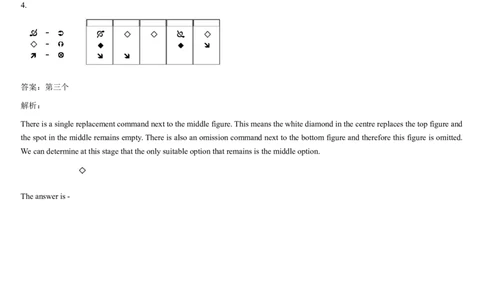
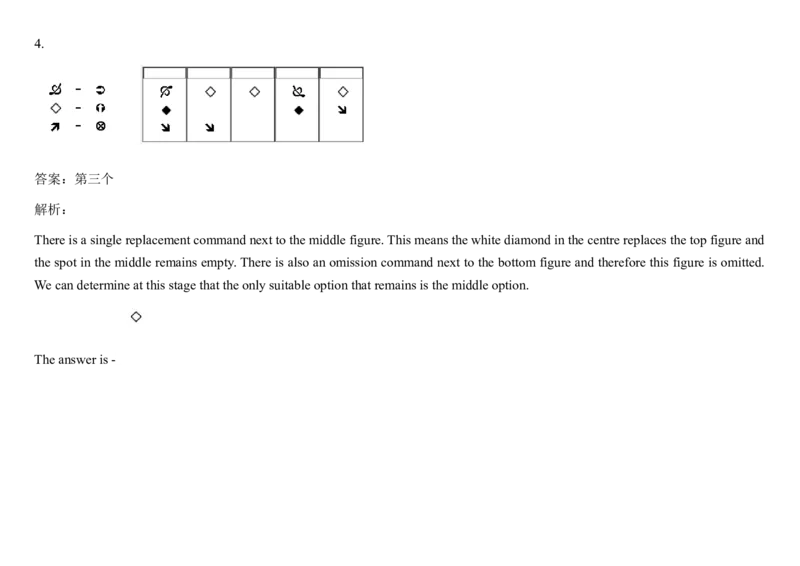
The answer is -4.
答案:第三个
解析:
There is a single replacement command next to the middle figure. This means the white diamond in the centre replaces the top figure and
the spot in the middle remains empty. There is also an omission command next to the bottom figure and therefore this figure is omitted.
We can determine at this stage that the only suitable option that remains is the middle option.
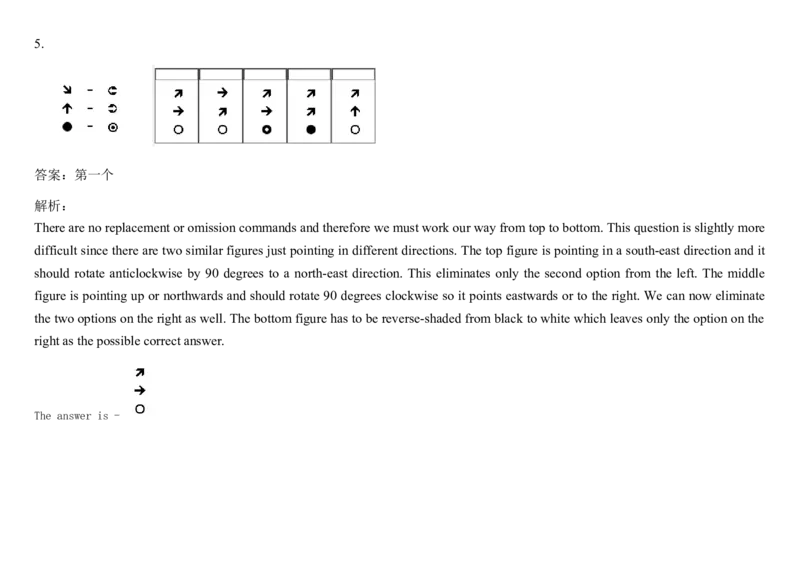
The answer is -5.
答案:第一个
解析:
There are no replacement or omission commands and therefore we must work our way from top to bottom. This question is slightly more
difficult since there are two similar figures just pointing in different directions. The top figure is pointing in a south-east direction and it
should rotate anticlockwise by 90 degrees to a north-east direction. This eliminates only the second option from the left. The middle
figure is pointing up or northwards and should rotate 90 degrees clockwise so it points eastwards or to the right. We can now eliminate
the two options on the right as well. The bottom figure has to be reverse-shaded from black to white which leaves only the option on the
right as the possible correct answer.
The answer is -6.
答案:第五个
解析:
This column has 4 figures in it. There are 2 replacements commands, next to the second and fourth figure from the top. The second figure
replaces the top figure and the fourth figure replaces the third figure. This means there should be empty spots in the second and fourth
places. A quick scan shows that only the answer option on the right has empty spots in the second and fourth places so we can determine
at this stage that it must be the correct answer and there is no need to proceed with the other commands. (If you want to, you can double
check and confirm that the remaining figures in this answer option are the correct ones).
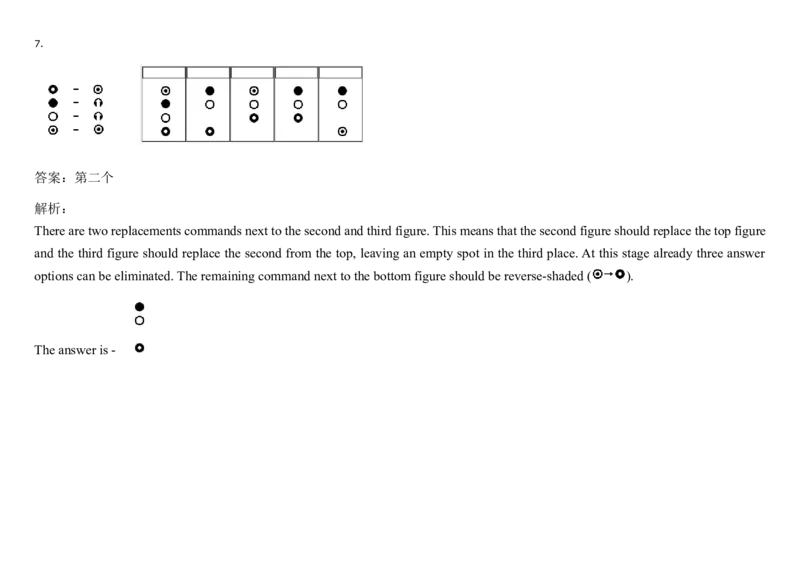
The answer is -7.
答案:第二个
解析:
There are two replacements commands next to the second and third figure. This means that the second figure should replace the top figure
and the third figure should replace the second from the top, leaving an empty spot in the third place. At this stage already three answer
options can be eliminated. The remaining command next to the bottom figure should be reverse-shaded ( ).
The answer is -8.
答案:第四个
解析:
In this question there are 4 similar shapes making it slightly trickier. There is one replacement command next to the bottom figure therefore
the bottom figure will replace the third figure from the top and leave an empty space behind. At this stage we can eliminate the middle
answer option and the option on the right that do not have an empty space at the bottom. The first figure at the top should rotate 90 degrees
clockwise, pointing up. Only two options remain valid at this stage. The second figure from the top rotates 90 degrees anticlockwise so it
should point upwards as well. We can now eliminate the left option as well.
The answer is -