夜雨聆风
夜雨聆风


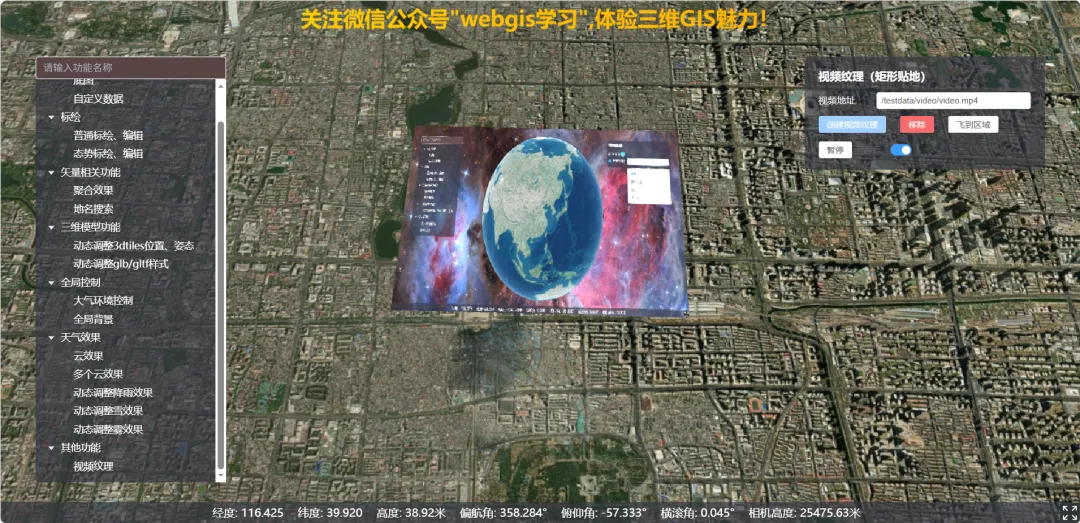
Vue3+Cesium教程–视频纹理源码免费分享(第75篇)
import * as Cesium from 'cesium'export type VideoTextureRectangle = {west: numbersouth: numbereast: numbernorth: number}export interface VideoTextureCreateOptions {videoUrl?: stringrectangle?: VideoTextureRectangleheight?: numberheightReference?: Cesium.HeightReferenceclassificationType?: Cesium.ClassificationTypegranularity?: numberloop?: booleanmuted?: booleansyncWithClock?: boolean}const DEFAULT_RECT: VideoTextureRectangle = {west: 116.38,south: 39.9,east: 116.42,north: 39.925,}export const DEFAULT_SAMPLE_VIDEO_URL = '/testdata/video/video.mp4'export default class VideoTexture {private readonly viewer: Cesium.Viewerprivate readonly video: HTMLVideoElementprivate readonly bounds: Cesium.Rectangleprivate entity: Cesium.Entity | undefinedprivate synchronizer: Cesium.VideoSynchronizer | undefinedconstructor(viewer: Cesium.Viewer, options: VideoTextureCreateOptions = {}) {this.viewer = viewerconst rect = options.rectangle ?? DEFAULT_RECTthis.bounds = Cesium.Rectangle.fromDegrees(rect.west,rect.south,rect.east,rect.north,)const heightReference =options.heightReference ?? Cesium.HeightReference.CLAMP_TO_GROUNDlet rectangleHeight: number | undefinedif (heightReference === Cesium.HeightReference.CLAMP_TO_GROUND) {rectangleHeight = undefined} else if (heightReference === Cesium.HeightReference.RELATIVE_TO_GROUND) {rectangleHeight = options.height ?? 12} else {rectangleHeight = options.height ?? 0}const classificationType =options.classificationType ?? Cesium.ClassificationType.TERRAINconst granularity = options.granularityconst loop = options.loop ?? trueconst muted = options.muted ?? trueconst url = options.videoUrl ?? DEFAULT_SAMPLE_VIDEO_URLthis.video = document.createElement('video')this.video.style.display = 'none'this.video.setAttribute('playsinline', '')this.video.playsInline = truethis.video.crossOrigin = 'anonymous'this.video.loop = loopthis.video.muted = mutedthis.video.preload = 'auto'this.video.src = urldocument.body.appendChild(this.video)if (options.syncWithClock) {this.synchronizer = new Cesium.VideoSynchronizer({clock: viewer.clock,element: this.video,})}const rectangleGraphics: Cesium.RectangleGraphics.ConstructorOptions = {coordinates: this.bounds,heightReference,classificationType,granularity,material: new Cesium.ImageMaterialProperty({image: this.video,}),}if (rectangleHeight !== undefined) {rectangleGraphics.height = rectangleHeight}this.entity = viewer.entities.add({rectangle: rectangleGraphics,})void this.video.play().catch(() => {})}getVideoElement(): HTMLVideoElement {return this.video}getEntity(): Cesium.Entity | undefined {return this.entity}async play(): Promise<void> {await this.video.play()}pause(): void {this.video.pause()}setMuted(muted: boolean): void {this.video.muted = muted}setLoop(loop: boolean): void {this.video.loop = loop}setShow(show: boolean): void {if (this.entity) this.entity.show = show}flyTo(duration = 2.0): void {this.viewer.camera.flyTo({destination: this.bounds,duration,})}/** 更换视频源(会重新 load,创建后调用) */async setSource(url: string): Promise<void> {this.pause()this.video.src = urlthis.video.load()await this.video.play().catch(() => {})}destroy(): void {this.pause()if (this.synchronizer && !this.synchronizer.isDestroyed()) {this.synchronizer.destroy()this.synchronizer = undefined}if (this.entity) {this.viewer.entities.remove(this.entity)this.entity = undefined}this.video.removeAttribute('src')this.video.load()this.video.remove()}}
const createTexture = () => {if(!viewer || active.value) returnactive.value = new VideoTexture(viewer, {videoUrl: videoUrl.value || undefined,muted: muted.value,loop: true,})playing.value = trueactive.value.flyTo(2)}
const togglePlay = async () => {if (!active.value) returnconst v = active.value.getVideoElement()if (v.paused) {await active.value.play()playing.value = true} else {active.value.pause()playing.value = false}}
setMuted(muted: boolean): void {this.video.muted = muted}
<divclass="video-texture-panel"><divclass="section-title"><spanclass="title">视频纹理(矩形贴地)</span></div><divclass="form-row"><spanclass="label">视频地址</span><el-inputv-model="videoUrl"size="small"placeholder="mp4 / m3u8(需浏览器支持)"clearable /></div><divclass="actions"><el-buttontype="primary"size="small":disabled="!!active" @click="createTexture">创建视频纹理</el-button><el-buttontype="danger"size="small":disabled="!active" @click="removeTexture">移除</el-button><el-buttonsize="small":disabled="!active" @click="flyTo">飞到区域</el-button></div><divv-if="active"class="playback"><el-buttonsize="small" @click="togglePlay">{{ playing ? '暂停' : '播放' }}</el-button><spanclass="muted-label">静音</span><el-switchv-model="muted"size="small" @change="onMutedChange" /></div></div>