 夜雨聆风
夜雨聆风
大家好,我是木兮!
写在前面
之前和大家讲过 Hermes Agent 的安装和入门,想必不少人已经跑起来了。同时,也有很多朋友之前用过 OpenClaw,里面沉淀了自己的 Agent、人格设定、记忆、skills 和 Telegram Bot 配置。如果重新搭一遍,不仅麻烦,还容易丢掉之前的积累。所以今天这篇文章,就和大家分享一下如何将 OpenClaw 上的 Agent 迁移到 Hermes Agent。
迁移步骤大致如下:
1、停止 OpenClaw
2、备份并打包
3、远程拷贝
4、执行 预演
5、全量迁移
6、重启并验证
补充背景,我的 OpenClaw 和 Hermes Agent 分别是在不同的服务器上。
一、停止OpenClaw
OpenClaw所在的服务器执行
1、停止OpenClaw服务
systemctl --user stop openclaw-gateway.service2、检查状态
systemctl --user status openclaw-gateway.service --no-pager二、备份并打包
OpenClaw所在的服务器执行
1、备份 OpenClaw 目录
把 /root/.openclaw 原样复制一份,防止迁移失败还能恢复
cp -a /root/.openclaw /root/.openclaw.bak.$(date +%Y%m%d_%H%M%S)2、打包 OpenClaw 目录
把 .openclaw 压缩成一个 .tar.gz 文件,方便传到 Hermes 服务器。
tar -czf /root/openclaw-full-backup.tar.gz -C /root .openclaw3、查看压缩包是否生成成功
确认文件存在,如图显示文件大小是15M,说明已经打包成功。
ls -lh /root/openclaw-full-backup.tar.gz
三、OpenClaw压缩包传到 Hermes 服务器并解压
Hermes Agent所在的服务器执行
Tips:如果你的OpenClaw和Hermes Agent是在同一台机器,那直接走第四步就行
1、切到lighthouse用户(Hermes Agent 被安装在lighthouse这个目录下)
su - lighthouse2、远程拷贝压缩包
在 Hermes Agent服务器上,把 OpenClaw 服务器的备份包拉到本机 /home/lighthouse/ 目录下(将OPENCLAW_SERVER_IP替换为OpenClaw的IP,优先用外网IP,内网IP还需要确认下2台机器是不是在同一个内网)
scp root@OPENCLAW_SERVER_IP:/root/openclaw-full-backup.tar.gz /home/lighthouse/3、看下是否拉取成功
ls -lh /home/lighthouse/openclaw-full-backup.tar.gz
4、创建目录
创建~/openclaw-import,专门用来放 OpenClaw 备份内容
mkdir -p ~/openclaw-import5、解压压缩包
把 openclaw-full-backup.tar.gz 解压到 ~/openclaw-import 目录
tar -xzf ~/openclaw-full-backup.tar.gz -C ~/openclaw-import6、验证解压后的内容
查看解压后的 OpenClaw 目录,确认里面有 openclaw.json、workspace、skills 等内容。
ls -la ~/openclaw-import/.openclaw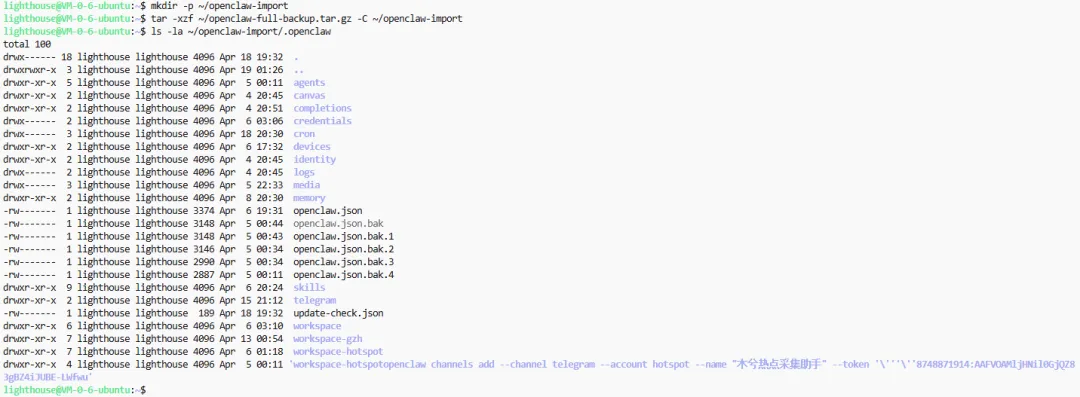
四、 执行迁移预演
先预演迁移,不真正写入 Hermes
hermes claw migrate --dry-run --source ~/openclaw-import/.openclaw结果说明,预演结果正常
◆ Dry Run Results No files were modified. This is a preview of what would happen.五、正式全量迁移
1、执行全量迁移命令
hermes claw migrate --preset full --source ~/openclaw-import/.openclaw2、确认迁移
Proceed with migration? [Y/n]: Y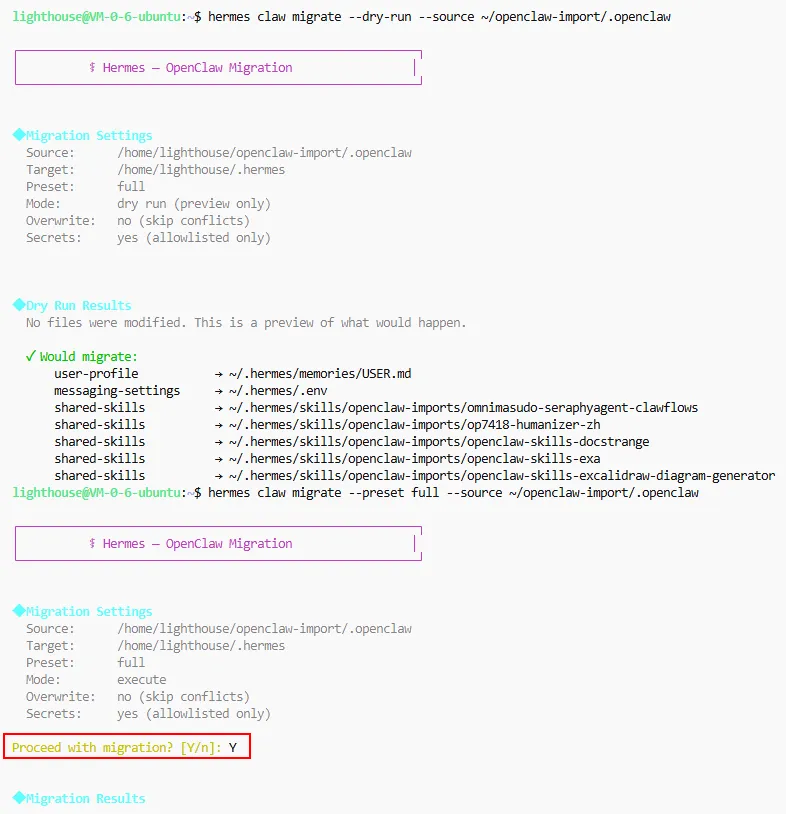
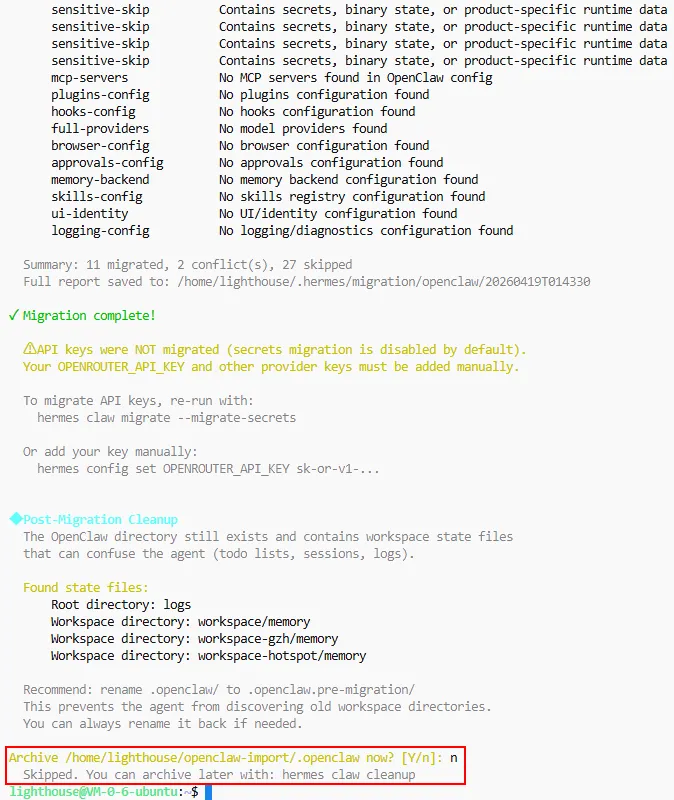
3、是否现在把 .openclaw目录 改名归档,选择n。
Archive /home/lighthouse/openclaw-import/.openclaw now? [Y/n]:n我们还没检查 workspace-gzh、workspace-hotspot、AGENTS.md 等内容,先保留方便核对。迁移已完成,后面确认无误后再手动归档也可以。
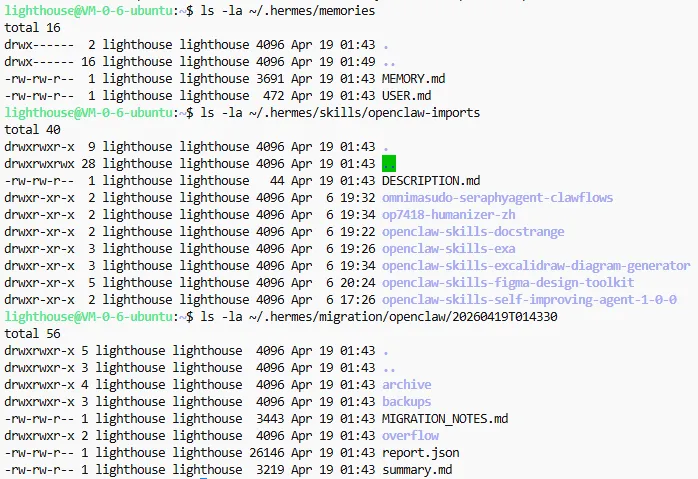
4、检查迁移结果
ls -la ~/.hermes/memoriesls -la ~/.hermes/skills/openclaw-importsls -la ~/.hermes/migration/openclaw/20260419T014330记忆已迁移,skills 已迁移,迁移报告已生成。
到这一步我们已经把所有Agent的记忆、共享 skills、部分消息配置迁移过来了,如果是一个刚安装的Hermes Agent(还没配置profile),那么OpenClaw的默认Agent会成为Hermes Agent的默认profile,再配置模型就可以使用了。
我之前其实已经在Hermes Agent 里设置过一个默认Agent了,默认Agent暂时不用(用之前安装Hermes Agent时配置的profile就行)。最主要的是我除了默认Agent,还设置了很多垂类场景的Agent(例如热点采集助手、公众号助手等等),这个需要额外处理下才能使用。
六、多 Agent 恢复步骤
我用我的公众号助手和热点采集助手举个例子
1、创建 Hermes Profile
hermes profile create gzhhermes profile create hotspot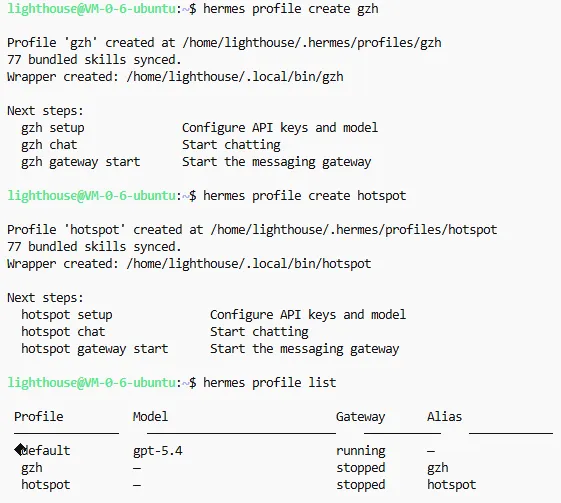
2、复制 Agent 人格文件
cp ~/openclaw-import/.openclaw/workspace-gzh/SOUL.md ~/.hermes/profiles/gzh/SOUL.mdcp ~/openclaw-import/.openclaw/workspace-gzh/AGENTS.md ~/.hermes/profiles/gzh/AGENTS.mdcp ~/openclaw-import/.openclaw/workspace-hotspot/SOUL.md ~/.hermes/profiles/hotspot/SOUL.mdcp ~/openclaw-import/.openclaw/workspace-hotspot/AGENTS.md ~/.hermes/profiles/hotspot/AGENTS.md3、复制记忆文件
mkdir -p ~/.hermes/profiles/gzh/memories ~/.hermes/profiles/hotspot/memoriescp ~/openclaw-import/.openclaw/workspace-gzh/USER.md ~/.hermes/profiles/gzh/memories/USER.mdcp ~/openclaw-import/.openclaw/workspace-hotspot/USER.md ~/.hermes/profiles/hotspot/memories/USER.mdcp ~/openclaw-import/.openclaw/workspace-hotspot/MEMORY.md ~/.hermes/profiles/hotspot/memories/MEMORY.md4、复制 skills
cp -a ~/.hermes/skills/openclaw-imports/* ~/.hermes/profiles/gzh/skills/cp -a ~/.hermes/skills/openclaw-imports/* ~/.hermes/profiles/hotspot/skills/5、写入各自 Telegram Bot 配置
GZH_TOKEN=$(jq -r '.channels.telegram.accounts.gzh.botToken' ~/openclaw-import/.openclaw/openclaw.json)HOTSPOT_TOKEN=$(jq -r '.channels.telegram.accounts.hotspot.botToken' ~/openclaw-import/.openclaw/openclaw.json)ALLOW_USER=$(jq -r '.channels.telegram.allowFrom[0]' ~/openclaw-import/.openclaw/openclaw.json)cat > ~/.hermes/profiles/gzh/.env <<EOFTELEGRAM_BOT_TOKEN=$GZH_TOKENTELEGRAM_ALLOWED_USERS=$ALLOW_USEREOFcat > ~/.hermes/profiles/hotspot/.env <<EOFTELEGRAM_BOT_TOKEN=$HOTSPOT_TOKENTELEGRAM_ALLOWED_USERS=$ALLOW_USEREOF6、给 Profile 配置模型
for p in gzh hotspot; do$p config set model.provider openai-codex$p config set model.default gpt-5.4$p config set model.base_url https://chatgpt.com/backend-api/codexdone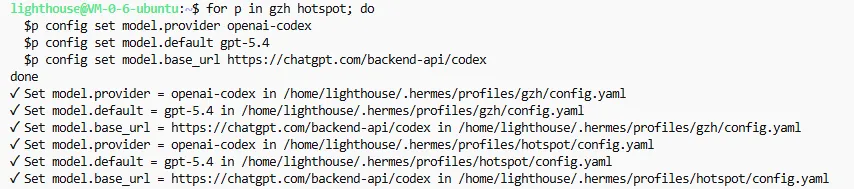
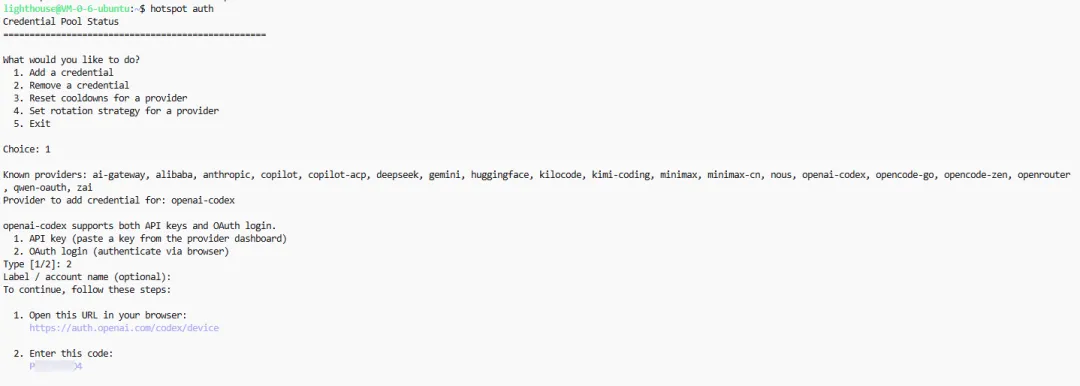
7、分别授权 Codex
gzh authhotspot auth选择流程:
1openai-codex2(标签/账户名称)可设置也可直接回车授权登录、绑定code和之前入门安装里一样的
8、安装并启动 Profile Gateway
for p in gzh hotspot; do$p gateway install$p gateway startdonesystemctl --user restart hermes-gateway-gzh hermes-gateway-hotspot9、检查状态
hermes profile list看到类似这样就成功:
gzh gpt-5.4 runninghotspot gpt-5.4 running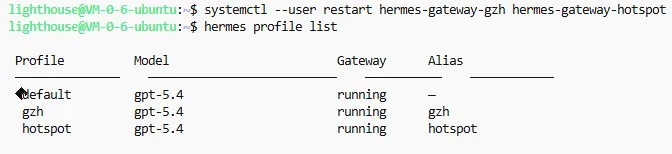
10、Telegram 私聊里设置 Home Channel
分别给两个 Bot 发送
/sethome在每个 Telegram Bot 的私聊窗口发送 /sethome,将当前聊天设置为该 Agent 的 Home Channel。这样后续定时任务、主动通知会发送到这个窗口;如果不设置,Hermes 会提示 No home channel is set。
然后验证下是否能正常使用,如果能按各自身份回复,说明多 Agent / 多 Bot 恢复完成。
写在最后
这次从 OpenClaw 迁移到 Hermes Agent,我最大的感受是:迁移不是简单地把一个工具换成另一个工具,而是把过去沉淀下来的 Agent 资产重新接到新的运行体系里。
如果你只是单 Agent,官方的 hermes claw migrate 基本可以完成大部分迁移,后面主要补模型授权、重启 Gateway、测试 Telegram 即可。
但如果你和我一样,之前在 OpenClaw 里做了多个 Agent、多个 Telegram Bot,那就不能指望一条命令全部自动恢复。官方迁移更像是先把记忆、skills、部分配置这些“底层资产”搬过来,后面还需要用 Hermes Profile 重新恢复每个 Agent 的人格、模型、授权和 Bot 绑定。
所以我的建议是:
1、迁移前一定先备份。
2、先执行 --dry-run 看清楚会迁什么。
3、单 Agent 可以直接走官方迁移。
4、多 Agent 要额外准备 Profile 恢复步骤。
5、迁移完成后一定要通过 Telegram 实测,而不是只看命令执行成功。
这篇文章也算是我自己的一次真实迁移记录。整体看下来,Hermes Agent 的 Profile 机制更适合后续做多 Agent 隔离,但从 OpenClaw 迁移过来时,还是要对“官方迁移”和“多 Agent 恢复”这两件事有清晰区分。
