夜雨聆风
夜雨聆风
01我们到底解决了什么问题?
传统使用方式需要工作人员先打开专用客户端,再输入账号、选择科室,最后进入数据上报页面。频繁切换系统时,这几步很容易打断工作流程。
用户在 HIS 中点击“传染病上报”; HIS 将用户工号、科室编码拼接到访问地址; Web 页面调用前置软件原有登录接口; 保存 Token 和菜单权限; 自动进入数据上报页面。 完整代码见:https://gist.github.com/N3verL4nd/26cbe44435df3ecab0b94de7d10c2d17 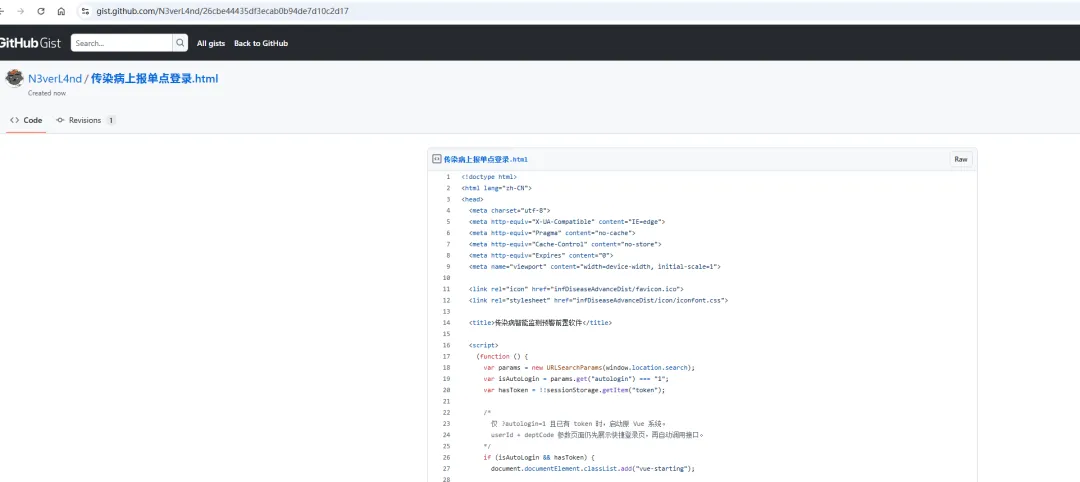
整个方案没有修改原 Vue 业务代码,核心是复用前置软件已经提供的 getSecretKey、pluginLogin和菜单权限接口。
02最终访问地址
页面部署到前置软件 Tomcat 的 ROOT 应用后,可直接通过下面的地址访问:
http://前置机IP:8881/infDiseaseAdvance-demo.html?userId=005590&deptCode=0141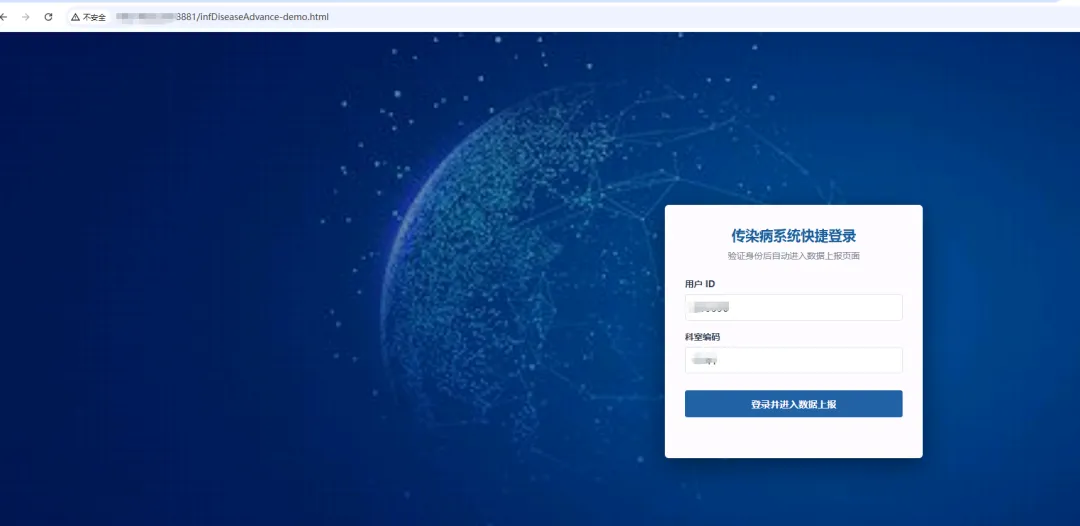
userId是前置软件用户 ID,deptCode是当前登录科室编码。这两个参数应由 HIS 根据当前登录用户动态生成。03单点登录关键代码
页面首先从 URL 读取用户和科室参数:
const params = new URLSearchParams(window.location.search);
const userId = params.get("userId");
const deptCode = params.get("deptCode");

if (userId && deptCode) {
  sessionStorage.clear();
  doLogin();
}
随后获取本次登录使用的请求 ID。正式使用时,请将许可证配置替换为本院实际值,不要把真实配置发布到互联网:
const PLATFORM_BASE = window.location.origin;
const SECRET_LICENSE = "请填写本院许可证标识";

async function getSecretKey() {
  const url = PLATFORM_BASE
    + "/appBackend/hisSecret/getSecretKey?license="
    + encodeURIComponent(SECRET_LICENSE);

  const response = await fetch(url, {
    method: "GET",
    credentials: "include"
  });

  const result = await response.json();

  if (!response.ok || !result.result || !result.secretKey) {
    throw new Error(result.desc || "获取请求 ID 失败");
  }

  return result.secretKey;
}
拿到请求 ID 后,调用插件登录接口:
async function pluginLogin(secretKey, userId, deptCode) {
  const response = await fetch(
    PLATFORM_BASE + "/appBackend/hisSecret/pluginLogin",
    {
      method: "POST",
      headers: { "Content-Type": "application/json" },
      credentials: "include",
      body: JSON.stringify({
        id: secretKey,
        userId: userId,
        orgCode: "请填写本院机构编码",
        deptCode: deptCode
      })
    }
  );

  const result = await response.json();

  if (!response.ok || result.result !== true
      || Number(result.code) !== 1000) {
    throw new Error(result.desc || "登录验证失败");
  }

  return result.data;
}
登录成功后,将原系统运行所需的 Token 和用户信息写入 sessionStorage:
function saveUserSession(loginData) {
  const user = loginData.user || {};

  sessionStorage.setItem("token", loginData.token);
  sessionStorage.setItem("userId", user.userId || "");
  sessionStorage.setItem("loginName", user.loginName || "");
  sessionStorage.setItem("realName", user.realName || "");
  sessionStorage.setItem("orgCode", user.orgCode || "");
  sessionStorage.setItem("departmentName", user.departmentName || "");
  sessionStorage.setItem("userType", user.userType || "");
}
完成权限加载后,重新载入页面并进入数据上报路由:
window.location.replace(
  window.location.pathname + "?autologin=1#/dataReport"
);04部署到前置软件目录
将最终 HTML 文件命名为:
infDiseaseAdvance-demo.html目标目录为:
/opt/hclient/client/webapps/ROOT/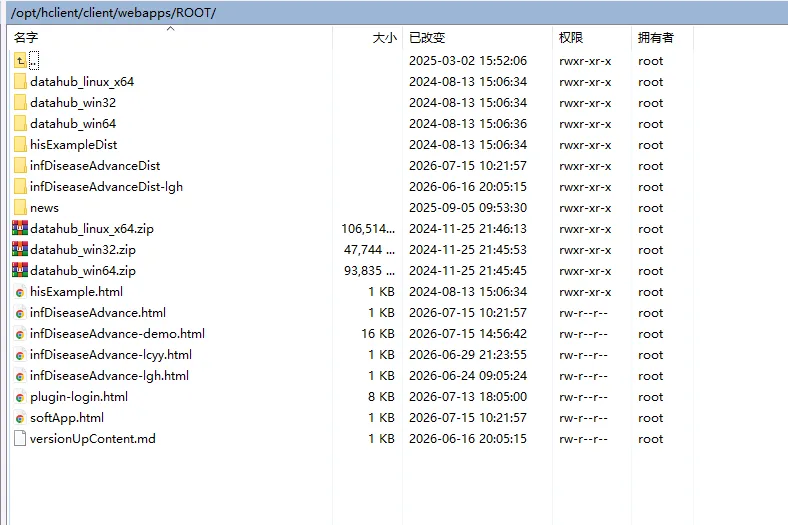
确认原 Vue 系统的静态资源仍然存在:
ls -l /opt/hclient/client/webapps/ROOT/infDiseaseAdvanceDist
ls -l /opt/hclient/client/webapps/ROOT/infDiseaseAdvanceDist/js
ls -l /opt/hclient/client/webapps/ROOT/infDiseaseAdvanceDist/css05上线前必须完成的验证
不带参数打开页面,确认能够显示快捷登录界面; 带正确工号和科室访问,确认自动进入数据上报; 切换不同科室,确认菜单权限与用户身份正确; 点击注销,确认返回快捷登录页而不是循环登录; 关闭浏览器重新打开,确认旧 Token 不会串号; 同时测试前置机直连地址和 Nginx 代理地址; 查看浏览器控制台,确认 JS、CSS 和图片没有 404。
06安全边界不能忽略
不要在公开文章或代码仓库中泄露真实许可证标识、机构编码和接口响应; 不要在页面中设置真实的默认工号、科室或管理账号; 建议由服务端签发短时效、一次性登录凭据,避免只凭可修改的 URL 参数识别用户; 记录发起系统、用户、科室、时间、来源 IP 和登录结果,方便审计追踪; 必须保证 HIS 当前用户与前置软件用户之间存在可靠映射。
07写在最后
医院信息化改造不一定都要推倒重来。很多时候,只要把现有系统的登录流程、Token 保存方式和路由机制梳理清楚,就能用一个轻量页面改善使用体验。
这次改造没有触碰前置软件的核心业务,只是在 HIS 与前置软件之间补上了一座桥:用户少点几次鼠标,信息科也少维护一套桌面入口。前置软件开发商目前已无人维保,了解一点技术细节还是很有必要的。