 夜雨聆风
夜雨聆风


腾讯微信OpenClaw插件API通信过程剖析与Python原生代码复刻原理
点击上方“Deephub Imba”,关注公众号,好文章不错过 !
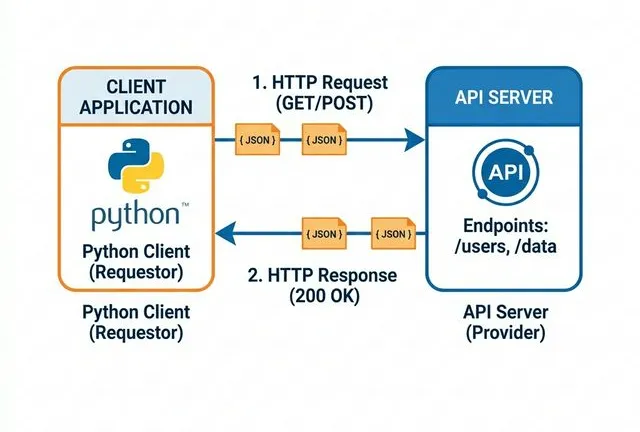
腾讯官方开放了一个微信插件 @tencent-weixin/openclaw-weixin,声称可以扫码即可登录,支持消息收发 。这个插件是腾讯官方发布的,用的是微信内部的 ilink AI Bot 平台接口。 本文将介绍如何不装 OpenClaw,直接把协议扒出来,并用 Python 复刻 。
从 npm 包逆向协议
# 先看看这个包里有什么 curl -s https://unpkg.com/@tencent-weixin/openclaw-weixin@1.0.3/?meta | python -m json.tool
源码是 TypeScript 原文发布的 ,没混淆、没打包。41 个文件,结构清晰:
src/ ├── api/ │ ├── api.ts ← HTTP 请求层 (5个接口) │ ├── types.ts ← 完整类型定义 │ └── session-guard.ts ├── auth/ │ ├── login-qr.ts ← 扫码登录流程 │ └── accounts.ts ← 账号持久化 ├── messaging/ │ ├── inbound.ts ← 消息接收 + context_token 管理 │ ├── send.ts ← 消息发送 │ └── process-message.ts ← 完整处理链路 ├── cdn/ │ ├── aes-ecb.ts ← AES 加密 │ └── cdn-upload.ts ← 媒体上传 └── channel.ts ← 插件主入口
我花了一个晚上通读了所有源码,梳理出了完整协议。
协议全貌: 5 个 HTTP 接口搞定一切
所有接口都是 POST JSON,基地址 https://ilinkai.weixin.qq.com。
通用请求头
headers = { "Content-Type": "application/json", "AuthorizationType": "ilink_bot_token", # 固定值 "Authorization": f"Bearer {bot_token}", # 扫码获取 "X-WECHAT-UIN": base64(random_uint32), # 随机生成 "Content-Length": str(len(body_bytes)), # 必须精确 }
接口列表
| 接口 | 路径 | 用途 || — — — | — — — | — — — || getUpdates | /ilink/bot/getupdates | 长轮询收消息 || sendMessage | /ilink/bot/sendmessage | 发消息 || getUploadUrl | /ilink/bot/getuploadurl | CDN 上传 || getConfig | /ilink/bot/getconfig | 获取 typing ticket || sendTyping | /ilink/bot/sendtyping | “正在输入”状态 |另外还有两个登录接口 (不在 bot 路径下):
-
GET /ilink/bot/get_bot_qrcode?bot_type=3→ 获取二维码 -
GET /ilink/bot/get_qrcode_status?qrcode=xxx→ 轮询扫码状态
扫码登录: 60 行 Python 搞定
import httpx, qrcode, time BASE = "https://ilinkai.weixin.qq.com" # Step 1: 获取二维码 resp = httpx.get(f"{BASE}/ilink/bot/get_bot_qrcode?bot_type=3") data = resp.json() qrcode_key = data["qrcode"] qrcode_url = data["qrcode_img_content"] # Step 2: 终端显示二维码 qr = qrcode.QRCode(border=1) qr.add_data(qrcode_url) qr.make(fit=True) qr.print_ascii(invert=True) # Step 3: 长轮询等扫码确认 while True: status_resp = httpx.get( f"{BASE}/ilink/bot/get_qrcode_status?qrcode={qrcode_key}", headers={"iLink-App-ClientVersion": "1"}, timeout=40, ) status = status_resp.json() if status["status"] == "scaned": print("已扫码,请在手机上确认…") elif status["status"] == "confirmed": bot_token = status["bot_token"] account_id = status["ilink_bot_id"] user_id = status["ilink_user_id"] print(f"登录成功! token={bot_token[:20]}…") break elif status["status"] == "expired": print("二维码过期,请重新获取") break
扫码后你会得到三个关键值:
-
bot_token– 后续所有 API 的认证令牌 -
ilink_bot_id– Bot 的账户 ID -
ilink_user_id– 扫码人的微信 ID (格式:xxx@im.wechat)
第一个大坑: 消息发送成功但收不到
拿到 token 后,我写了最简单的发送: # ❌ 错误的写法 – API 返回 200 但消息不投递 resp = httpx.post(f”{BASE}/ilink/bot/sendmessage”, json={ “msg”: { “to_user_id”: user_id, “context_token”: saved_context_token, “item_list”: [{“type”: 1, “text_item”: {“text”: “Hello!”}}], } }, headers=headers) print(resp.status_code) # 200 print(resp.text) # {} # 微信上: 啥也没收到
HTTP 200,空响应体{}。没有错误码,没有错误信息,就是收不到。这是最阴险的 bug
幽灵字段: 逆向发现的真相
最终我回到 OpenClaw 源码,逐字对比 send.ts 里的请求构造: // OpenClaw 的 buildTextMessageReq (src/messaging/send.ts) function buildTextMessageReq(params) { return { msg: { from_user_id: “”, // ← 空字符串,不是不传 to_user_id: to, client_id: clientId, // ← 每条消息唯一 ID !!! message_type: 2, // ← MessageType.BOT !!! message_state: 2, // ← MessageState.FINISH !!! item_list: […], context_token: contextToken, }, }; }
然后看 api.ts 的发送函数:
// src/api/api.ts export async function sendMessage(params) { await apiFetch({ baseUrl: params.baseUrl, endpoint: "ilink/bot/sendmessage", // 注意这里: 每个请求都附带 base_info !!! body: JSON.stringify({ …params.body, base_info: buildBaseInfo() }), token: params.token, timeoutMs: params.timeoutMs ?? 15_000, label: "sendMessage", }); } function buildBaseInfo() { return { channel_version: "1.0.3" }; // ← 版本标识 }
漏了 4 个字段 :| 字段 | 值 | 作用 || — — — | — — -| — — — || from_user_id | "" | 空字符串,标记发送方 || client_id | UUID | 每条消息唯一ID,服务端用于去重和路由 || message_type | 2 | 标记为 BOT 消息 (1=用户, 2=Bot) || message_state | 2 | 标记为完成态 (0=新建, 1=生成中, 2=完成) |以及请求体顶层的:| 字段 | 值 | 作用 || – – – | – – -| – – – || base_info.channel_version | "1.0.3" | 插件版本标识 |这些字段不在官方文档里 (README 只写了 to_user_id, context_token, item_list),但服务端依赖它们做消息路由 。缺少任何一个,消息就被静默丢弃。
正确的发送格式
import uuid def send_message(token, to_user_id, text, context_token): """能实际投递的消息发送""" body = { "msg": { "from_user_id": "", "to_user_id": to_user_id, "client_id": f"mybot-{uuid.uuid4().hex[:12]}", "message_type": 2, # BOT "message_state": 2, # FINISH "context_token": context_token, "item_list": [ {"type": 1, "text_item": {"text": text}} ], }, "base_info": {"channel_version": "1.0.3"}, } raw = json.dumps(body, ensure_ascii=False) headers = { "Content-Type": "application/json", "AuthorizationType": "ilink_bot_token", "Authorization": f"Bearer {token}", "X-WECHAT-UIN": base64.b64encode( str(random.randint(0, 0xFFFFFFFF)).encode() ).decode(), "Content-Length": str(len(raw.encode("utf-8"))), } resp = httpx.post( "https://ilinkai.weixin.qq.com/ilink/bot/sendmessage", content=raw.encode("utf-8"), headers=headers, timeout=15, ) return resp.status_code == 200
第二个大坑: context_token 是什么?
context_token 是 ilink 协议的会话上下文令牌。每次用户给 Bot 发消息时,getUpdates 返回的消息体里都带有一个context_token。
{ "msgs": [{ "from_user_id": "xxx@im.wechat", "context_token": "AARzJW…(很长的base64)…", "item_list": [{"type": 1, "text_item": {"text": "你好"}}] }], "get_updates_buf": "CgkI…" }
关键问题: 没有 context_token 能不能发?答案: API 不报错 (返回 200),但消息不投递。必须有 context_token。 那 context_token 会过期吗?这是我踩的第二个坑。一开始我以为 context_token 是一次性的,因为:
-
用 context_token 发第一条消息 → 收到了
-
同一个 token 发第二条 → 收不到
但真相是: context_token 可以无限复用,收不到是因为第一条发送的格式就不对!当我补全了 client_id、message_type、message_state 之后,同一个 context_token 连发 10 条都能收到。 OpenClaw 的源码也证实了这一点 – – 在 inbound.ts 里,context_token 是持久化存储的:
// src/messaging/inbound.ts const contextTokenStore = new Map(); // 内存缓存 export function setContextToken(accountId, userId, token) { contextTokenStore.set(`${accountId}:${userId}`, token); persistContextTokens(accountId); // 同时写磁盘 } export function getContextToken(accountId, userId) { return contextTokenStore.get(`${accountId}:${userId}`); }
每次收到用户消息就更新 token,发送时取最新的那个。token 会随着用户新消息刷新,但旧的也能用。
完整的 Python 客户端 (120 行)
""" 微信 ilink Bot 客户端 - 完整实现 """ import base64, json, logging, os, random, time, uuid from pathlib import Path import httpx ILINK_BASE = "https://ilinkai.weixin.qq.com" class WeChatBot: def __init__(self, token, to_user_id, context_token="", config_path="wechat.json"): self.base = ILINK_BASE self.token = token self.to_user_id = to_user_id self.context_token = context_token self.config_path = config_path self._cursor = "" @classmethod def from_config(cls, path="wechat.json"): with open(path) as f: cfg = json.load(f) return cls( token=cfg["token"], to_user_id=cfg["to_user_id"], context_token=cfg.get("context_token", ""), config_path=path, ) def _headers(self): uin = base64.b64encode(str(random.randint(0, 0xFFFFFFFF)).encode()).decode() return { "Content-Type": "application/json", "AuthorizationType": "ilink_bot_token", "Authorization": f"Bearer {self.token}", "X-WECHAT-UIN": uin, } def _post(self, endpoint, body): body["base_info"] = {"channel_version": "1.0.3"} raw = json.dumps(body, ensure_ascii=False).encode("utf-8") headers = self._headers() headers["Content-Length"] = str(len(raw)) resp = httpx.post( f"{self.base}/ilink/bot/{endpoint}", content=raw, headers=headers, timeout=35, ) text = resp.text.strip() return json.loads(text) if text and text != "{}" else {"ret": 0} def get_updates(self): """长轮询拉取新消息,自动更新 context_token""" result = self._post("getupdates", {"get_updates_buf": self._cursor}) self._cursor = result.get("get_updates_buf", self._cursor) for msg in result.get("msgs", []): ct = msg.get("context_token", "") if ct: self.context_token = ct self._save_token(ct) return result.get("msgs", []) def send(self, text, to=None, context_token=None): """发送文本消息""" return self._post("sendmessage", { "msg": { "from_user_id": "", "to_user_id": to or self.to_user_id, "client_id": f"bot-{uuid.uuid4().hex[:12]}", "message_type": 2, "message_state": 2, "context_token": context_token or self.context_token, "item_list": [{"type": 1, "text_item": {"text": text}}], } }) def refresh_and_send(self, text): """先刷新 context_token,再发送 (推荐)""" self.get_updates() return self.send(text) def _save_token(self, ct): try: p = Path(self.config_path) if p.exists(): cfg = json.loads(p.read_text()) cfg["context_token"] = ct p.write_text(json.dumps(cfg, indent=2, ensure_ascii=False)) except Exception: pass def listen(self, handler): """持续监听消息 (阻塞)""" while True: try: msgs = self.get_updates() for msg in msgs: ct = msg.get("context_token", "") from_user = msg.get("from_user_id", "") text = "" for item in msg.get("item_list", []): if item.get("type") == 1: text = item.get("text_item", {}).get("text", "") if ct and text: reply = handler(text, from_user) if reply: self.send(reply, to=from_user, context_token=ct) except Exception as e: logging.error(f"listen error: {e}") time.sleep(5)
踩坑清单
序号坑表现解法 1缺 client_id200 但不投递每条消息生成唯一 UUID2缺 message_type200 但不投递固定传 2 (BOT)3缺 message_state200 但不投递固定传 2 (FINISH)4缺 base_info200 但不投递{"channel_version": "1.0.3"}5缺 Content-Length偶发超时手动计算 UTF-8 字节长度6缺 context_token200 但不投递getUpdates 获取,持久化保存7响应体为 {}以为失败{} 就是成功,sendMessage 无返回值8get_qrcode_status 超时以为登录失败正常行为,重试即可9二维码过期status=”expired”重新调 get_bot_qrcode
这个方案的边界
能做的:
-
个人微信收发消息 (1对1)
-
文本/图片/文件/视频 (需 AES-128-ECB 加密上传 CDN)
-
•持续运行的交互 Bot
-
定时推送通知
不能做的 / 注意事项:
-
不能发群消息 (ilink 只支持 direct chat)
-
需要先完成扫码登录 (一次即可,token 持久化)
-
需要用户至少给 bot 发过一条消息 (获取初始 context_token)
-
不清楚 token 有效期上限 (目前测试数天内正常)
-
这是腾讯内部平台,协议可能随时变更
总结
整个逆向过程的关键收获:
1. **npm 包是个宝藏** — — 很多”闭源”服务的官方 SDK 都以源码形式发布在 npm 上,TypeScript 类型定义就是最好的 API 文档。2. **HTTP 200 ≠ 成功** — — ilink 的 sendMessage 无论消息是否投递都返回 200 + `{}`。没有错误码、没有提示。这种设计对调试是灾难性的。3. **“可选字段”可能是必填的** — — 官方文档只列了 `to_user_id`、`context_token`、`item_list`,但 `client_id`、`message_type`、`message_state` 才是消息路由的关键。4. **先读源码再写代码** — — 如果一开始就完整对比 OpenClaw 的请求格式,可以省两天。别猜,看源码。
原文在这里,本文略删改:
https://medium.com/@gymayong/%E6%88%91%E9%80%86%E5%90%91%E4%BA%86%E8%85%BE%E8%AE%AF%E5%BE%AE%E4%BF%A1-ilink-%E5%8D%8F%E8%AE%AE-%E7%94%A8-python-%E5%AE%9E%E7%8E%B0%E4%BA%86%E4%B8%80%E4%B8%AA%E8%83%BD%E4%B8%BB%E5%8A%A8%E6%8E%A8%E9%80%81%E7%9A%84%E5%BE%AE%E4%BF%A1-bot-48d429106b72
喜欢就关注一下吧:
 点个 在看 你最好看!