夜雨聆风
夜雨聆风0️⃣ 前置环境准备
安装 Node.js
OpenCLaw 基于 Node.js 运行,需要安装 Node.js 18 或更高版本。
Ubuntu/Debian 系统:
# 更新包管理器curl-fsSL https://deb.nodesource.com/setup_18.x |sudo-Ebash -sudoapt-getinstall-y nodejs# 验证安装node--versionnpm--version
CentOS/RHEL/Fedora 系统:
# 安装 Node.js 18curl-fsSL https://rpm.nodesource.com/setup_18.x |sudobash -sudoyum install-y nodejs# 验证安装node--versionnpm--version
macOS 系统:
# 使用 Homebrew 安装brew install node@18brew link--overwrite node@18# 验证安装node--versionnpm--version配置 npm 国内源(中国大陆用户推荐)
为了加速 npm 包下载,建议配置国内镜像源:
# 使用淘宝 npm 镜像源npm config set registry https://registry.npmmirror.com# 验证配置npm config get registry# 可选:设置 electron 镜像加速npm config set electron_mirror "https://npmmirror.com/mirrors/electron/"
恢复官方源的方法:
npm config set registry https://registry.npmjs.org1️⃣安装 OpenCLaw
# 全局安装openclawnpminstall-g openclaw# 验证安装openclaw --version
如果安装速度慢,可以使用 cnpm:
# 安装 cnpmnpminstall-g cnpm --registry=https://registry.npmmirror.com# 使用 cnpm 安装 openclawcnpm install-g openclaw
2️⃣ 启动安装向导
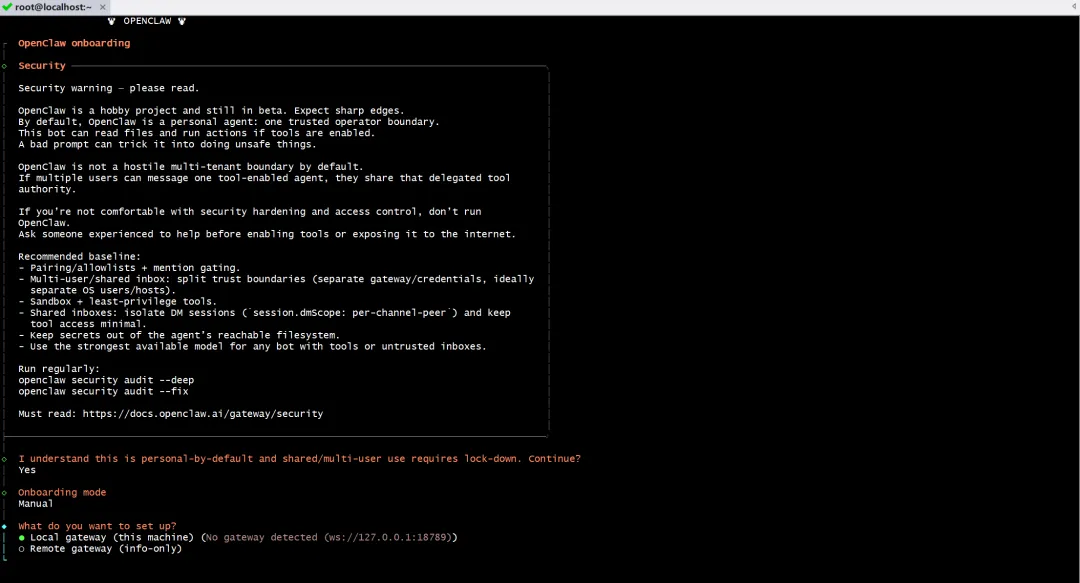
openclaw init3️⃣ 安全警告阅读与确认
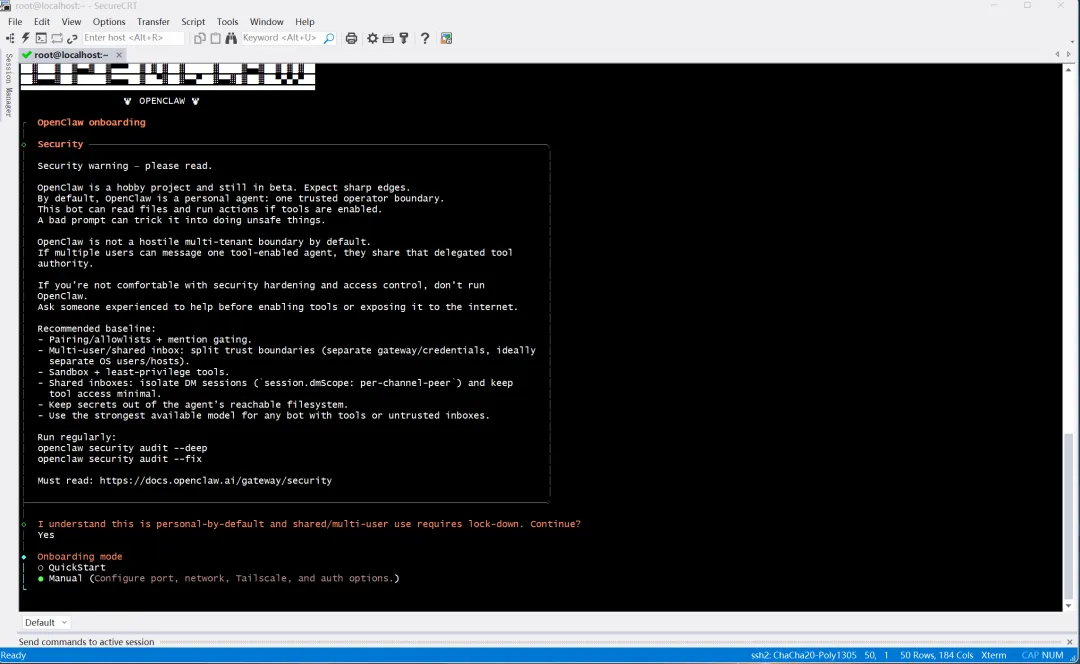
启动后首先会看到安全警告:
OpenCLaw 默认是个人使用,仅限单一可信用户。
若开启工具权限(如读写文件、执行命令),需防范恶意提示词攻击。
若要让多人使用,必须进行安全加固(如白名单、隔离会话、最小权限等)。
阅读后选择:Yes 表示理解并继续。
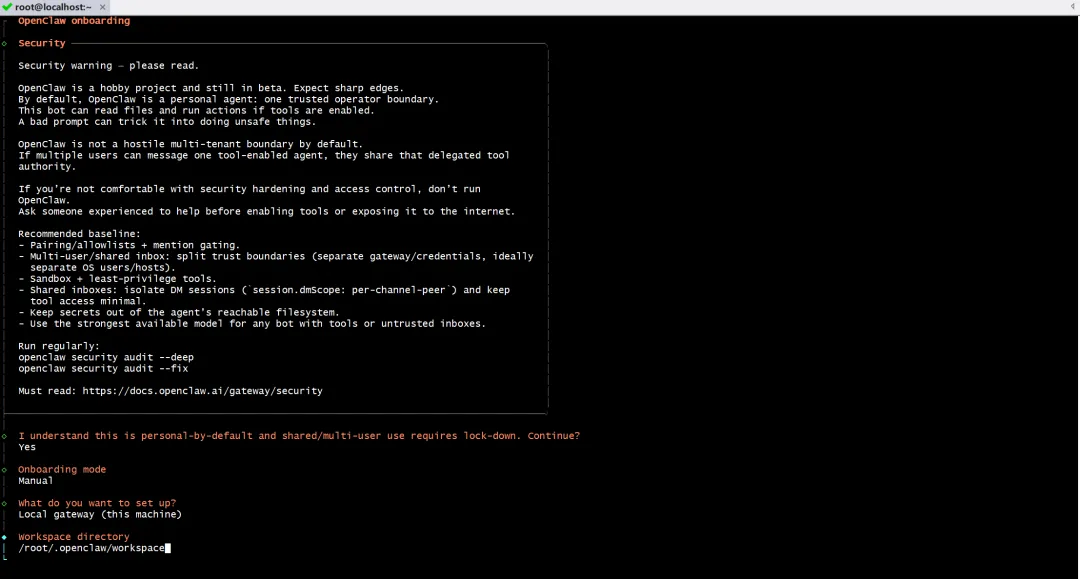
4️⃣ 选择安装模式
选择:Manual(手动配置)
安装目标:Local gateway (this machine)
5️⃣ 设置工作目录
默认路径:
/root/.openclaw/workspace(Linux)可接受默认值,直接下一步。
6️⃣ 选择模型/认证提供商
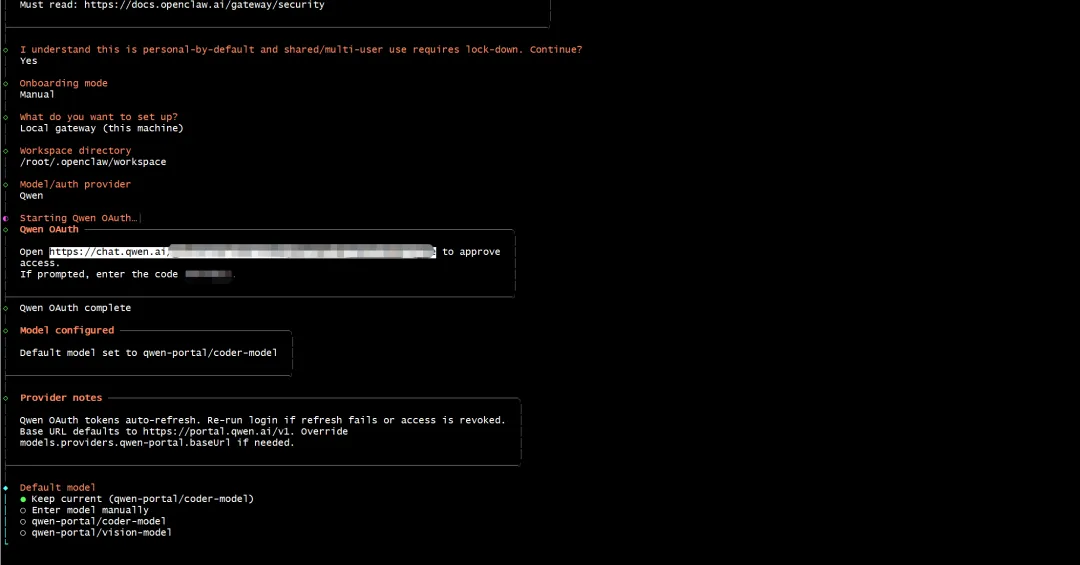
选择:Qwen(通义千问),使用 OAuth 认证。
系统会提示你打开浏览器访问:
https://chat.qwen.ai/authorize?user_code=AAFFABZL&client=qwen-code输入显示的授权码 AAFFABZL完成 OAuth 认证认证成功后,默认模型设置为:
qwen-portal/coder-model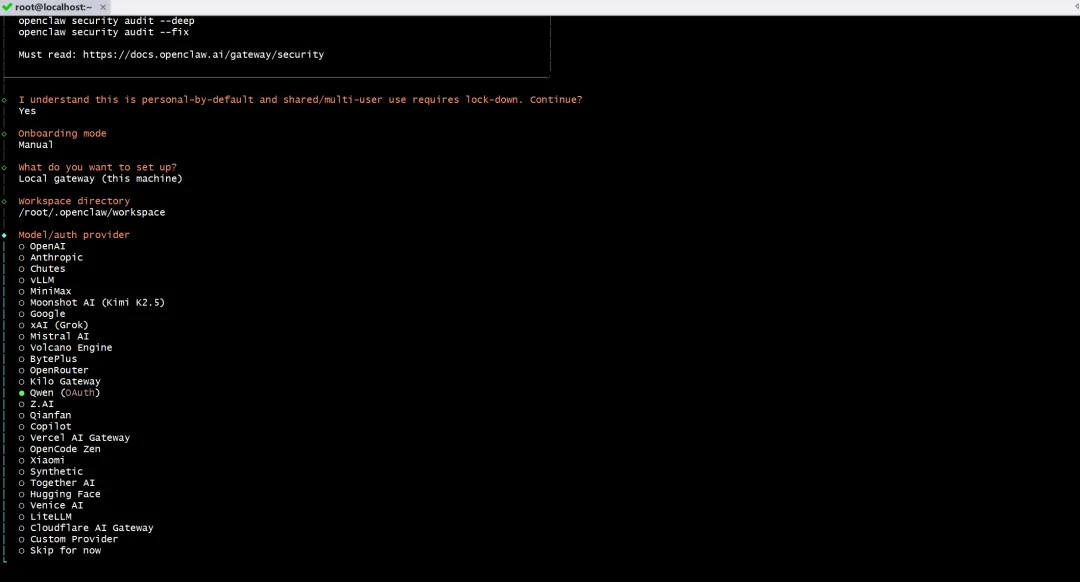

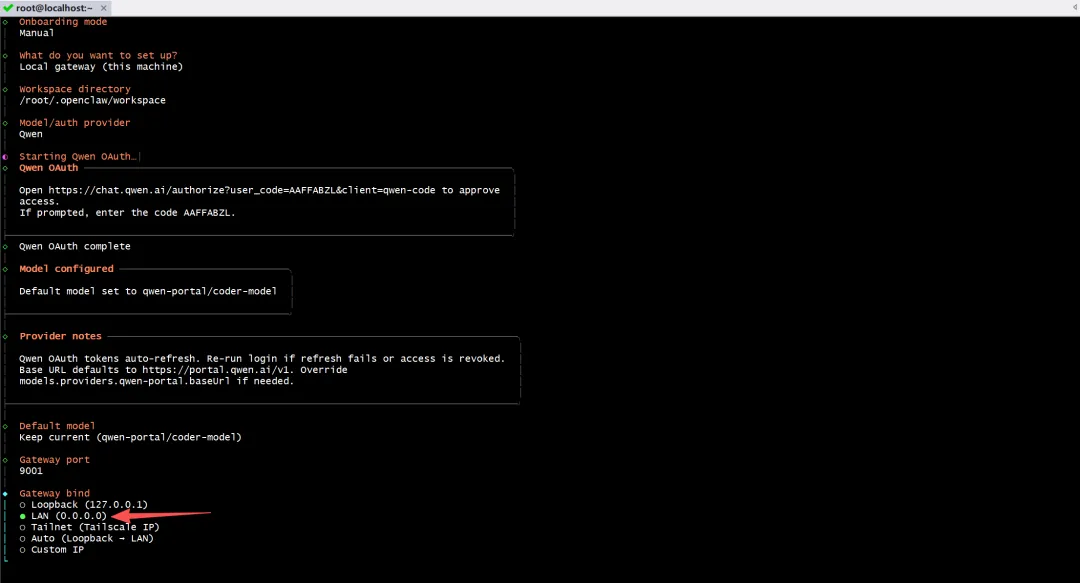
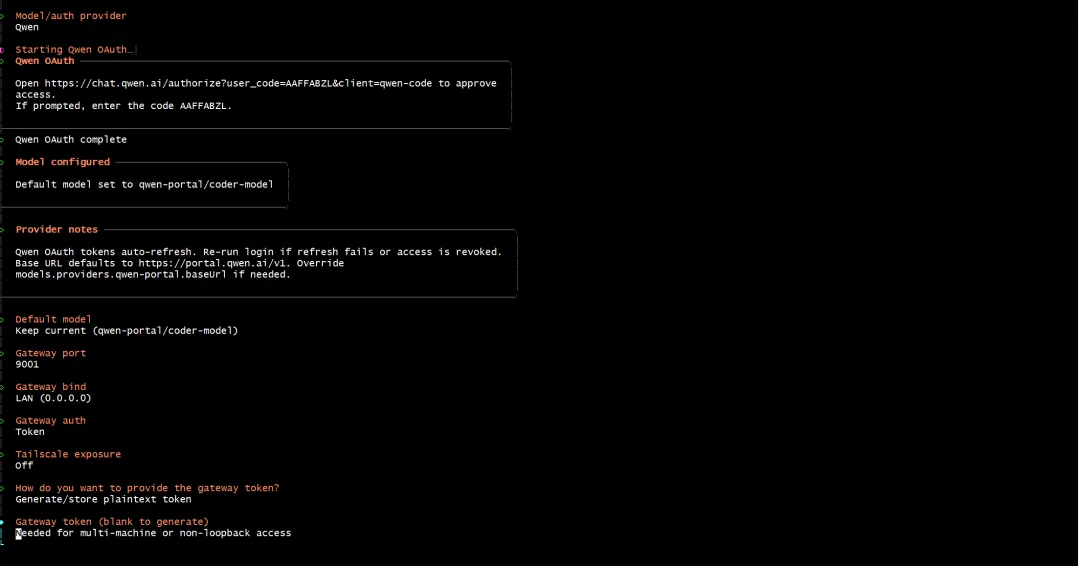
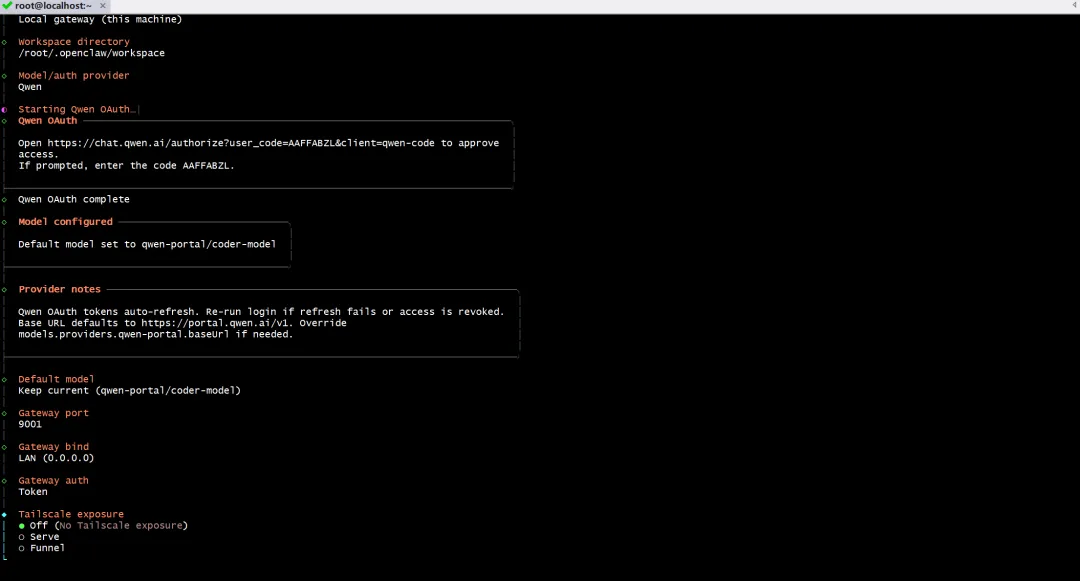
7️⃣ 配置网关
Gateway port:
9001(默认)Gateway bind:选择
LAN (0.0.0.0),允许局域网访问Gateway auth:选择
Token认证Tailscale exposure:选择
off,暂不启用 Tailscale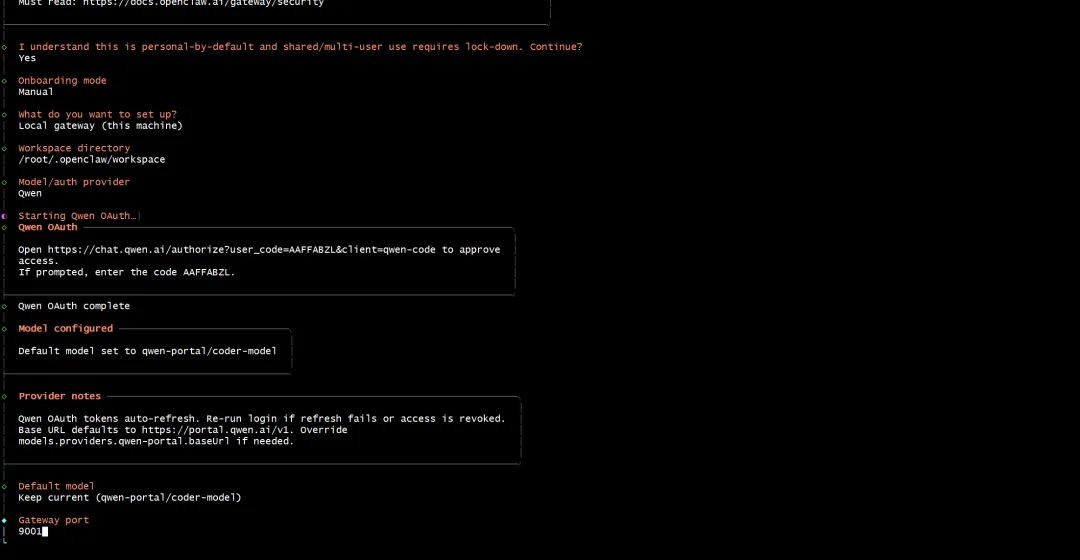
8️⃣ 设置网关 Token
选择:Generate/store plaintext token
系统会自动生成一个 Token,用于后续多机或非本地访问认证。请妥善保存此 Token。
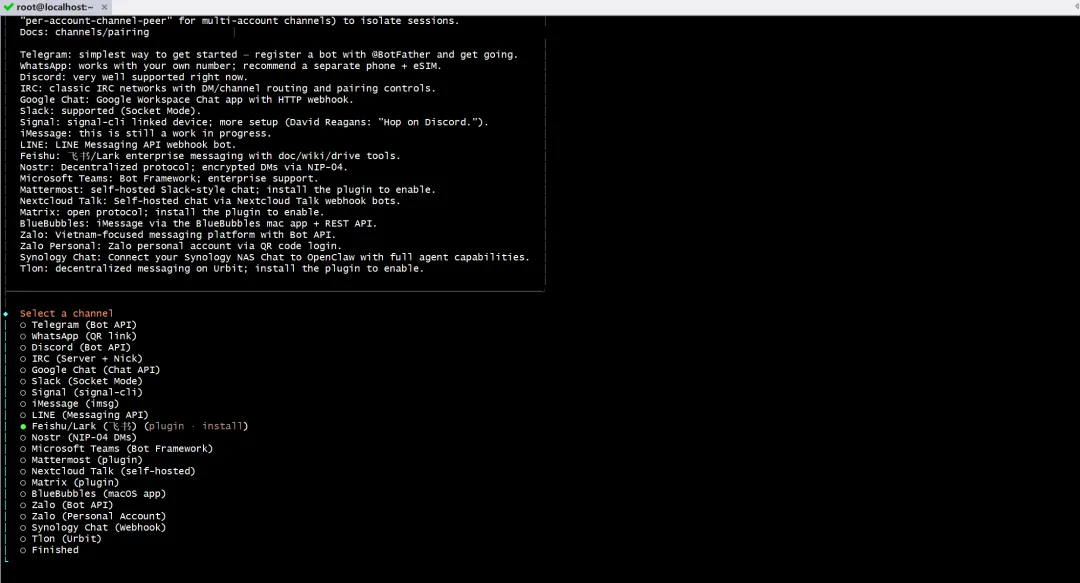
9️⃣ 选择消息通道(Channel)
选择你想要接入的平台,例如飞书:Feishu/Lark(👩💻)
系统会提示安装 Feishu 插件,选择使用本地路径。
🔟 配置飞书(Feishu)凭证
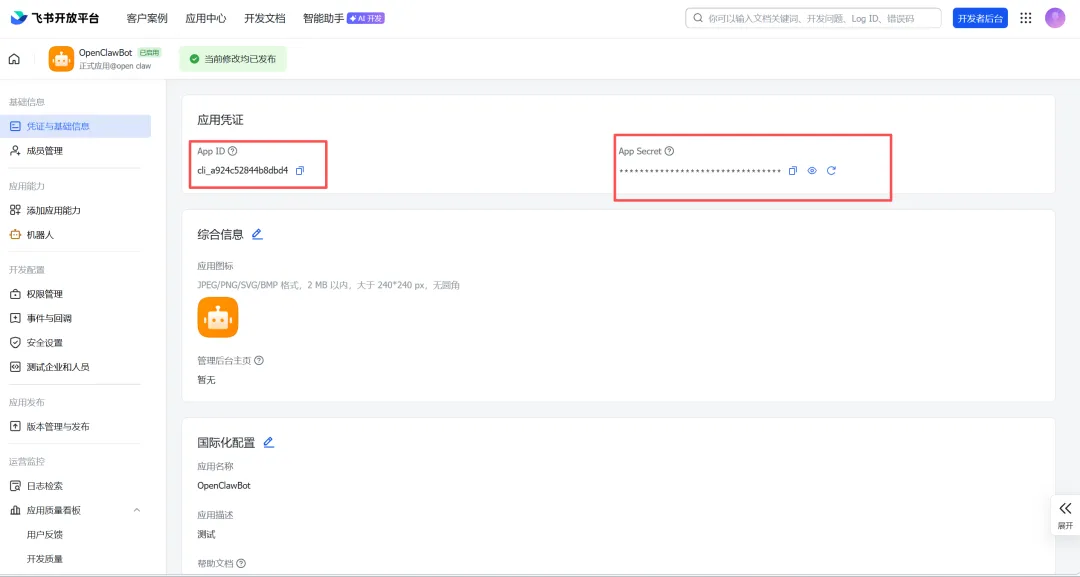
前往 飞书开放平台 创建自建应用
获取 App ID 和 App Secret
在 OpenCLaw 中依次输入:
App Secret
App ID
系统会自动测试连接,显示:
Connected as ou_xxx
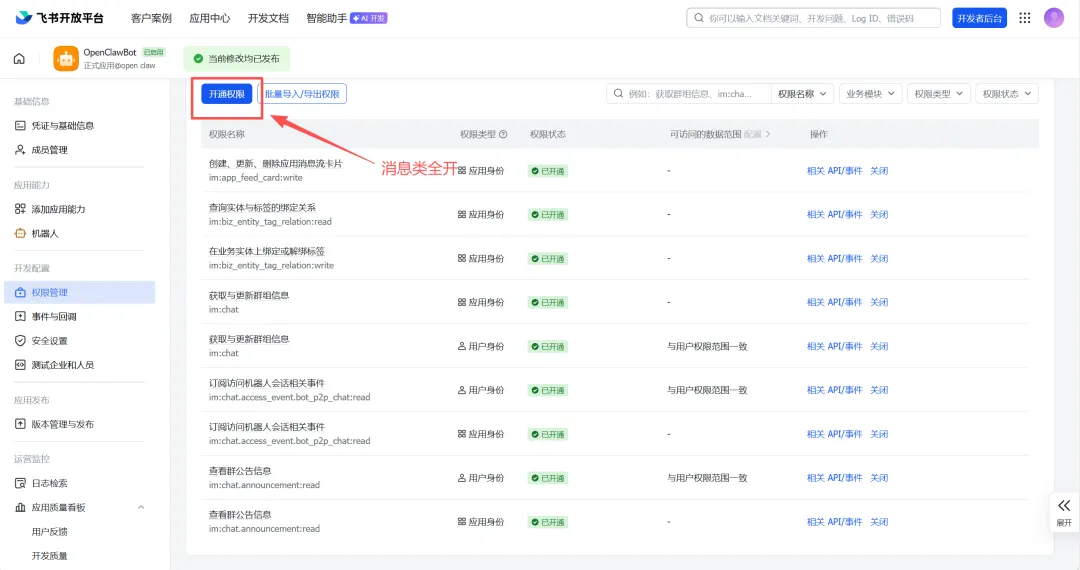
飞书应用权限配置:在飞书开放平台的应用中,需要开启以下权限:
im:messageim:chatcontact:user.base:readonly


1️⃣1️⃣ 设置飞书连接选项
连接模式:
websocket (default)飞书域名:选择
Feishu (feishu.cn) - china群聊策略:选择
Allowlist-only(仅允许特定群聊)群聊白名单:输入允许响应的群 ID(如
oc_xxxxx, oc_yyyyy)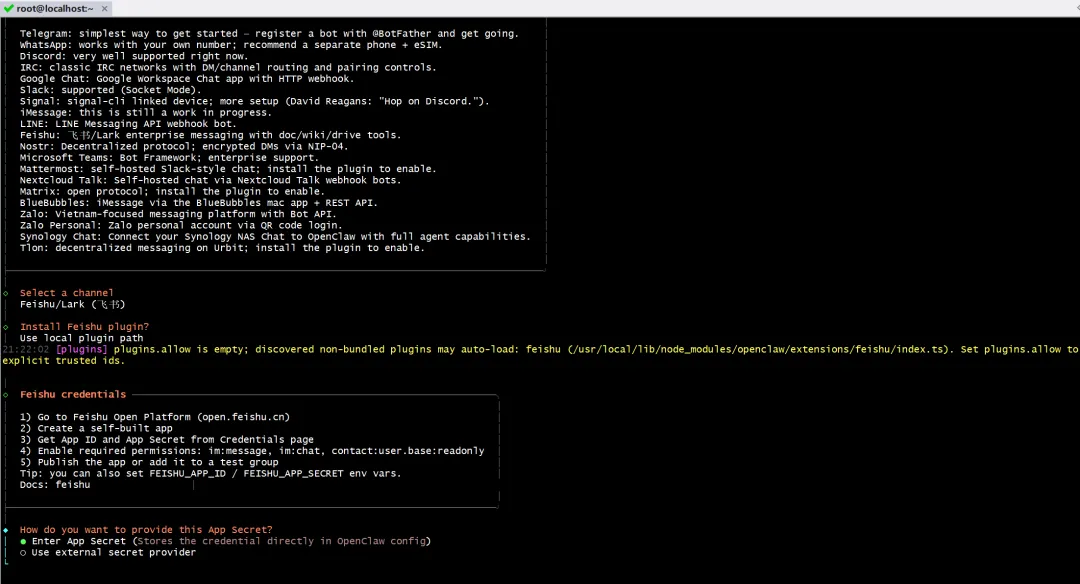
1️⃣2️⃣ 完成配置
所有配置完成后,OpenCLaw 将启动并连接到飞书等平台。
你可以通过飞书私聊或群聊与你的 OpenCLaw 交互。
1️⃣3️⃣ 验证运行状态
# 查看 OpenCLaw 运行状态openclaw status# 查看日志openclaw logs# 启动服务(如果未自动启动)openclaw start
✅ 安装完成后的建议
定期运行安全审计
openclaw security audit --deepopenclaw security audit --fix阅读官方安全文档
https://docs.openclaw.ai/gateway/security环境变量配置(可选)
# 编辑配置文件vim ~/.openclaw/config.yaml# 或使用环境变量exportFEISHU_APP_ID="your_app_id"exportFEISHU_APP_SECRET="your_app_secret"
开机自启动(Linux Systemd)
# 创建 systemd 服务文件sudo vim /etc/systemd/system/openclaw.service
ini[Unit]Description=OpenCLaw ServiceAfter=network.target[Service]Type=simpleUser=your_usernameExecStart=$(which openclaw) startRestart=on-failure[Install]WantedBy=multi-user.target
# 启用服务sudo systemctl enable openclawsudo systemctl start openclaw
❓ 常见问题排查
1. Node.js 版本问题
# 检查版本node--version# 需要 18+
2. 端口占用
# 检查 9001 端口netstat-tlnp|grep 9001# 修改配置文件中的端口
3. 飞书连接失败
确认 App ID 和 Secret 正确
确认应用已发布或添加到测试组
检查网络是否能访问飞书 API
4. npm 安装失败
# 清理缓存npm cache clean --force# 使用 cnpm 重试cnpm install-g openclaw
这样你就完成了 OpenCLaw 的完整安装和配置!如有其他问题,欢迎继续提问。