本地安装openclaw openclaw 网上说很流行, 深圳腾讯大厦排起了长队,软件工程人员免费安装。今天我这非专业人仕,自己动手试一试,在本地安装openclaw, 与大家分享。依照豆包提供的“ OpenClaw 一键安装脚本(Win10 专用)方法。这是全自动脚本,会自动安装所有必备依赖、配置环境、下载 OpenClaw,全程无需手动操作。
使用方法:按下 Win + X,选择 Windows PowerShell (管理员),把下面完整代码全部复制,直接粘贴进去,按回车,等待自动完成(全程 3~10 分钟,取决于网速)。
| <# OpenClaw 全自动一键安装脚本 适用:Windows 10 专业版/家庭版 x64 功能:自动安装 Node.js、Git、VC++ 运行库、配置环境、拉取并安装 OpenClaw #> # 强制管理员运行 if (!([Security.Principal.WindowsPrincipal][Security.Principal.WindowsIdentity]::GetCurrent()).IsInRole([Security.Principal.WindowsBuiltInRole]::Administrator)) { Start-Process powershell.exe "-NoProfile -ExecutionPolicy Bypass -File `"$PSCommandPath`"" -Verb RunAs exit } Write-Host "`n=============================================" -ForegroundColor Cyan Write-Host " OpenClaw 一键安装脚本 开始执行 " -ForegroundColor Cyan Write-Host "=============================================`n" -ForegroundColor Cyan # 1. 设置脚本执行权限 Write-Host "[1/6] 配置系统脚本权限..." -ForegroundColor Yellow Set-ExecutionPolicy RemoteSigned -Scope CurrentUser -Force Set-ExecutionPolicy Bypass -Scope Process -Force # 2. 安装 Chocolatey 包管理器(自动装软件) Write-Host "[2/6] 安装 Chocolatey 软件管理器..." -ForegroundColor Yellow if (-not (Get-Command choco -ErrorAction SilentlyContinue)) { [System.Net.ServicePointManager]::SecurityProtocol = [System.Net.ServicePointManager]::SecurityProtocol -bor 3072 Invoke-Expression ((New-Object System.Net.WebClient).DownloadString('https://community.chocolatey.org/install.ps1')) $env:Path = [System.Environment]::GetEnvironmentVariable("Path","Machine") + ";" + [System.Environment]::GetEnvironmentVariable("Path","User") } # 3. 自动安装所有必备依赖 Write-Host "[3/6] 自动安装 Node.js、Git、VC++ 运行库..." -ForegroundColor Yellow choco install nodejs-lts --version=22.0.0 -y --force choco install git -y --force choco install vcredist140 -y --force choco install ffmpeg -y --force # 刷新环境变量 $env:Path = [System.Environment]::GetEnvironmentVariable("Path","Machine") + ";" + [System.Environment]::GetEnvironmentVariable("Path","User") # 4. 验证依赖安装成功 Write-Host "[4/6] 检查依赖版本..." -ForegroundColor Yellow node -v npm -v git --version # 5. 拉取 OpenClaw 源码并安装 Write-Host "[5/6] 下载并安装 OpenClaw..." -ForegroundColor Yellow cd $env:USERPROFILE if (Test-Path "OpenClaw") { Remove-Item "OpenClaw" -Recurse -Force } git clone https://github.com/OpenClaw/OpenClaw.git cd OpenClaw npm install --production # 6. 完成提示 Write-Host "`n=============================================" -ForegroundColor Green Write-Host " ✅ OpenClaw 安装完成! " -ForegroundColor Green Write-Host "=============================================`n" -ForegroundColor Green Write-Host "启动命令:cd $env:USERPROFILE\OpenClaw`n npm start`n" -ForegroundColor White Write-Host "安装路径:$env:USERPROFILE\OpenClaw`n" -ForegroundColor White pause |
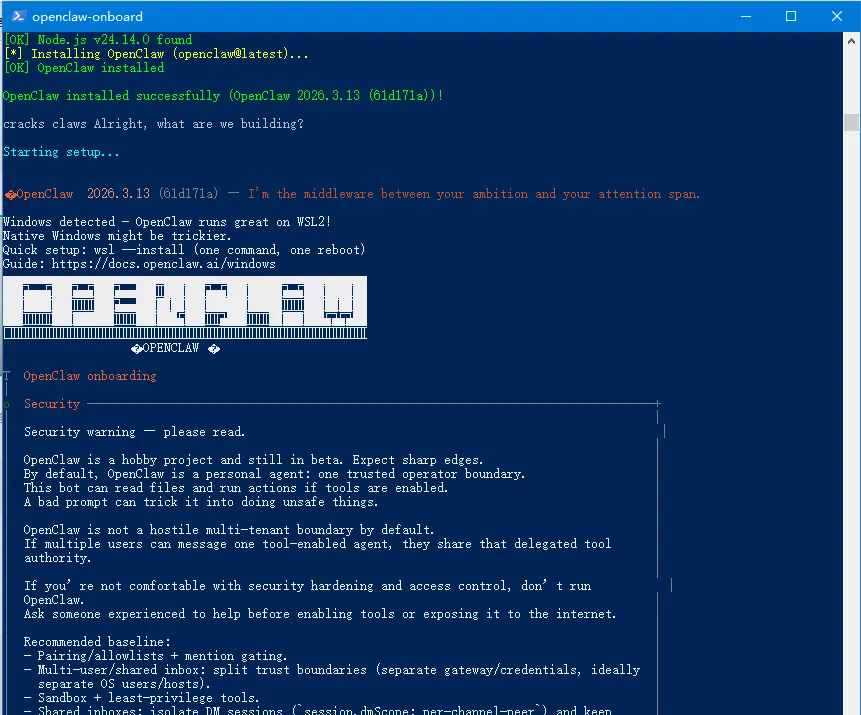
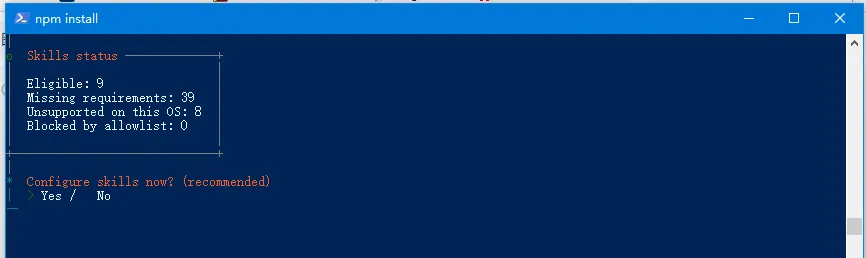
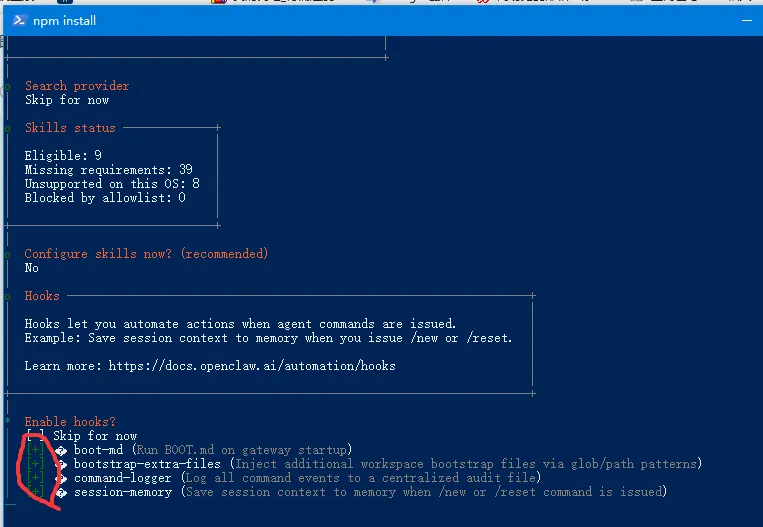
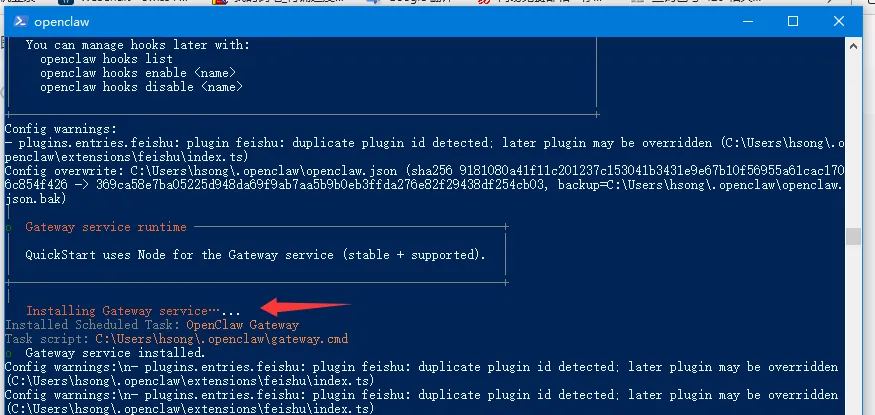
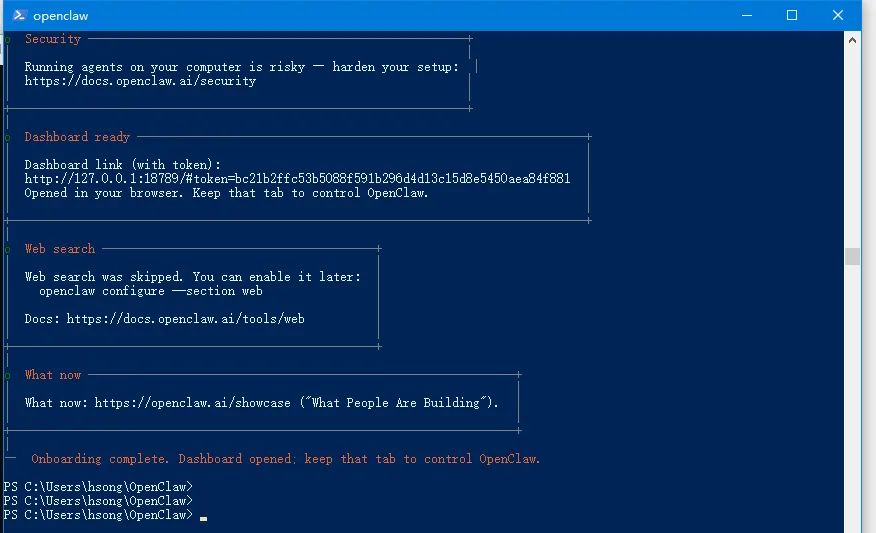
运行结果如下: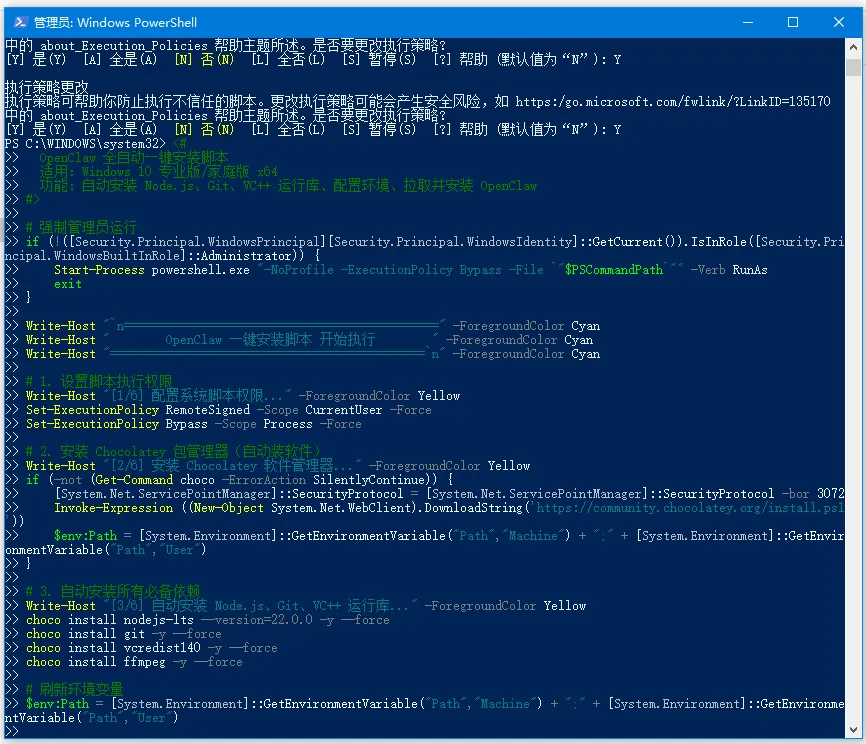
同样, 也可以一步一步手动安装。先将相关软件, 先下载下来, 一个一个安装, 安装之后检查一下, 安装环境,是否符合安装openclaw.
安装顺序建议:
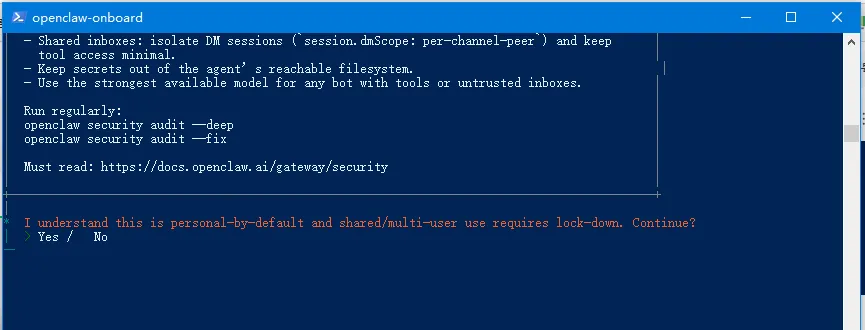
在安装过程中, 有时会出错, 豆包不是万能的。 只要你有耐心,虚心学习, 一步一步寻找方法。相信自己,总有一次会成功的, 相住自己。 解决方法总是比困难多。
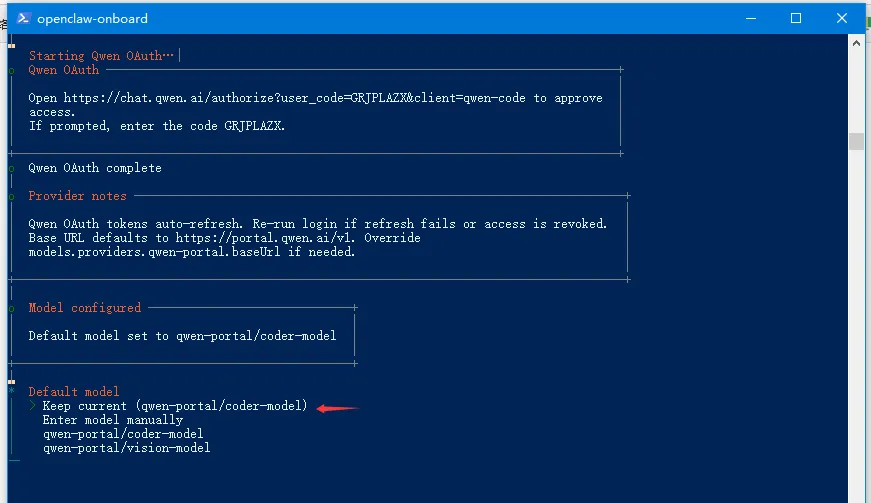
我自己是按一步-步指令来操作的。官方指令安装方法:
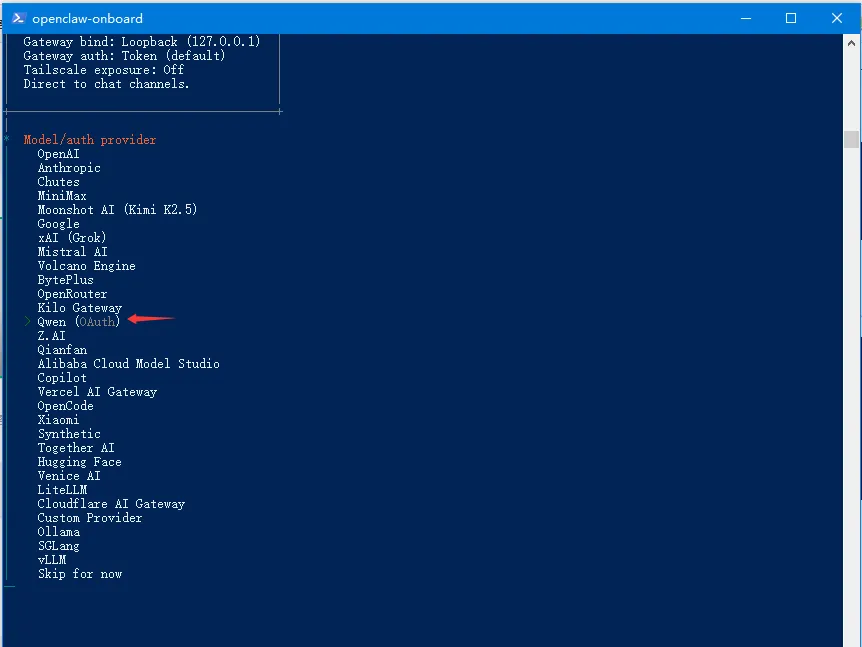
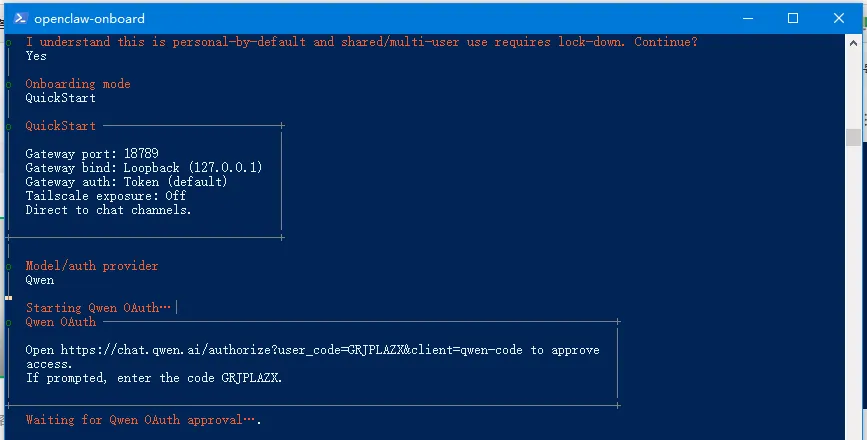
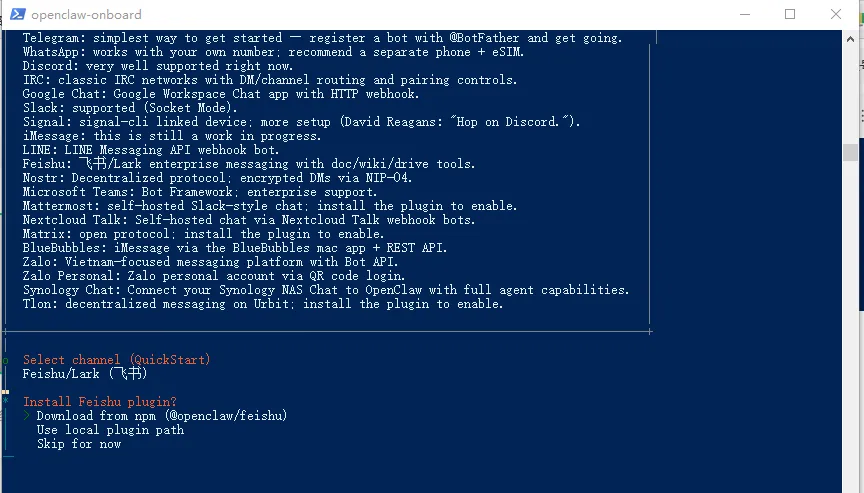
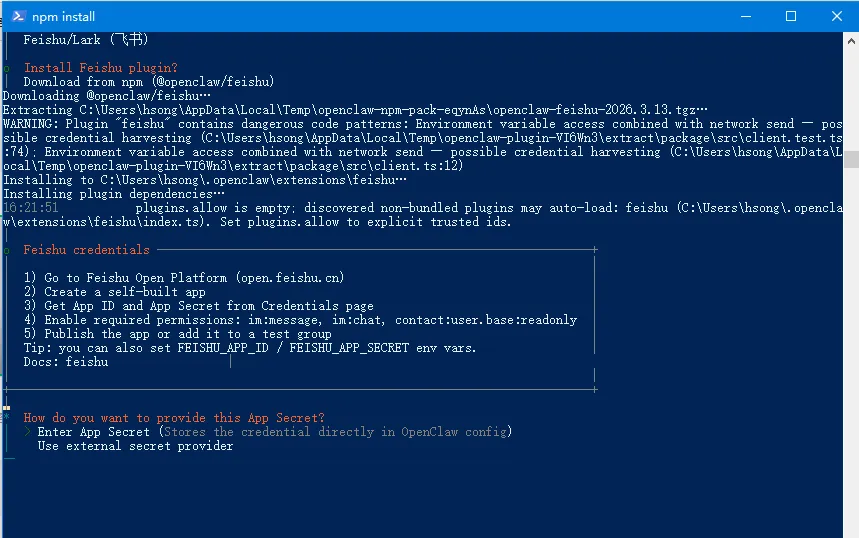
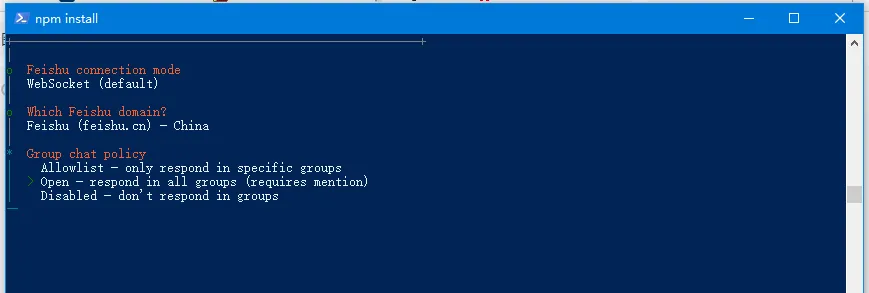
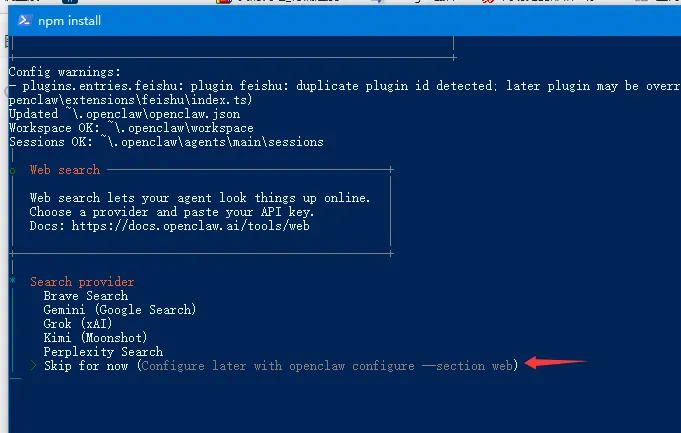
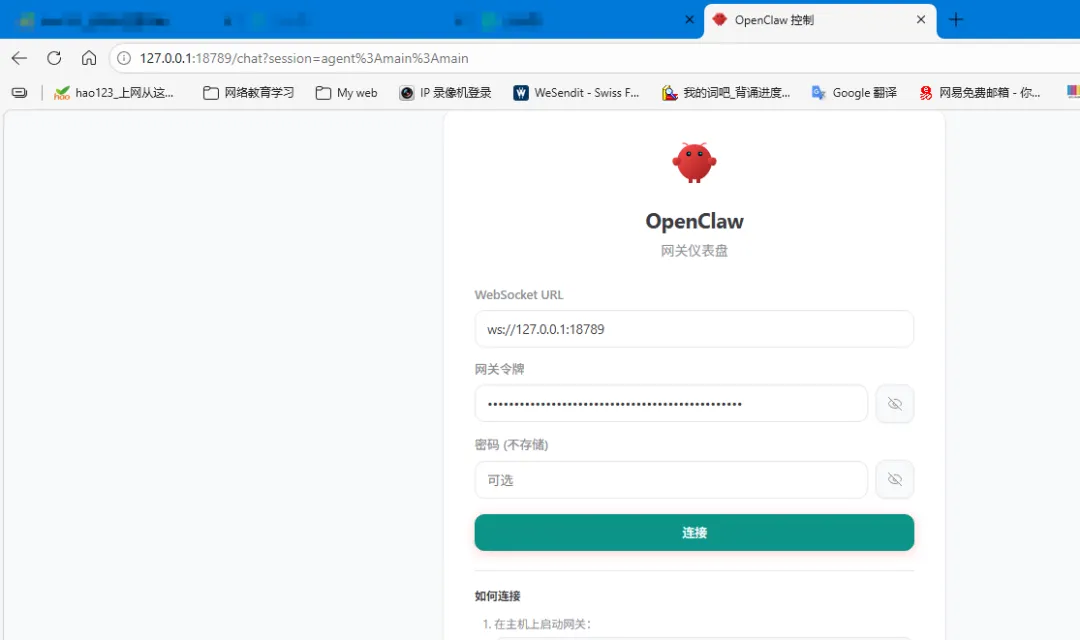
移动上/下箭头选择千问(有免费额度),确认。之后会直接跳转到千问注册页面, 不过我已注册了,点确认即可。确认之后,直接返回操作界面。选择保持现有千问模板, 确认。选择对接与openclaw沟通方法,选择飞书并安装插件。http://127.0.0.1:18789
在这安装的过程中, 有时出错, 只要重复按步再做一次,成功就在前面。
 夜雨聆风
夜雨聆风