夜雨聆风
夜雨聆风OnlyOffice (Win 版) 和 NextCloud 配合实现在线 Office 服务
独立观察员 2026 年 5 月 3 日
一、OnlyOffice 社区版安装(Windows 版)
1.1、资源
安装文档:https://helpcenter.onlyoffice.com/zh/docs/installation/docs-community-install-windows.aspx
社区版下载:https://www.onlyoffice.com/zh/download-community#docs-community
单独必备组件:https://download.onlyoffice.com/install/documentserver/windows/onlyoffice-documentserver-prerequisites.exe
GitHub:https://github.com/ONLYOFFICE/DocumentServer
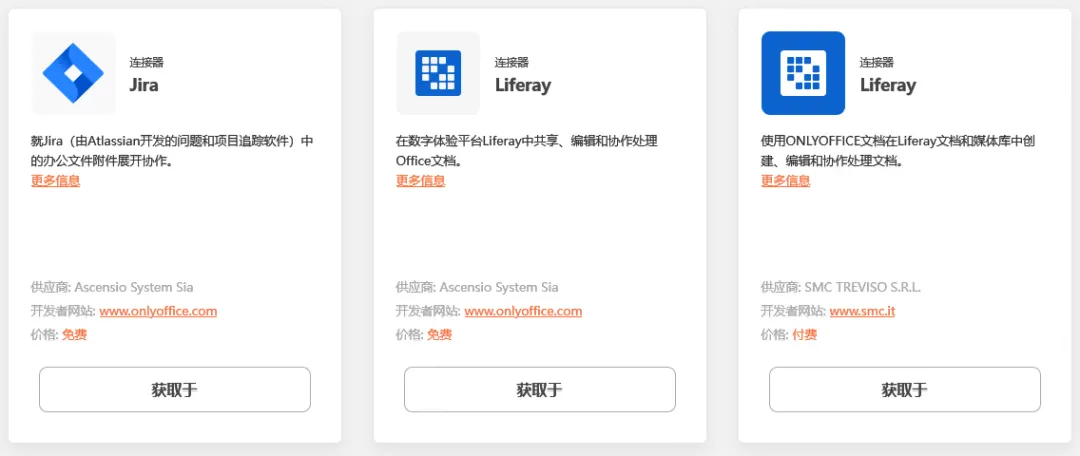
连接器选择:https://www.onlyoffice.com/all-connectors
1.2、官方文档
在 ONLYOFFICE 文档部分下载社区版安装文件。
双击您刚刚下载的 onlyoffice-documentserver.exe 文件。
默认情况下,ONLYOFFICE 文档使用端口 80 监听传入连接。从版本 4.3 开始,您可以更改 ONLYOFFICE 文档的端口以替代默认端口。要更改端口,请使用以下参数运行可执行文件:
onlyoffice-documentserver.exe /DS_PORT=<PORT_NUMBER>其中
<PORT_NUMBER>是您希望 ONLYOFFICE 文档使用的端口号。对于离线安装,请单独下载必备组件。
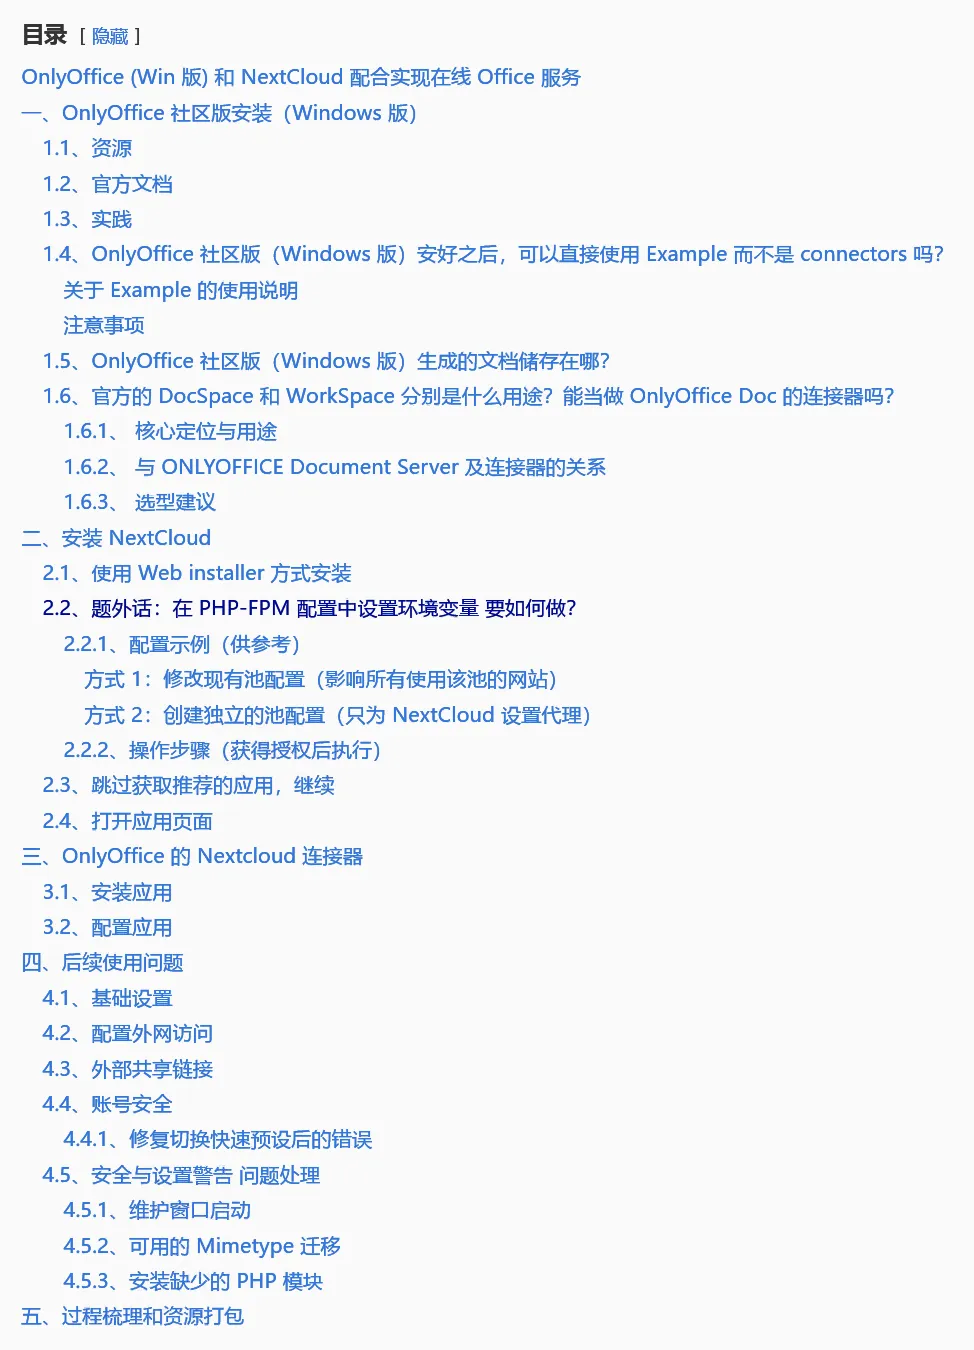
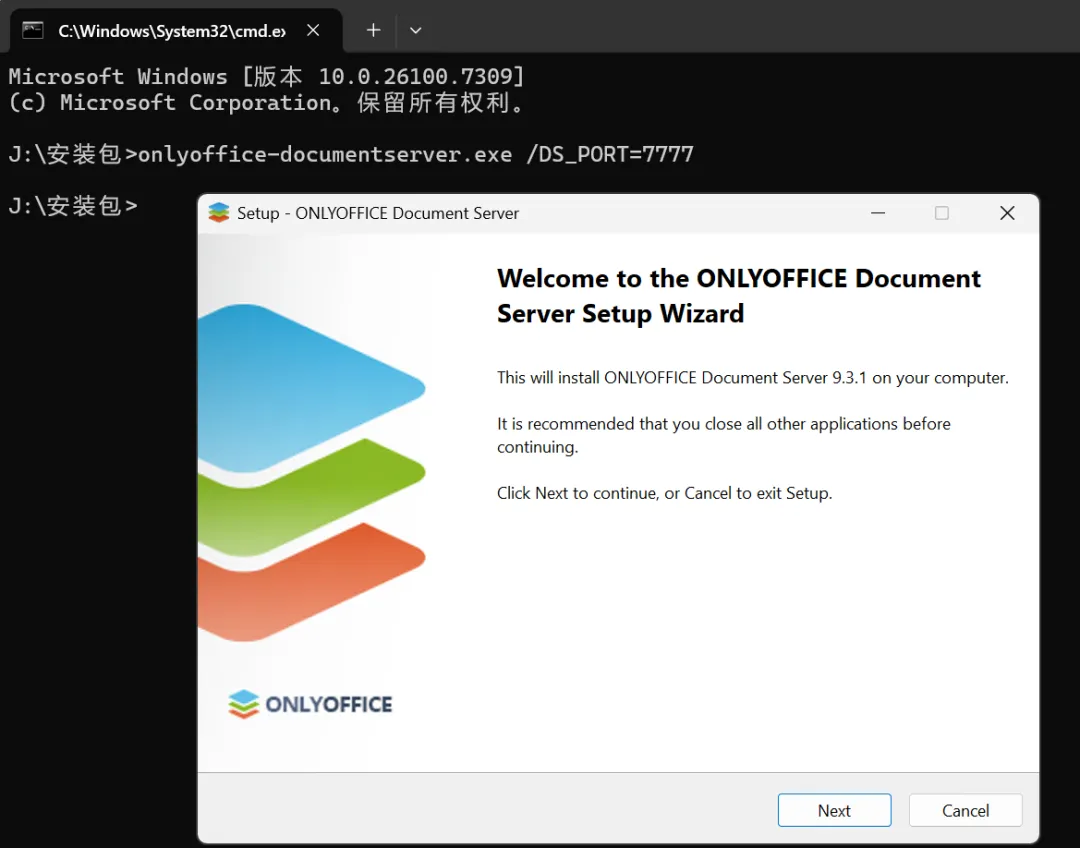
文档服务器安装向导将启动。点击下一步 > 按钮以开始安装过程。
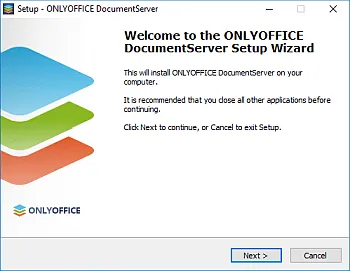
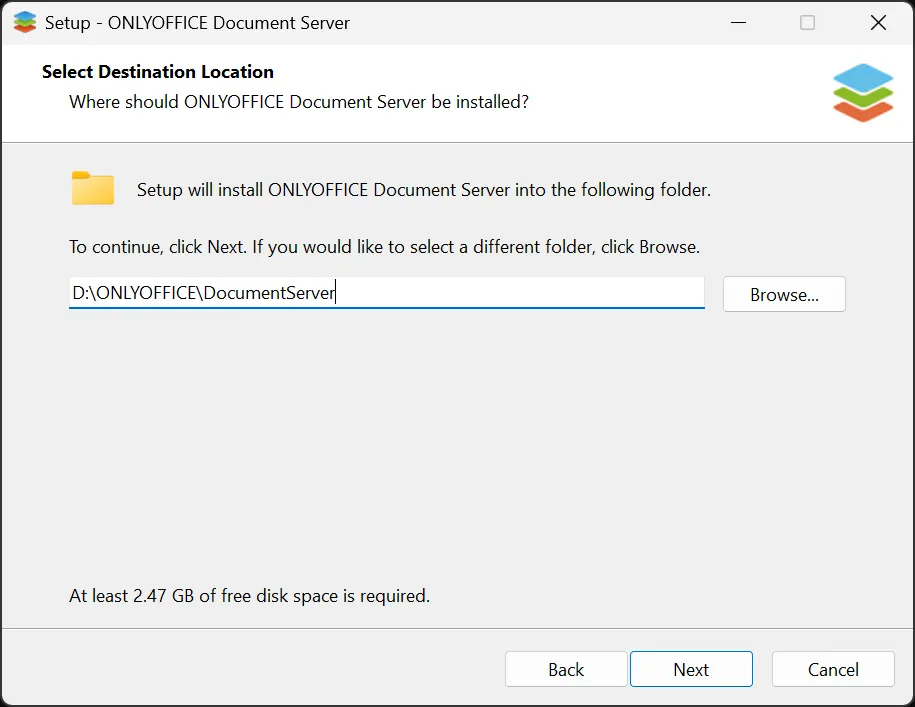
默认情况下,ONLYOFFICE 文档将安装到以下文件夹:
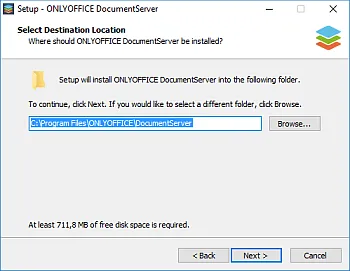
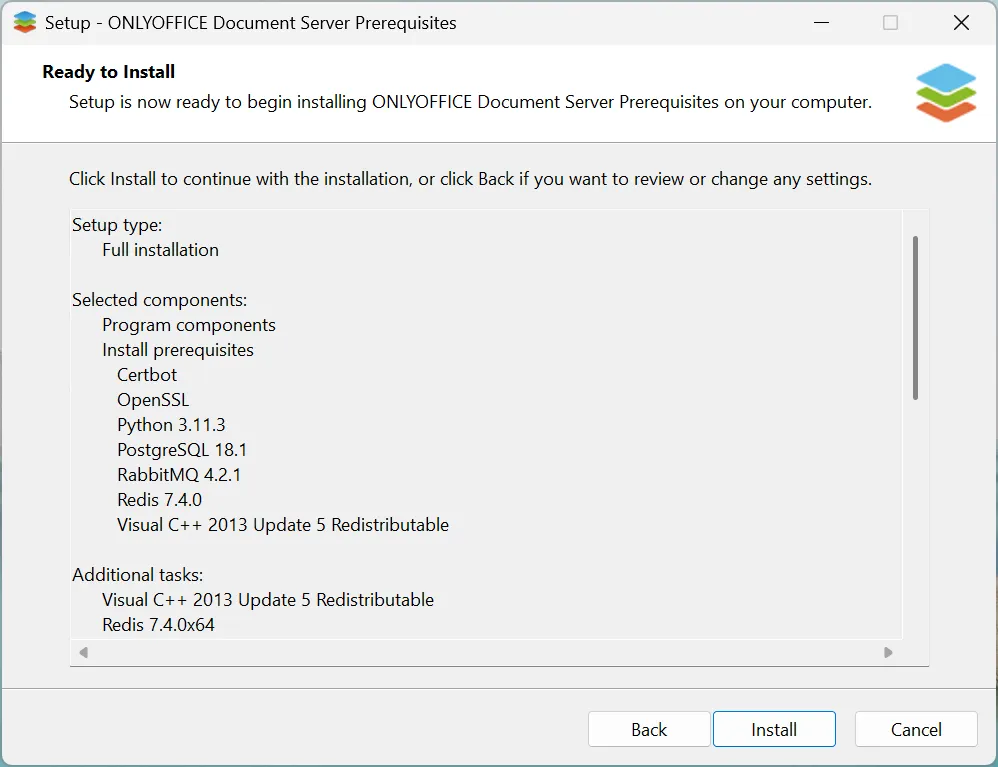
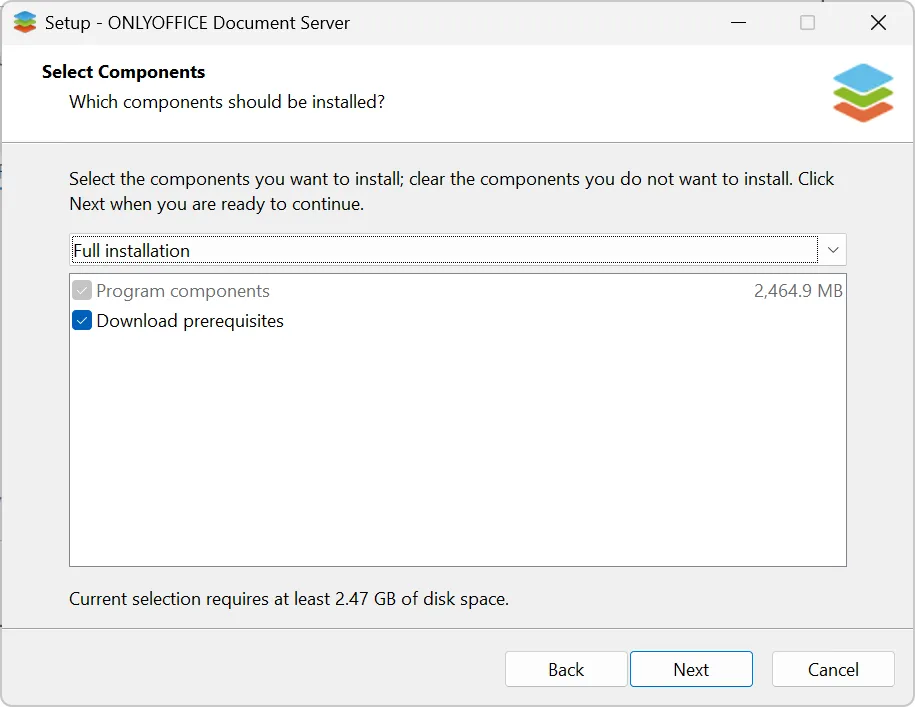
C:\Program Files\ONLYOFFICE\DocumentServer\。如果需要,您可以通过点击浏览按钮并选择计算机上的所需文件夹来更改它。然后点击下一步 > 按钮。如果您的电脑上缺少 ONLYOFFICE 文档正常工作所需的一些附加组件,这些依赖项将首先下载并安装。选择所需的组件并点击下一步 > 按钮。
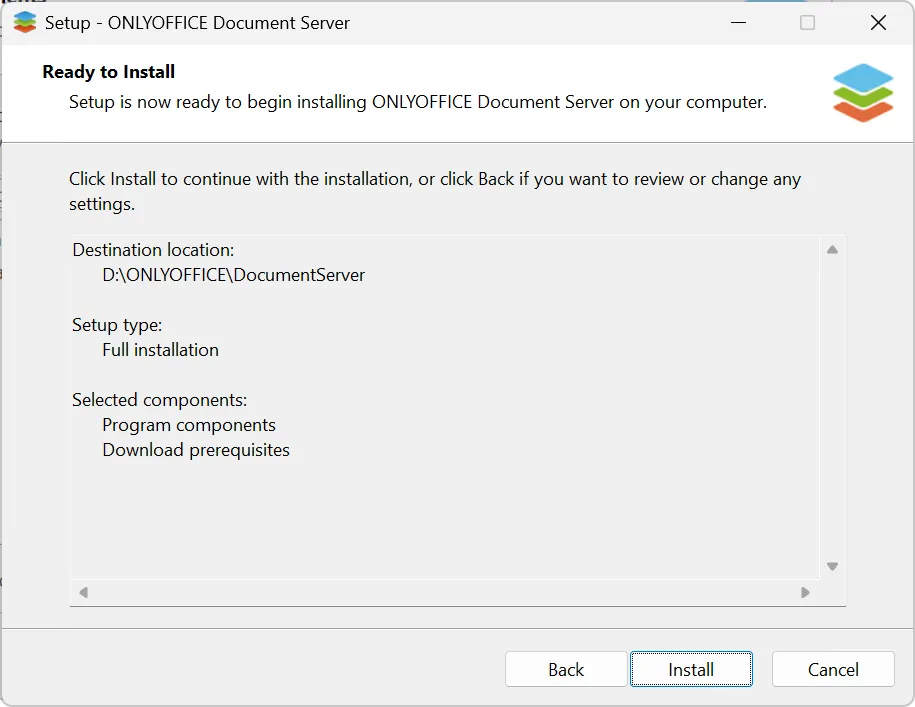
点击安装按钮并等待缺少的组件安装完成。如果所需组件已安装在您的电脑上,ONLYOFFICE 文档的安装将开始。
安装过程完成后,点击完成按钮以关闭向导窗口。
如果打开 ONLYOFFICE 文档服务器演示选项被选中,社区版欢迎页面将在您的浏览器中打开。或者,您可以在浏览器的地址栏中输入 http://localhost/example。在这里,您可以找到有关如何启用文档示例或使用提供的 API 将在线编辑器集成到您的 Web 应用程序中的进一步说明。
1.3、实践
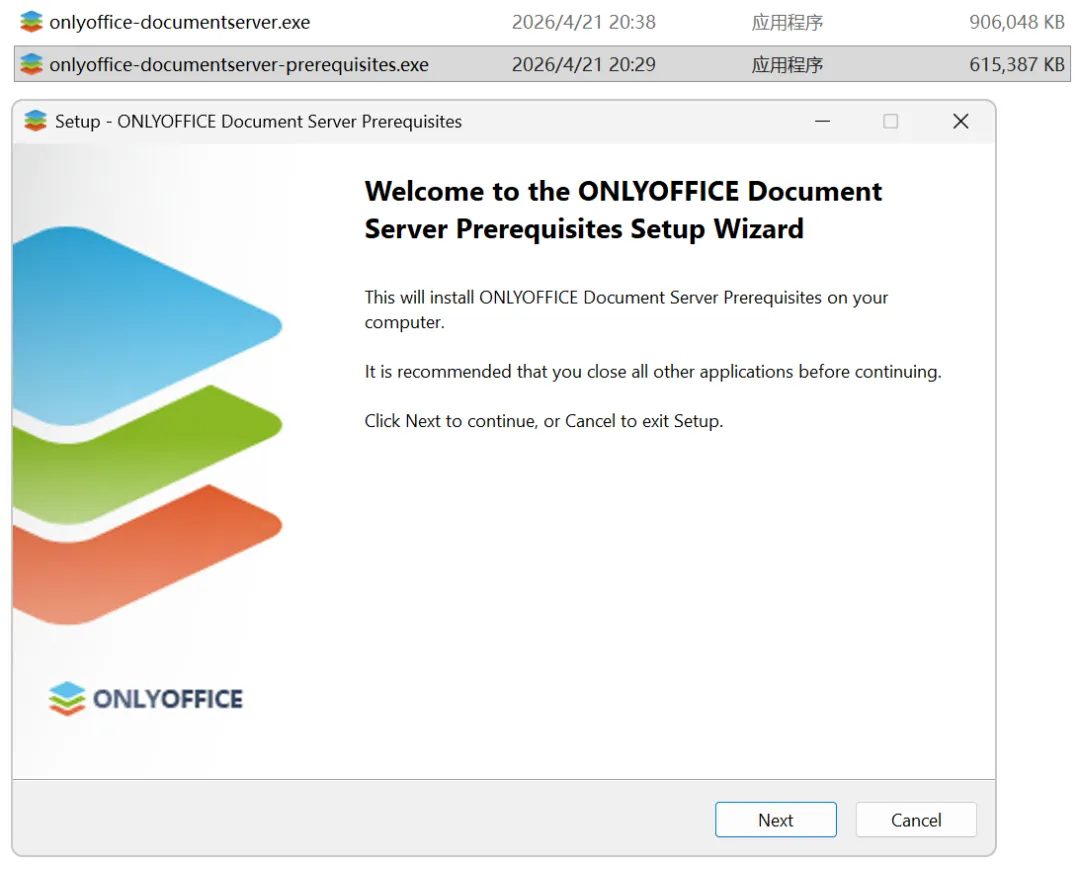
先安装需求包:
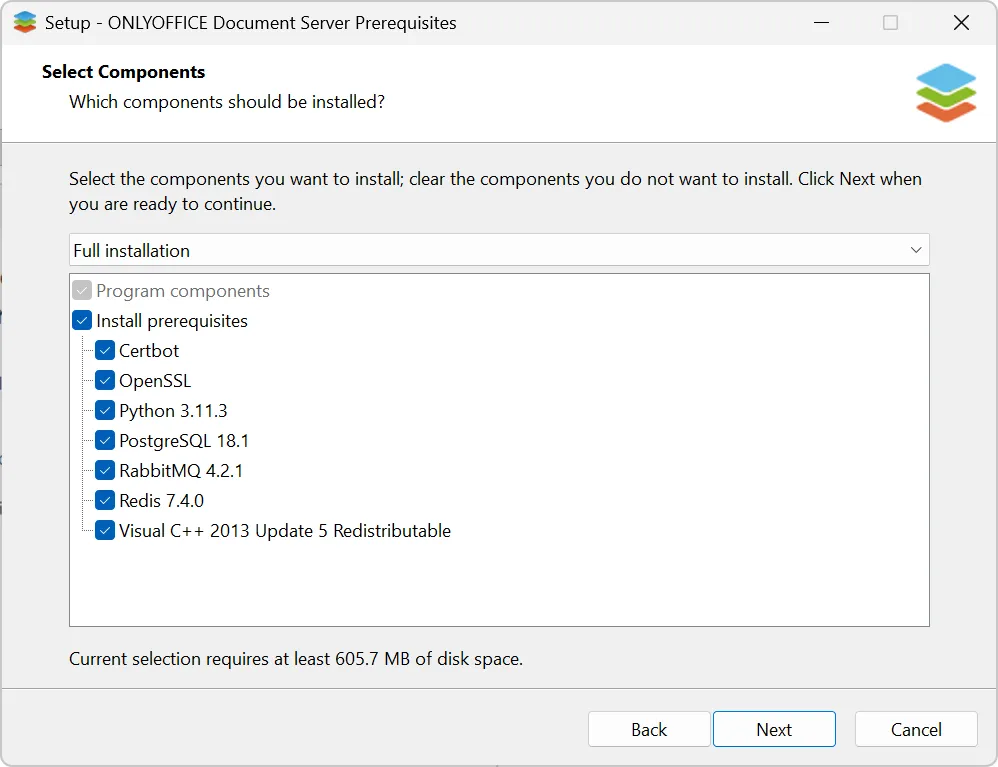
完全安装:
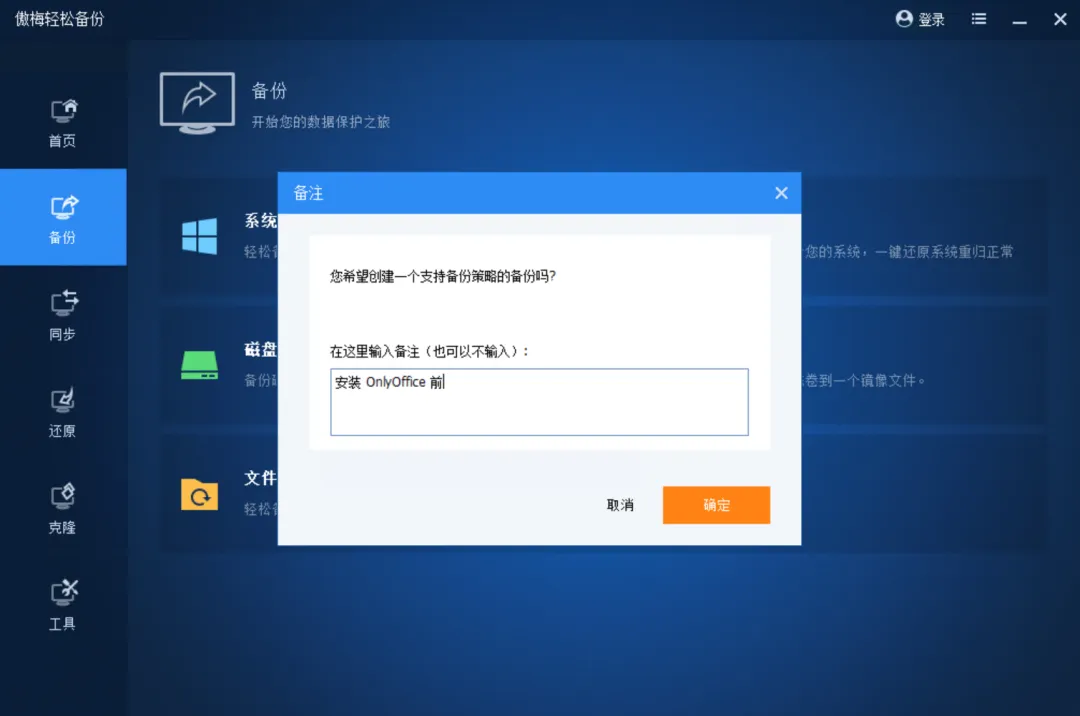
好像不能选安装目录,所以先做个系统备份:
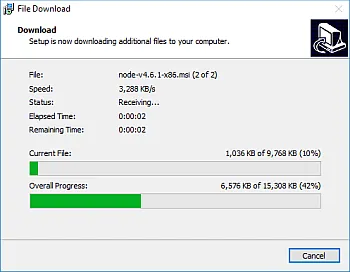
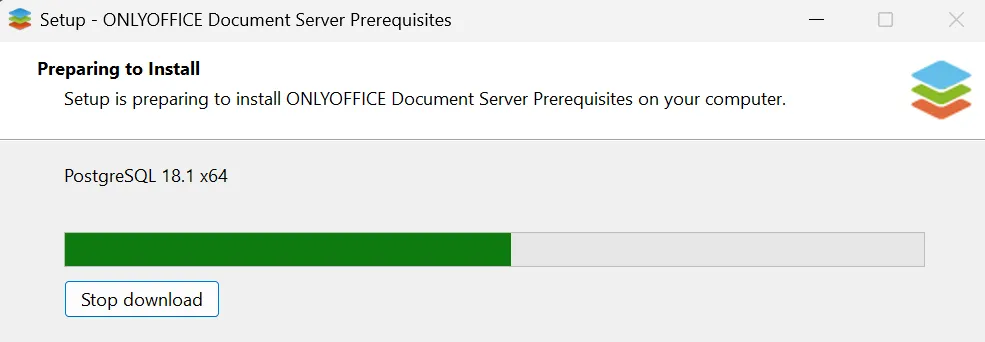
还是会在线下载东西:
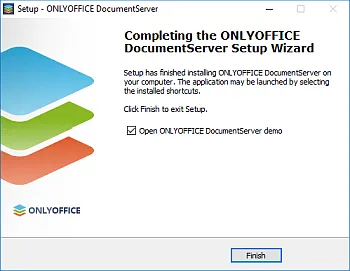
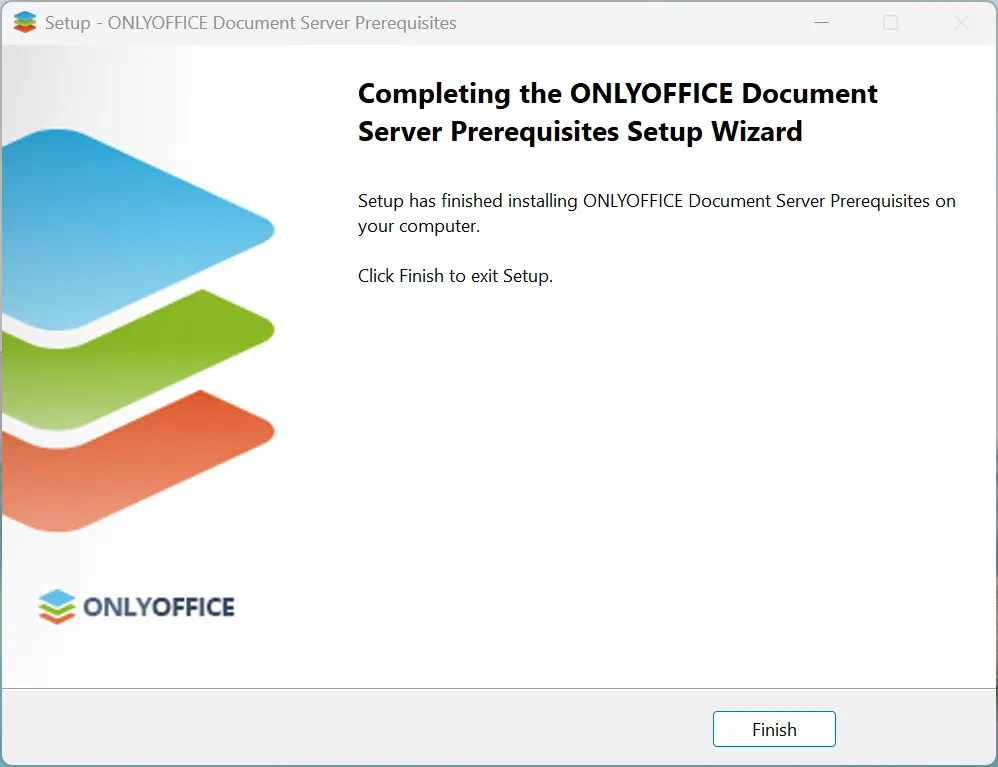
安好了:
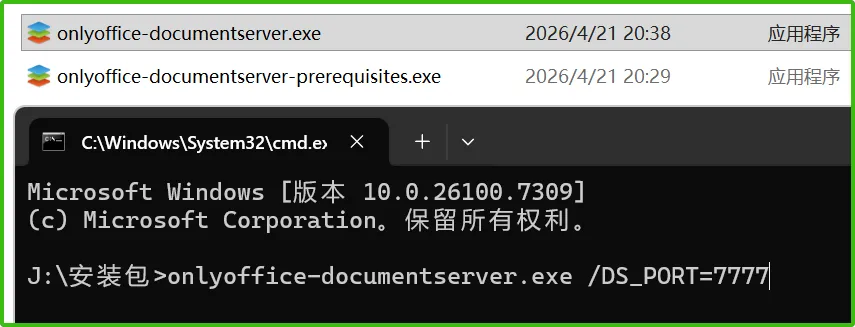
下面开始安装本体(指定端口 7777):
onlyoffice-documentserver.exe /DS_PORT=7777安装到 D 盘:
又有下载需求包,可能不需要了,不过还是勾着吧:
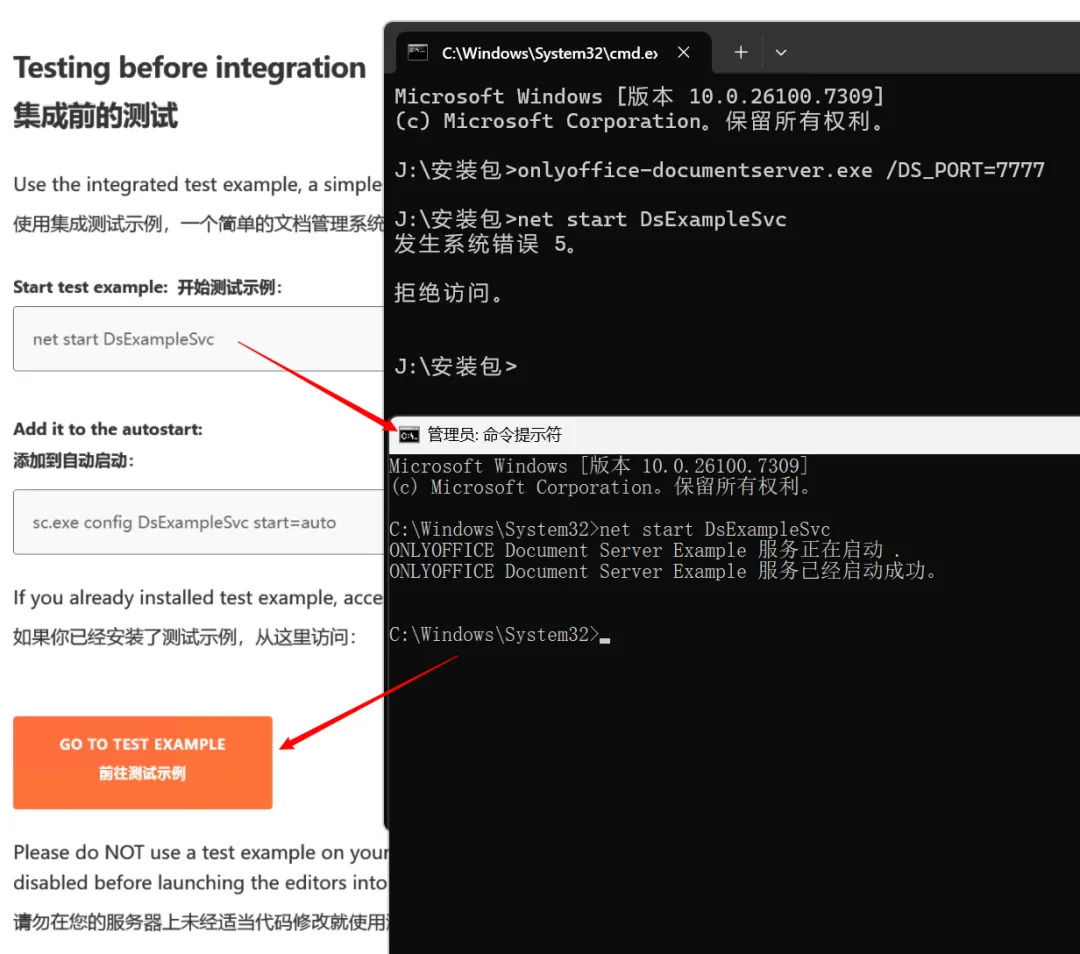
在这卡了好久:
可能有一两个小时之后弹出:
然后就安好了:
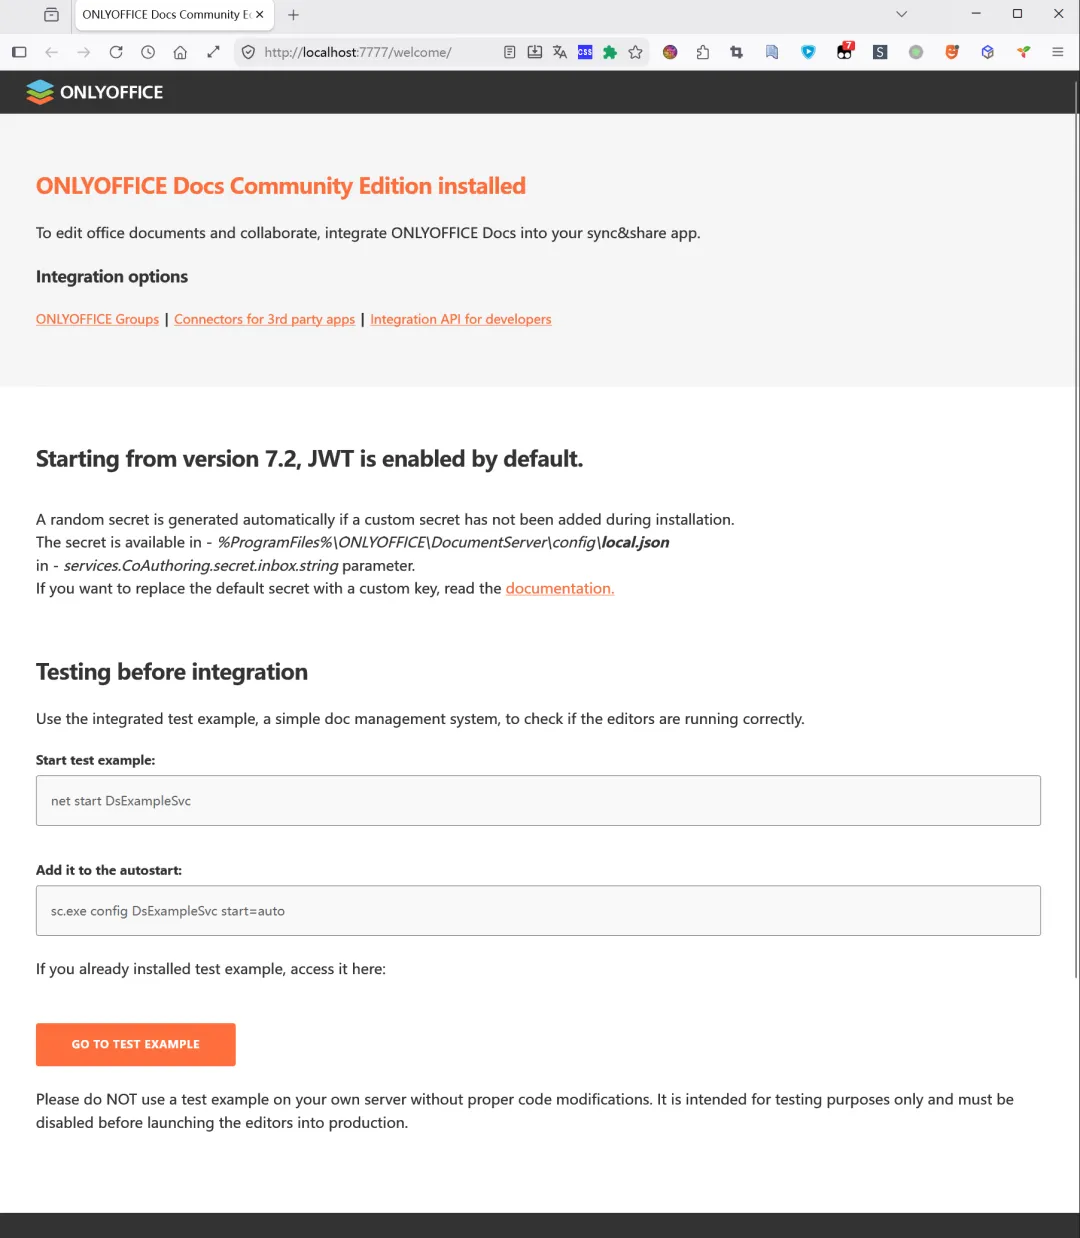
访问网页:
翻译如下:
集成前测试:
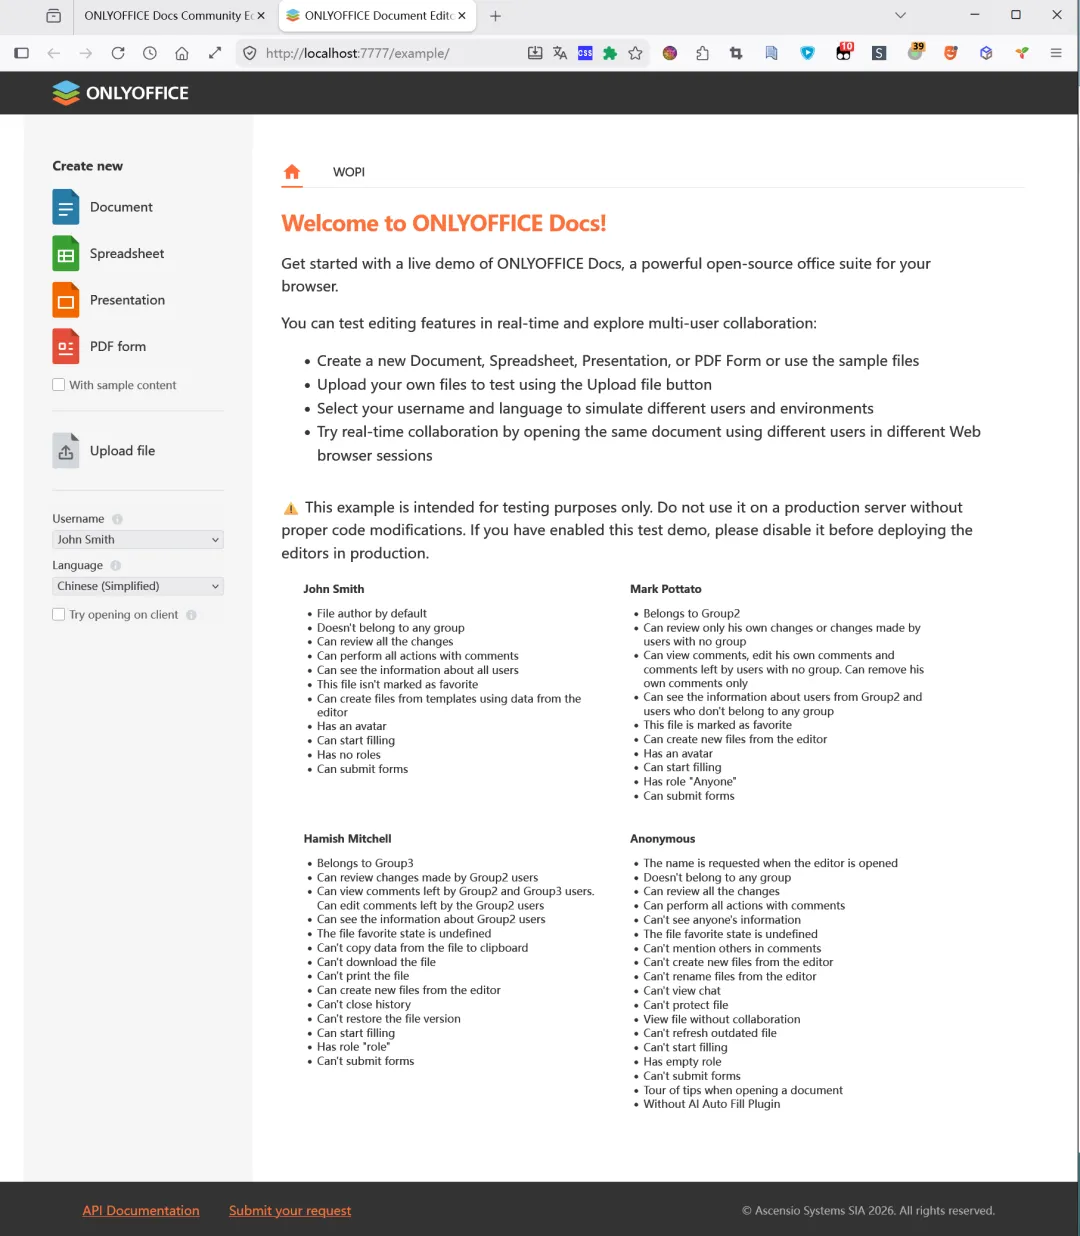
打开的测试页:
文档:
表格:
PPT:
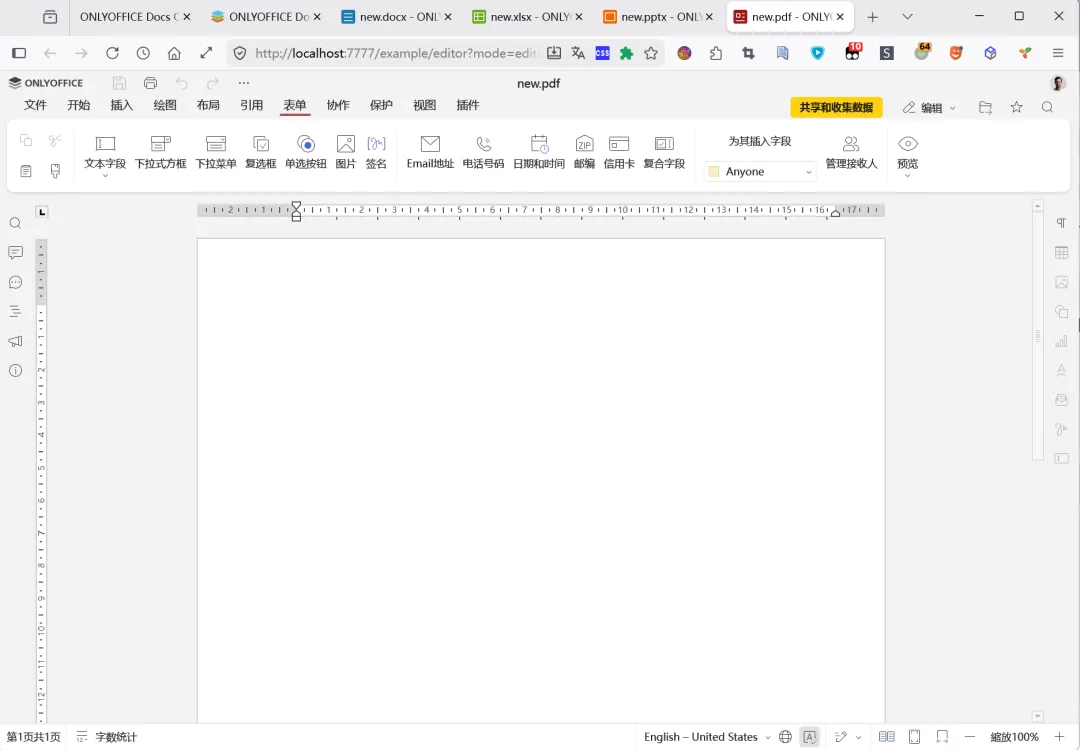
PDF:
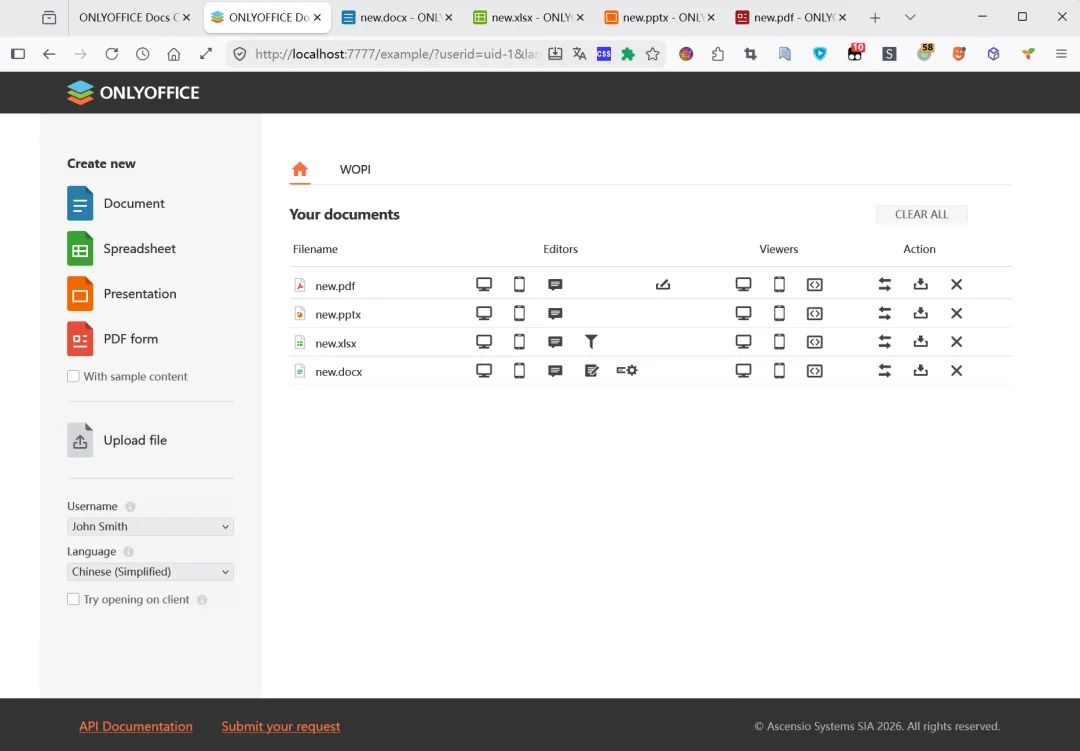
文件列表:
都是可以使用的,不过意思好像是不推荐直接使用这个 Example,需要使用 Connectors 来集成(https://www.onlyoffice.com/all-connectors):
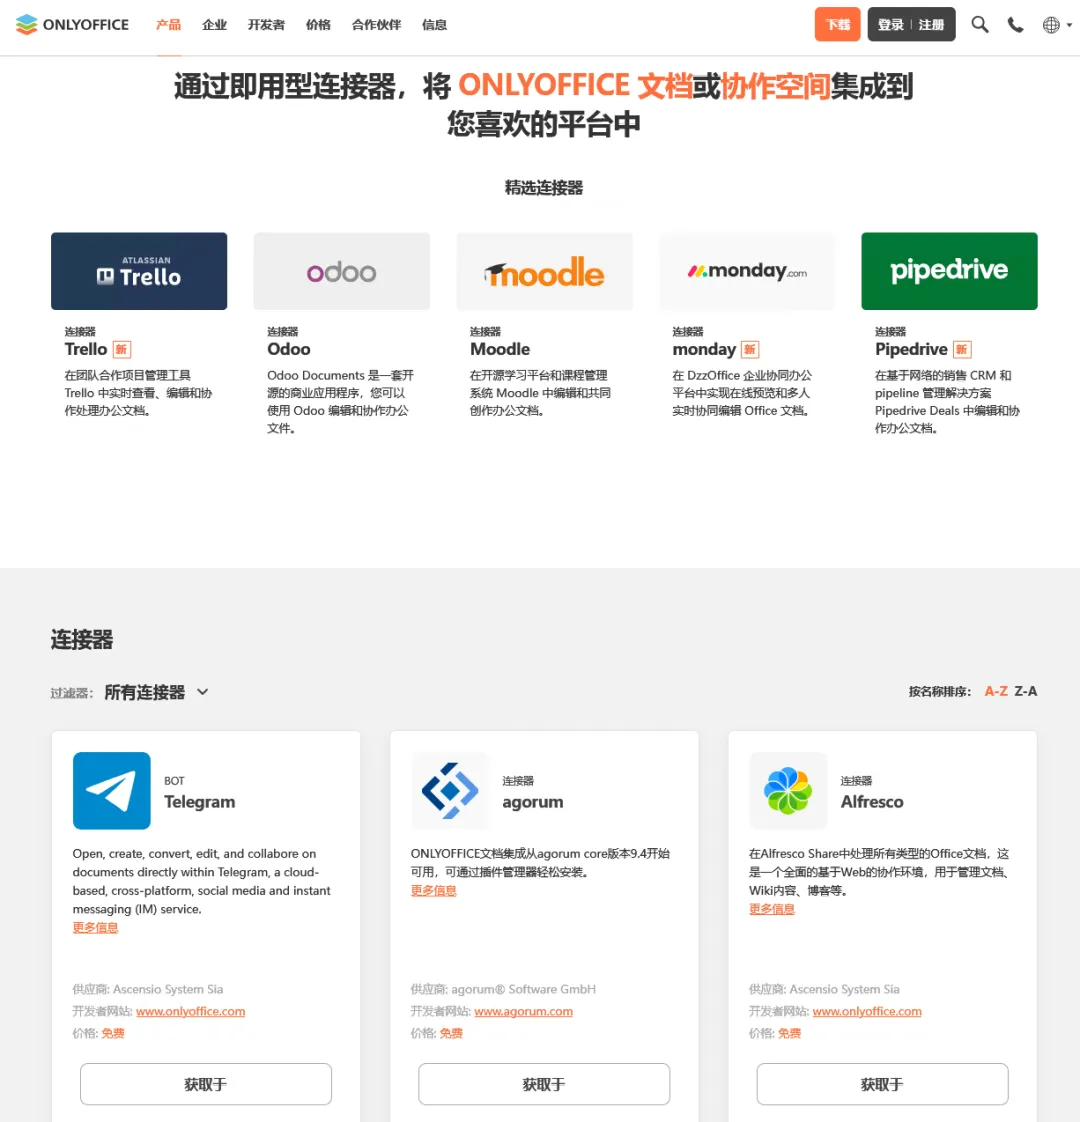
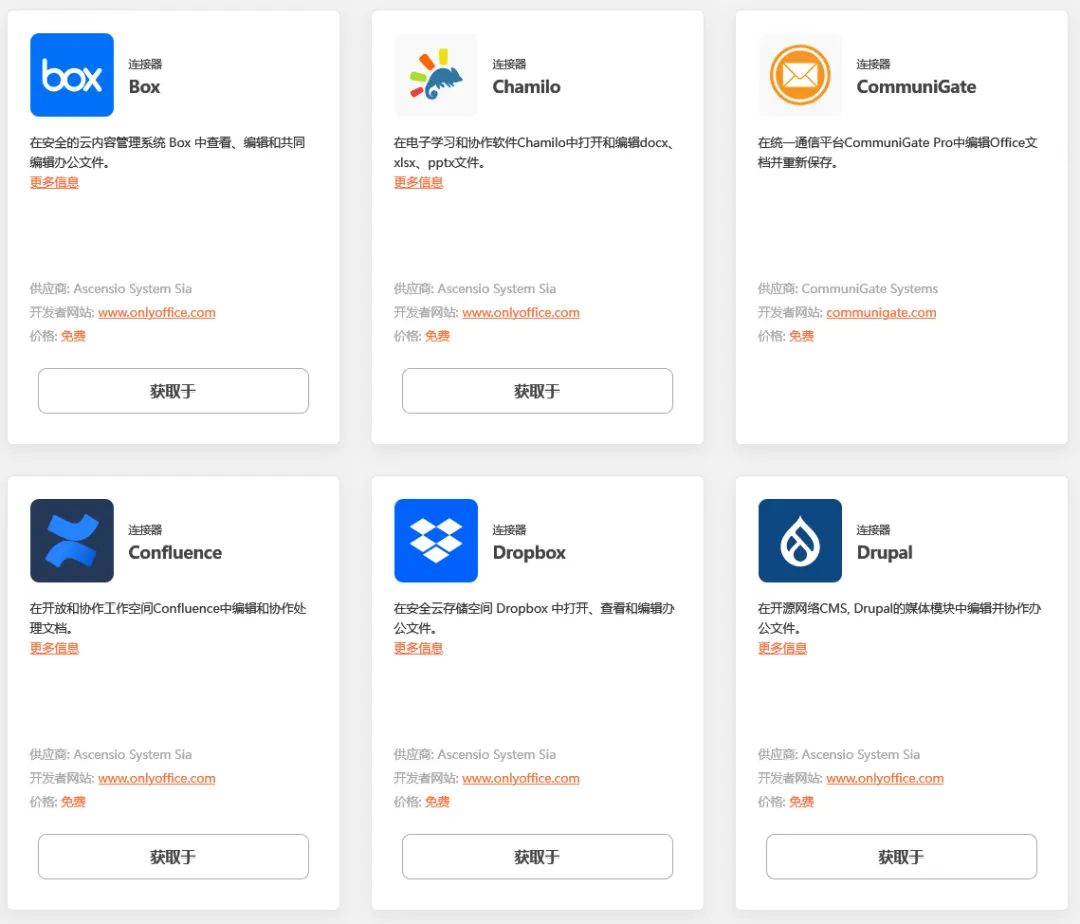
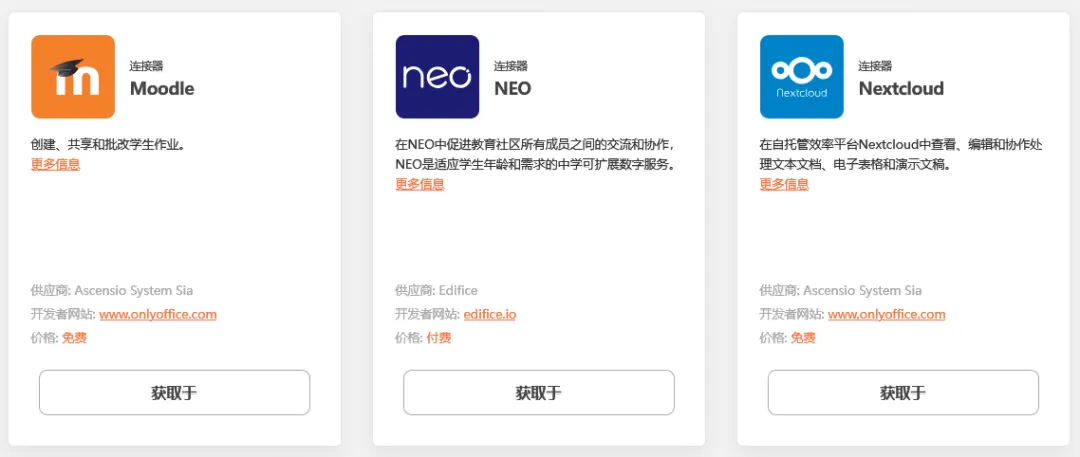
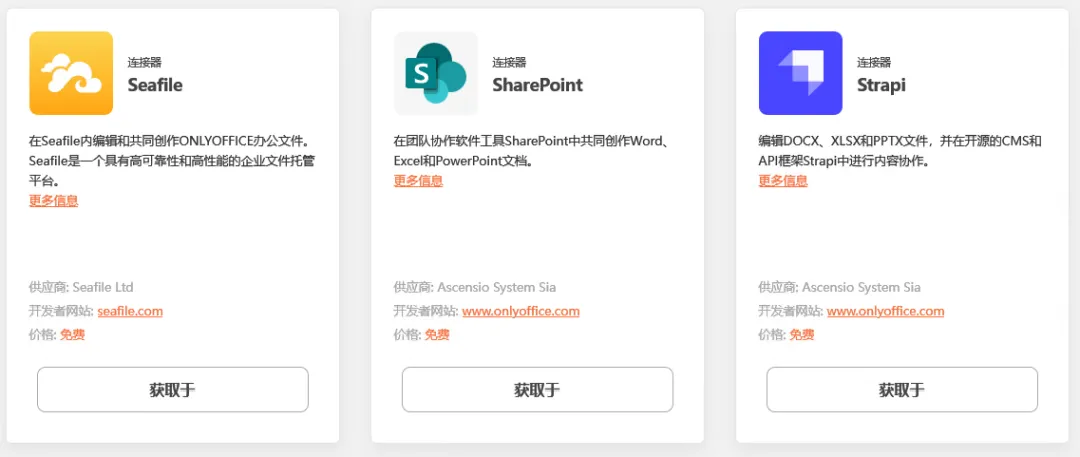
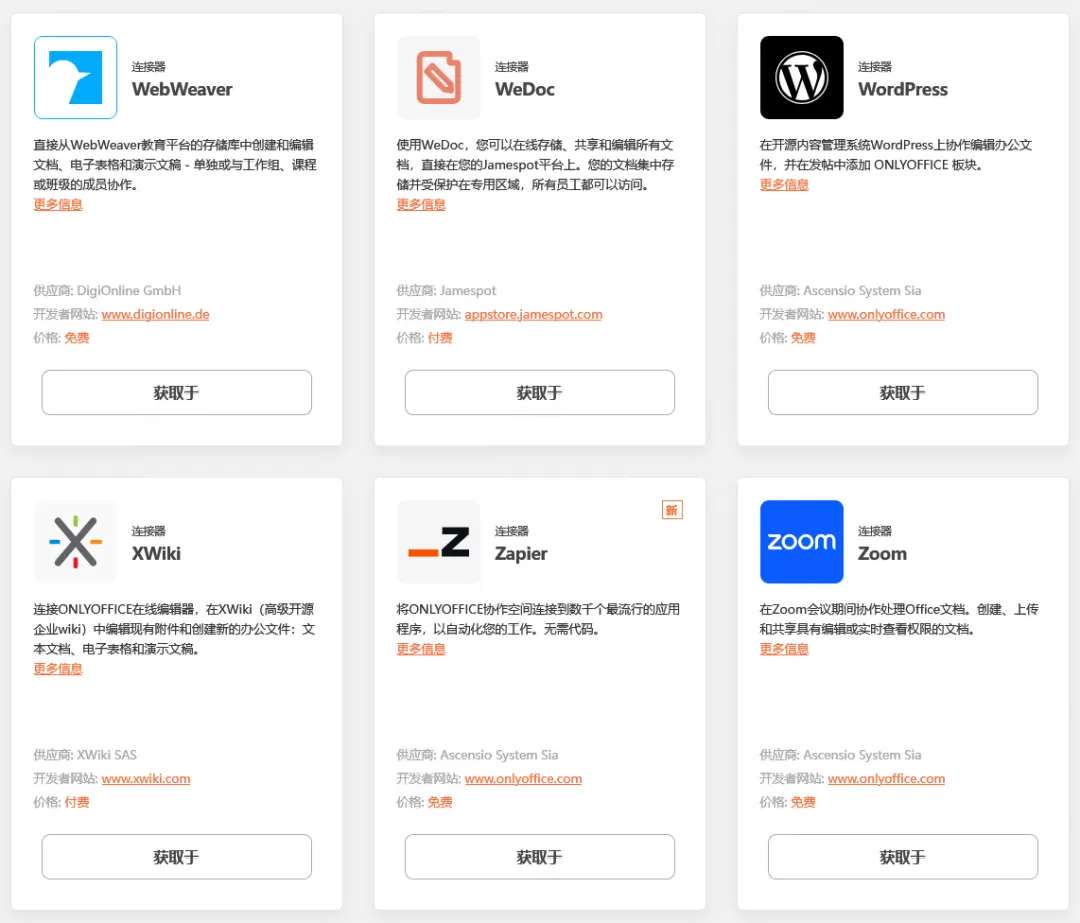
可选择的还是挺多的(挑了一些截图下来):
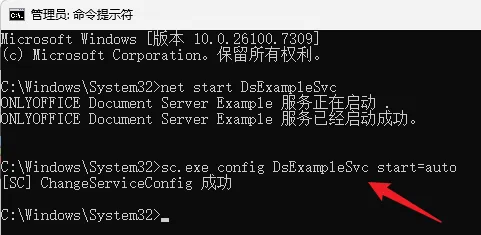
我们这里先不管它,先给它添加为自动启动再说:
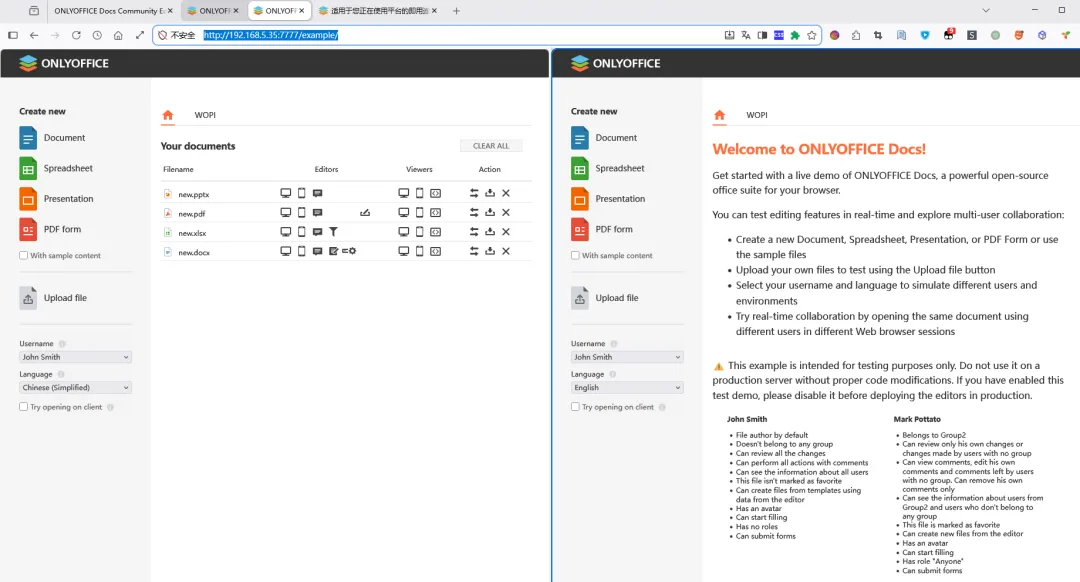
sc.exe config DsExampleSvc start=auto之后可以用 IP 访问(之前是 localhost):
http://192.168.5.35:7777/example/不过 localhost(左)和 IP(右)访问好像是两套,之前新建的文件在 IP 访问下没有了:
还可用 Frp 弄个内网穿透,本地地址写的是 127.0.0.1,最终外网访问走的是和 localhost 一套的数据。不过这个没有密码,最好不要映射到外网。
问了下 AI(ima-DSv3.2):
1.4、OnlyOffice 社区版(Windows 版)安好之后,可以直接使用 Example 而不是 connectors 吗?
是的,ONLYOFFICE 社区版(Windows 版)安装完成后,可以直接使用 Example 进行文档编辑和协作,而无需通过连接器(connectors)集成到其他系统。
1.4.1、关于 Example 的使用说明
访问方式:安装并启动服务后,您可以在浏览器中直接访问
http://localhost/example/来打开 Example 页面。如果您在安装时指定了非默认端口(例如 8080),则访问地址应为http://localhost:8080/example/。核心功能:Example 是一个内置的演示前端,它允许您直接体验 ONLYOFFICE 的核心功能,包括:
- 创建和编辑
文本文档、电子表格和演示文稿。 - 上传本地文件
进行在线编辑。 支持实时协作编辑。 支持查看和编辑 PDF 文件。 与连接器的区别:Example 是 ONLYOFFICE Document Server 自带的一个独立、完整的演示应用。而连接器(如用于 Nextcloud、Confluence、SharePoint 等的官方连接器)的作用是将 ONLYOFFICE 的文档编辑能力集成到现有的第三方平台或系统中。如果您只是想测试或单纯使用 ONLYOFFICE 的功能,而不打算将其嵌入到其他系统里,那么直接使用 Example 是完全足够且最简便的方式。
1.4.2、注意事项
- JWT 令牌设置
:如果您在本地通过 Example 打开文件时遇到错误,可能需要根据您的网络配置调整 JWT(JSON Web Token)设置。例如,在某些本地测试场景下,可能需要将相关配置文件中的 token下的enable值设置为false以关闭令牌验证。但请注意,根据官方文档,本地打开文件通常需要使用令牌。- 服务启动
:确保 ONLYOFFICE 文档服务已成功启动。在 Windows 上,安装完成后通常需要使用管理员权限运行命令 net start DsExampleSvc来启动服务。总结:对于刚安装好 ONLYOFFICE 社区版(Windows)的用户,如果想立即体验其文档编辑与协作功能,直接访问
http://localhost/example/是最快捷、最直接的途径,无需任何额外的连接器配置。1.5、OnlyOffice 社区版(Windows 版)生成的文档储存在哪?
OnlyOffice 社区版(Windows 版)本身并不直接 “储存” 你编辑或生成的文档内容 —— 它的 Example 演示页面主要是让你在线打开、编辑和预览文档,文档的来源通常是你手动上传到它的临时会话或示例文件夹中,并不会像常规文件系统那样永久保存到你的电脑固定路径。
具体来说:
本地文件上传
当你在 Example 页面上传文档(如 Word、Excel、PPT)时,这些文件会被 OnlyOffice Document Server 读取到内存或临时工作目录进行处理和渲染,编辑后的内容如果要保存,需要你手动下载到本地指定位置,否则关闭页面后不会自动保留在服务器。默认存储机制
OnlyOffice 社区版的 Document Server 默认使用/var/www/onlyoffice/Data(Linux 容器路径)或安装目录下的data文件夹作为工作与缓存区,但这些是服务器端临时存储,Windows 版安装包一般会把数据放在安装目录的DocumentServer/data或类似路径,仅供服务运行时使用,不建议当作长期文档存储位置。持久化保存
如果需要让文档长期保存,必须由你在编辑完成后点击下载,把文件存到自己的电脑文件夹、局域网共享盘或挂载的外部存储。社区版不自带用户文档库或数据库管理功能,所以不存在像企业版那样的集中文档库存储概念。与连接器区别
如果使用 Nextcloud、OnlyOffice Workspace 等连接器,文档会储存在对应系统的文件存储里(例如 Nextcloud 的 data 目录),但单纯的 Example 演示页面只是一个前端 UI,不涉及后台文档库,因此文件不会自动留存。总结:
OnlyOffice 社区版(Windows 版)Example 中的文档只存在于临时会话或缓存目录,编辑后需手动下载才能永久保存;它本身不提供长期文档存储功能,所有生成的文档最终位置由你决定并保存在本地或其他外部存储中。1.6、官方的 DocSpace 和 WorkSpace 分别是什么用途?能当做 OnlyOffice Doc 的连接器吗?
ONLYOFFICE DocSpace 和 Workspace 是官方提供的两个核心协作平台,它们都集成了文档编辑能力,但定位和功能侧重点不同。它们本身不是连接器,但都包含并可以作为 ONLYOFFICE Document Server 的连接器使用,将文档编辑功能集成到自身平台中。
1.6.1、 核心定位与用途
ONLYOFFICE DocSpace(协作空间)
- 定位
:一个专注于文档协作与安全共享的轻量化平台。它以 “房间” 为核心概念,旨在为敏捷团队、项目组或需要与外部伙伴协作的场景提供快速、安全的文档处理环境。 - 核心功能
:提供协作房间、公共房间、自定义房间和安全(私密)房间等多种房间类型,用于实时协同编辑、外部共享、模板化流程以及端到端加密的机密文件处理。它强调文档的即时协作、权限精细控制和跨组织安全共享。 ONLYOFFICE Workspace
- 定位
:一个功能全面的企业级团队协作与生产力套件。它面向中大型企业,集成了在线办公、项目管理、客户关系管理(CRM)、邮件、日历、聊天等一体化功能,旨在构建一个完整的数字化工作空间。 - 核心功能
:除了包含 DocSpace 的文档协作能力,还提供了强大的项目管理(如甘特图、任务跟踪)、CRM 系统、邮件聚合与管理、以及论坛、博客等团队协作工具。它更侧重于企业工作流的全周期管理。 简单来说,DocSpace 是专注于 “文档协作” 的工具,而 Workspace 是包含文档协作在内的 “企业办公操作系统”。
1.6.2、 与 ONLYOFFICE Document Server 及连接器的关系
ONLYOFFICE Document Server(Doc)是提供核心文档编辑、预览、协作功能的无界面服务端。它本身无法独立管理文件和用户,必须通过 “连接器” 与一个文档管理系统(DMS)集成才能发挥作用。
DocSpace 和 Workspace 本身就是 “官方 DMS”
DocSpace 和 Workspace 都内置了文件存储、用户管理和权限体系。当您使用它们时,它们就充当了 Document Server 的 “宿主” 或连接器。用户在这些平台内点击文档时,平台会生成参数调用 Document Server 打开编辑器,编辑完成后,Document Server 再通过回调接口将文件保存回平台。因此,它们可以完美地作为 Document Server 的连接器使用。与其他连接器的对比
除了官方的 DocSpace 和 Workspace,还有许多第三方系统可以通过开发连接器与 Document Server 集成,例如 NextCloud、OwnCloud 等开源网盘。这些第三方连接器的成熟度、维护状态和体验各不相同。而 DocSpace 和 Workspace 作为官方原生平台,能确保与 Document Server 的最新功能完全兼容,并提供开箱即用的无缝体验。1.6.3、 选型建议
如果您的需求纯粹是团队内或跨组织的文档创建、实时编辑、安全共享和版本管理,希望快速上手且运维简单,那么 ONLYOFFICE DocSpace 是更轻量、更聚焦的选择。 如果您需要一个功能完备的企业办公套件,不仅需要文档协作,还希望集成项目管理、CRM、企业邮箱、日程管理等,构建统一的数字工作台,那么 ONLYOFFICE Workspace 是更合适的选择。 如果您已经拥有其他文档管理系统(如 NextCloud),并希望在其中嵌入 ONLYOFFICE 的编辑功能,那么您需要为该系统安装和配置对应的第三方连接器。 总结:DocSpace 和 Workspace 是 ONLYOFFICE 官方提供的、集成了 Document Server 的协作平台,它们自身就是 Document Server 的 “终极连接器”。选择哪一个取决于您是需要一个专注的文档协作工具,还是一个全面的企业办公解决方案。
二、安装 NextCloud
2.1、使用 Web installer 方式安装
官网安装页面:https://nextcloud.com/install/#community-projects
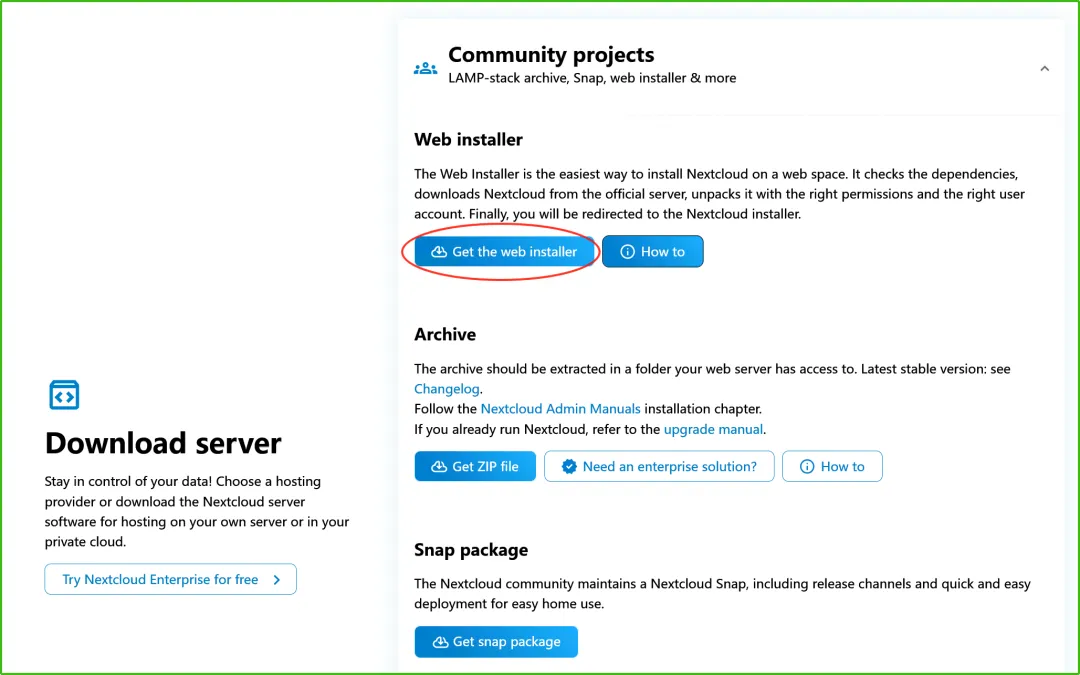
选择 Web installer 方式:
整体方法:
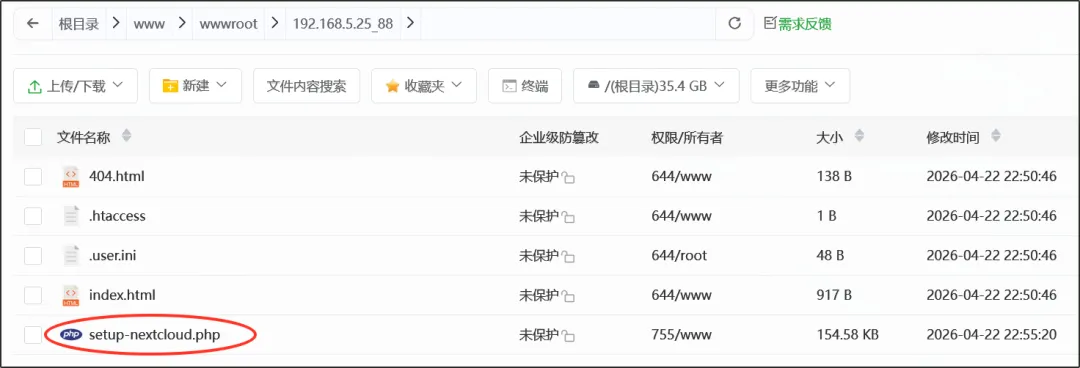
下载 setup-nextcloud.php 文件。
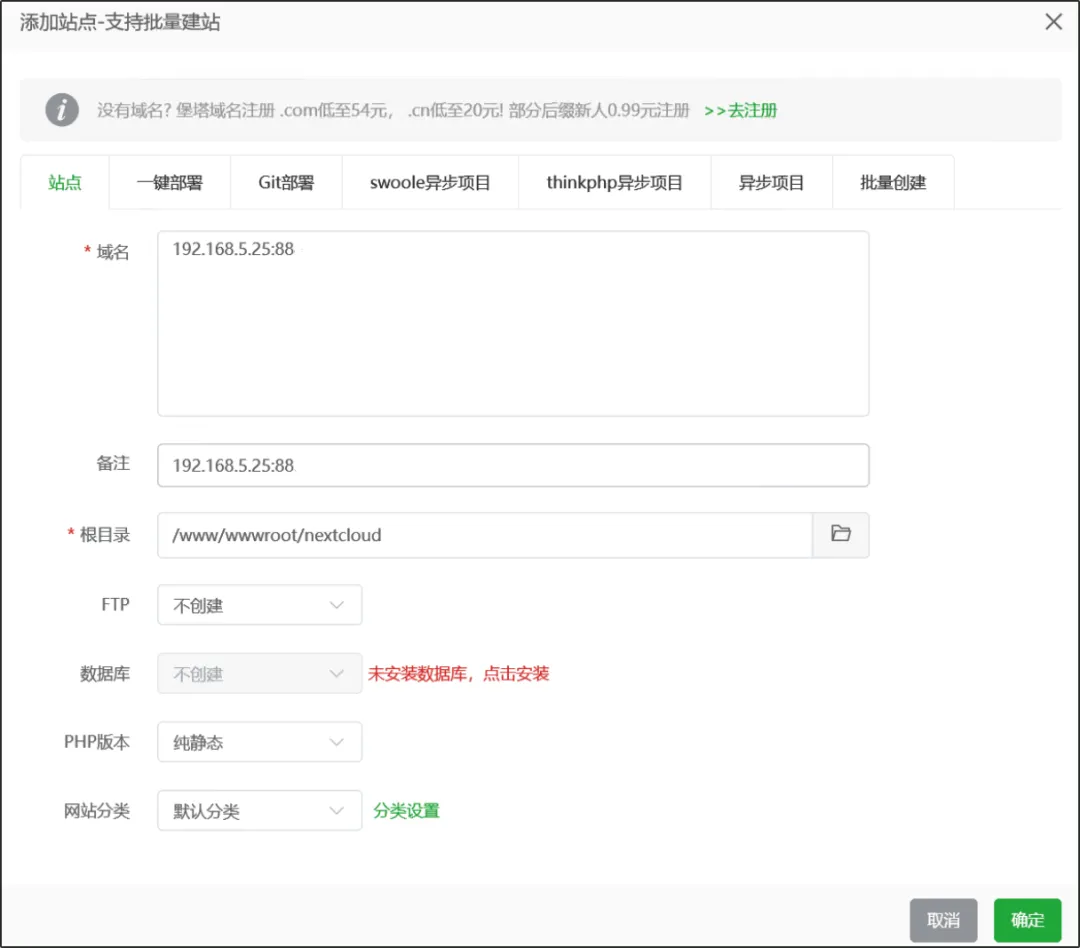
在 Linux 虚拟机(Hyper-V)中的宝塔面板中添加站点:
上传刚才下载的文件到网站文件夹中:
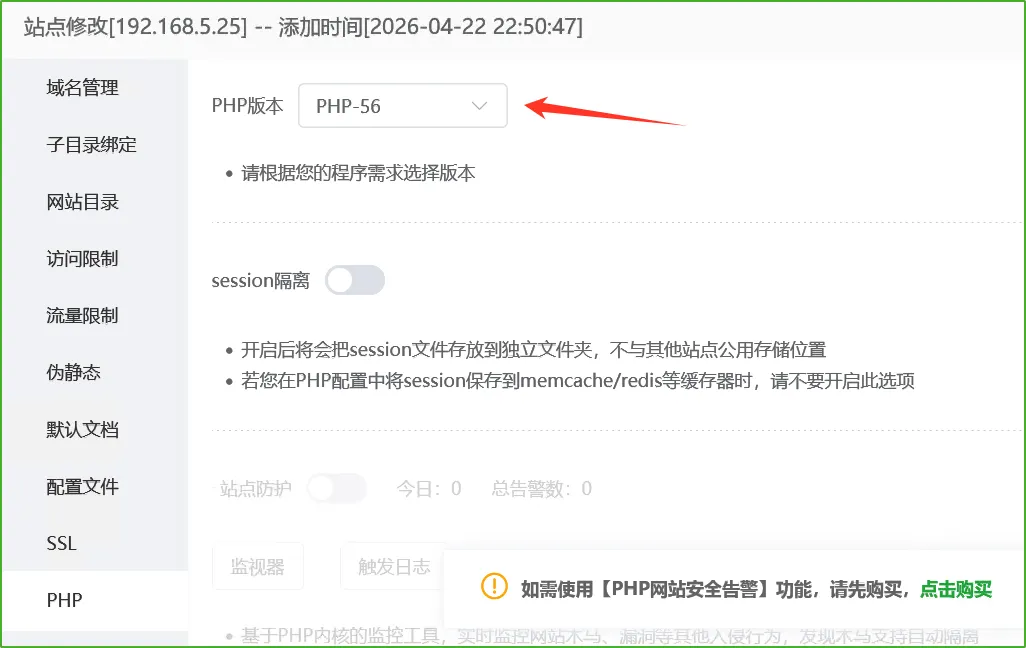
确认已经安装了 PHP 并在网站中指定:
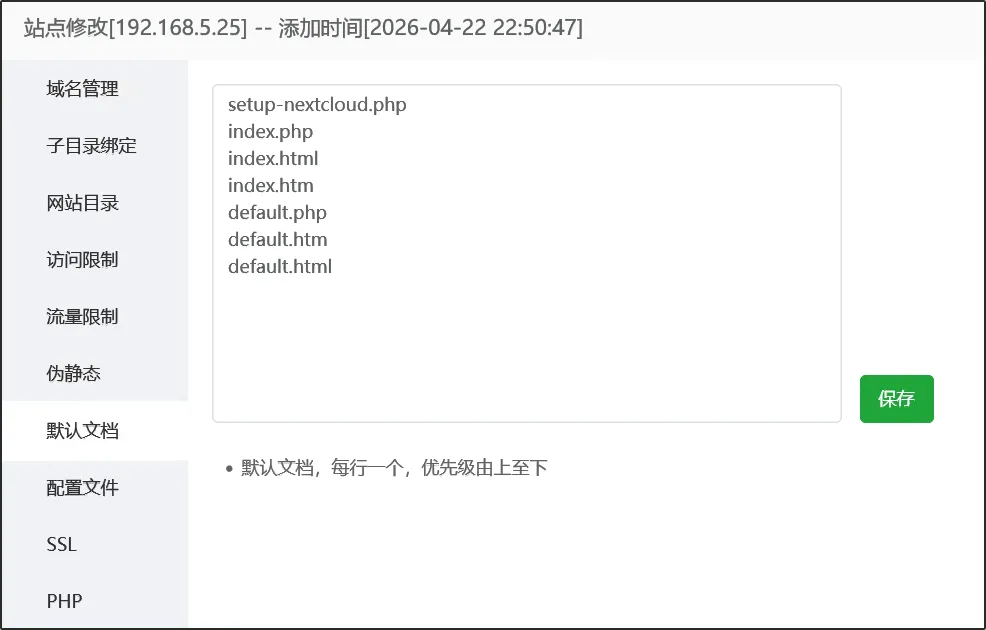
然后如果直接访问 192.168.5.25:88/setup-nextcloud.php 会变成下载,可以更改网站的默认文档:
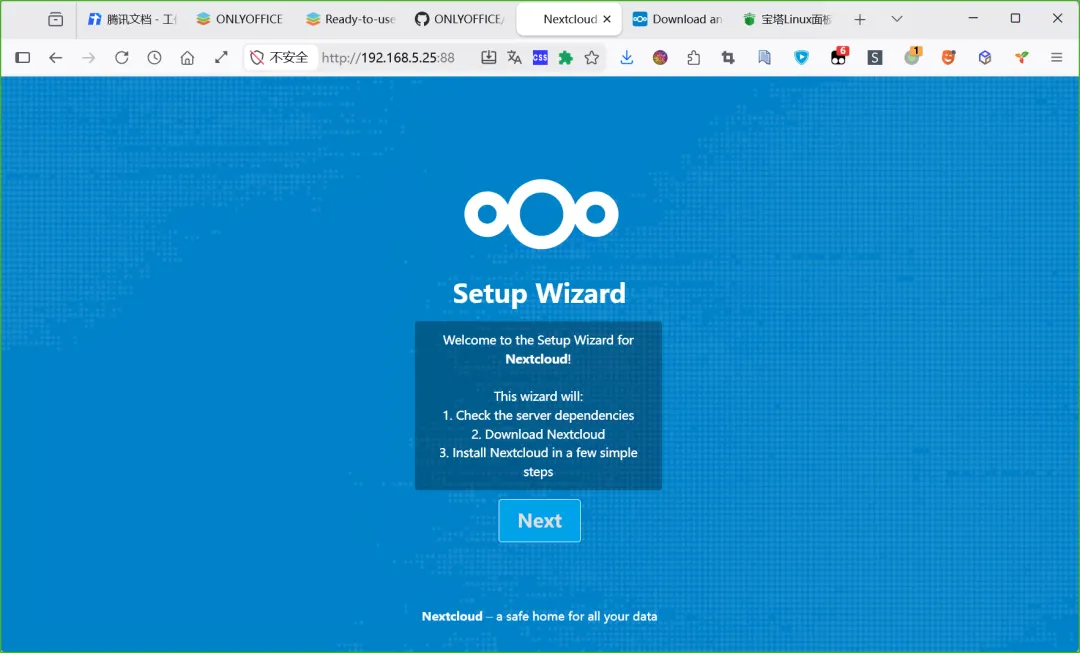
访问后即可开始安装:
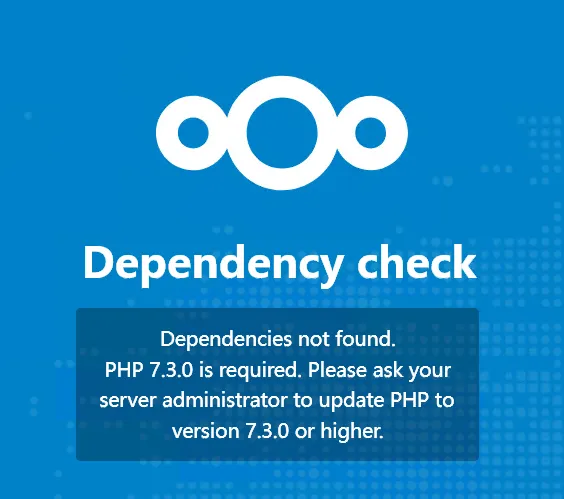
需要 PHP 7.3 以上:
安排:
刷新后进入了下一步:
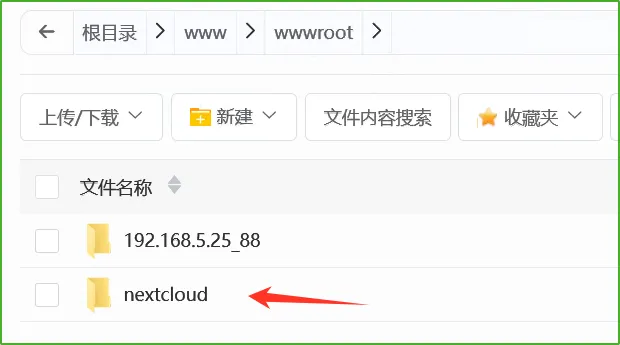
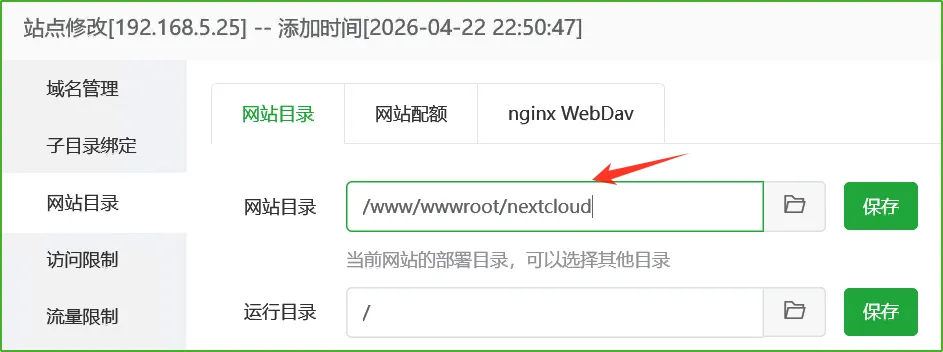
由于之前设置网站目录比较草率,现在先修改一下,先拷贝网站目录为 nextcloud 目录:
然后再网站中切换目录:
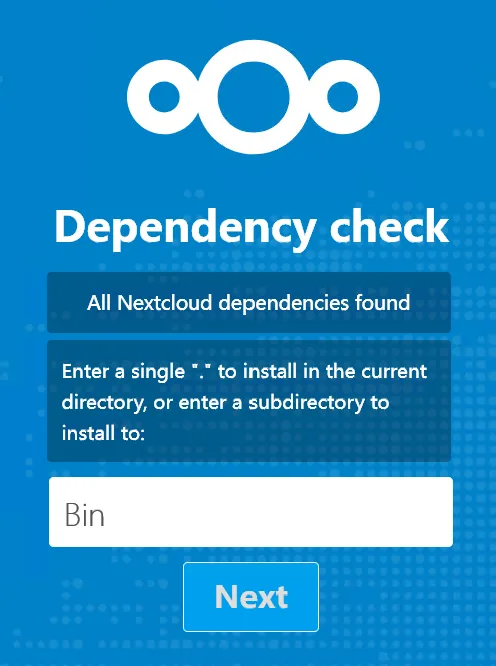
然后继续安装,设置子目录为 Bin:
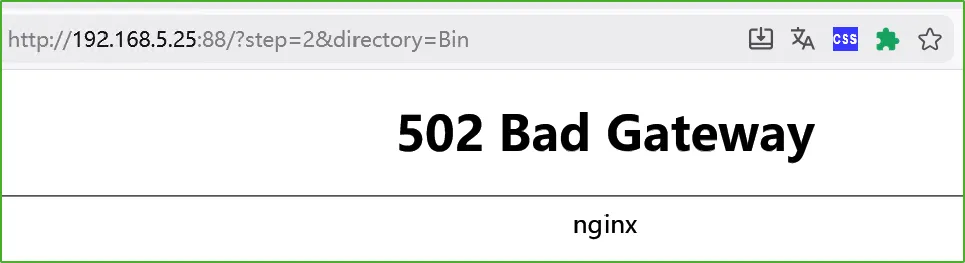
等了一会儿,502 了:
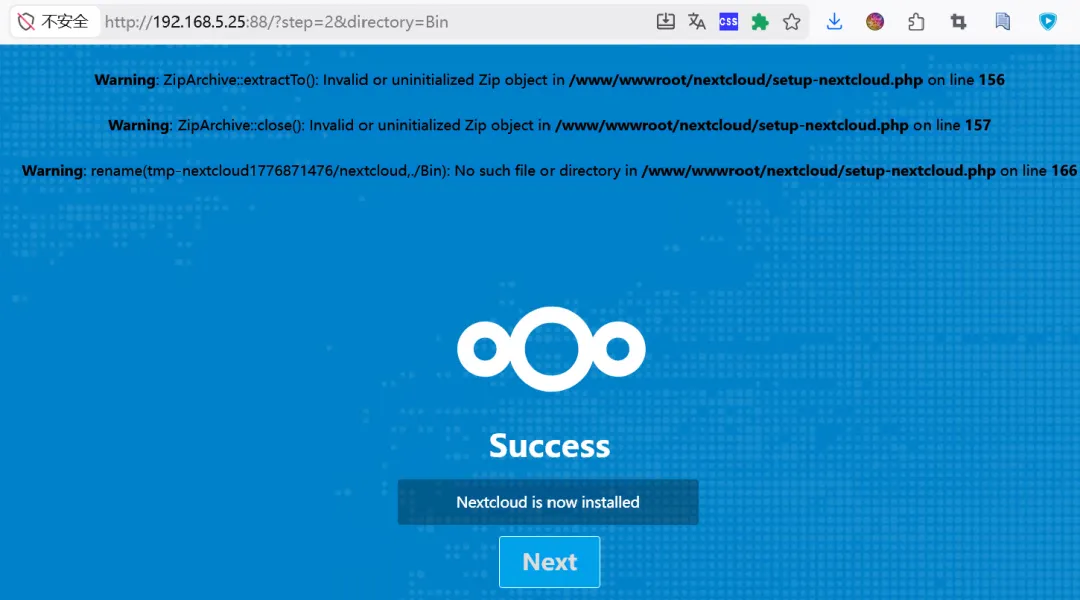
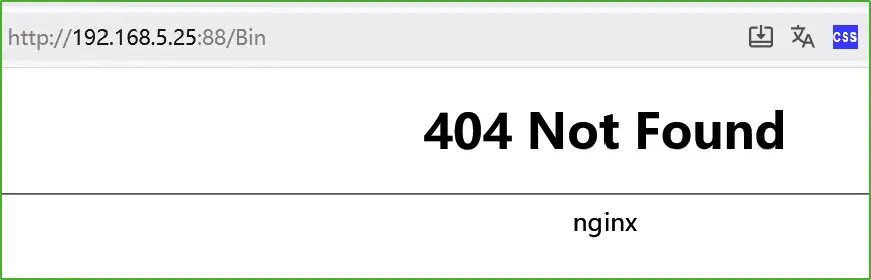
刷新一下,说是安装好了,不过顶部有报错,提到了不存在 Bin 目录:
点击 Next,404 了:
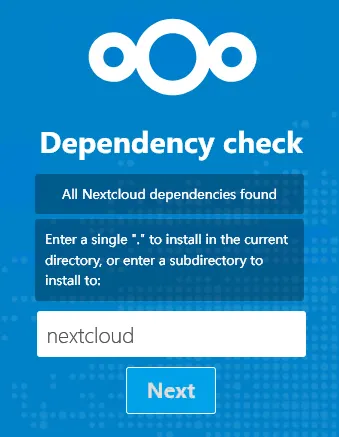
发现安装文件被删除了,重新上传,打算再试一次。
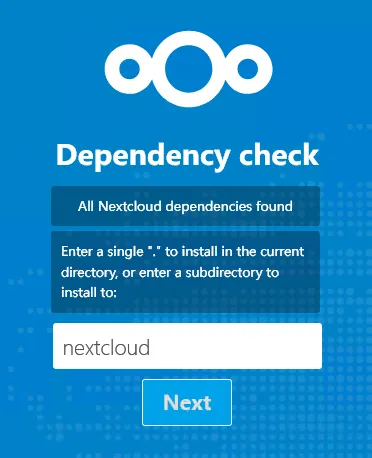
又到这一步时,保持默认:
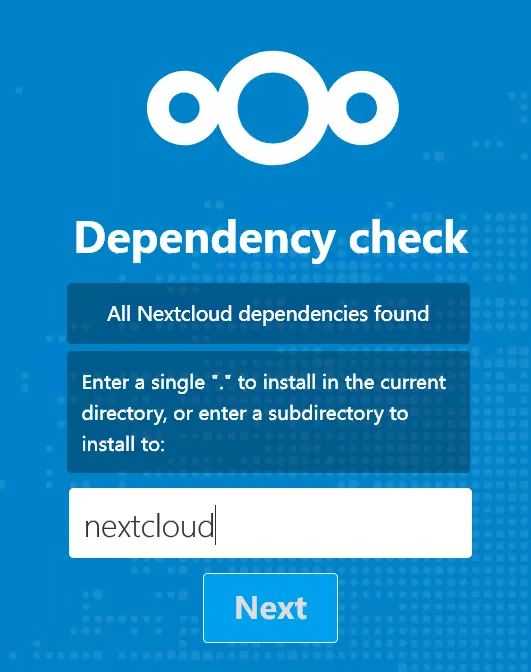
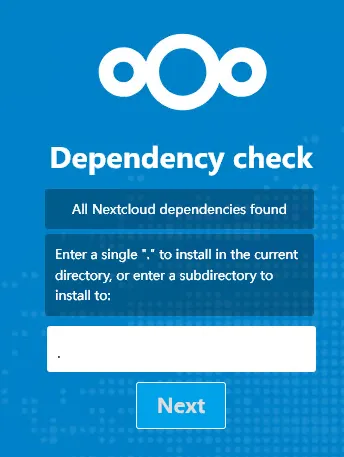
还是老样子。再改为点 (.) 试试:
还是不行。
在网站目录下手动创建目录:
然后再使用同名目录:
还是不行,看来要从报错入手:
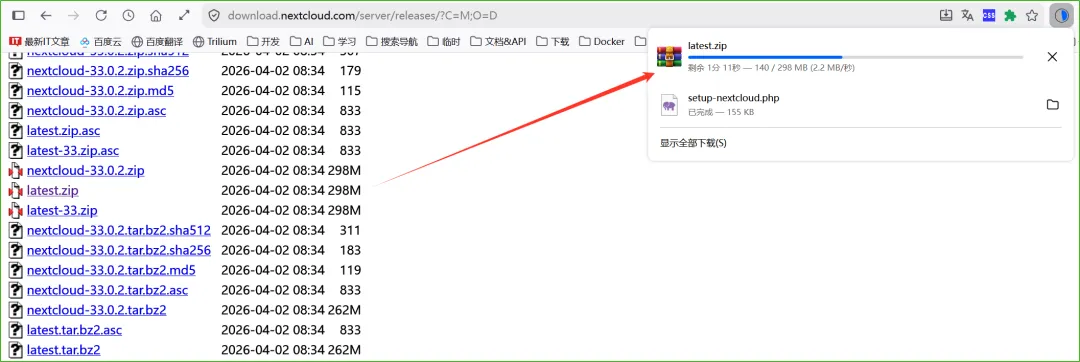
Warning: ZipArchive::extractTo(): Invalid or uninitialized Zip object in /www/wwwroot/nextcloud/setup-nextcloud.php on line 156Warning: ZipArchive::close(): Invalid or uninitialized Zip object in /www/wwwroot/nextcloud/setup-nextcloud.php on line 157Warning: rename(tmp-nextcloud1776925416/nextcloud,./nextcloud): No such file or directory in /www/wwwroot/nextcloud/setup-nextcloud.php on line 166问了下 AI,分析了一下,应该是脚本下载压缩包时不成功,直接找到脚本里的地址:
https://download.nextcloud.com/server/releases/
查看页面,得到以下地址:
排序地址:https://download.nextcloud.com/server/releases/?C=M;O=D
最新 zip 地址:https://download.nextcloud.com/server/releases/latest.zip
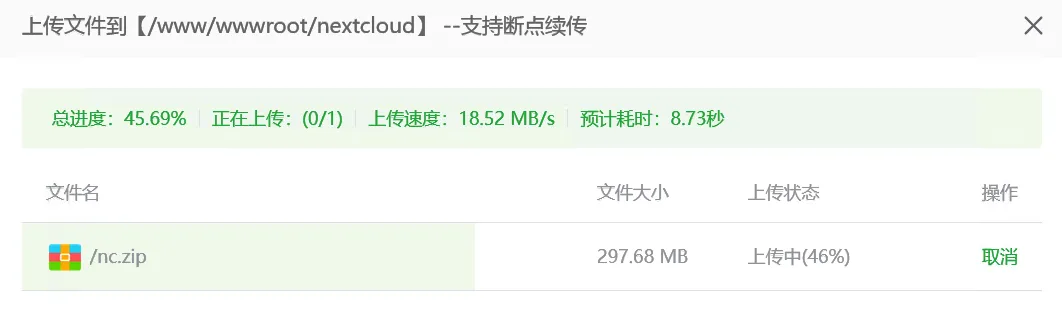
使用宝塔的 url 下载,并命名为 nc.zip:
下不了,还是浏览器下载吧:
改名为 nc.zip 并上传到网站中:
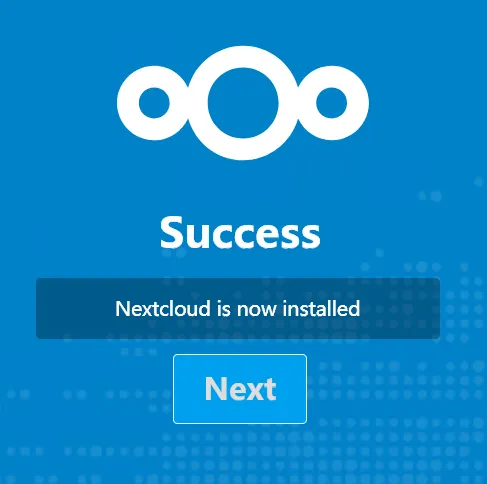
再次执行安装过程(访问网址),这次是无错误安装完成了:
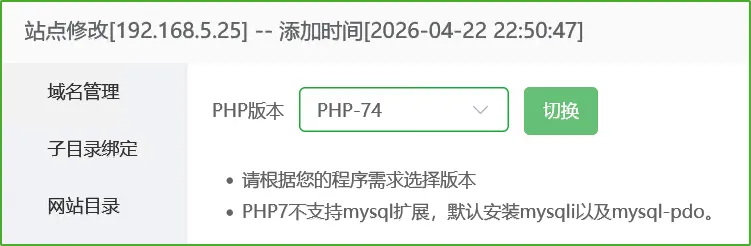
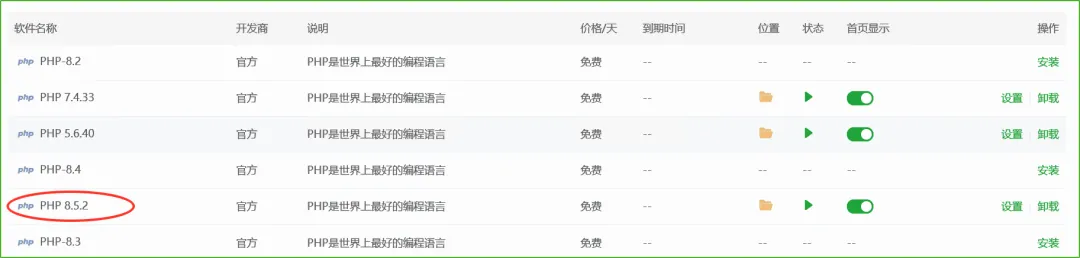
Next 之后,提示需要 PHP 8.2:
这个好办,直接给它安排上 8.5.2:
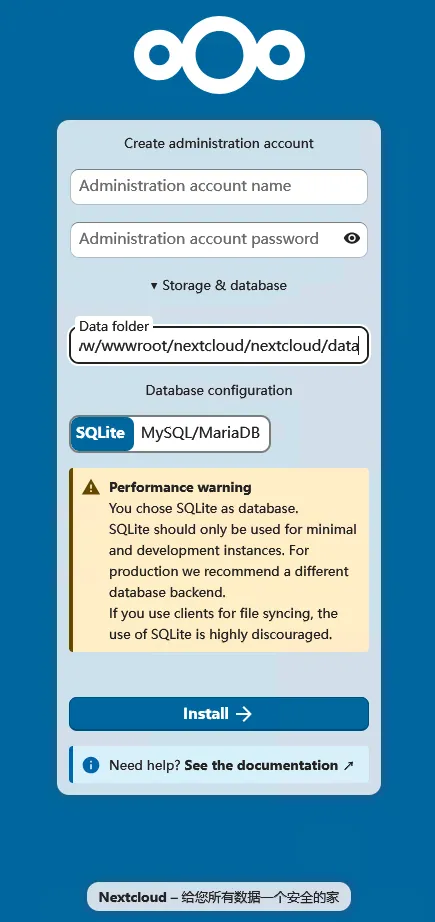
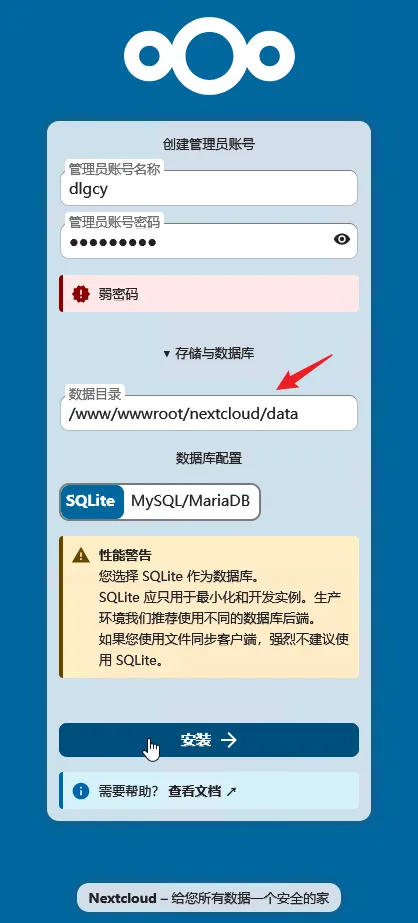
切换网站的 PHP 版本后,刷新网页,出现设置管理员账号、数据文件夹、数据库 的界面,并提示 SQLite 可能会有性能问题:
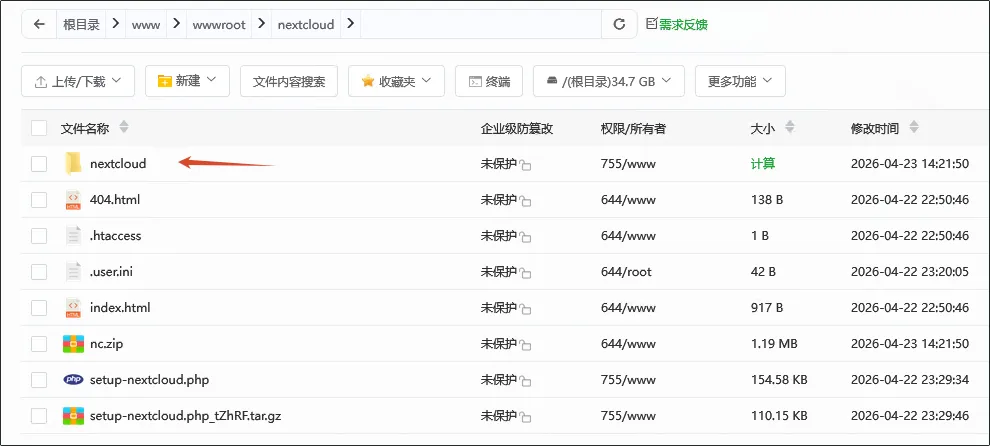
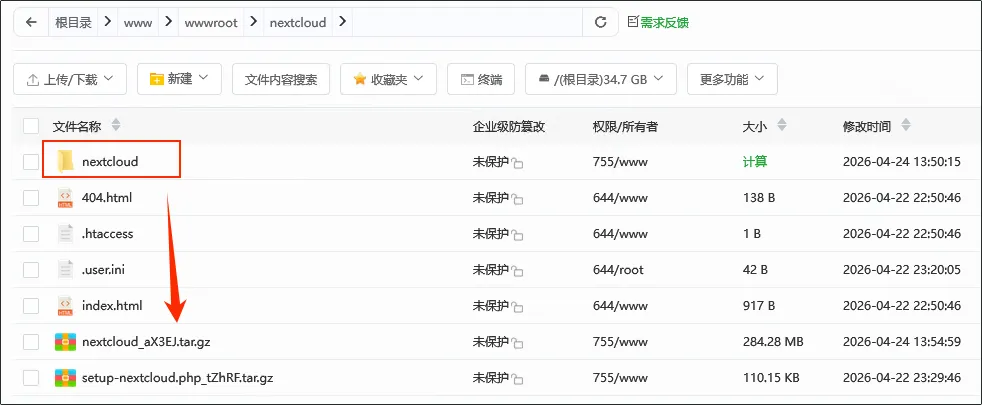
此时先暂停一下,压缩安装好的 nextcloud 目录:
并下载下来,和 nc.zip、安装脚本 一起打包,留待以后不时之需(v33):
设置了一个用户名、密码,更改了数据目录,数据库保持默认 SQLite,点击安装:
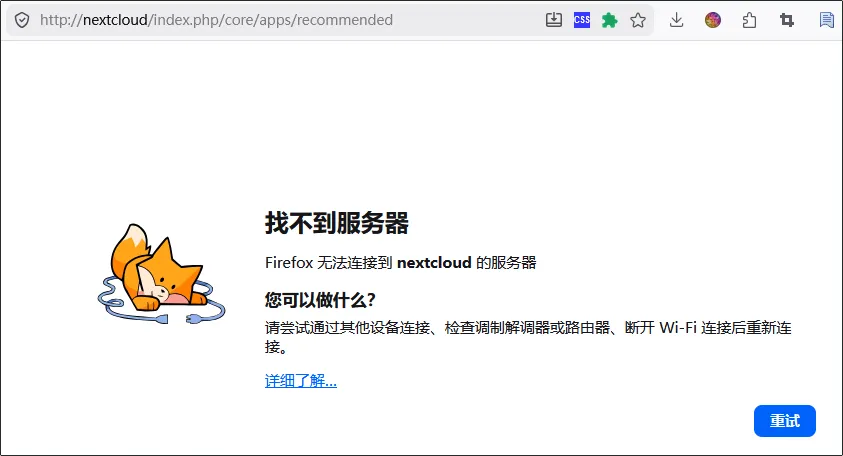
提示找不到服务器了:
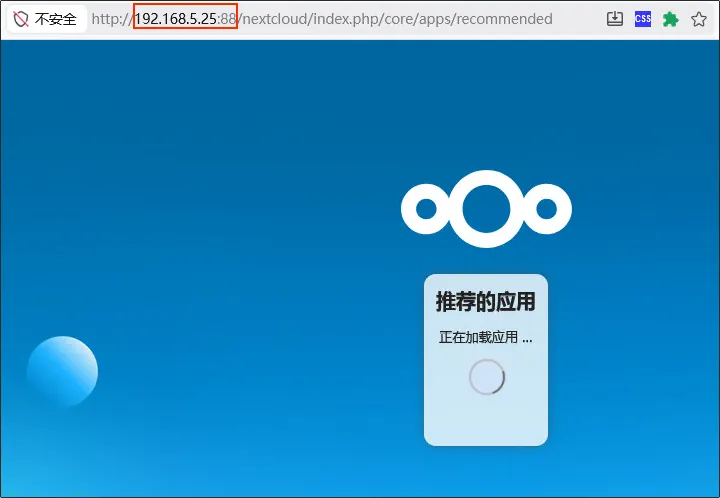
修正地址后可以了:
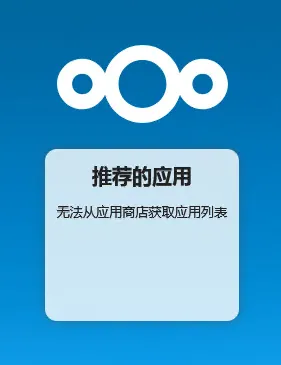
提示无法获取,应该是网络环境问题:
使用宝塔面板自带的 AI 服务询问设置代理的方法:
2.2、题外话:在 PHP-FPM 配置中设置环境变量 要如何做?
2.2.1、配置示例(供参考)
假设您的代理是
http://192.168.1.100:7890,配置如下:方式 1:修改现有池配置(影响所有使用该池的网站)
在
/www/server/php/85/etc/php-fpm.conf的[www]部分添加:[www]; ... 现有配置 ...; 添加代理环境变量env[HTTP_PROXY] = http://192.168.1.100:7890env[HTTPS_PROXY] = http://192.168.1.100:7890env[NO_PROXY] = 127.0.0.1,localhost,192.168.0.0/16方式 2:创建独立的池配置(只为 NextCloud 设置代理)
创建新文件
/www/server/php/85/etc/php-fpm.d/nextcloud.conf:


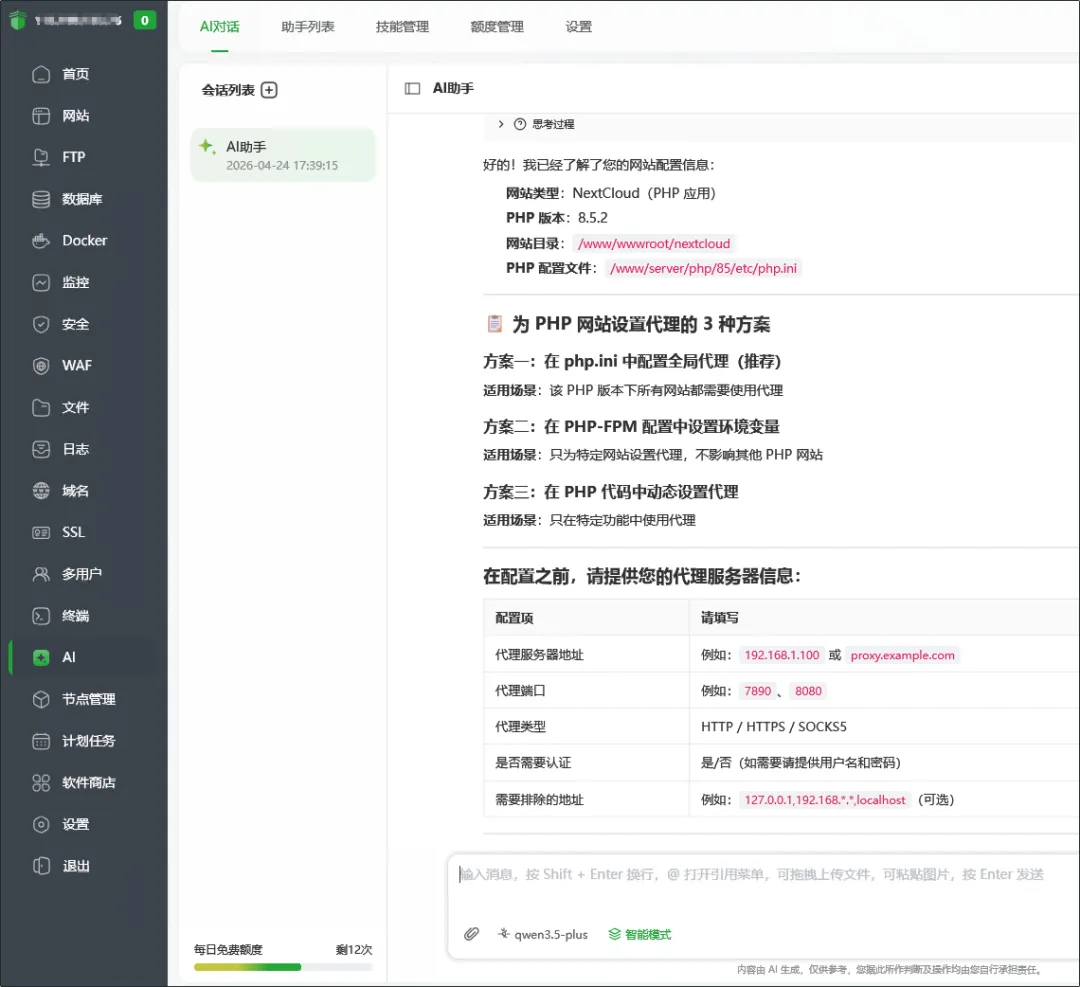
[nextcloud]; 基础配置user = wwwgroup = wwwlisten = 127.0.0.1:9001listen.allowed_clients = 127.0.0.1; 进程管理pm = dynamicpm.max_children = 50pm.start_servers = 5pm.min_spare_servers = 5pm.max_spare_servers = 20; 代理环境变量env[HTTP_PROXY] = http://192.168.1.100:7890env[HTTPS_PROXY] = http://192.168.1.100:7890env[NO_PROXY] = 127.0.0.1,localhost; 网站目录chdir = /www/wwwroot/nextcloud/nextcloud
然后在 Nginx 配置中指定使用该 PHP-FPM 池。
2.2.2、操作步骤(获得授权后执行)
- 备份原配置文件
- 修改或创建 PHP-FPM 配置文件
- 修改 Nginx 配置(如果创建新池)
- 重启 PHP-FPM 服务
- 验证配置是否生效
2.3、跳过获取推荐的应用,继续
还是不行,直接访问 index.php,显示如下:
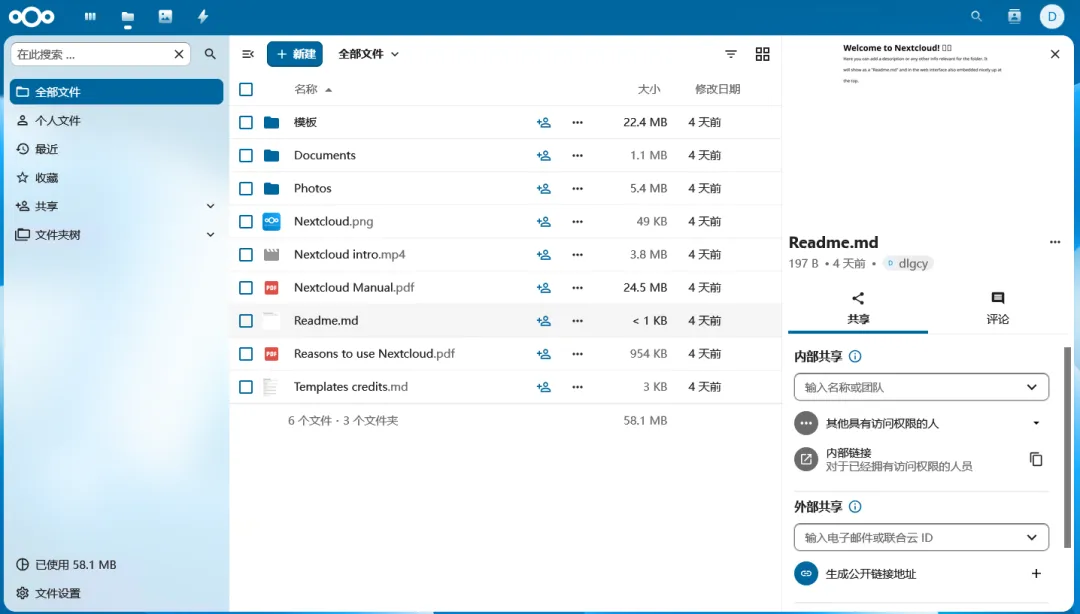
文件列表是这样的:
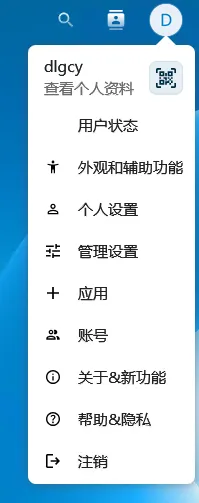
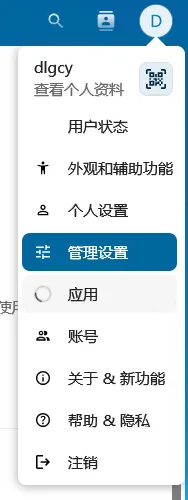
用户头像菜单:
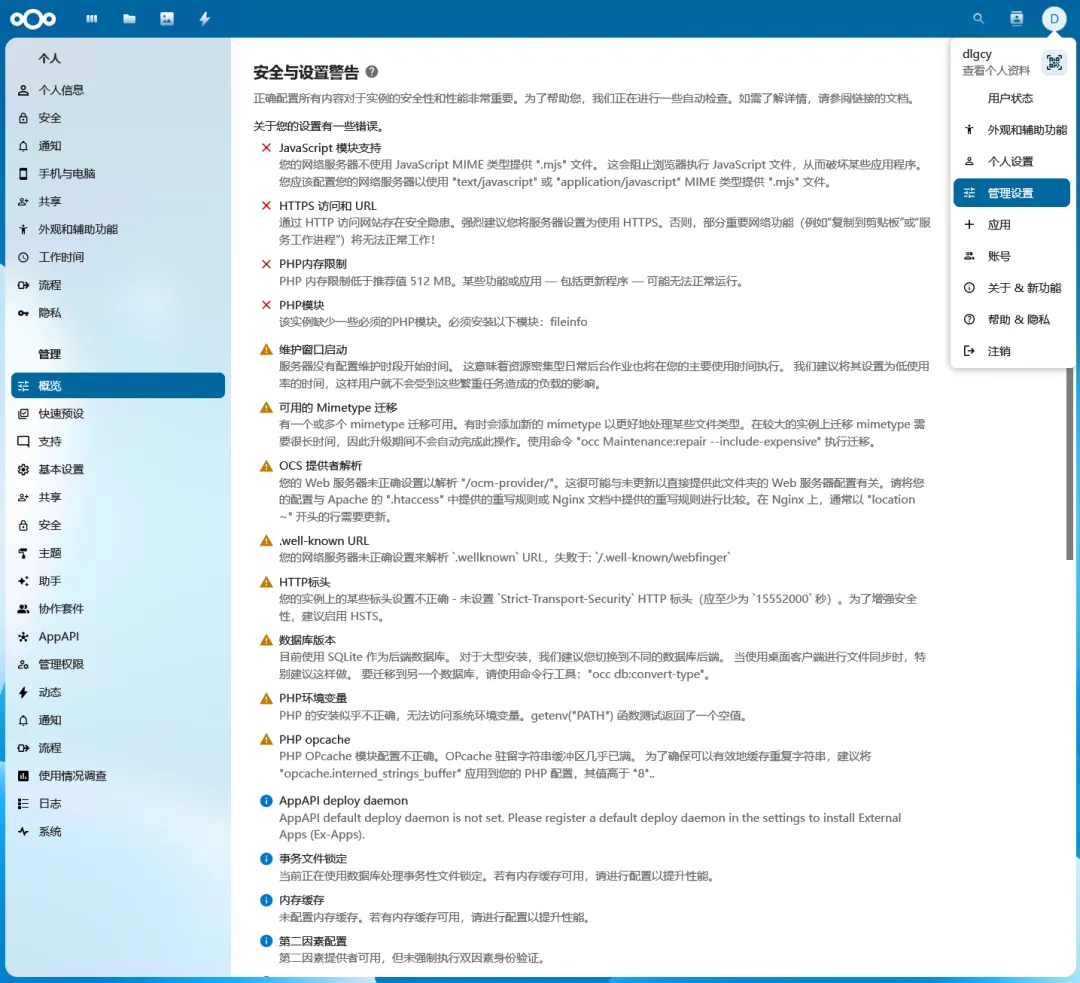
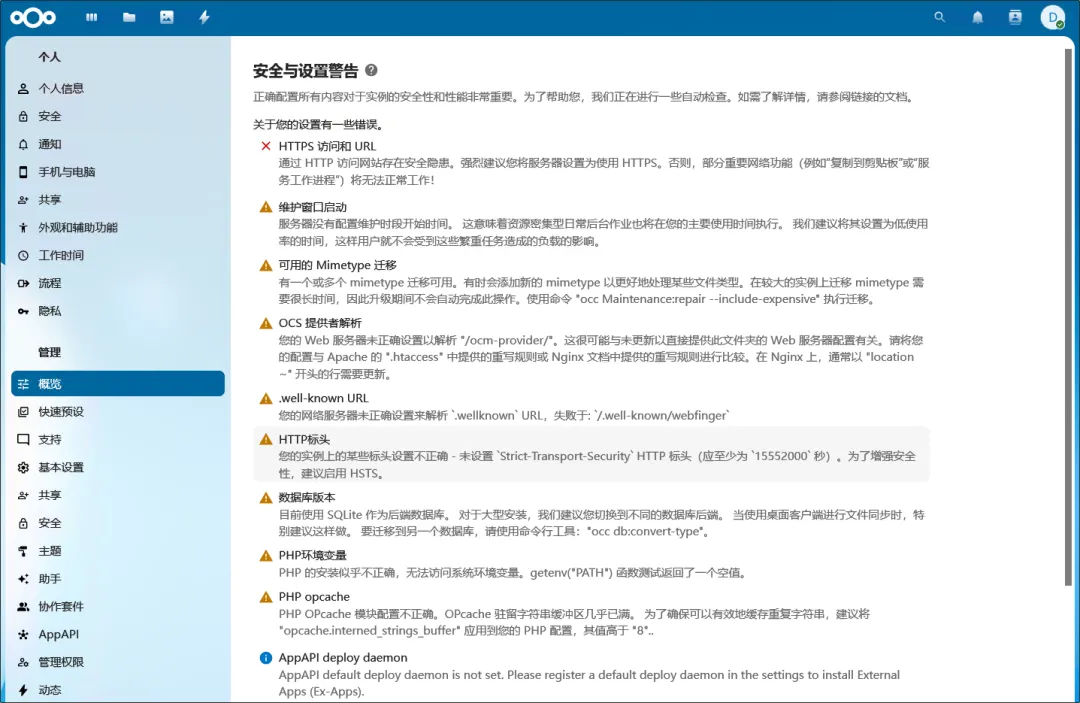
管理设置 -- 概览 中有一些警告:
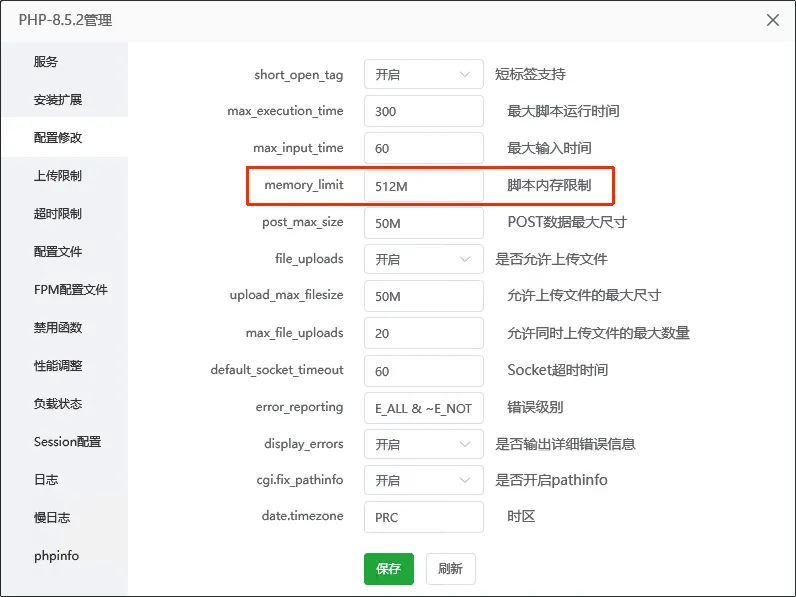
修改 PHP 内存限制:
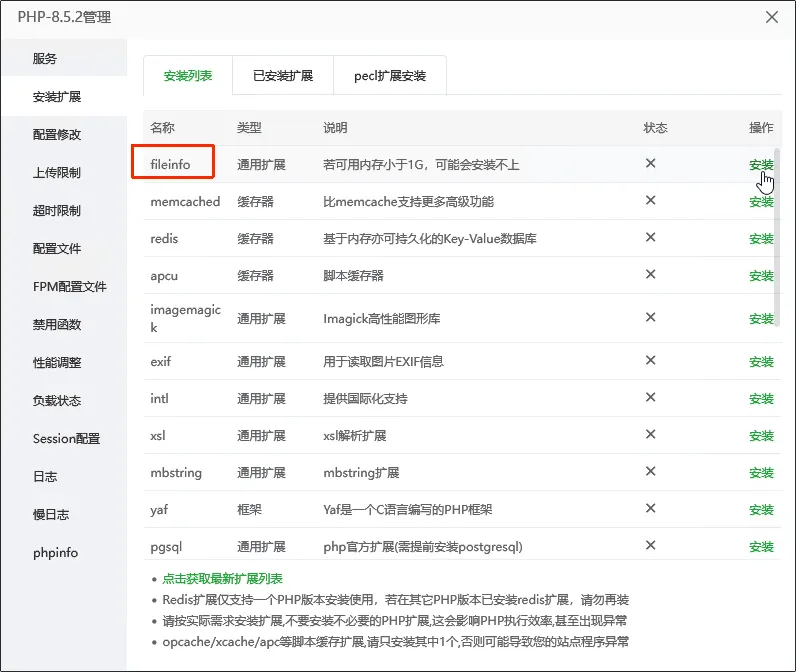
PHP 安装 fileinfo 扩展:
应用页面还是打不开:
修改 JavaScript 模块支持 错误
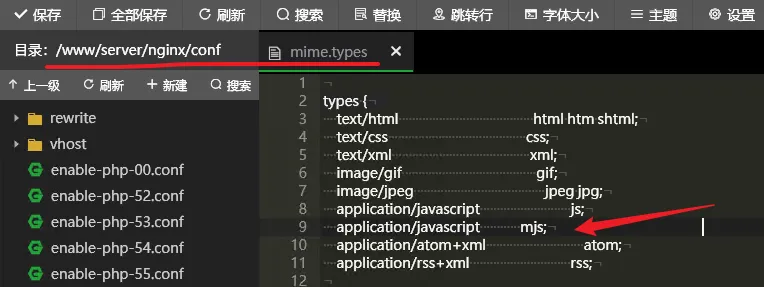
JavaScript 模块支持 您的网络服务器不使用 JavaScript MIME 类型提供 ".mjs" 文件。 这会阻止浏览器执行 JavaScript 文件,从而破坏某些应用程序。 您应该配置您的网络服务器以使用 "text/javascript" 或 "application/javascript" MIME 类型提供 ".mjs" 文件。
在 /www/server/ngnix/conf/mime.types 中新增一行:
application/javascript mjs;突然 502 了,问了下 AI,是之前设置代理导致的:
恢复之后刷新,出现如下界面:
管理设置中的概览中只有一个 HTTPS 的错误了(其它是警告):
应用页面还是打不开(502)。
2.4、打开应用页面
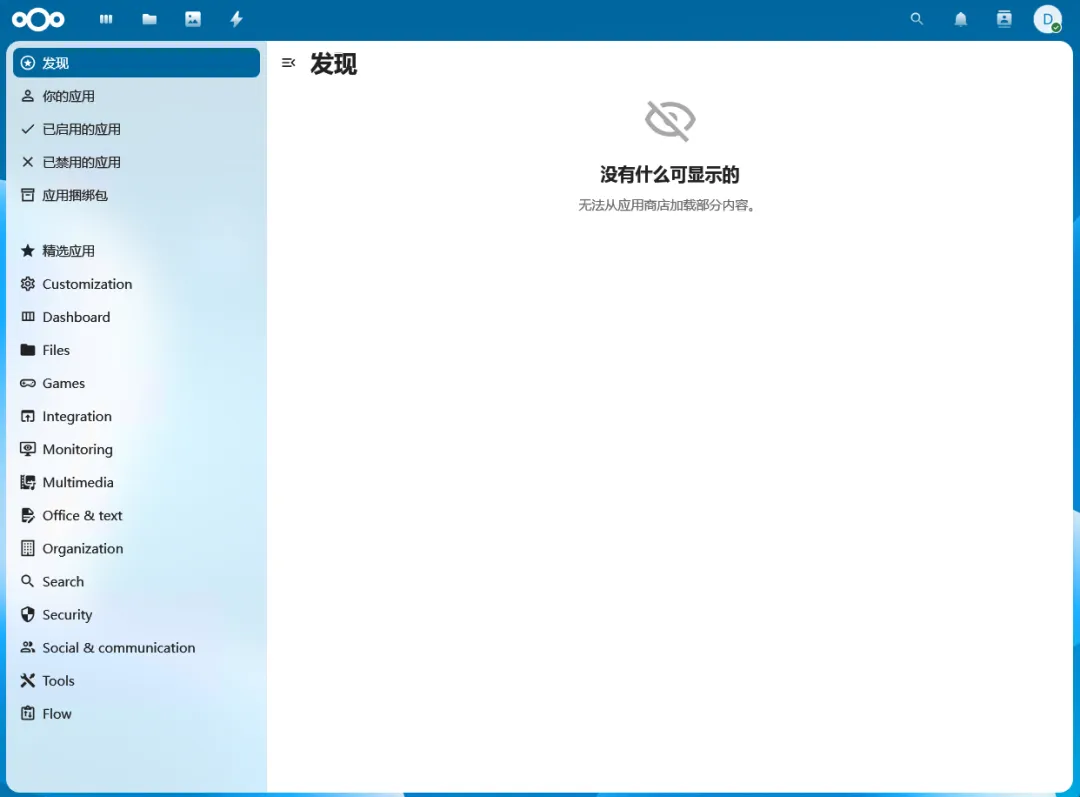
按照文章《Nextcloud 应用商店空白加载不出来 / Nextcloud 应用商店无法打开》解决应用页面打不开的问题(网络问题)。
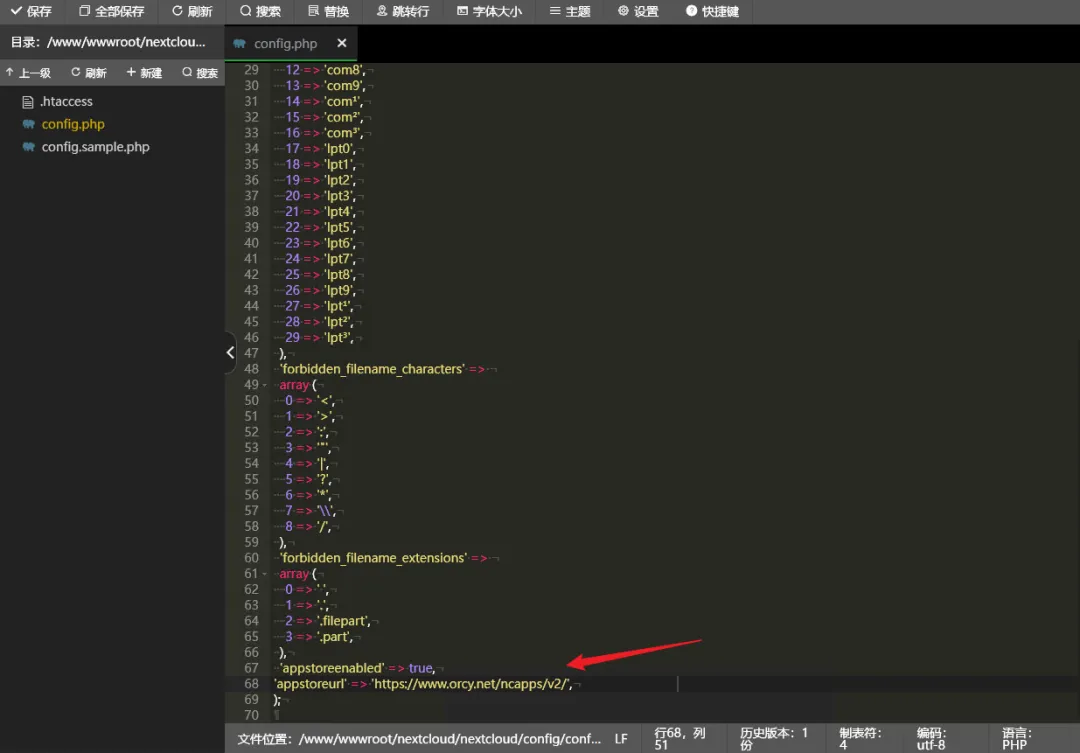
修改 /www/wwwroot/nextcloud/nextcloud/config/config.php 文件,在其中添加如下内容:
'appstoreenabled' => true,'appstoreurl' => 'https://www.orcy.net/ncapps/v2/',然后刷新应用页面,可以打开了:
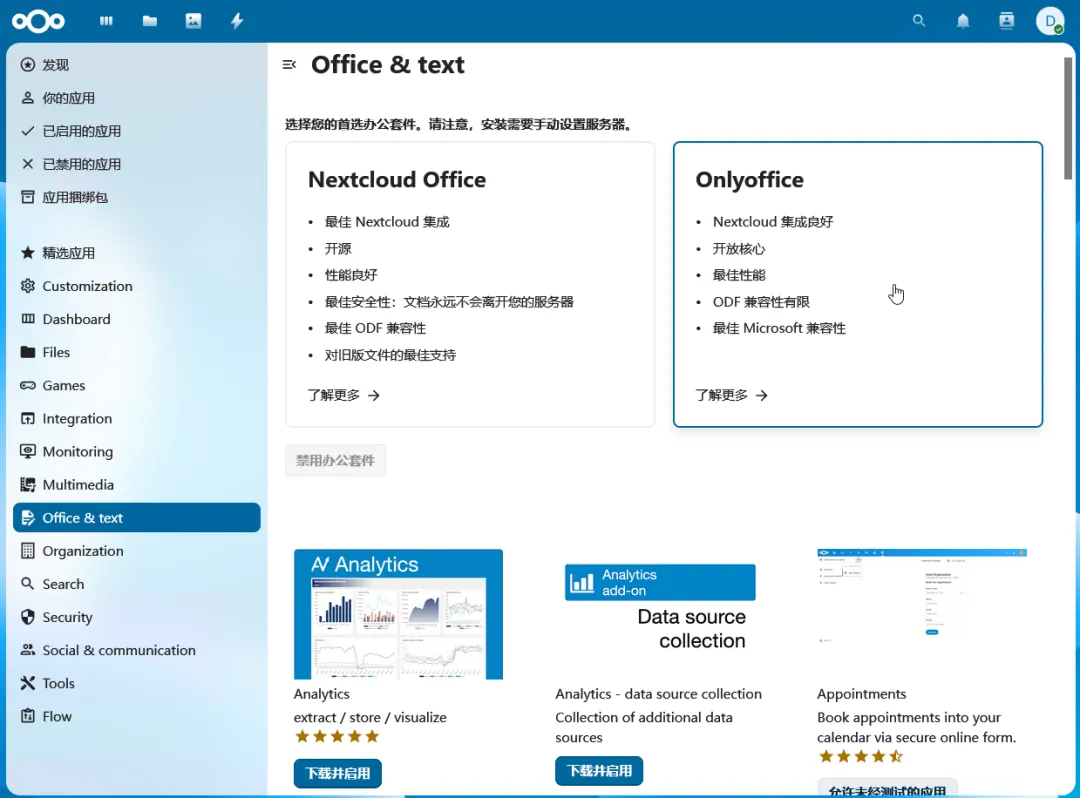
在 Office & Text 栏目中能找到 OnlyOffice:
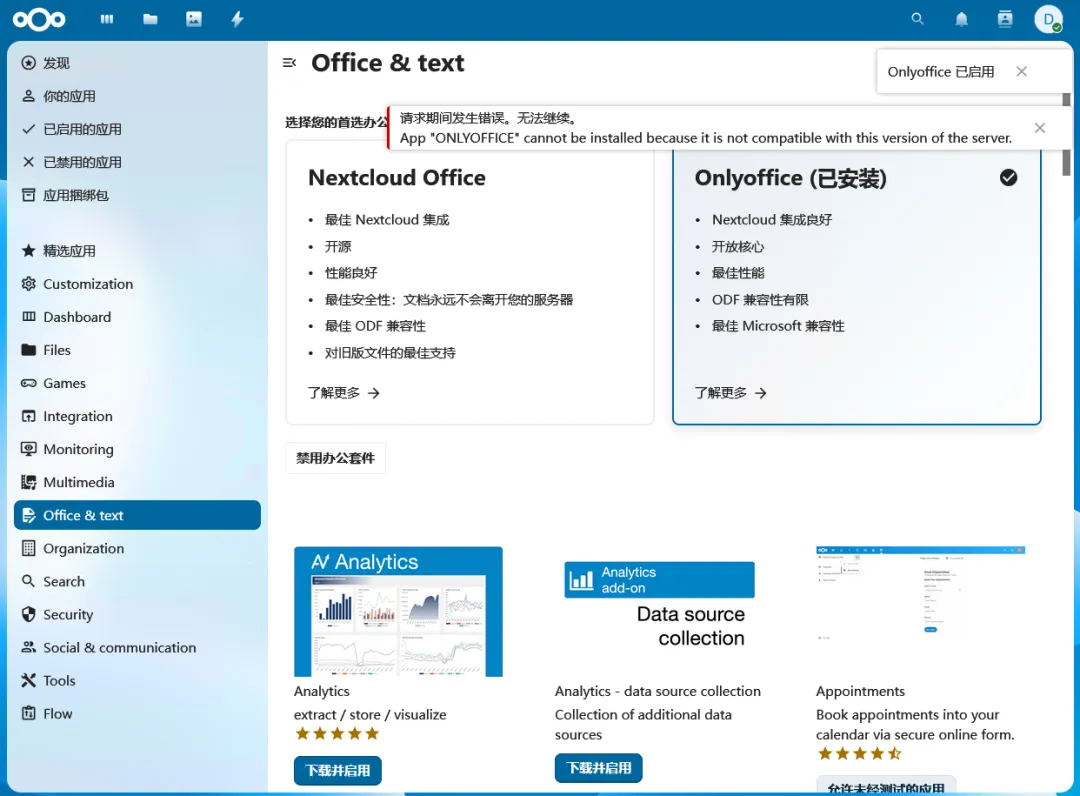
点击之后显示已安装,但是又提升不兼容:
三、OnlyOffice 的 Nextcloud 连接器
3.1、安装应用
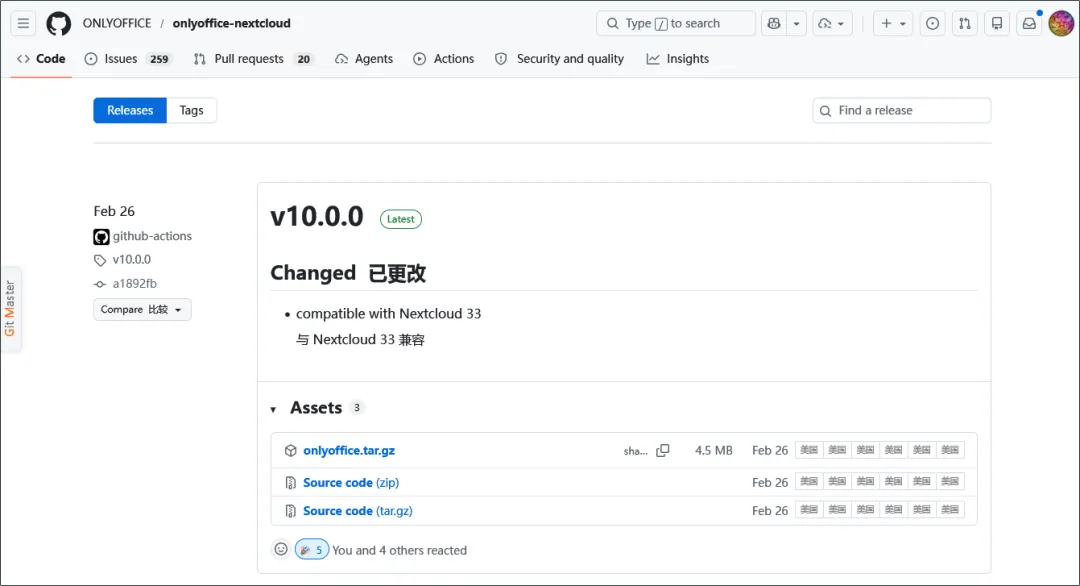
开源地址:https://github.com/ONLYOFFICE/onlyoffice-nextcloud
下载地址:https://github.com/ONLYOFFICE/onlyoffice-nextcloud/releases
选择 v10.0.0 版本(兼容 Nextcloud 33 )
上传文件到 nextcloud/apps 目录中并解压为 onlyoffice 文件夹:
然后打开 已禁用的应用 页面,启用 ONLYOFFICE:
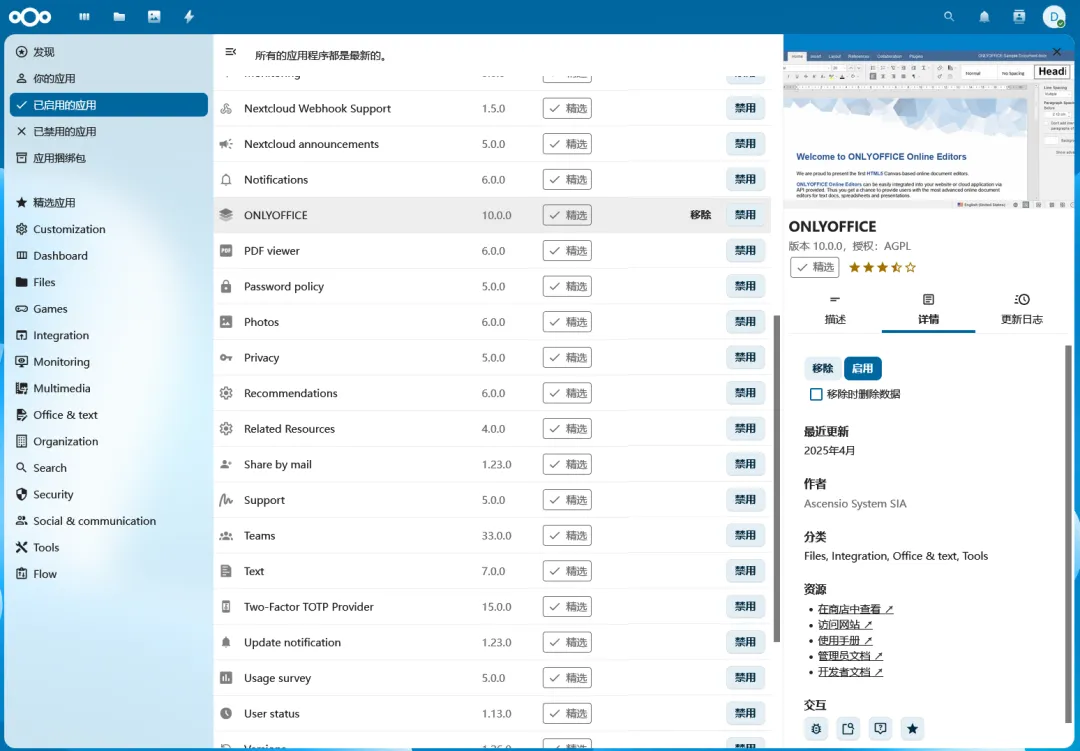
在 已启用的应用 页面中就能看到了:
3.2、配置应用
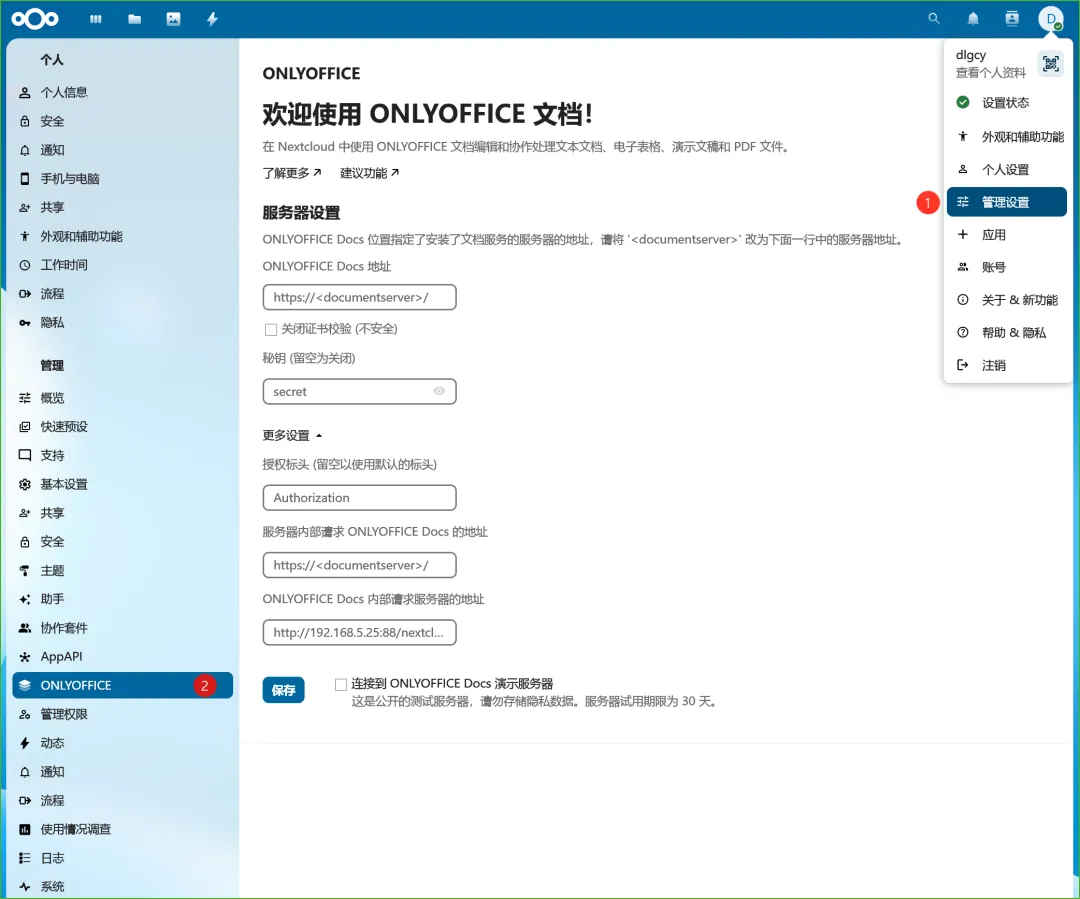
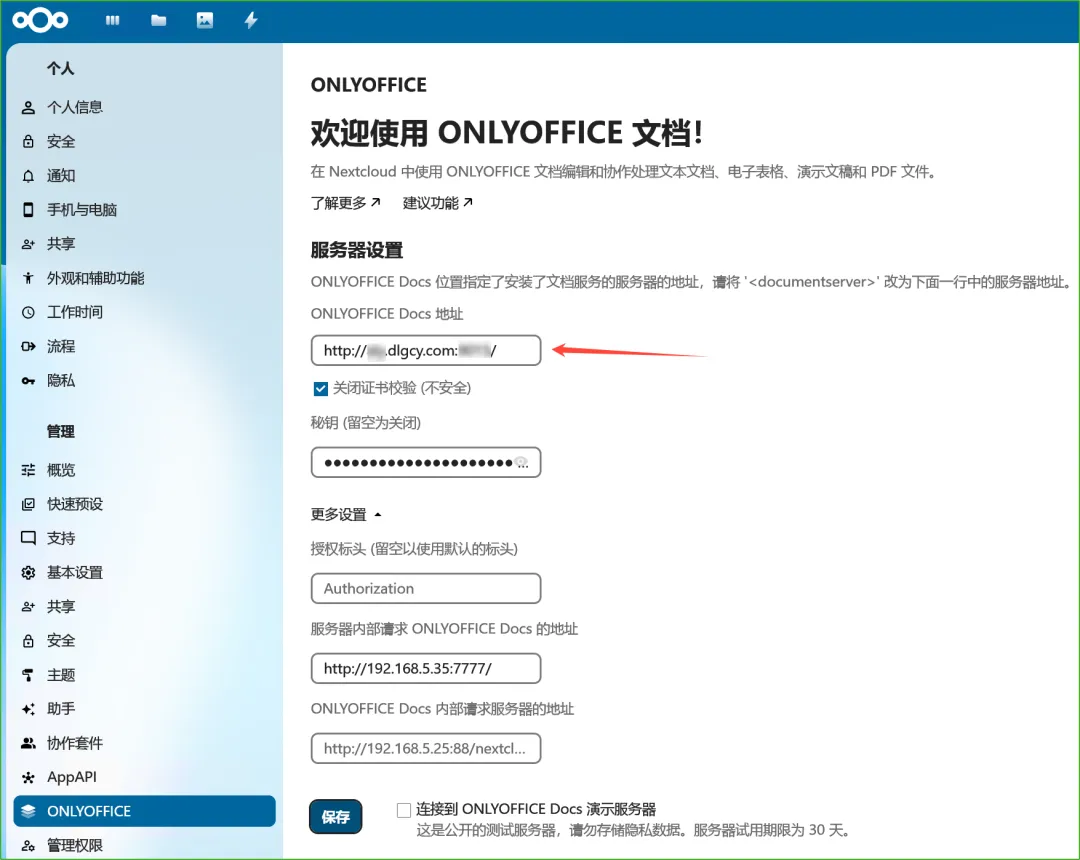
点击 Nextcloud 的 管理设置 -- ONLYOFFICE:
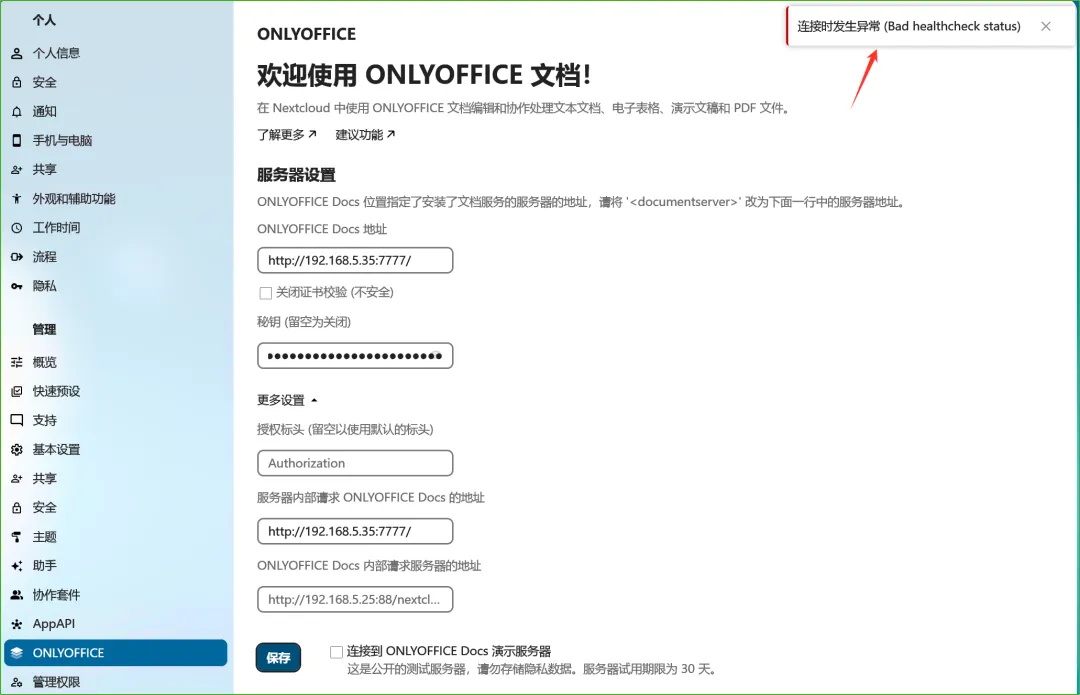
填写 OnlyOffice Docs 的地址等信息:
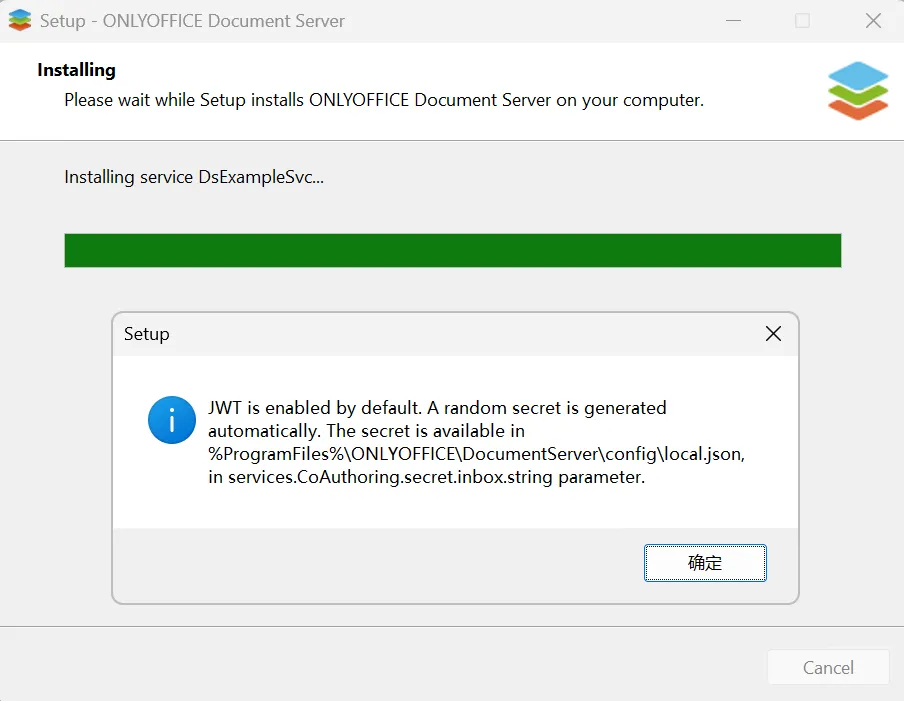
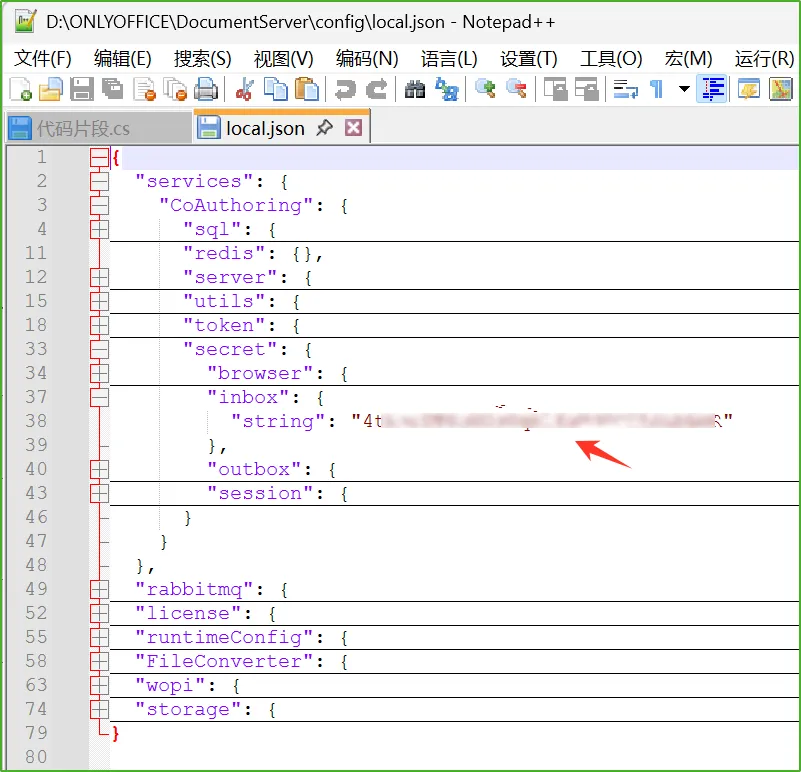
其中密钥在
%ProgramFiles%\ONLYOFFICE\DocumentServer\config\local.json中(安装目录,我的在 D 盘)的services.CoAuthoring.secret.inbox.string节点:但是连接发生异常了(Bad healthcheck status):
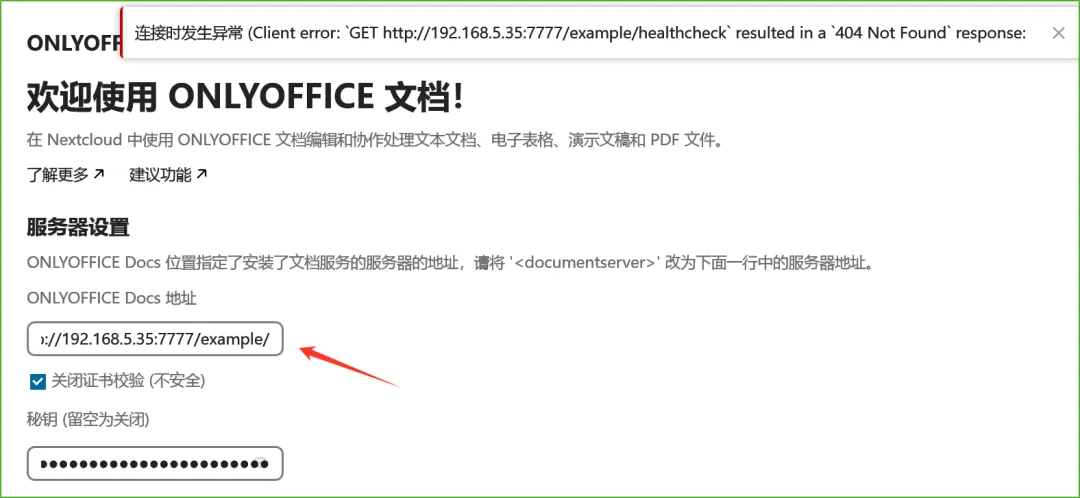
将地址带上 example(之前访问的 Demo 地址),出现 404 错误,所以这个 healthcheck 是 OnlyOffice 的服务:
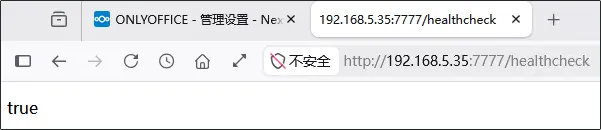
直接访问 http://192.168.5.35:7777/healthcheck ,返回 true(可能是因为重启了下电脑的原因):
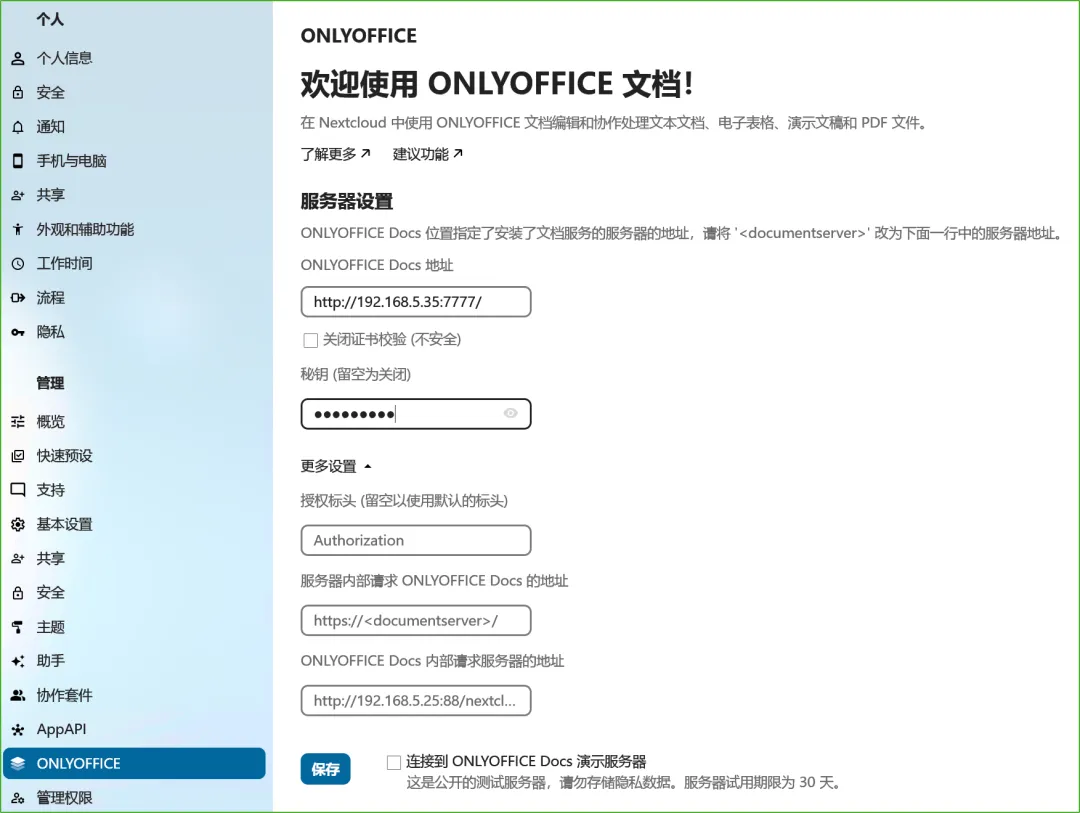
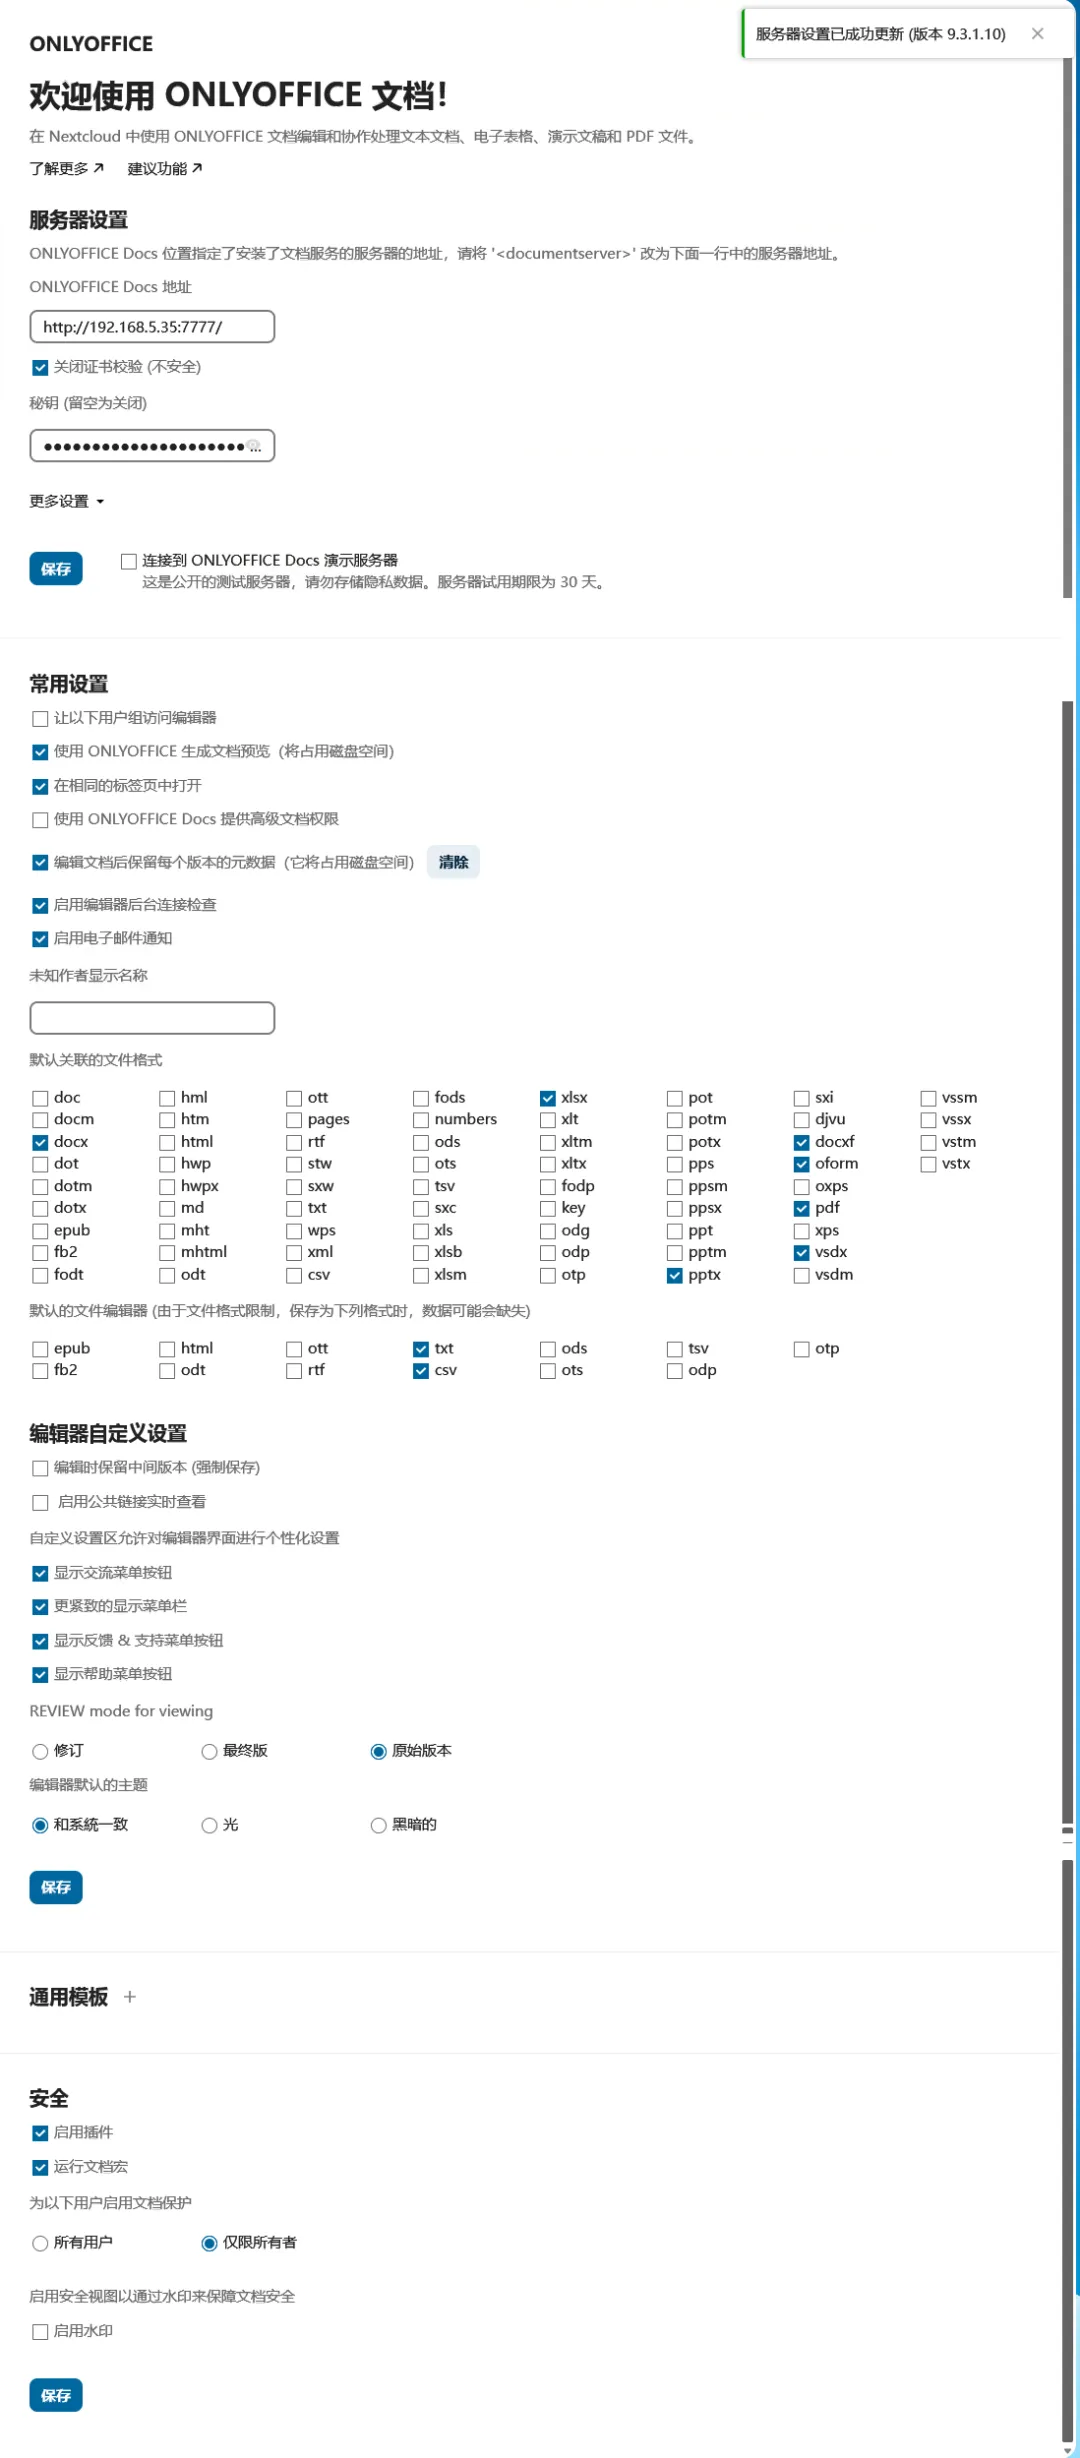
此时再将地址改回 http://192.168.5.35:7777/ 并保存,果然成功了:
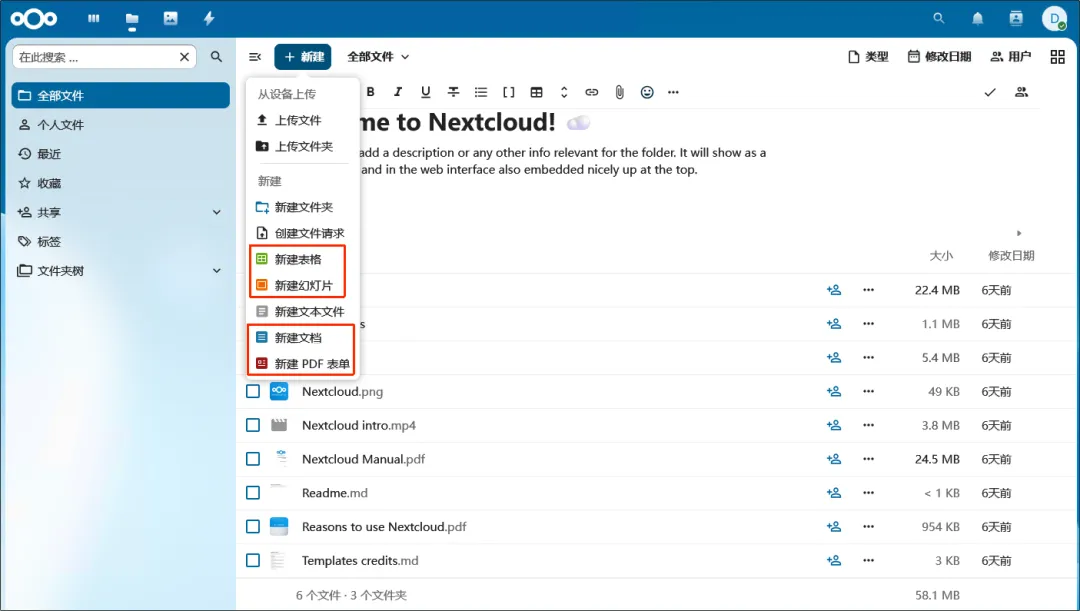
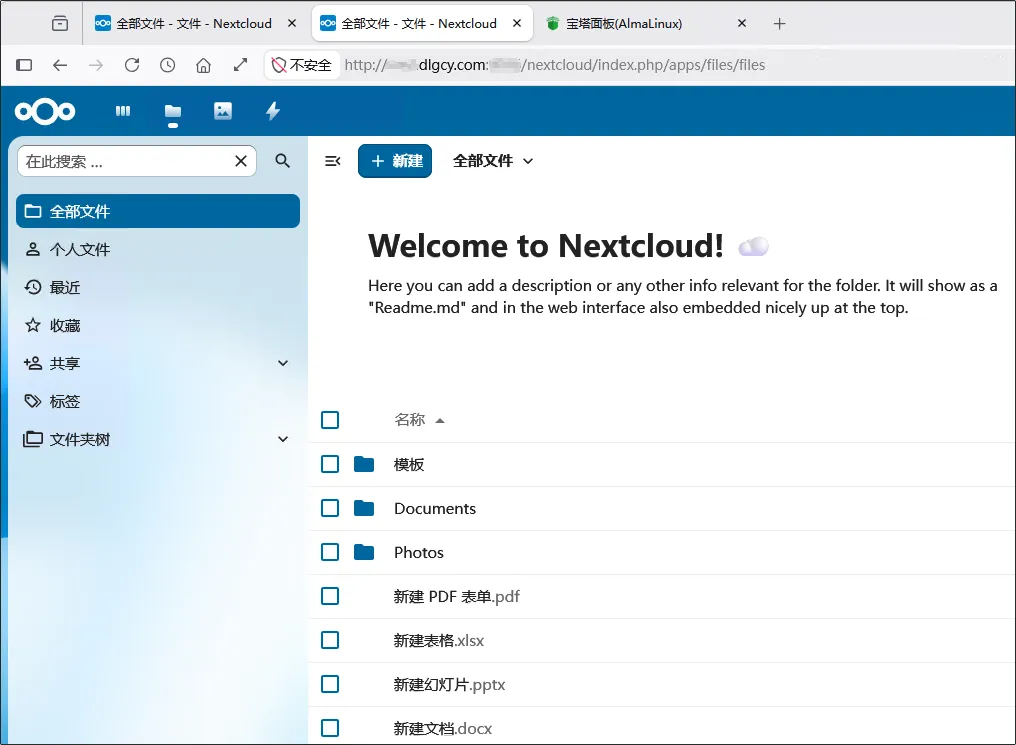
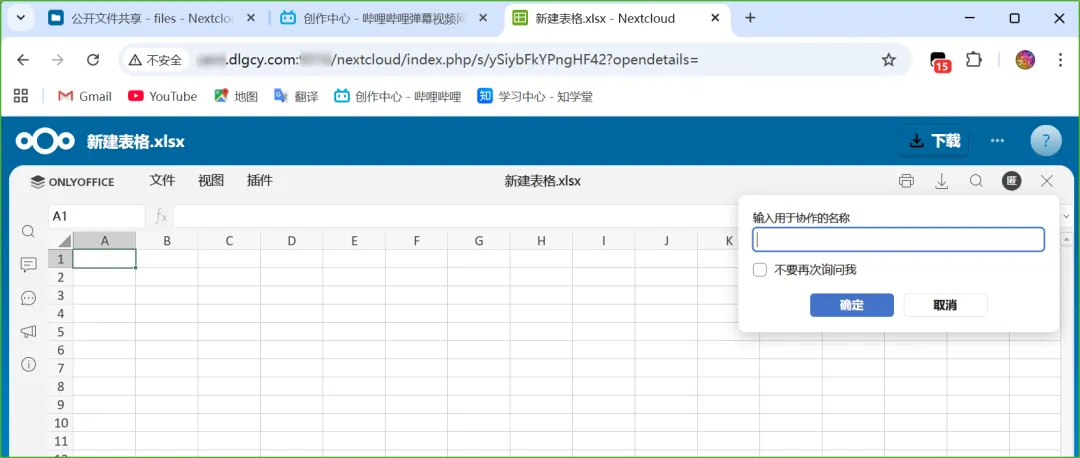
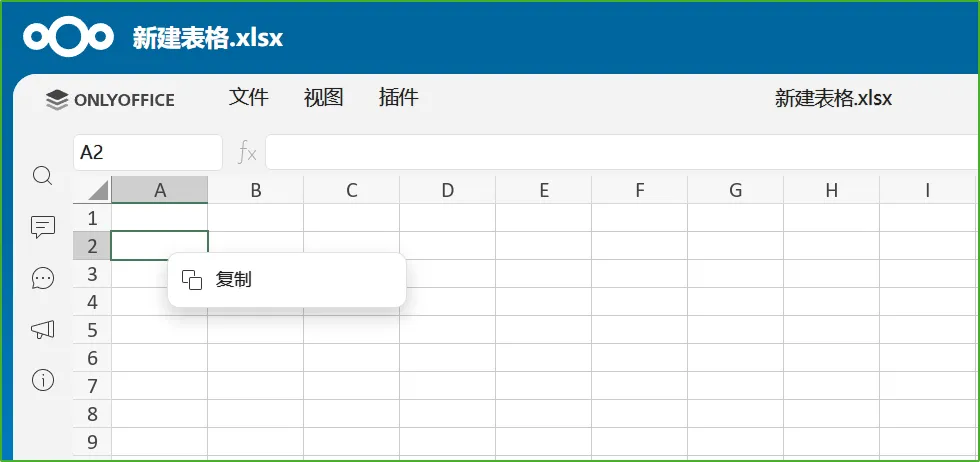
此时再到 Nextcloud 的文件列表中,点击 新建 按钮,弹出菜单中多了 新建表格、新建幻灯片、新建文档、新建 PDF 表单,这些之前是没有的,也就是新安装的 OnlyOffice 插件带来的:
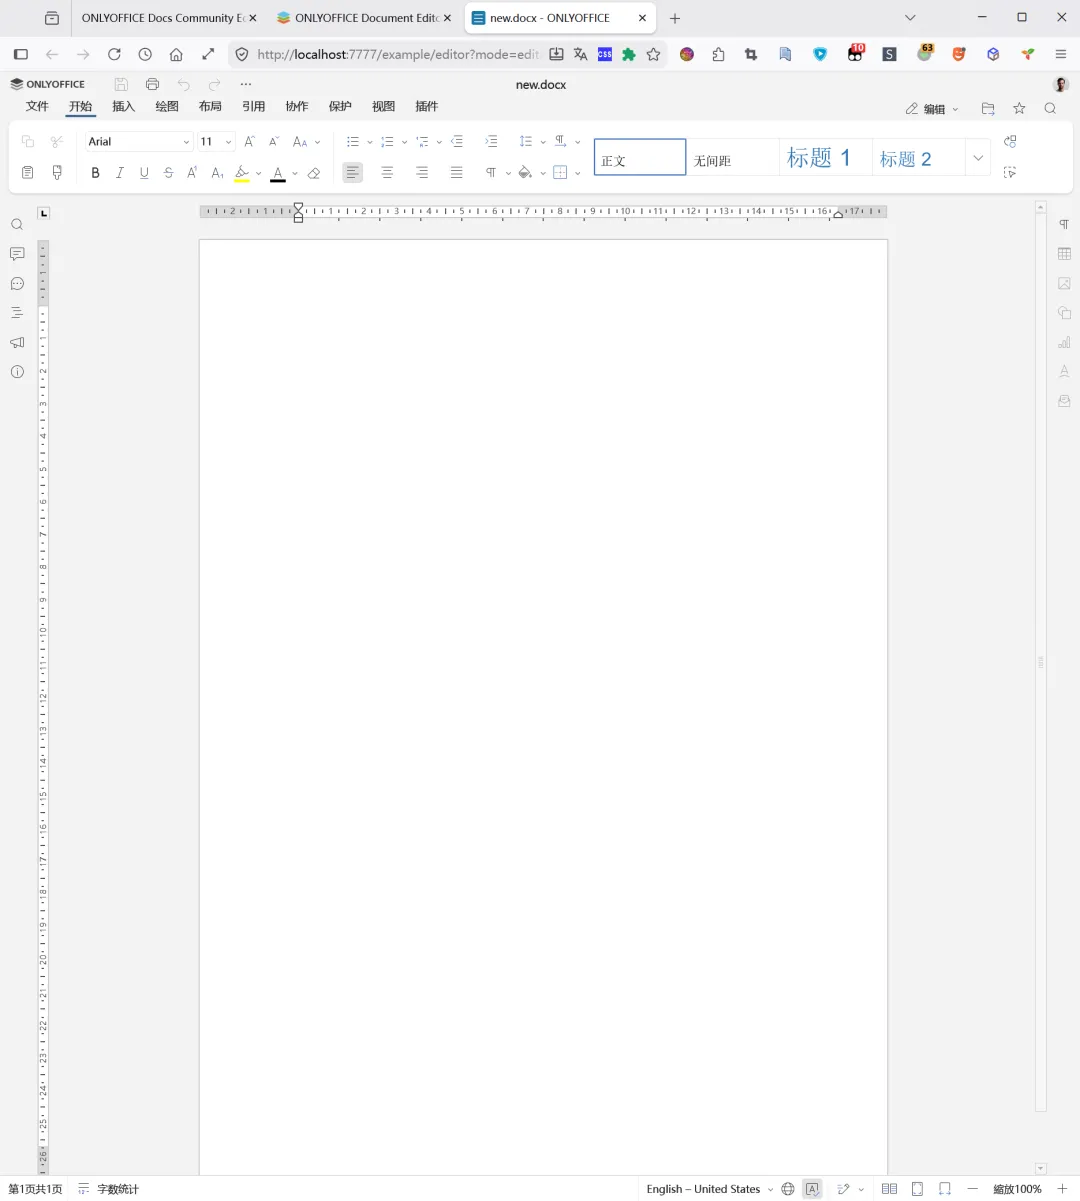
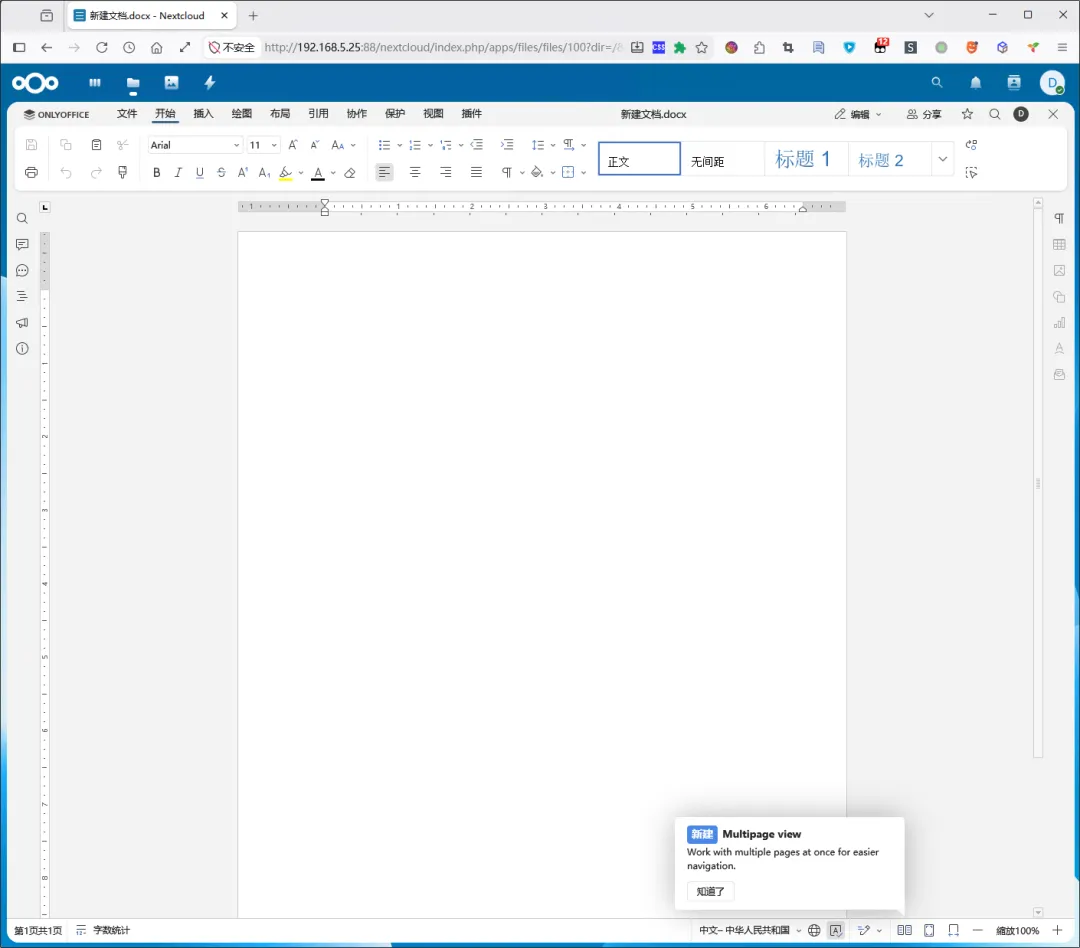
新建个文档(在当前页打开了):
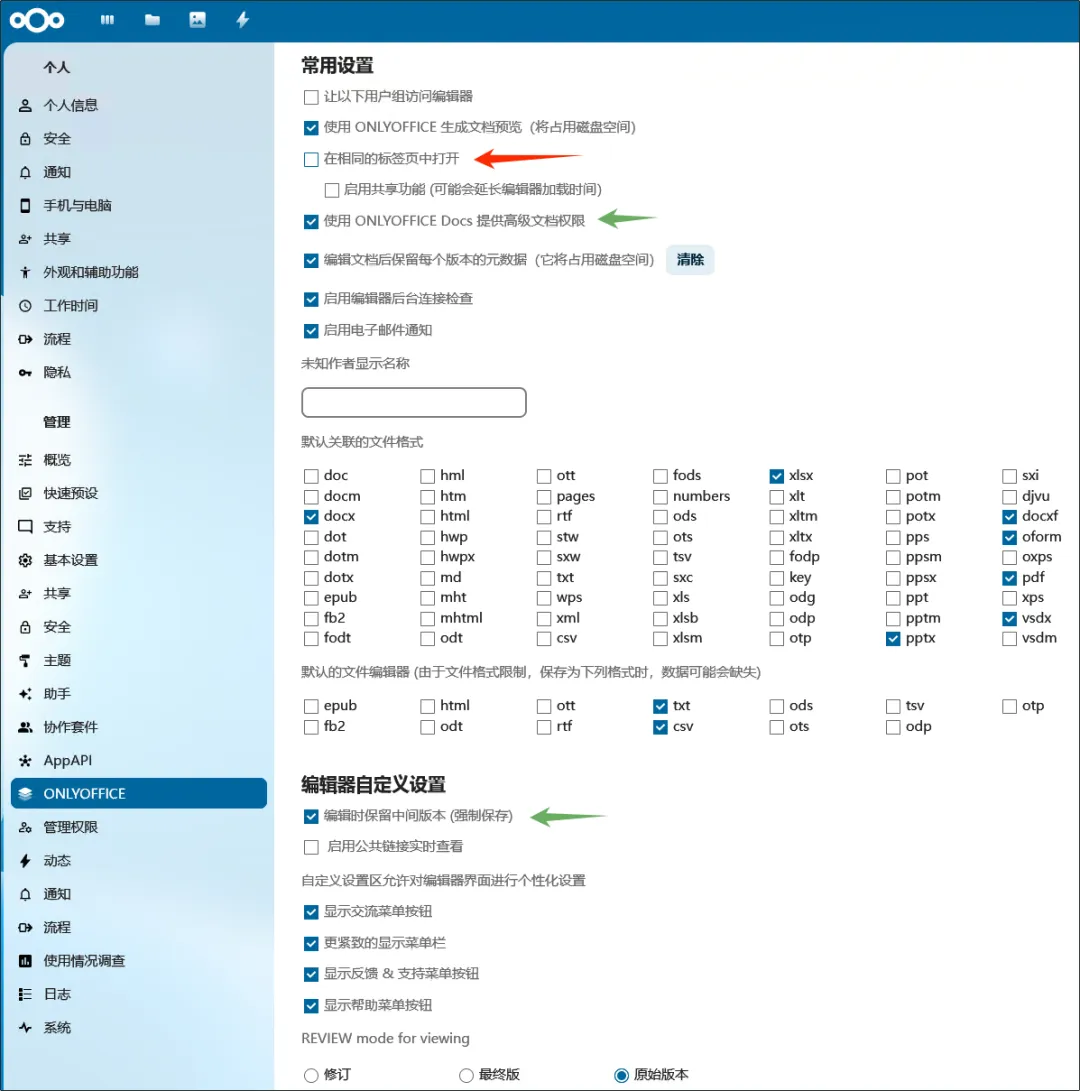
可以在插件设置页面进行设置(取消勾选 在相同的标签页中打开):
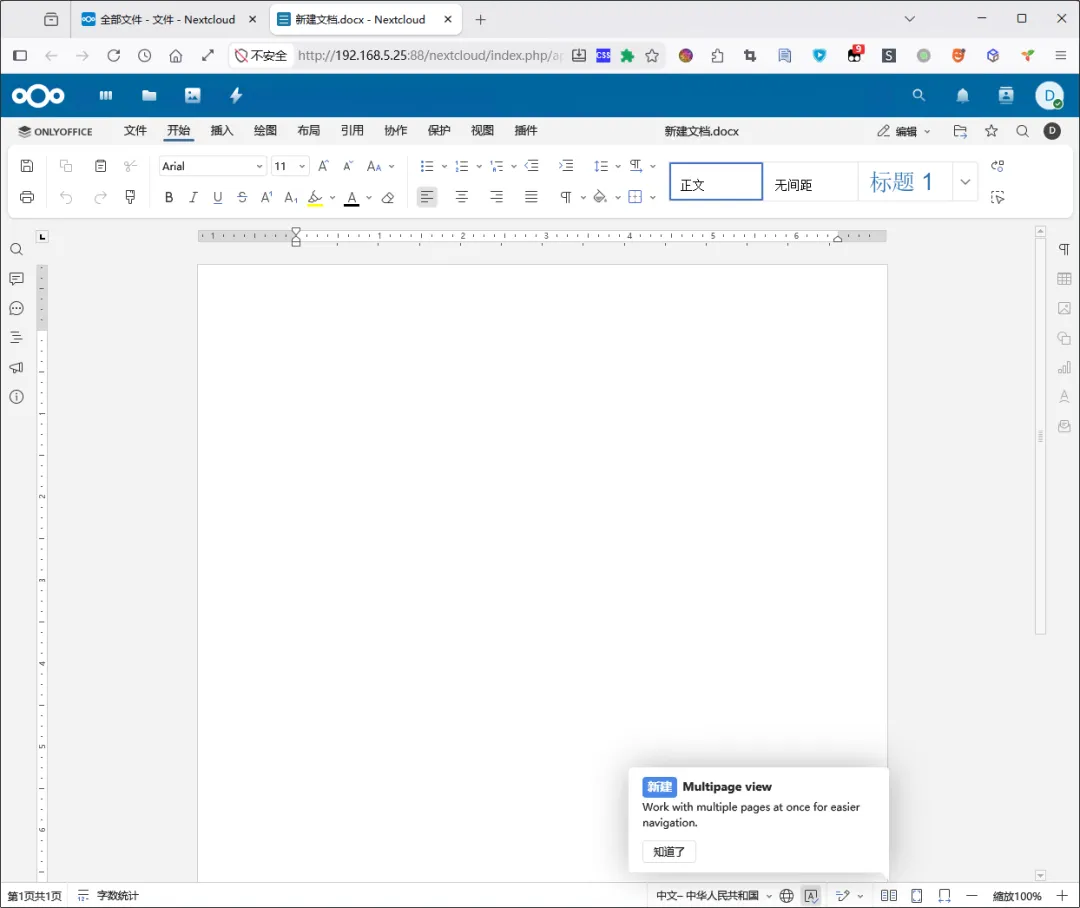
保存设置后再点开文件,就会在新标签页打开了:
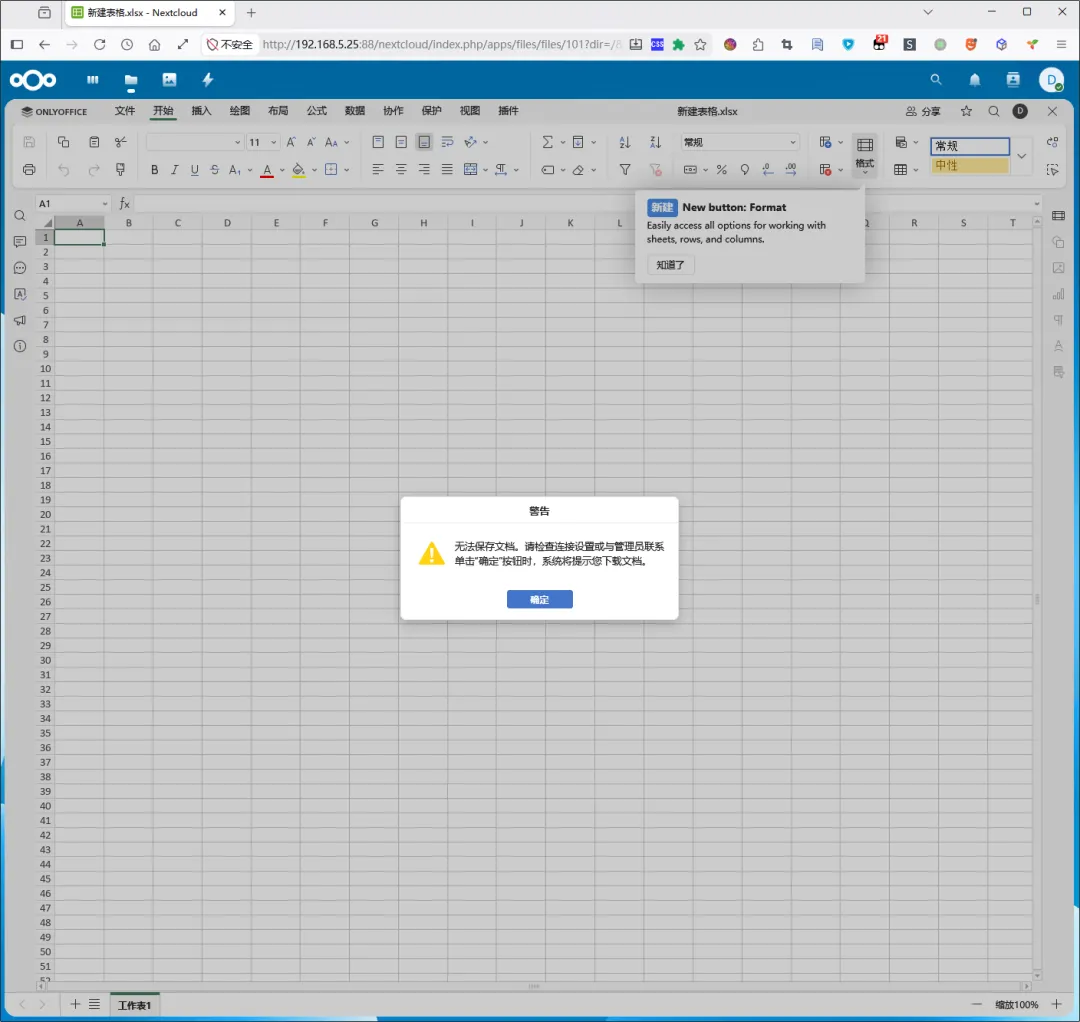
有的时候不稳定,提示无法保存,需要下载,如下图所示。这种情况刷新或者重新开一下可能就好了。
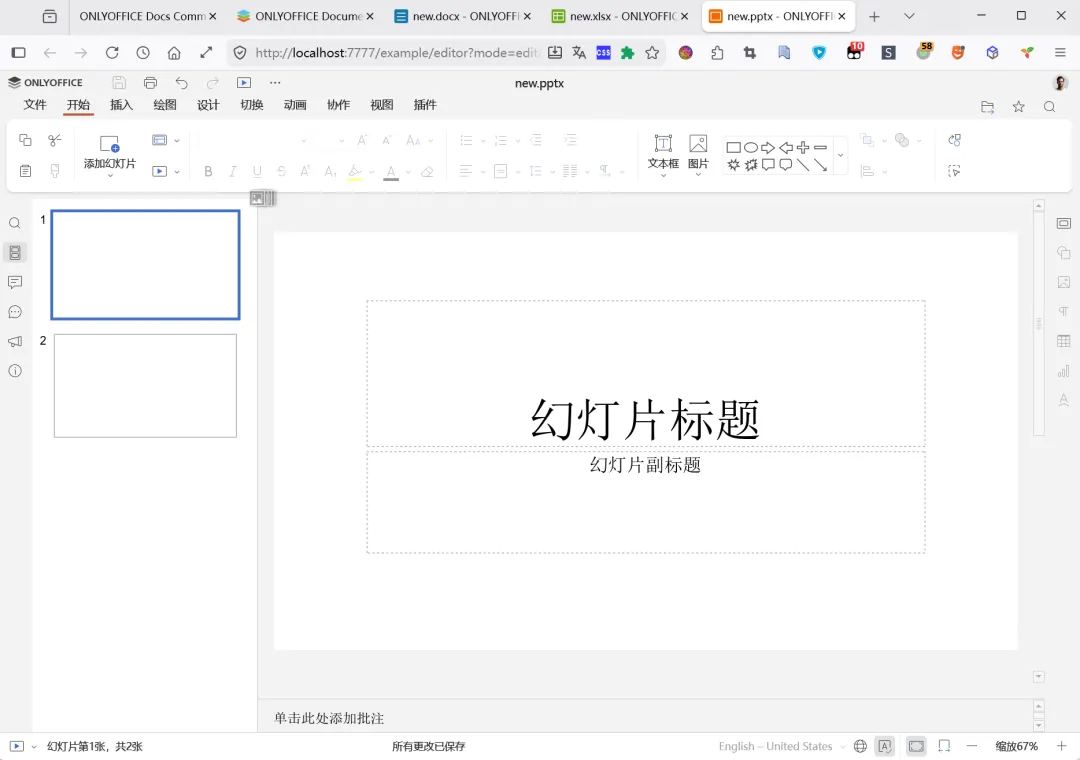
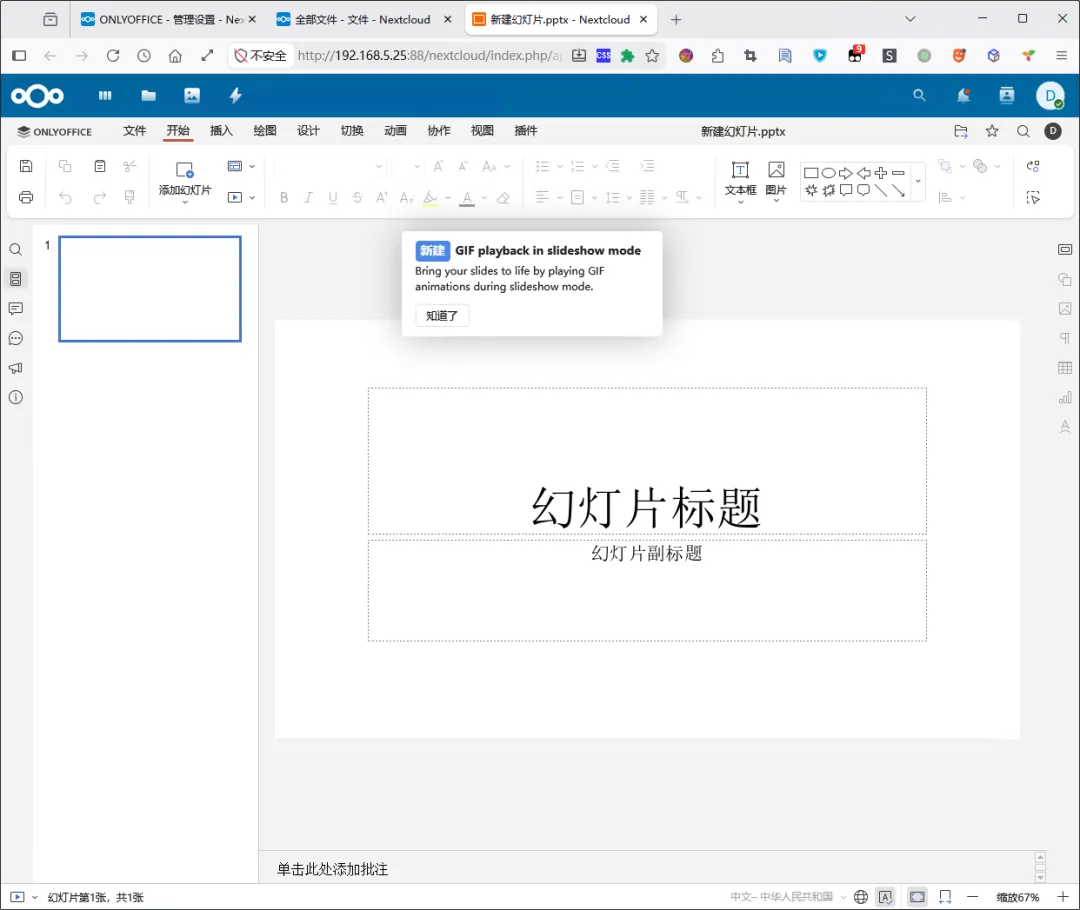
新建 PPT:
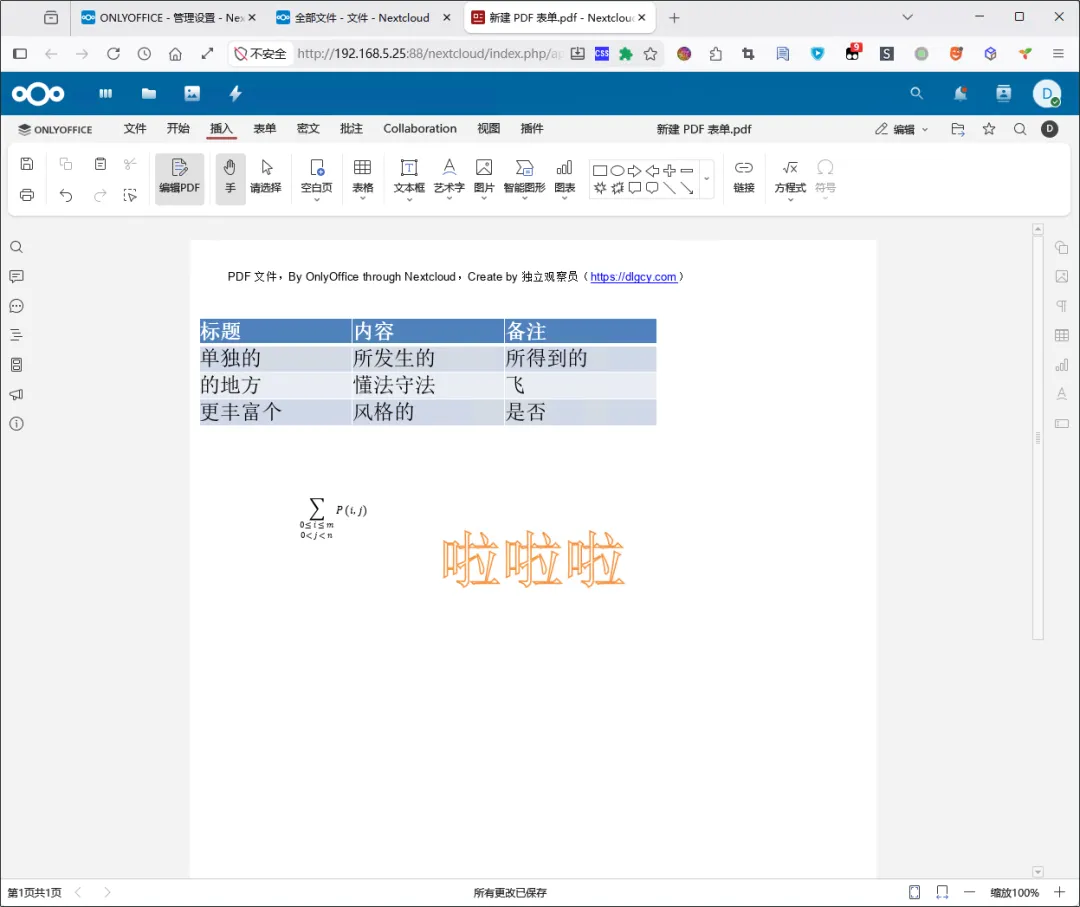
新建个 PDF 表单:
四、后续使用问题
4.1、基础设置
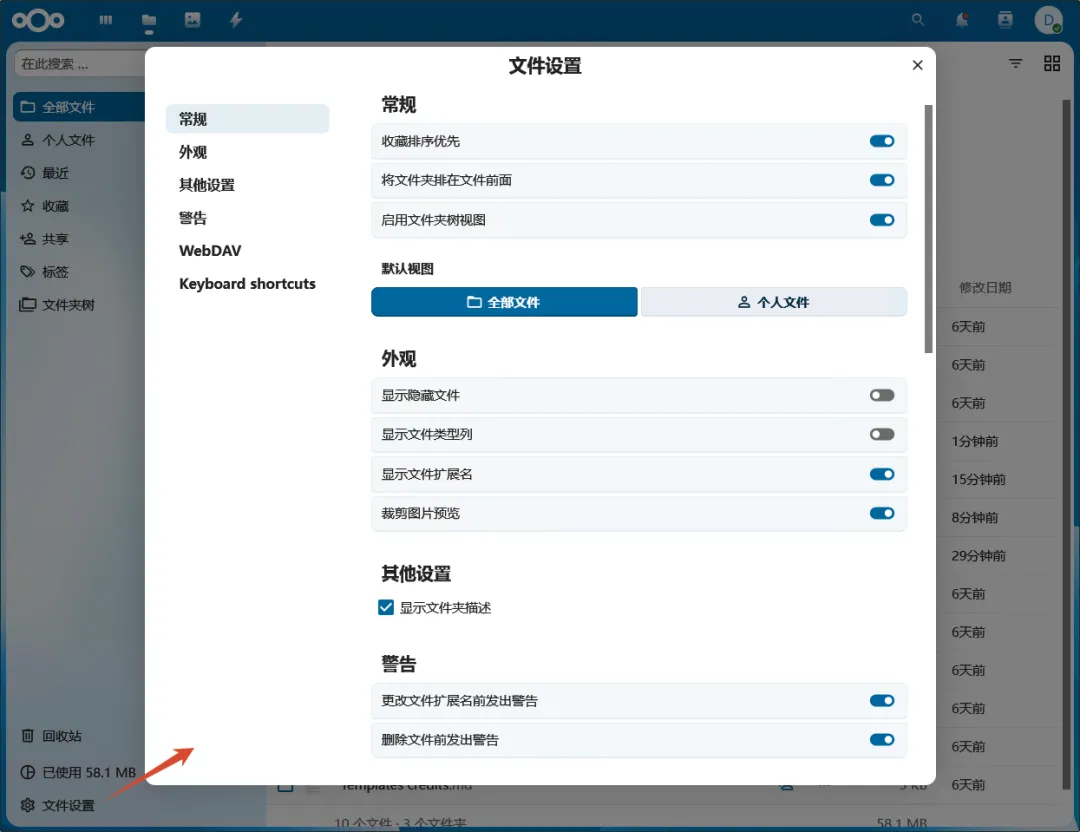
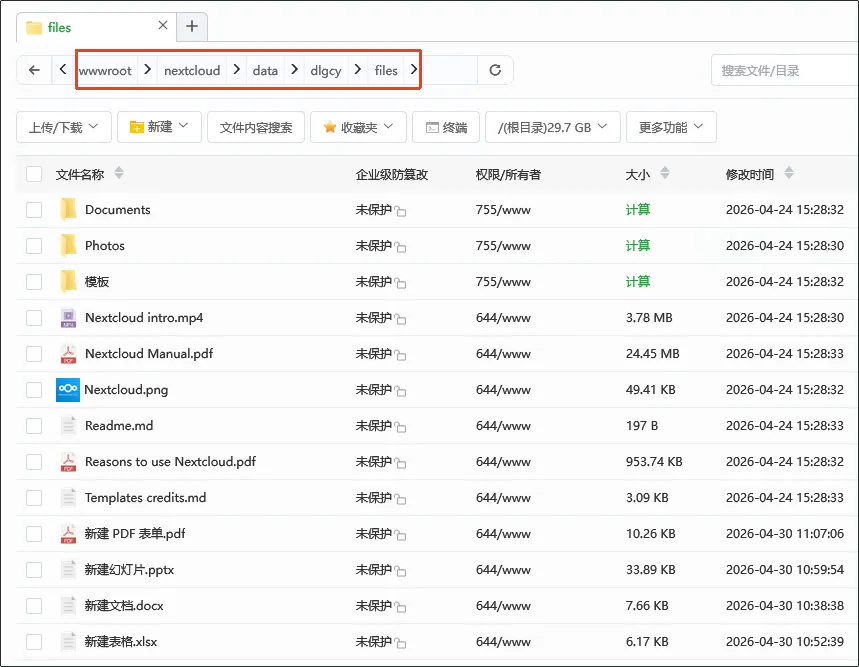
Nextcloud 中有个 文件设置,可以按需设置一下:
文件都存放在 Nextcloud 网站的数据目录中:
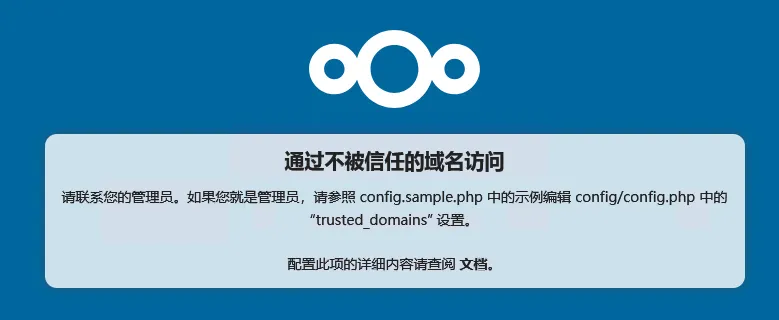
4.2、配置外网访问
通过 frp 给 Nextcloud 做了个外网穿透访问,结果提示 通过不被信任的域名访问:
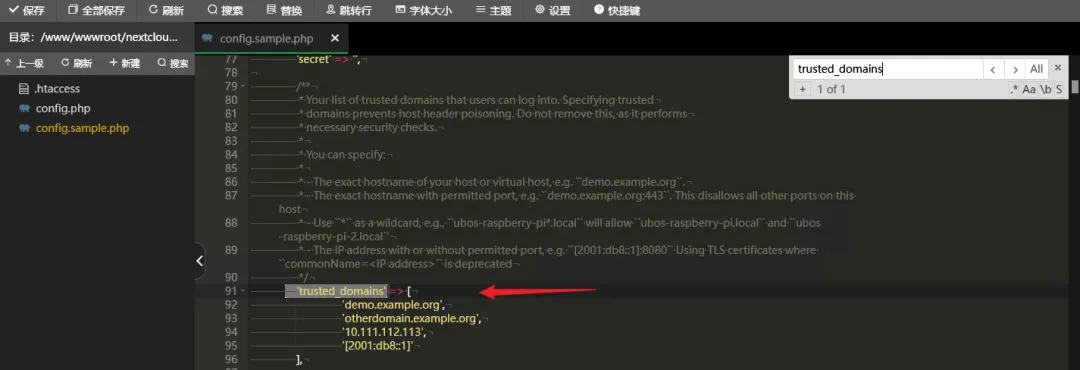
那我们就按提示看看示例配置:
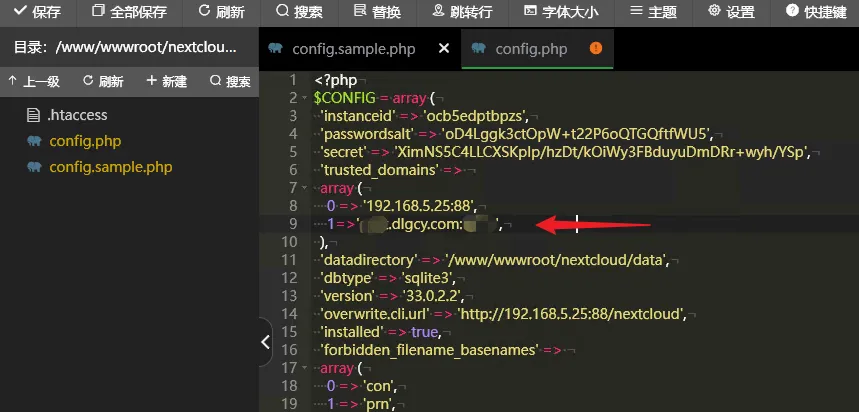
然后我们编辑实际使用的 config.php 文件,写法有点不一样,不过影响不大,我们参照已有的一条本地 IP 的续写一条就行了:
改完保存之后,我们再刷新一下页面就能正常访问了:
4.3、外部共享链接
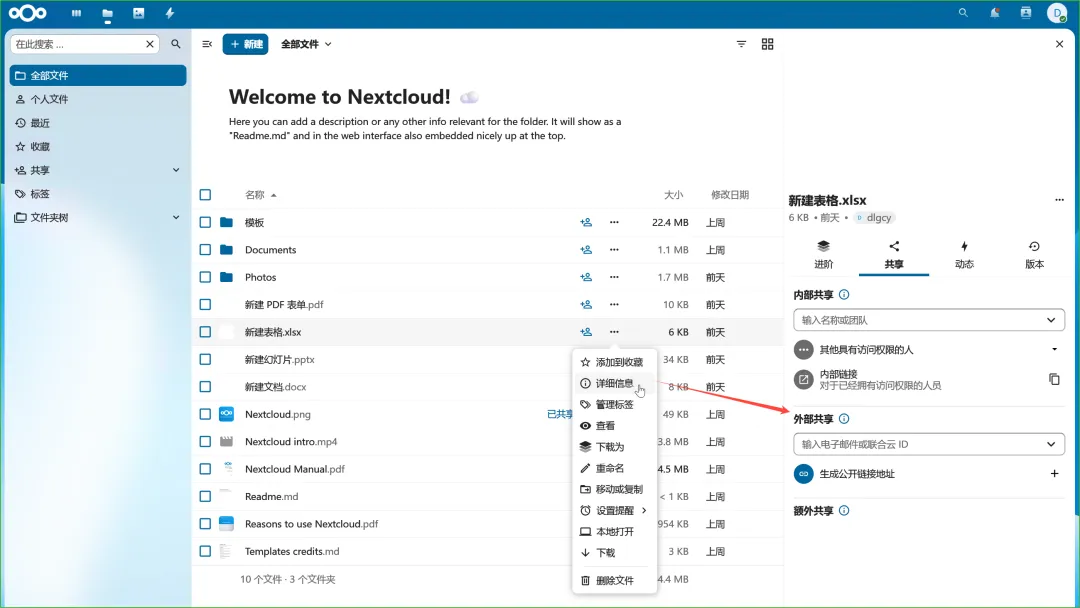
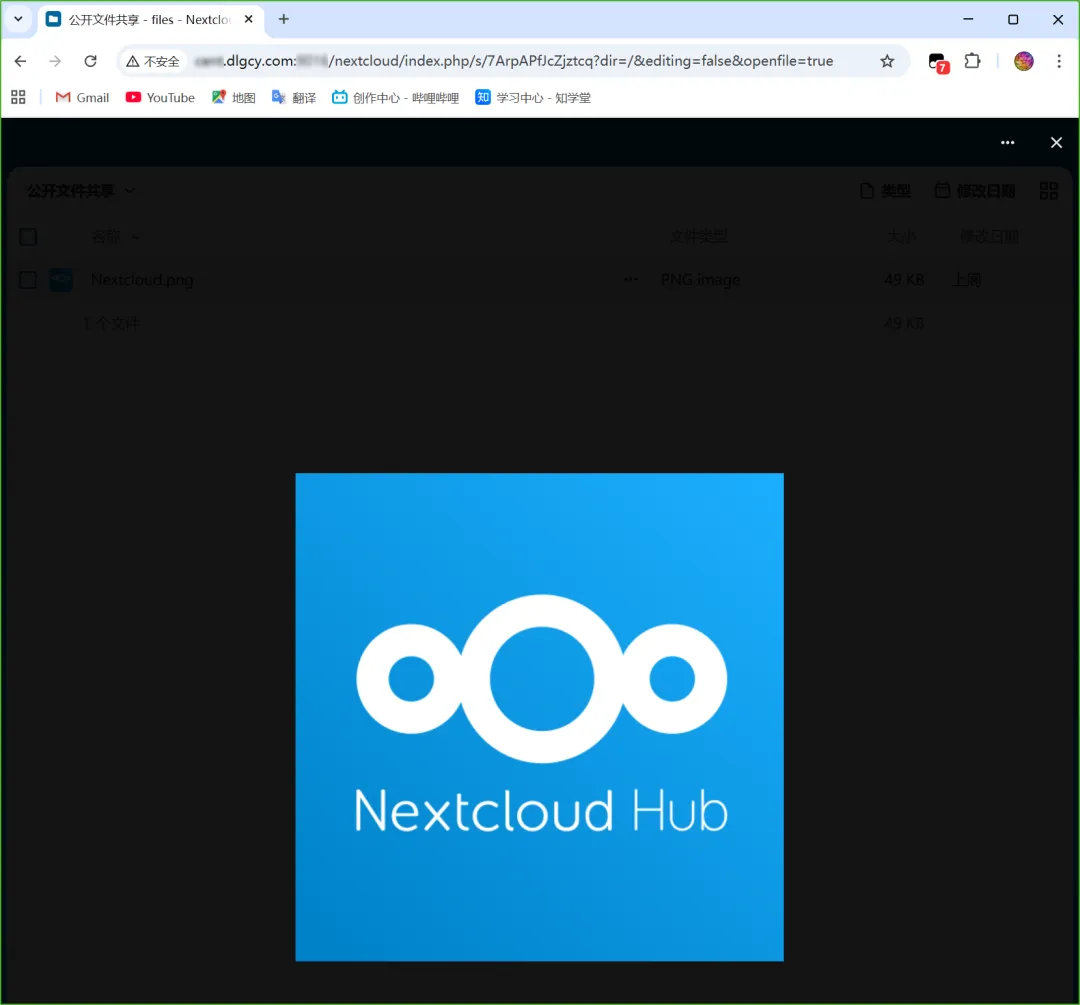
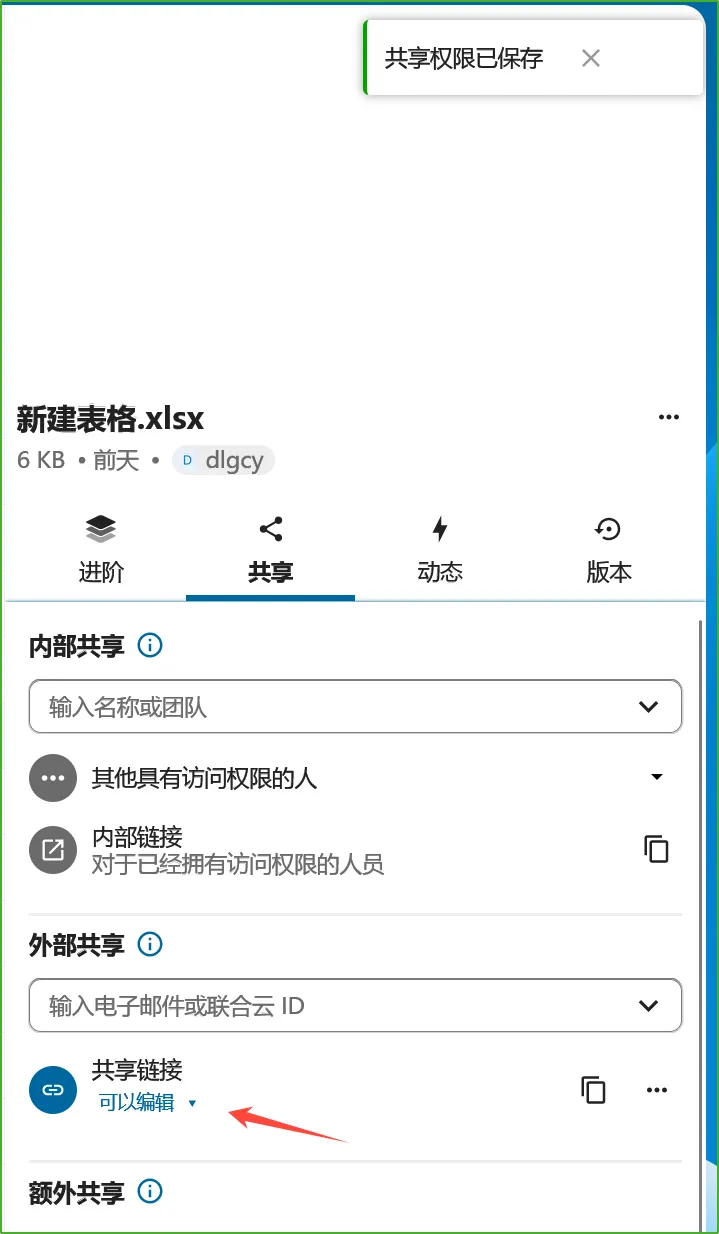
首先在需要共享的文件上,点击 三个点 图标,再点击弹框中的 详细信息,展开右侧的详细信息区域:
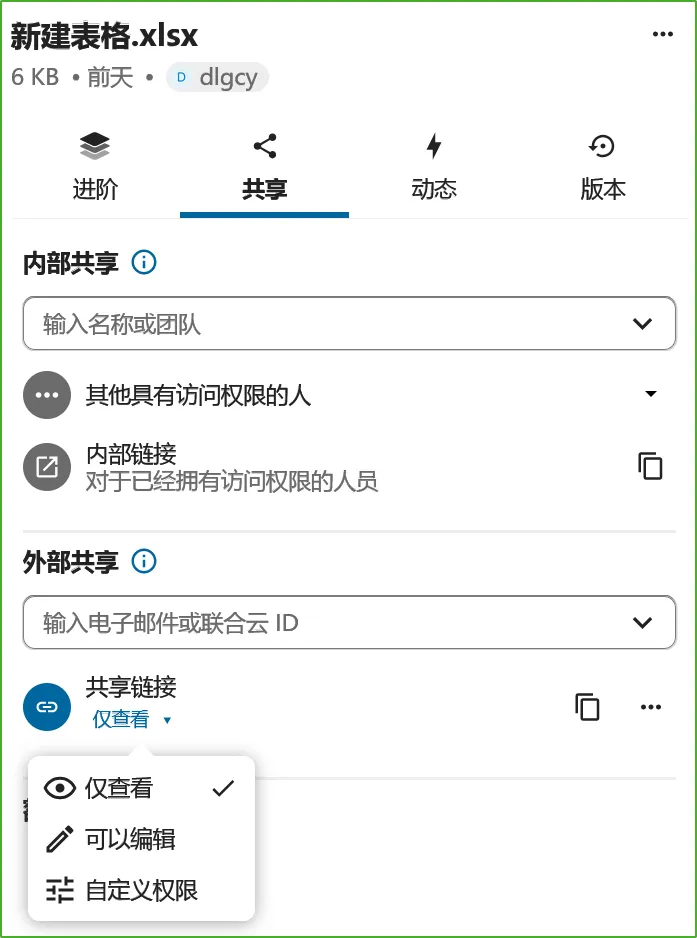
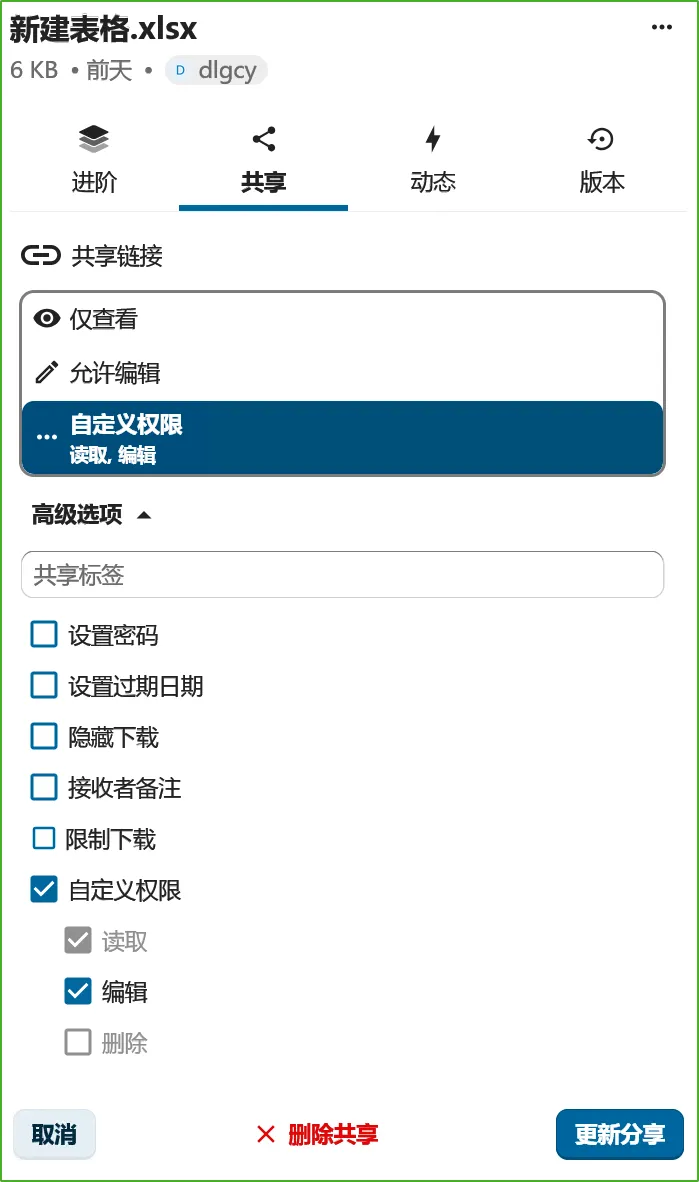
点击 生成公开链接地址 后,可以设置共享链接的权限(仅查看、可以编辑、自定义权限):
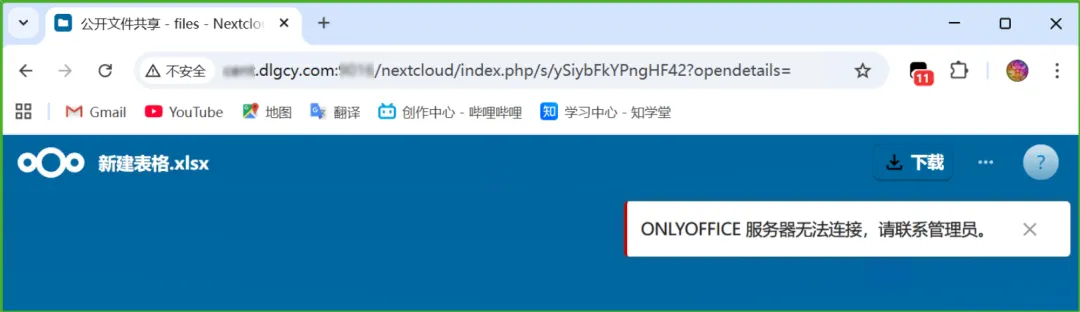
访问时提示 ONLYOFFICE 服务器无法连接:
这个应该是因为配置 OnlyOffice 的时候填的是内网地址导致的,对于不通过 OnlyOffice 的文件类型是可以的:
将 ONLYOFFICE 插件设置中的 Docs 地址改为外网地址:
然后刷新共享链接即可:
此时是不能编辑的:
我们把权限设置为 可以编辑:
现在就可以编辑了:
还可以自定义权限:
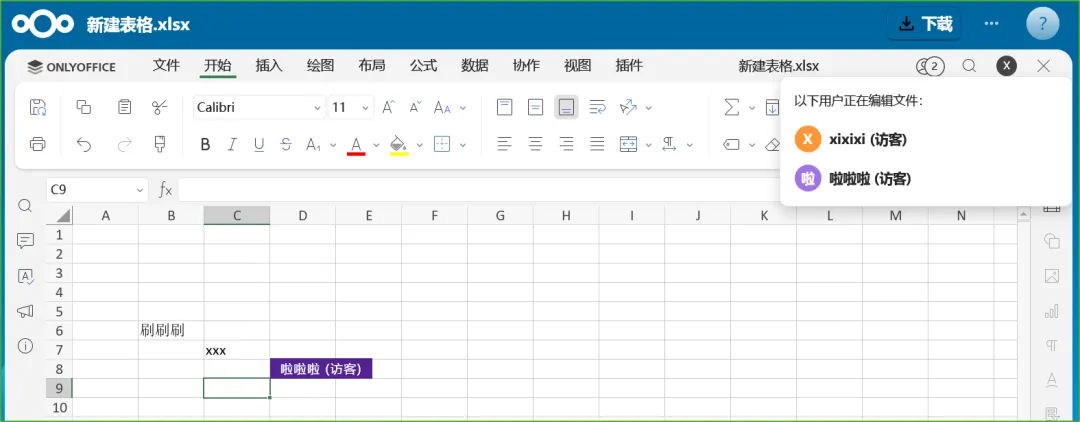
支持多人 (访客) 协作:
4.4、账号安全
目前将网站页面链接或者打开的文件链接(非共享链接)在别的地方打开,都需要登录,而且没有注册入口,应该是符合个人使用场景的:
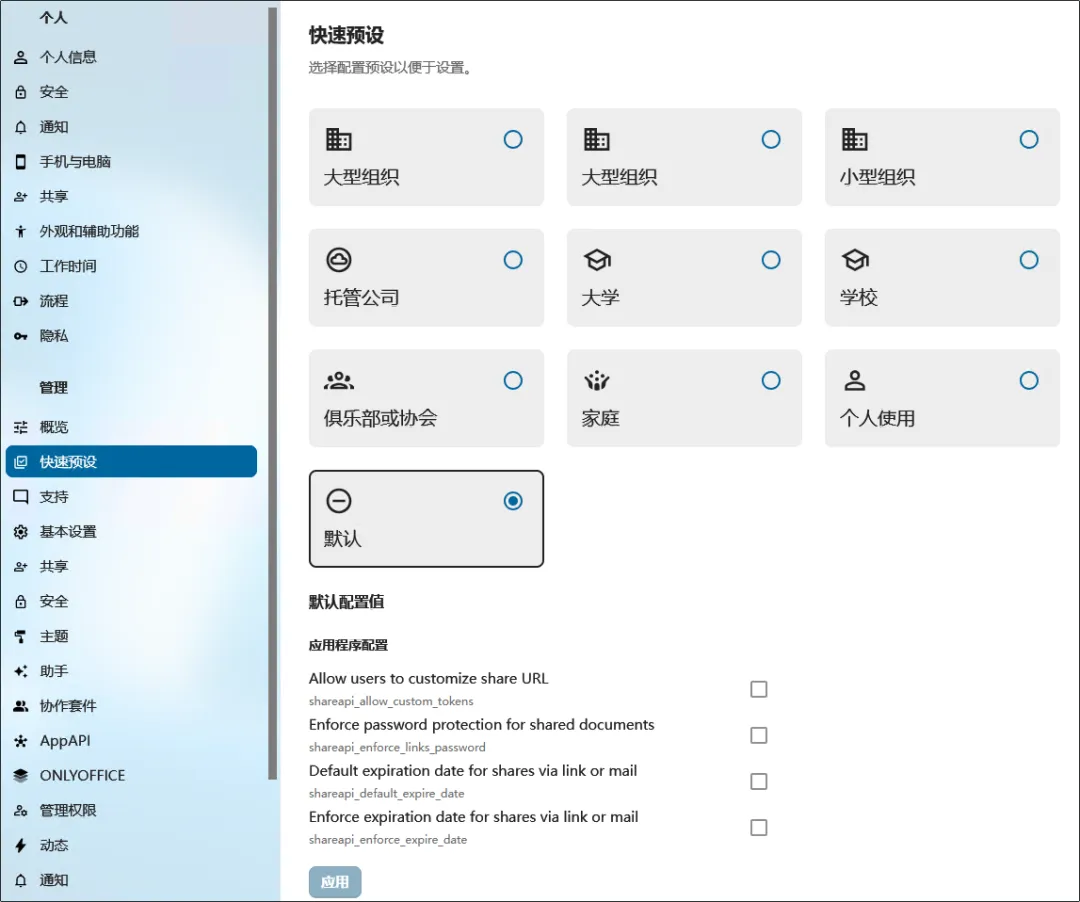
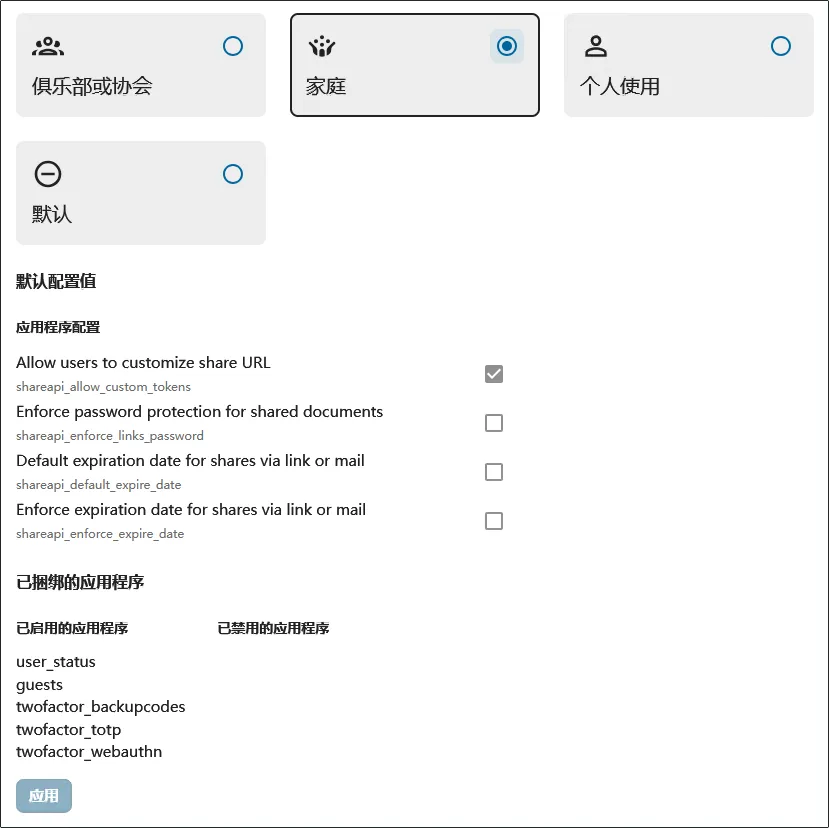
还可以在 快速预设 栏目中设置使用场景:
切换成别的,底下会有变化:
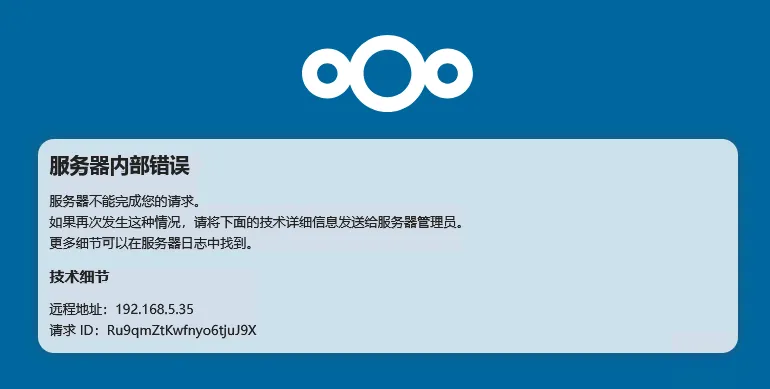
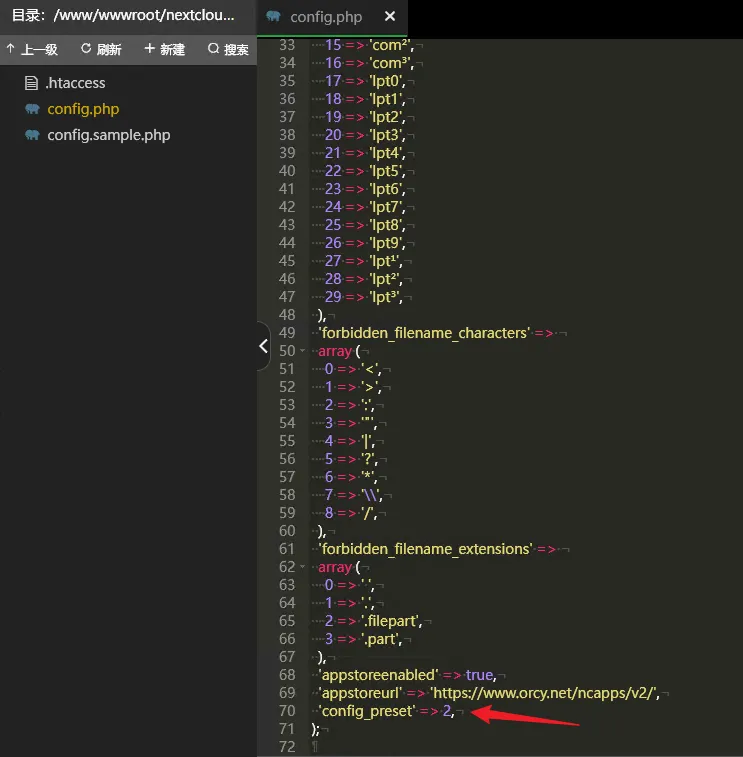
4.4.1、修复切换快速预设后的错误
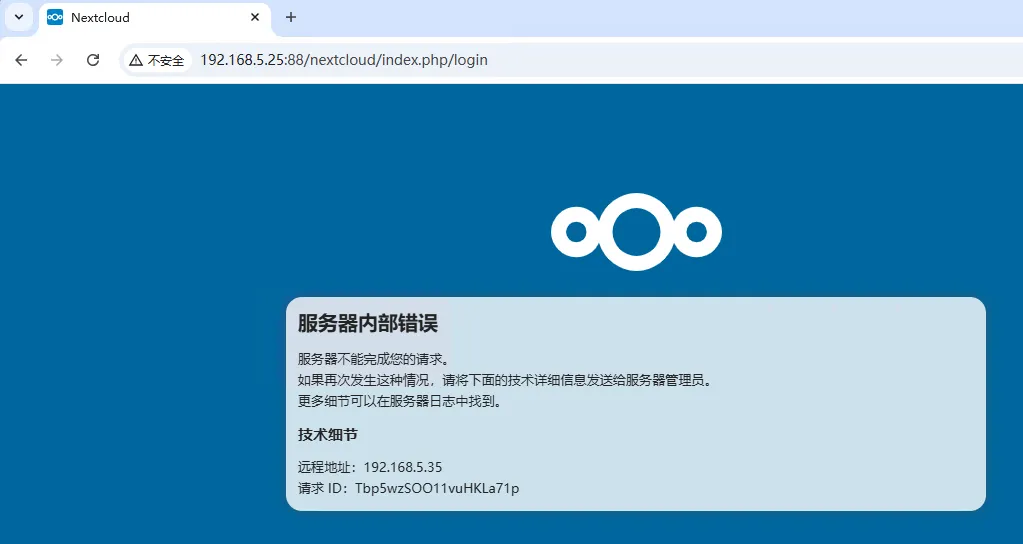
切换之后出错了:
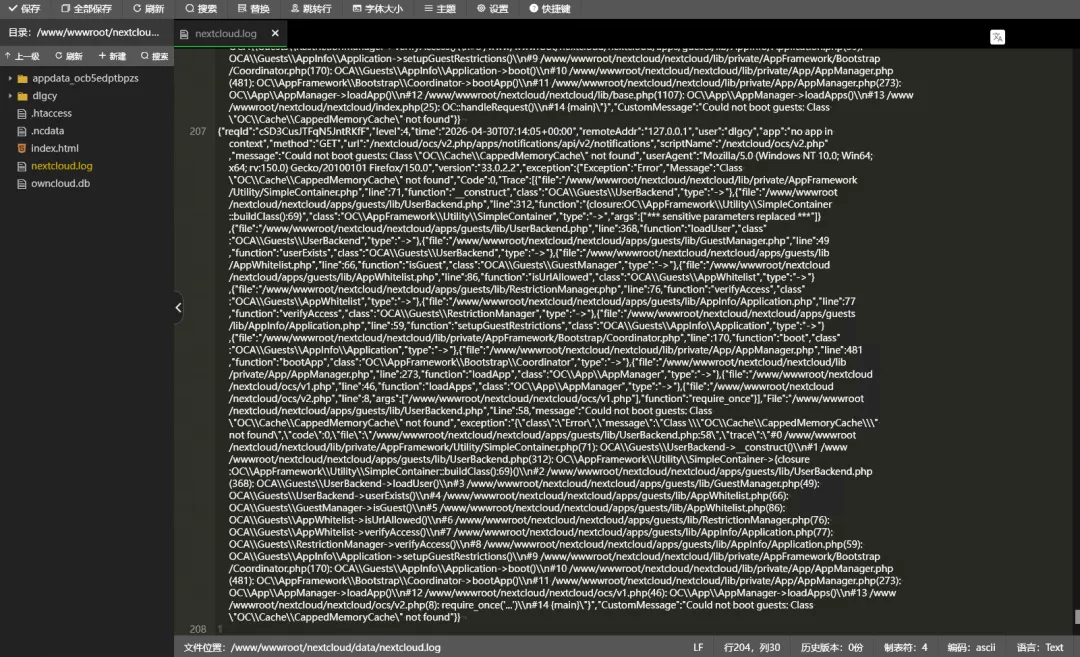
日志如下:
查看配置文件,最后新增了一行,先把它删除吧:
但是删除了还是不行。改成 0 也不行。问了 AI ,说是要清除服务器缓存什么的,但是没看到相关缓存。
不过 Chrome 浏览器中没有登录的页面还是能正常访问了,难道是浏览器的缓存问题?
先登录一下试试,还是不行:
尝试升级:
cd /www/wwwroot/nextcloud/nextcloud/sudo -u www php occ upgrade没用
php occ输出了一大堆命令


Nextcloud 33.0.2Usage:command [options] [arguments]Options:-h, --help Display help for the given command. When no command is given display help for the list command-q, --quiet Do not output any message-V, --version Display this application version--ansi|--no-ansi Force (or disable --no-ansi) ANSI output-n, --no-interaction Do not ask any interactive question--no-warnings Skip global warnings, show command output only-v|vv|vvv, --verbose Increase the verbosity of messages: 1 for normal output, 2 for more verbose output and 3 for debugAvailable commands:check check dependencies of the server environmentcompletion Dump the shell completion scripthelp Display help for a commandlist List commandssetupchecks Run setup checks and output the resultsstatus show some status informationupgrade run upgrade routines after installation of a new release. The release has to be installed before.activityactivity:send-mails Sends the activity notification mailsadmin-delegationadmin-delegation:add add setting delegation to a groupadmin-delegation:remove remove settings delegation from a groupadmin-delegation:show show delegated settingsappapp:disable disable an appapp:enable enable an appapp:getpath Get an absolute path to the app directoryapp:install install an appapp:list List all available appsapp:remove remove an appapp:update update an app or all appsapp_apiapp_api:app:config:delete Delete ExApp configsapp_api:app:config:get Get ExApp configapp_api:app:config:list List ExApp configsapp_api:app:config:set Set ExApp configapp_api:app:disable Disable registered external appapp_api:app:enable Enable registered external appapp_api:app:list List ExAppsapp_api:app:register Install external Appapp_api:app:unregister Unregister external appapp_api:app:update Update ExAppapp_api:daemon:list List registered daemonsapp_api:daemon:register Register daemon config for ExApp deploymentapp_api:daemon:registry:add Add deploy daemon Docker registry mappingapp_api:daemon:registry:list List the configured deploy daemon Docker registry mappingsapp_api:daemon:registry:remove Remove deploy daemon Docker registry mappingapp_api:daemon:unregister Unregister daemonbackgroundbackground:cron [background:ajax|background:webcron] Use cron, ajax or webcron to run background jobsbackground-jobbackground-job:delete Remove a background job from databasebackground-job:execute Execute a single background job manuallybackground-job:list List background jobsbackground-job:worker Run a background job workerbroadcastbroadcast:test test the SSE broadcastercalendarcalendar:export Export calendar data from supported calendars to disk or stdoutcalendar:import Import calendar data to supported calendars from disk or stdincirclescircles:check Checking your configurationcircles:maintenance Clean stuff, keeps the app runningcircles:manage:config edit config/type of a Teamcircles:manage:create create a new teamcircles:manage:destroy destroy a circle by its IDcircles:manage:details get details about a team by its IDcircles:manage:edit edit displayName or description of a Teamcircles:manage:join emulate a user joining a Teamcircles:manage:leave simulate a user joining a Teamcircles:manage:list listing current teamscircles:manage:setting edit setting for a Teamcircles:members:add Add a member to a Teamcircles:members:details get details about a member by its IDcircles:members:level Change the level of a member from a Teamcircles:members:list listing Members from a Teamcircles:members:remove remove a member from a teamcircles:members:search Change the level of a member from a Teamcircles:memberships index and display memberships for local and federated userscircles:migrate:customgroupscircles:remote remote featurescircles:shares:files listing shares filescircles:sync Sync Circles and Memberscircles:test testing some featuresconfigconfig:app:delete Delete an app config valueconfig:app:get Get an app config valueconfig:app:set Set an app config valueconfig:import Import a list of configsconfig:list List all configsconfig:preset Select a config presetconfig:system:delete Delete a system config valueconfig:system:get Get a system config valueconfig:system:set Set a system config valuedavdav:absence:getdav:absence:setdav:clear-calendar-unshares Clear calendar unshares for a userdav:clear-contacts-photo-cache Clear cached contact photosdav:create-addressbook Create a dav addressbookdav:create-calendar Create a dav calendardav:create-subscription Create a dav subscriptiondav:delete-calendar Delete a dav calendardav:delete-subscription Delete a calendar subscription for a userdav:fix-missing-caldav-changes Insert missing calendarchanges rows for existing eventsdav:list-addressbooks List all addressbooks of a userdav:list-calendar-shares List all calendar shares for a userdav:list-calendars List all calendars of a userdav:list-subscriptions List all calendar subscriptions for a userdav:move-calendar Move a calendar from an user to anotherdav:remove-invalid-shares Remove invalid dav sharesdav:retention:clean-updav:send-event-reminders Sends event remindersdav:sync-birthday-calendar Synchronizes the birthday calendardav:sync-system-addressbook Synchronizes users to the system addressbookdbdb:add-missing-columns Add missing optional columns to the database tablesdb:add-missing-indices Add missing indices to the database tablesdb:add-missing-primary-keys Add missing primary keys to the database tablesdb:convert-filecache-bigint Convert the ID columns of the filecache to BigIntdb:convert-mysql-charset Convert charset of MySQL/MariaDB to use utf8mb4db:convert-type Convert the Nextcloud database to the newly configured onedb:schema:expected Export the expected database schema for a fresh installationdb:schema:export Export the current database schemaencryptionencryption:change-key-storage-root Change key storage rootencryption:decrypt-all Disable server-side encryption and decrypt all filesencryption:disable Disable encryptionencryption:enable Enable encryptionencryption:encrypt-all Encrypt all files for all usersencryption:list-modules List all available encryption modulesencryption:migrate-key-storage-format Migrate the format of the keystorage to a newer formatencryption:set-default-module Set the encryption default moduleencryption:show-key-storage-root Show current key storage rootencryption:status Lists the current status of encryptionfederationfederation:sync-addressbooks Synchronizes addressbooks of all federated cloudsfederation:sync-calendars Synchronize all incoming federated calendar sharesfilesfiles:cleanup Clean up orphaned filecache and mount entriesfiles:copy Copy a file or folderfiles:delete Delete a file or folderfiles:get Get the contents of a filefiles:mount:list List of mounts for a userfiles:mount:refresh Refresh the list of mounts for a userfiles:move Move a file or folderfiles:object:delete Delete an object from the object storefiles:object:get Get the contents of an objectfiles:object:info Get the metadata of an objectfiles:object:list List all objects in the object storefiles:object:multi:rename-config Rename an object store configuration and move all users over to the new configuration,files:object:multi:users Get the mapping between users and object store bucketsfiles:object:orphans List all objects in the object store that don't have a matching entry in the databasefiles:object:put Write a file to the object storefiles:put Write contents of a filefiles:recommendations:recommend Shows recommended files for an accountfiles:reminders List file remindersfiles:repair-tree Try and repair malformed filesystem tree structures (may be necessary to run multiple times for nested malformations)files:sanitize-filenames Renames files to match naming constraintsfiles:scan rescan filesystemfiles:scan-app-data rescan the AppData folderfiles:transfer-ownership All files and folders are moved to another user - outgoing shares and incoming user file shares (optionally) are moved as well.files:windows-compatible-filenames Enforce naming constraints for windows compatible filenamesgroupgroup:add Add a groupgroup:adduser add a user to a groupgroup:delete Remove a groupgroup:info Show information about a groupgroup:list list configured groupsgroup:removeuser remove a user from a groupguestsguests:add Add a new guest accountguests:list List created guestsinfoinfo:file get information for a fileinfo:file:space Summarize space usage of specified folderinfo:storage Get information a single storageinfo:storages List storages ordered by the number of filesintegrityintegrity:check-app Check integrity of an app using a signature.integrity:check-core Check integrity of core code using a signature.integrity:sign-app Signs an app using a private key.integrity:sign-core Sign core using a private key.l10nl10n:createjs Create javascript translation files for a given apploglog:file manipulate logging backendlog:manage manage logging configurationlog:tail Tail the nextcloud logfilelog:watch Watch the nextcloud logfilemaintenancemaintenance:data-fingerprint update the systems data-fingerprint after a backup is restoredmaintenance:mimetype:update-db Update database mimetypes and update filecachemaintenance:mimetype:update-js Update mimetypelist.jsmaintenance:mode Show or toggle maintenance mode statusmaintenance:repair repair this installationmaintenance:repair-share-owner repair invalid share-owner entries in the databasemaintenance:theme:update Apply custom theme changesmaintenance:update:htaccess Updates the .htaccess filememcachememcache:distributed:clear Clear values from the distributed memcachememcache:distributed:delete Delete a value in the distributed memcachememcache:distributed:get Get a value from the distributed memcachememcache:distributed:set Set a value in the distributed memcachememcache:redis:command Send raw redis command to the configured redis servermetadatametadata:get get stored metadata about a file, by its idmigrationsmigrations:preview Get preview of available DB migrations in case of initiating an upgradenotificationnotification:delete Delete a generated admin notification for the given usernotification:generate Generate a notification for the given usernotification:test-push Generate a notification for the given useronlyofficeonlyoffice:documentserver Manage document serverphotosphotos:albums:add Add specified photo to albumphotos:albums:create Create a new album for a userphotos:update-1000-cities Update the list of 1000 and more inhabitant citiespreviewpreview:cleanup Removes existing preview filespreview:generate generate a preview for a filepreview:reset-rendered-texts Deletes all generated avatars and previews of text and md filesrouterrouter:list Find the target of a route or all routes of an approuter:match Match a URL to the target routesecuritysecurity:bruteforce:attempts Show bruteforce attempts status for a given IP addresssecurity:bruteforce:reset resets bruteforce attempts for given IP addresssecurity:certificates list trusted certificatessecurity:certificates:export export the certificate bundlesecurity:certificates:import import trusted certificate in PEM formatsecurity:certificates:remove remove trusted certificateserverinfoserverinfo:update-storage-statistics Triggers an update of the counts related to storages used in serverinfoshareshare:list List available sharessharingsharing:cleanup-remote-storages Cleanup shared storage entries that have no matching entry in the shares_external tablesharing:delete-orphan-shares Delete shares where the owner no longer has access to the filesharing:expiration-notification Notify share initiators when a share will expire the next day.sharing:fix-share-owners Fix owner of broken shares after transfer ownership on old versionssnowflakesnowflake:decode Decode Snowflake IDs used by Nextcloudsupportsupport:report Generate a system reporttagtag:add Add new tagtag:delete delete a tagtag:edit edit tag attributestag:files:add Add a system-tag to a file or foldertag:files:delete Delete a system-tag from a file or foldertag:files:delete-all Delete all system-tags from a file or foldertag:list list tagstaskprocessingtaskprocessing:task-type:set-enabled Enable or disable a task typetaskprocessing:task:cleanup cleanup old taskstaskprocessing:task:get Display all information for a specific tasktaskprocessing:task:list list taskstaskprocessing:task:stats get statistics for taskstaskprocessing:worker Run a dedicated worker for synchronous TaskProcessing providerstexttext:reset Reset a text document session to the current file contentthemingtheming:config Set theming app config valuestrashbintrashbin:cleanup Remove deleted filestrashbin:expire Expires the users trashbintrashbin:restore Restore all deleted files according to the given filterstrashbin:size Configure the target trashbin sizetwofactor_totptwofactor_totp:cleanup Remove orphaned totp secretstwofactorauthtwofactorauth:cleanup Clean up the two-factor user-provider association of an uninstalled/removed providertwofactorauth:disable Disable two-factor authentication for a usertwofactorauth:enable Enable two-factor authentication for a usertwofactorauth:enforce Enabled/disable enforced two-factor authenticationtwofactorauth:state Get the two-factor authentication (2FA) state of a userupdateupdate:check Check for server and app updatesuseruser:add adds an accountuser:auth-tokens:add [user:add-app-password] Add app password for the named accountuser:auth-tokens:delete Deletes an authentication tokenuser:auth-tokens:list List authentication tokens of an useruser:clear-avatar-cache clear avatar cacheuser:delete deletes the specified useruser:disable disables the specified useruser:enable enables the specified useruser:info show user infouser:keys:verify Verify if the stored public key matches the stored private keyuser:lastseen shows when the user was logged in last timeuser:list list configured usersuser:profile Read and modify user profile propertiesuser:report shows how many users have accessuser:resetpassword Resets the password of the named useruser:setting Read and modify user settingsuser:sync-account-data sync user backend data to accounts table for configured usersuser:welcome Sends the welcome emailversionsversions:cleanup Delete versionsversions:expire Expires the users file versionswebhook_listenerswebhook_listeners:list Lists configured webhook listenersworkflowsworkflows:list Lists configured workflows
使用
php occ config:preset命令也不行:还尝试了
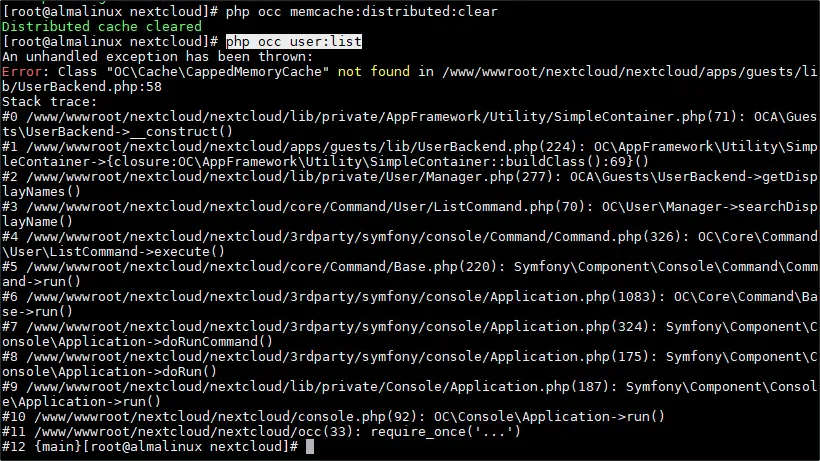
php occ maintenance:repair、php occ memcache:distributed:clear都不行。执行
php occ user:list触发了日志中的报错,看来就是用户模块出问题了:最终通过禁用 guests 应用解决了:
php occ app:disable guests网页上也能正常访问了。所以还是先别改快速预设吧,应该是缺少了一些文件。
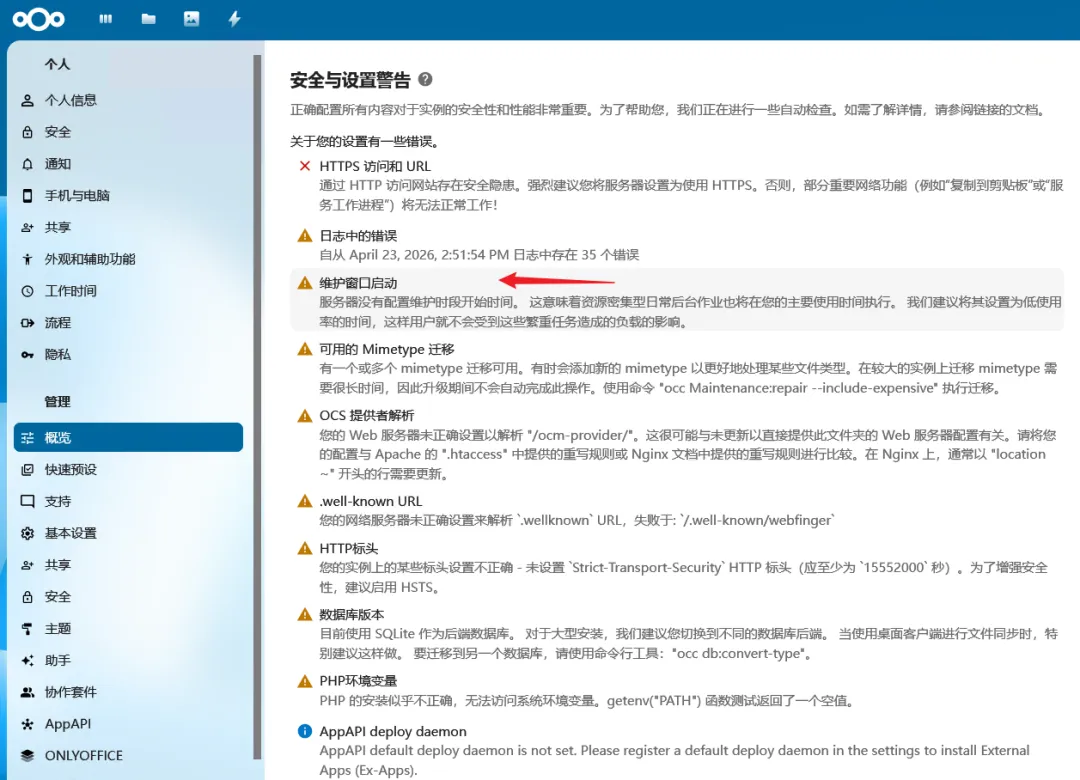
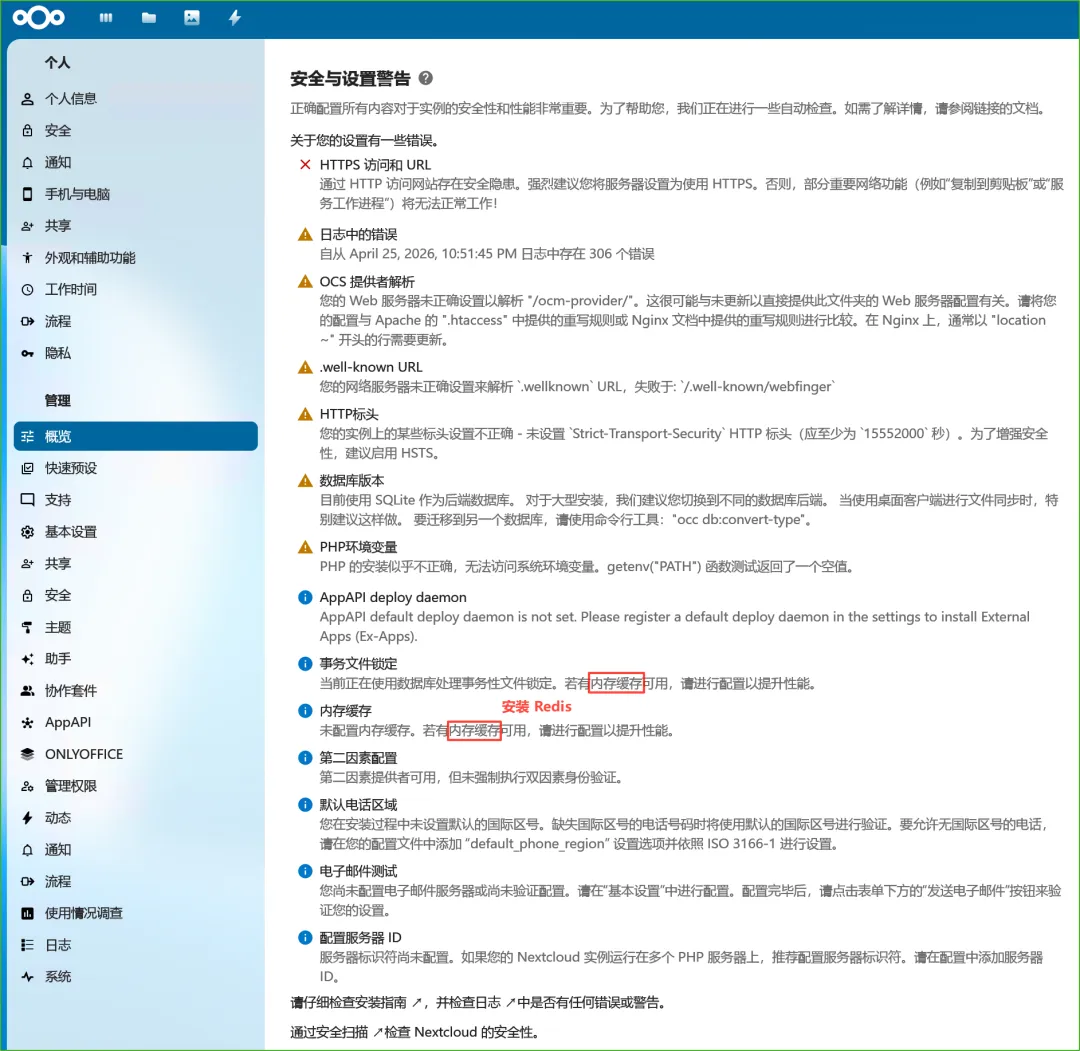
4.5、安全与设置警告 问题处理
4.5.1、维护窗口启动
[ima DSv4Flash]
该参数用于指定资源密集型日常后台作业(如文件扫描、缓存清理等)的执行时间段,避免在用户活跃时段影响系统性能。建议将维护窗口设置在服务器低负载时段(例如凌晨),以减轻对用户的影响。
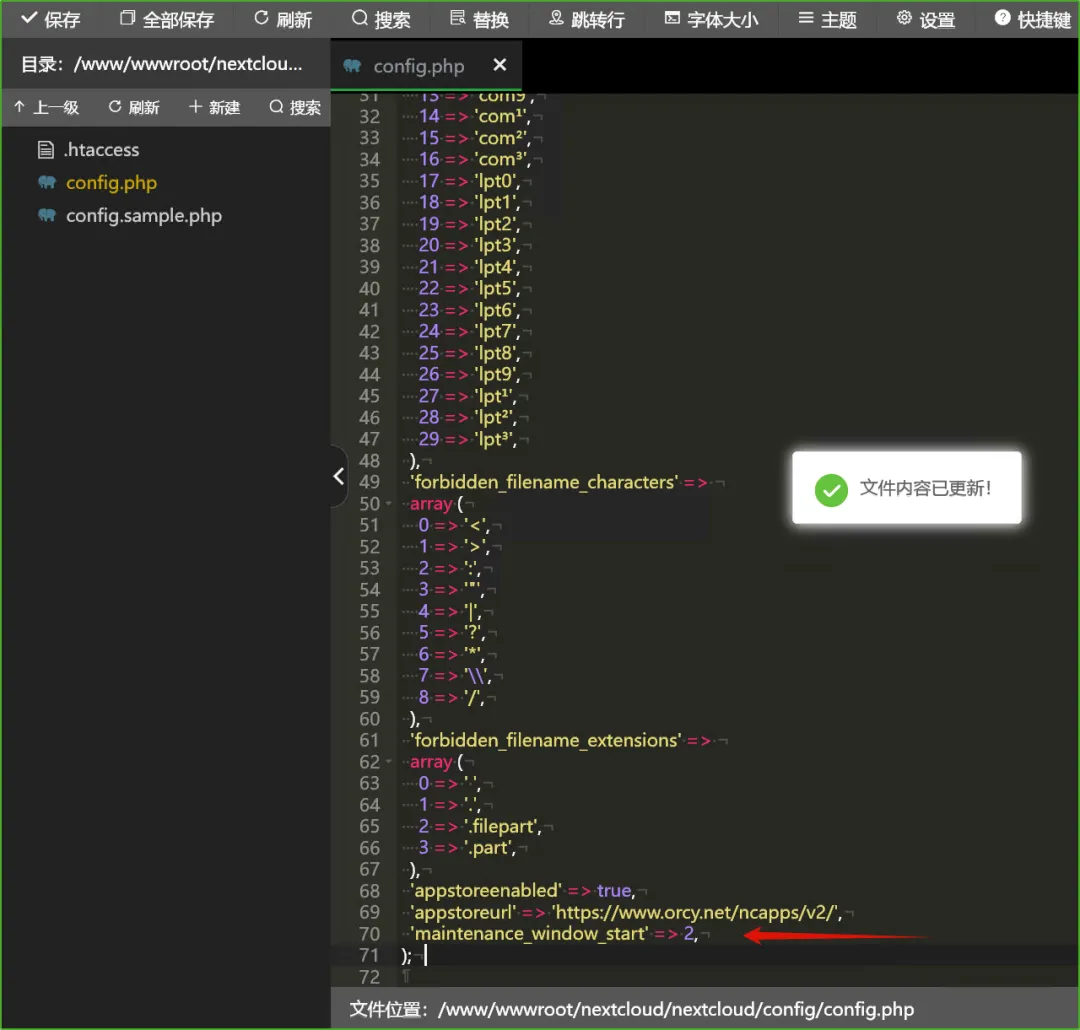
在 Nextcloud 安装目录下的
config/config.php文件中,添加以下一行配置:'maintenance_window_start' => 1,这里
1表示 UTC 时间凌晨 1 点作为维护窗口的起始时间(即非紧急后台作业将在 01:00 UTC 至 05:00 UTC 之间运行)。你可以根据服务器所在时区和低负载时段调整该数值(例如设置为2表示凌晨 2 点开始)实践:
4.5.2、可用的 Mimetype 迁移
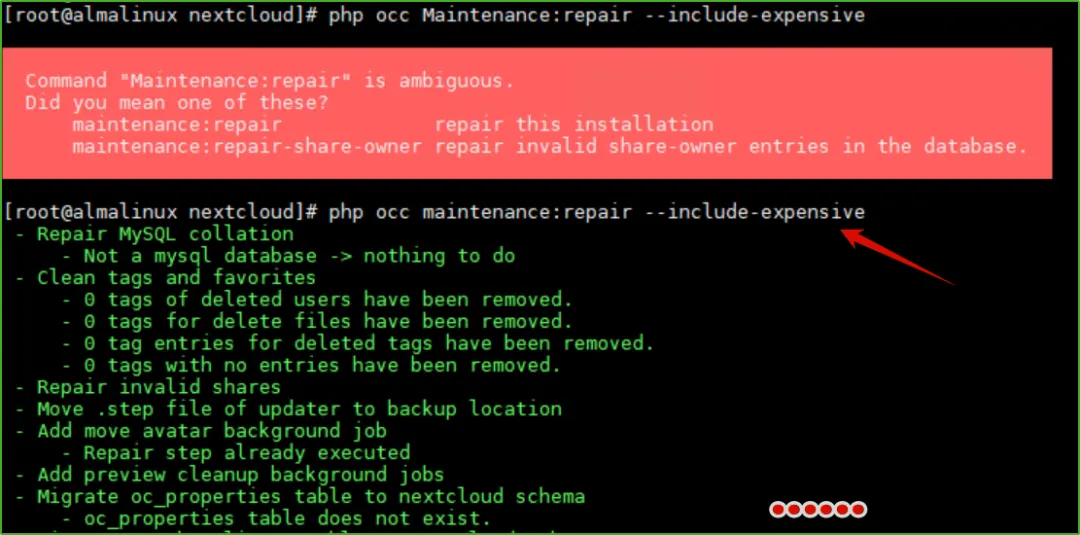
有一个或多个 mimetype 迁移可用。有时会添加新的 mimetype 以更好地处理某些文件类型。在较大的实例上迁移 mimetype 需要很长时间,因此升级期间不会自动完成此操作。使用命令 "occ Maintenance:repair --include-expensive" 执行迁移。
需要使用命令
php occ maintenance:repair --include-expensive进行修复:修复完成这条警告就没有了。
4.5.3、安装缺少的 PHP 模块
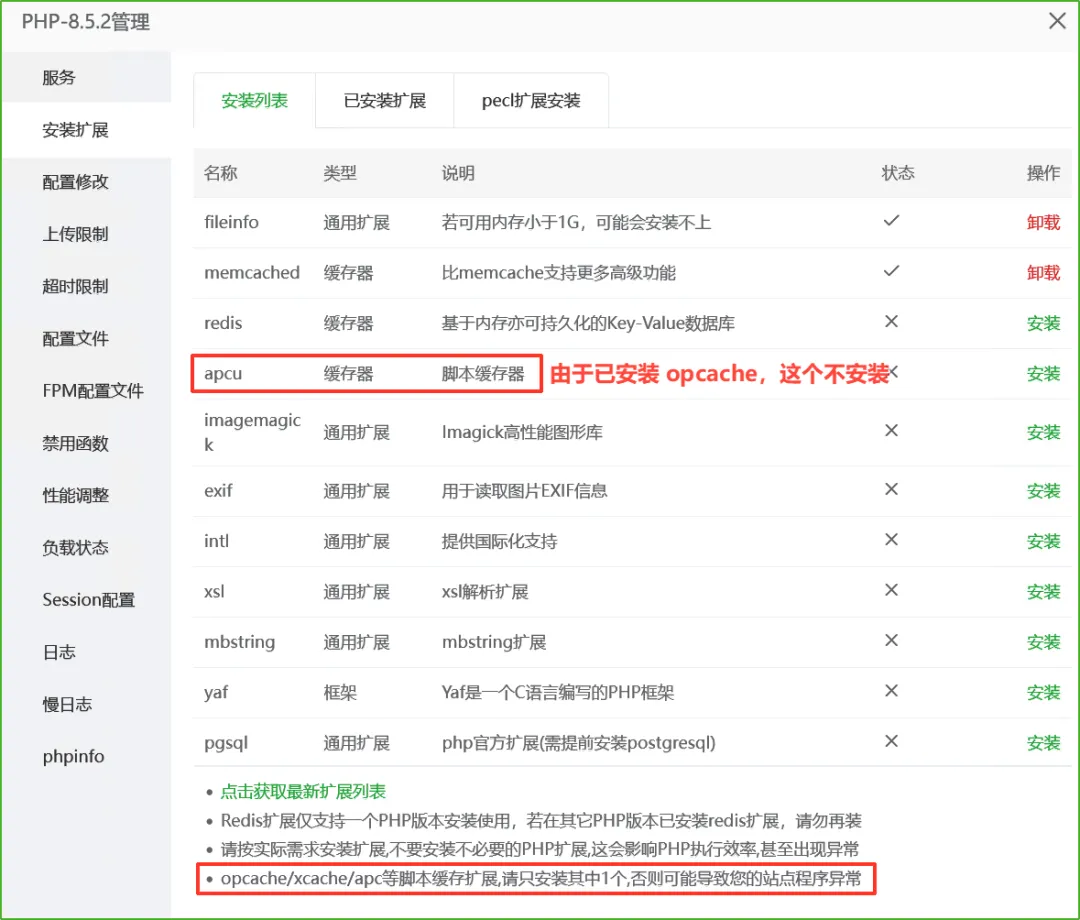
其中 apcu 由于已安装 opcache,所以不安装:
不对,说的是 apc,和我 apcu 有什么关系:
[ima DSv4Flash]:
官方推荐同时开启 OPcache 和 APCu 以实现双重优化。PHP 早期版本中的 APC 扩展同时提供 opcode 缓存和数据缓存功能。自 PHP 5.5 起,OPcache 取代了 APC 的 opcode 缓存部分,而数据缓存功能独立出来成为 APCu。所以两者的分工是明确的。最佳组合方案
- 优先开启 OPcache
:这是 PHP 性能优化的基础,几乎所有生产环境都应启用并调优。 - 按需添加 APCu
:如果应用有需要频繁读取的配置、字典数据或计算结果,可用 APCu 缓存。 - 分布式场景用 Redis
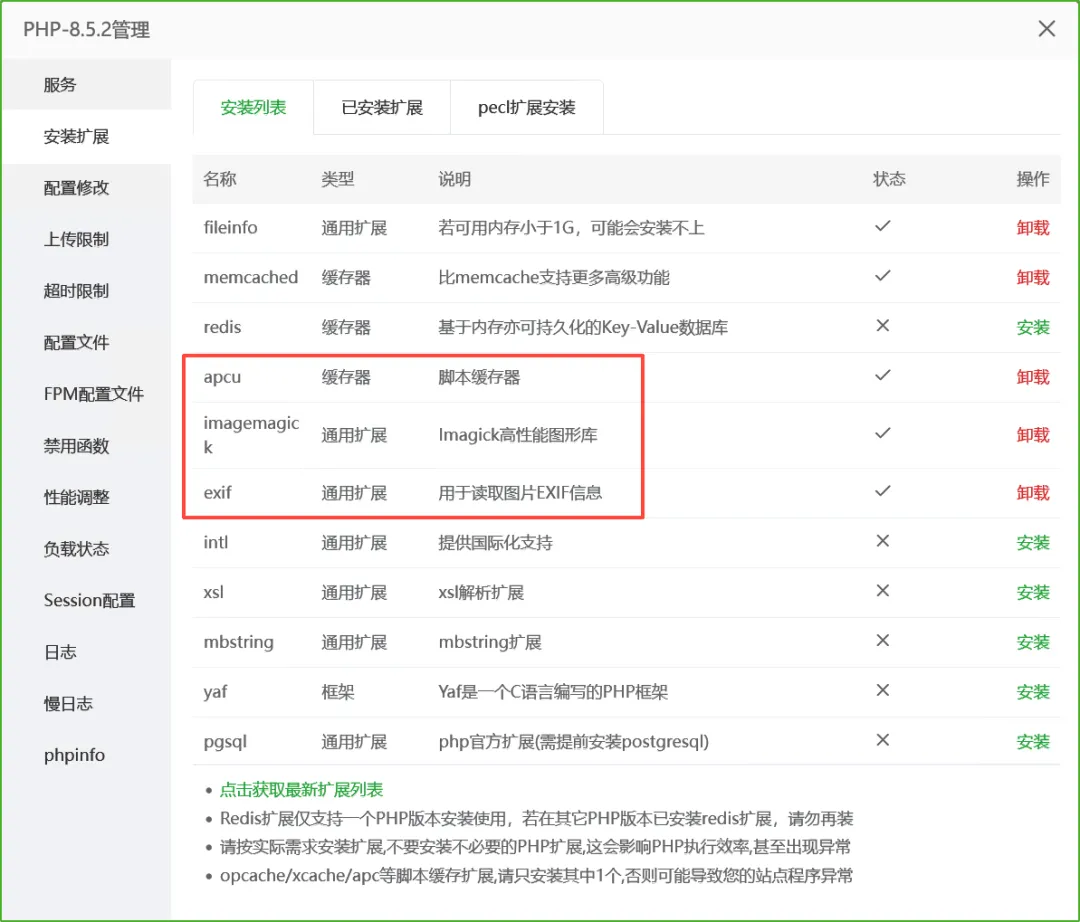
:如果有多台服务器需要共享缓存,建议使用 Redis 或 Memcached 替代 APCu。 所以,apcu 还是要装的。再把 imagemagick 和 exif 安装上:
gmp 也安上:
现在 Nextcloud 的概览中的警告剩余如下,其中内存缓存相关的需要安装 Redis,就先不安了:
五、过程梳理和资源打包
本文介绍了 OnlyOffice + NextCloud 配合实现在线 Office 功能的搭建和配置流程,包括其中的踩坑过程。其中,OnlyOffice 使用了 Windows 版,NextCloud 是在 Hyper-V 虚拟机(AlmaLinux 系统)上搭建的一个网站(通过宝塔面板创建网站),两者通过 NextCloud 上的 onlyoffice-nextcloud 插件(OnlyOffice 开发)进行连接,NextCloud 提供文件托管服务(搭建好之后可以当网盘使用),OnlyOffice 提供在线查看和编辑 Word、Excel、PPT、PDF 等服务,相互配合、相辅相成。
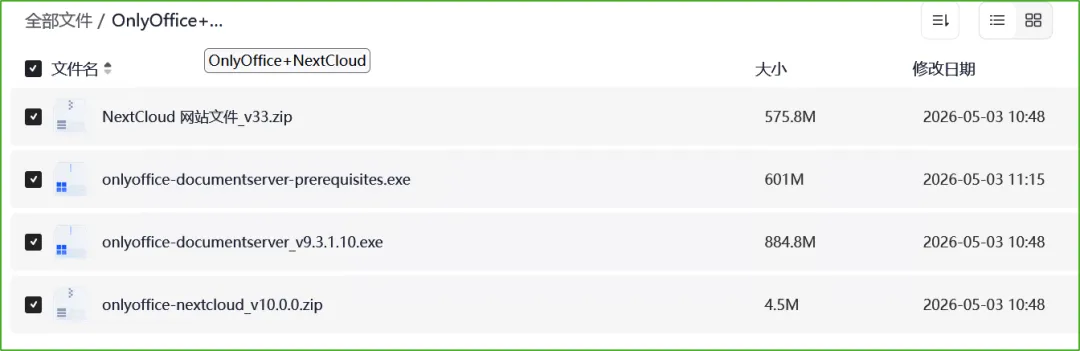
本次使用到的相关文件已整理在一起上传到夸克网盘了,需要的朋友可以在微信公众号 “独立观察员博客” 后台回复 “OnlyOffice” 进行获取:
原创文章,转载请注明: 转载自 独立观察员 (dlgcy.com)
本文链接地址:[OnlyOffice (Win 版) 和 NextCloud 配合实现在线 Office 服务](https://dlgcy.com/onlyoffice-nextcloud/)
关注微信公众号 独立观察员博客(DLGCY_BLOG) 第一时间获取最新文章
Windows
Hyper-V 使用 Win11 ISO 镜像创建虚拟机后进入不了虚拟光驱安装流程的解决方法
IIS 错误解决:当前标识没有对 Temporary ASP.NET Files 的写访问权限
Linux
CentOS7 安装 Trilium Notes 中文版 折腾记
在 VisualStudio 中以 WSL 方式启动程序的过程纪实
在 CentOS 上搭建 MinIO 对象存储服务并配置 HTTPS
在香蕉派的树莓派系统上配置 Syncthing 自启动(暨 Linux 软件自启服务配置)
作品
利用 C# 中的 FileSystemWatcher 制作一个文件夹监控小工具
使用 WPF 版简易 SIP 服务器向 GB28181 摄像头发送直播请求
下载中转加速器 VPSDownloader.NET(.NET Core 程序部署到 Linux 系统)
软件使用
电脑端『手机连接』和手机端『连接至 Windows』功能演示
小众笔记软件『蚂蚁笔记』Windows 客户端新版(v2.8.0)
图片标注工具 labelme 中的 AI 多边形(AI-Polygon)如何使用
在 Windows 上搭建配置 Jenkins 然后编译打包 VS 项目
使用 GB28181.Solution + ZLMediaKit + MediaServerUI 进行摄像头推流和播放
使用 Floccus 插件和坚果云同步Chrome 类浏览器书签
网络
在 Linux(树莓派)系统的 Chromium 浏览器上连接代理网络
搭建 Frp 来远程内网 Windows 和 Linux 机子
其它
推荐一款WIFI7路由器(中兴问天 BE7200 Pro+)
AMI BIOS 选项展示及部分解释 (by ChatGPT)
VisualStudio使用DialogPage存储配置信息
视频