 夜雨聆风
夜雨聆风Windows 11系统OpenClaw(龙虾)安装教程|保姆级一步到位
OpenClaw是一款能真正落地执行任务的开源 AI 智能体,可帮你处理邮件、管理日程、自动签到、对接聊天软件,全程在本地运行,隐私更安全。
本文基于 Windows 11 环境,把安装、配置、启动全流程拆到最简,新手照着做就能成功。

一、安装前准备(必做)
OpenClaw 依赖Git与Node.js运行,先装好这两个基础环境。
1. 安装 Git 下载地址:https://github.com/git-for-windows/git/releases/download/v2.52.0.windows.1/Git-2.52.0-64-bit.exe
安装要点:全程默认下一步,无需修改配置。
2. 安装 Node.js 下载地址:https://nodejs.org/
安装要点:选择LTS 稳定版,默认安装,自动配置环境变量。
OpenClaw 要求 Node.js 版本必须 ≥ 22
3. 验证环境 以管理员身份打开 CMD,输入:
git --versionnode -vnpm -v出现版本号即环境正常。
二、安装 OpenClaw 核心程序
这一步是关键,必须用管理员权限 CMD,且确保能正常访问 GitHub。
1. 打开管理员 CMD 路径:控制面板 → 系统和安全 → Windows 工具 → 找到命令提示符 → 右键以管理员身份运行。
2. 执行安装命令
参考https://docs.openclaw.ai/zh-CN/install
iwr -useb https://openclaw.ai/install.ps1 | iex或者npm i -g openclaw --ignore-scripts --registry=https://registry.npmmirror.comnpm i -g openclaw --ignore-scripts --registry=https://registry.npmmirror.com• 安装成功:提示更新若干包,无报错。 • 安装失败(code 128):多执行几次命令,多为网络波动导致。
openclaw --version安装报错:
PS C:\Users\Administrator> iwr -useb https://openclaw.ai/install.ps1 | iexOpenClaw Installer[OK] Windows detected[OK] Node.js v24.14.0 found[*] Installing OpenClaw (openclaw@latest)...iex : 无法加载文件 D:\Program Files\nodejs\npm.ps1,因为在此系统上禁止运行脚本。有关详细信息,请参阅 https:/go.microsoft.com/fwlink/?LinkID=135170 中的 about_Execution_Policies。所在位置 行:1 字符: 45iwr -useb https://openclaw.ai/install.ps1 | iex ~~~CategoryInfo : SecurityError: (:) [Invoke-Expression],PSSecurityExceptionFullyQualifiedErrorId : UnauthorizedAccess,Microsoft.PowerShell.Commands.InvokeExpressionCommand解决报错
设置执行策略为 RemoteSigned(允许运行本地脚本,远程脚本需签名)Set-ExecutionPolicy RemoteSigned -Scope CurrentUser -Force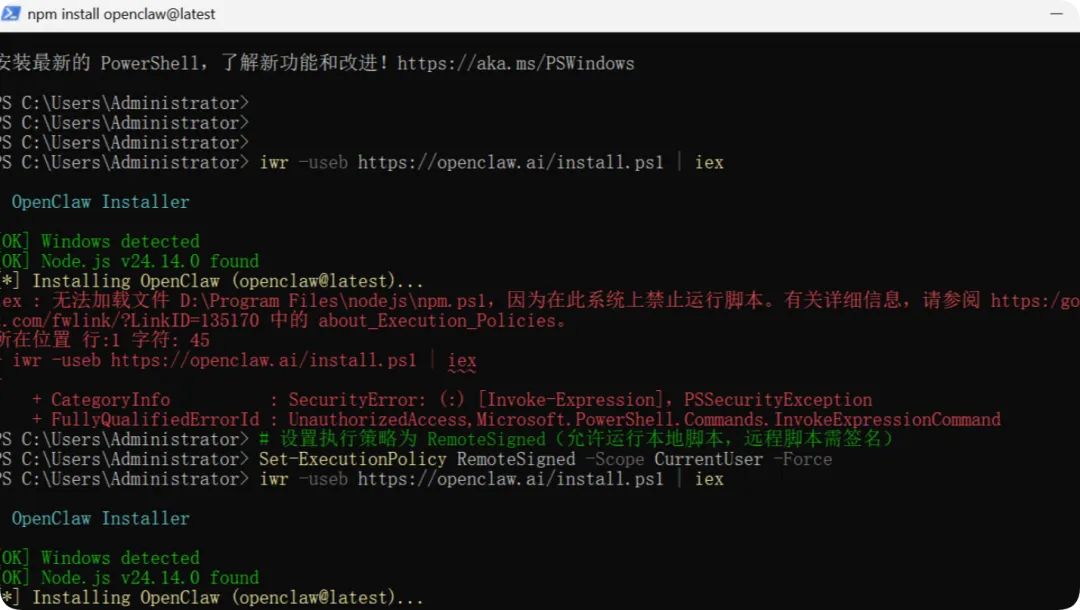
经过一段时间的安装
安装成功
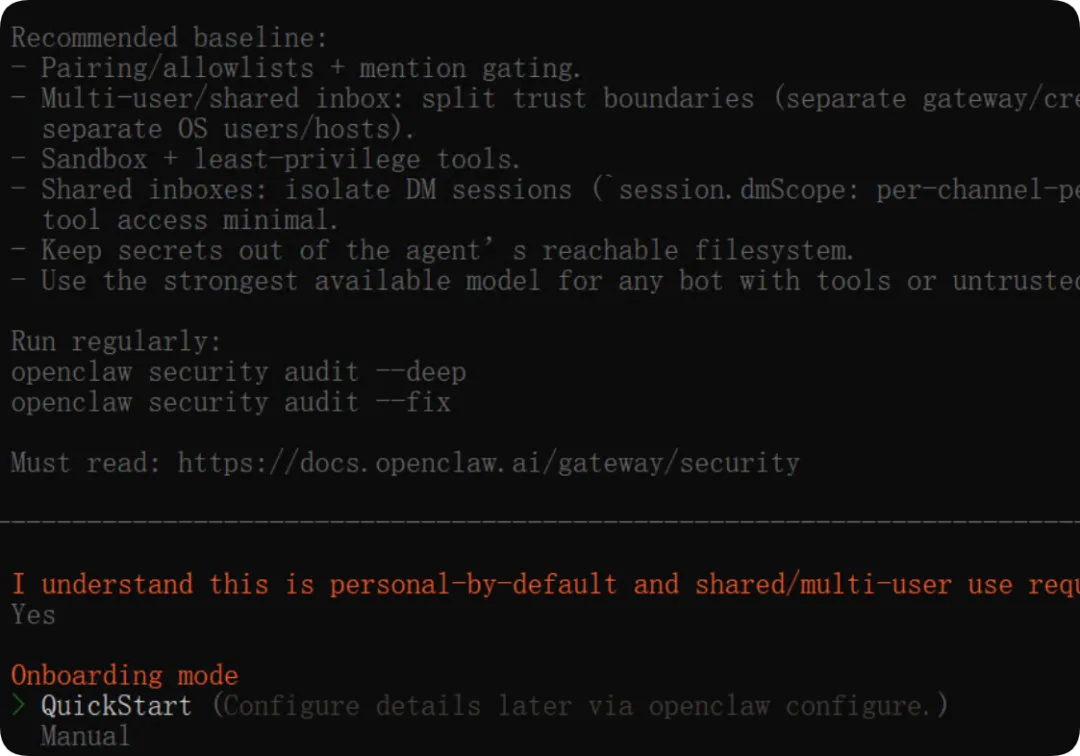
PS C:\Users\Administrator> iwr -useb https://openclaw.ai/install.ps1 | iex OpenClaw Installer[OK] Windows detected[OK] Node.js v24.14.0 found[*] Installing OpenClaw (openclaw@latest)...[OK] OpenClaw installedOpenClaw installed successfully (2026.3.2)!Cozy. I've already read your calendar. We need to talk.Starting setup...🦞 OpenClaw 2026.3.2 (85377a2) — I autocomplete your thoughts—just slower and with more API calls.Windows detected — OpenClaw runs great on WSL2!Native Windows might be trickier.Quick setup: wsl --install (one command, one reboot)Guide: https://docs.openclaw.ai/windows▄▄▄▄▄▄▄▄▄▄▄▄▄▄▄▄▄▄▄▄▄▄▄▄▄▄▄▄▄▄▄▄▄▄▄▄▄▄▄▄▄▄▄▄▄▄▄▄▄▄▄▄██░▄▄▄░██░▄▄░██░▄▄▄██░▀██░██░▄▄▀██░████░▄▄▀██░███░████░███░██░▀▀░██░▄▄▄██░█░█░██░█████░████░▀▀░██░█░█░████░▀▀▀░██░█████░▀▀▀██░██▄░██░▀▀▄██░▀▀░█░██░██▄▀▄▀▄██▀▀▀▀▀▀▀▀▀▀▀▀▀▀▀▀▀▀▀▀▀▀▀▀▀▀▀▀▀▀▀▀▀▀▀▀▀▀▀▀▀▀▀▀▀▀▀▀▀▀▀▀ 🦞 OPENCLAW 🦞T OpenClaw onboarding|o Security ---------------------------------------------------------------------------------+| || Security warning — please read. || || OpenClaw is a hobby project and still in beta. Expect sharp edges. || By default, OpenClaw is a personal agent: one trusted operator boundary. || This bot can read files and run actions if tools are enabled. || A bad prompt can trick it into doing unsafe things. || || OpenClaw is not a hostile multi-tenant boundary by default. || If multiple users can message one tool-enabled agent, they share that delegated tool || authority. || || If you’re not comfortable with security hardening and access control, don’t run || OpenClaw. || Ask someone experienced to help before enabling tools or exposing it to the internet. || || Recommended baseline: || - Pairing/allowlists + mention gating. || - Multi-user/shared inbox: split trust boundaries (separate gateway/credentials, ideally || separate OS users/hosts). || - Sandbox + least-privilege tools. || - Shared inboxes: isolate DM sessions (`session.dmScope: per-channel-peer`) and keep || tool access minimal. || - Keep secrets out of the agent’s reachable filesystem. || - Use the strongest available model for any bot with tools or untrusted inboxes. || || Run regularly: || openclaw security audit --deep || openclaw security audit --fix || || Must read: https://docs.openclaw.ai/gateway/security || |+--------------------------------------------------------------------------------------------+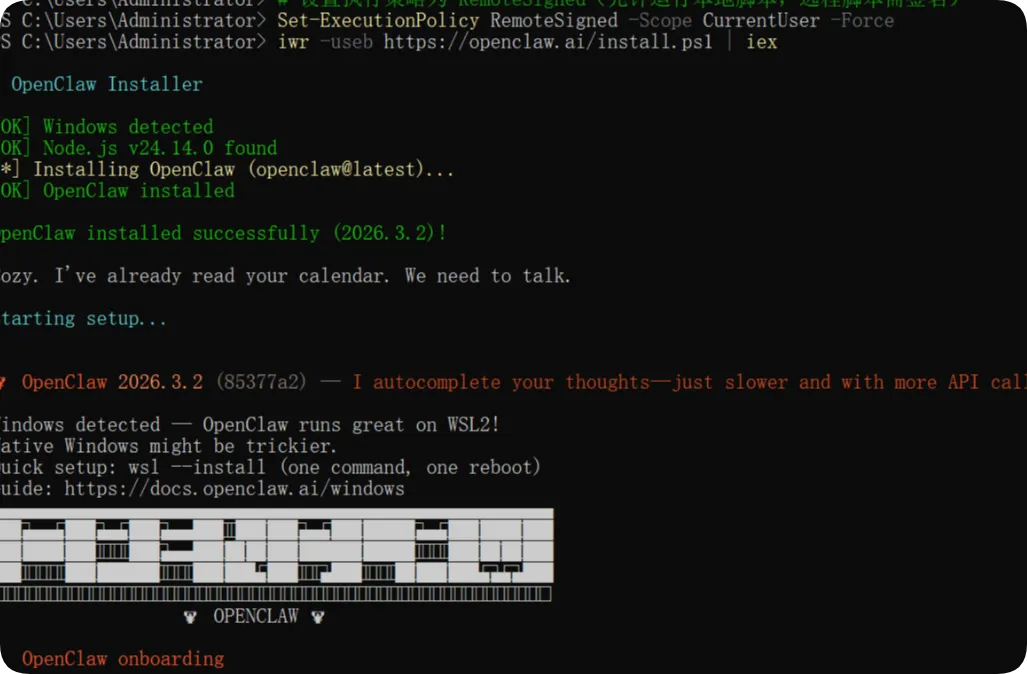
查看版本
openclaw --versionPS C:\Users\Administrator> openclaw --version2026.3.2出现类似2026.3.2的版本号,说明安装成功。
三、初始化配置与启动
安装完成后,进行初始化配置,绑定 AI 模型并启动服务。
1.执行初始化命令
openclaw onboard --install-daemon2.配置向导
协议确认:选Yes
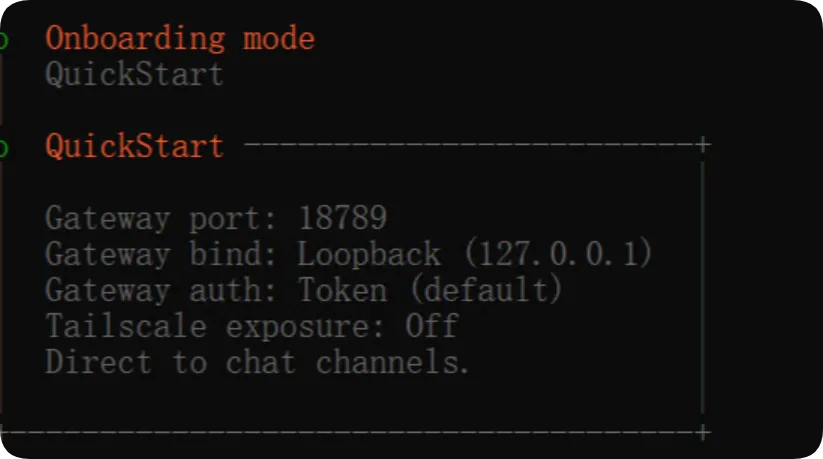
3.安装模式:QuickStart
4.配置处理:Use existing values
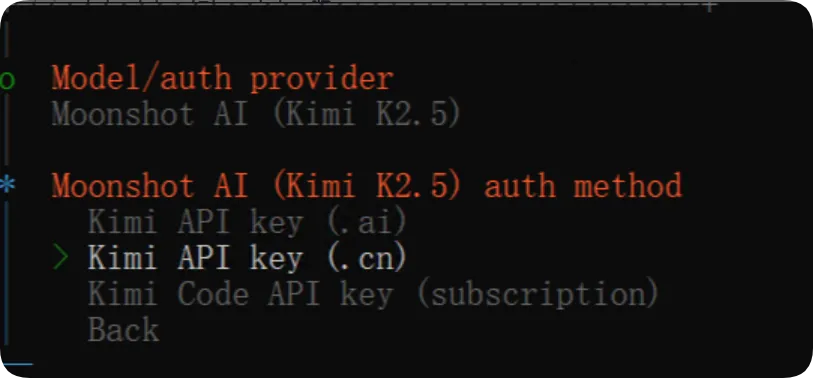
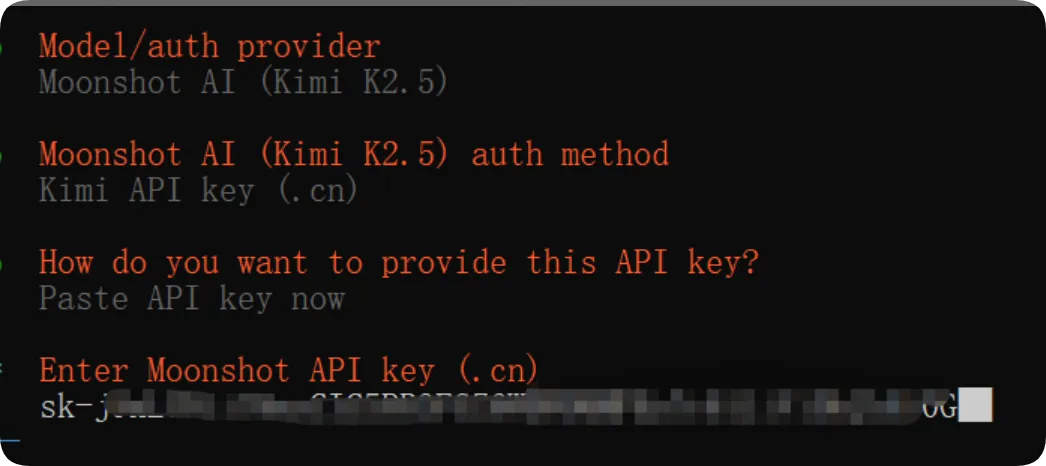
5.模型选择:新手推荐Qwen或Moonshot AI (Kimi K2.5)
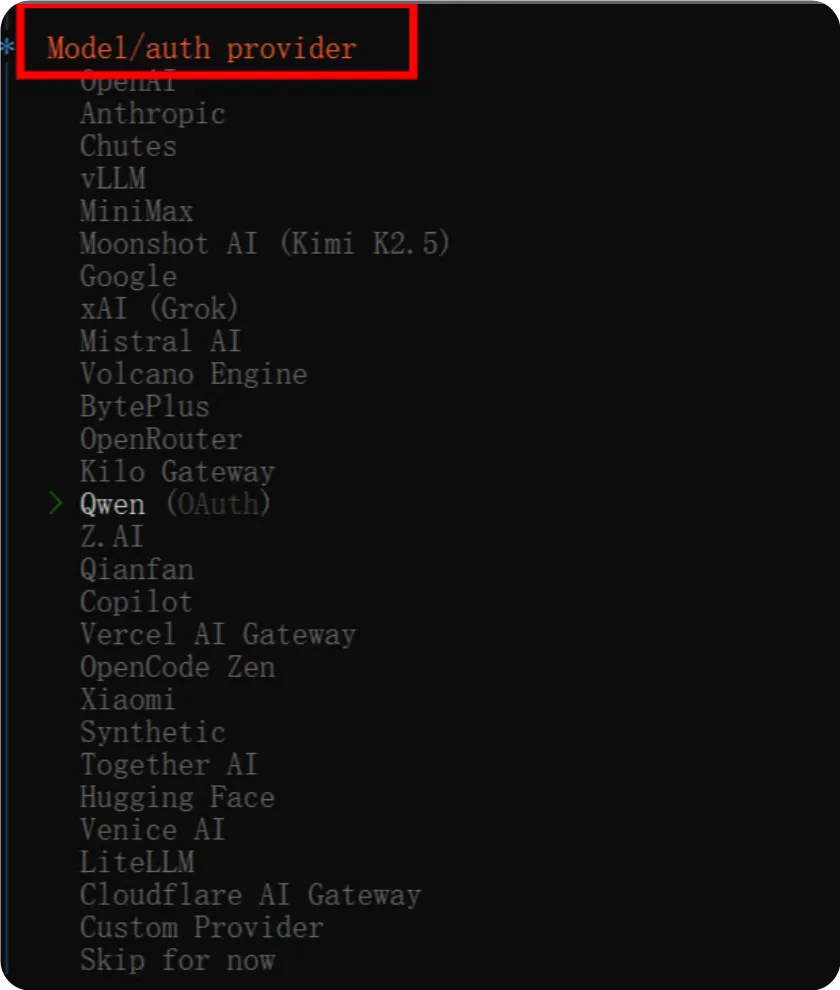
6.API 方式
选对应平台的 API Key,直接粘贴
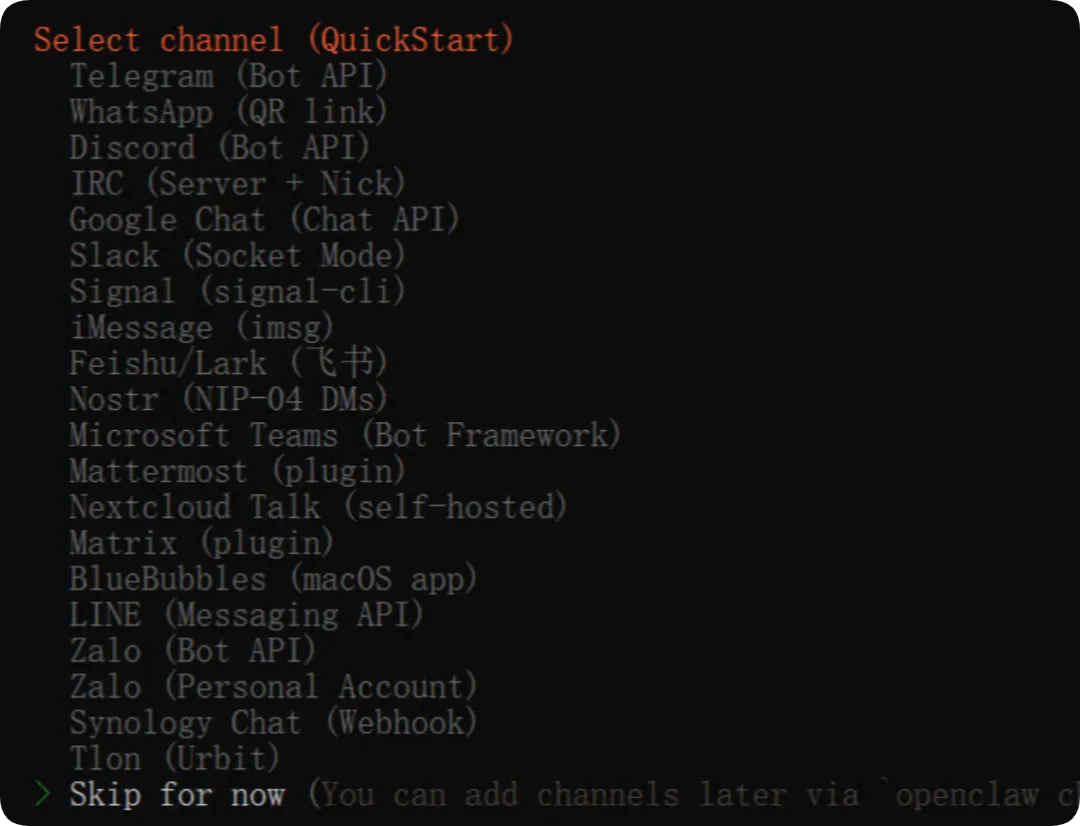
7.通讯渠道
选Skip for now(后续可再加)
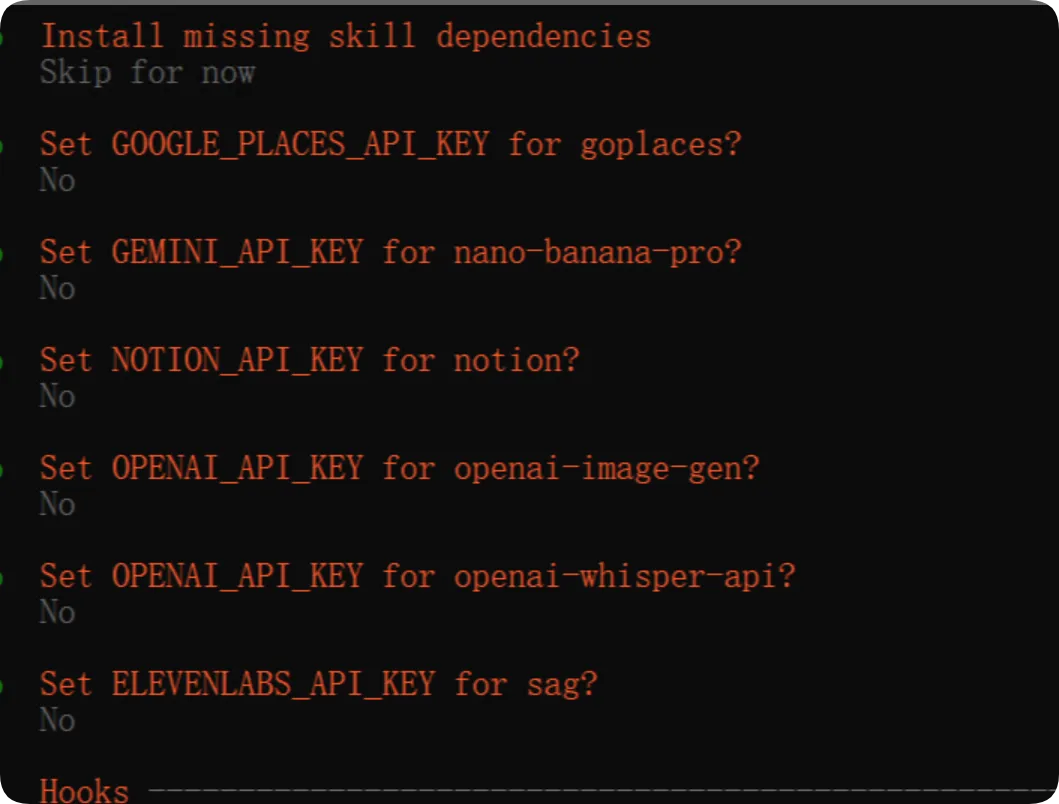
8.技能依赖
全部Skip for now
9.各类 API Key
统一选No
10.网关服务
Skip
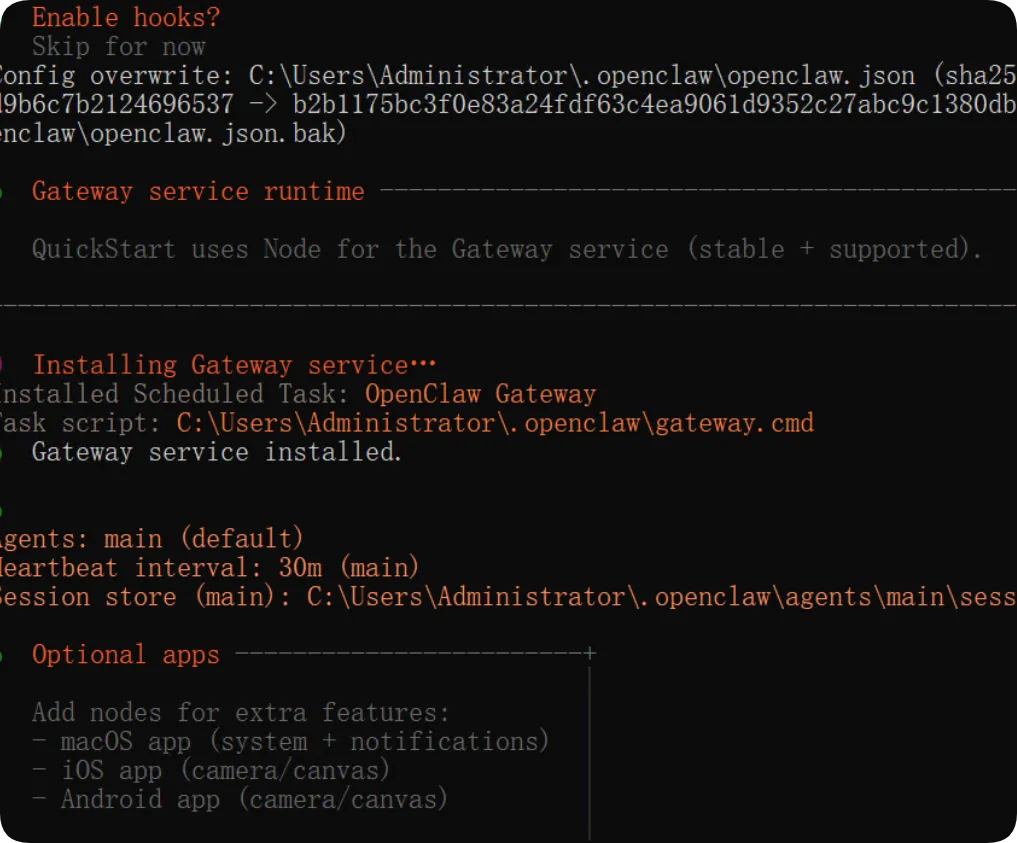
启动服务
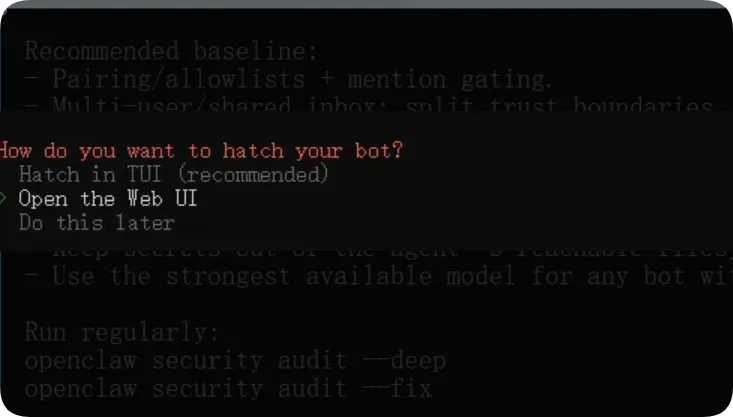
11.配置完成后,选择
Open the Web UI
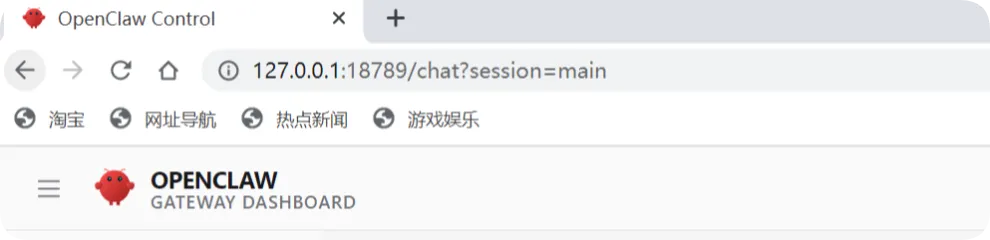
,浏览器自动打开本地面板:
http://127.0.0.1:18789/chat如果需要验证去配置文件中查找
C:\Users\Administrator\.openclaw\config.json查找"port": 18789, "mode": "local", "bind": "loopback", "auth": { "mode": "token", "token": "你的配置的token"http://127.0.0.1:18789/?token=你的配置的token看到面板显示版本号 + 健康状况正常,即为完全启动成功。
四、常见问题与注意事项
1. 安装报错 code 128:重试命令、检查网络、确认 Git 已装好。 2. 启动后无面板:重新执行初始化命令,确保端口 18789 未被占用。 3. 模型不生效:检查 API Key 是否正确,选择国内节点更稳定。 4. 运行更稳定:官方建议搭配WSL2使用,原生 Windows 偶有兼容问题。
五、总结
OpenClaw 是轻量化、强执行的本地 AI 助手,Windows 11 按 “装环境→装主程序→初始化→启 WebUI” 四步走,5–10 分钟就能完成部署。配置时尽量默认,减少出错概率,先用基础功能,熟悉后再扩展渠道与技能。
