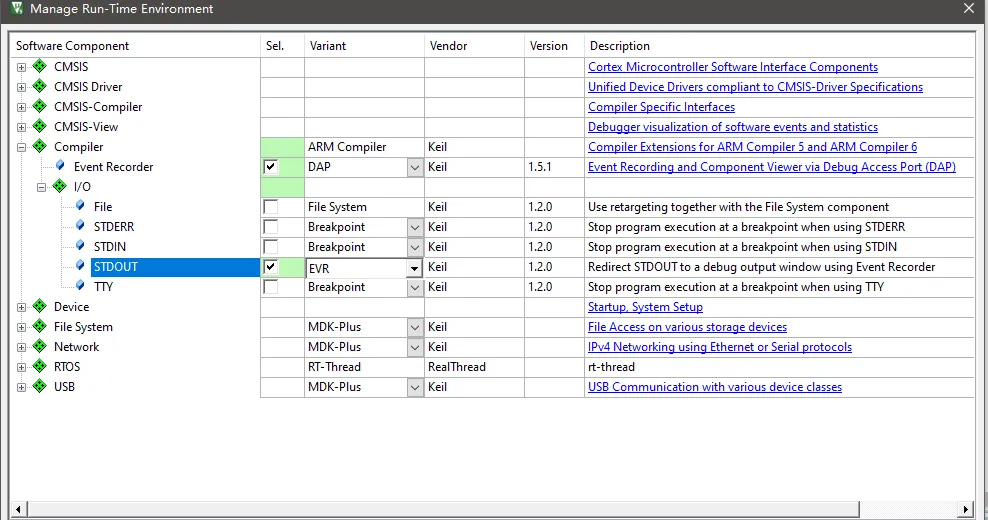
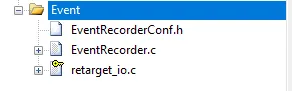
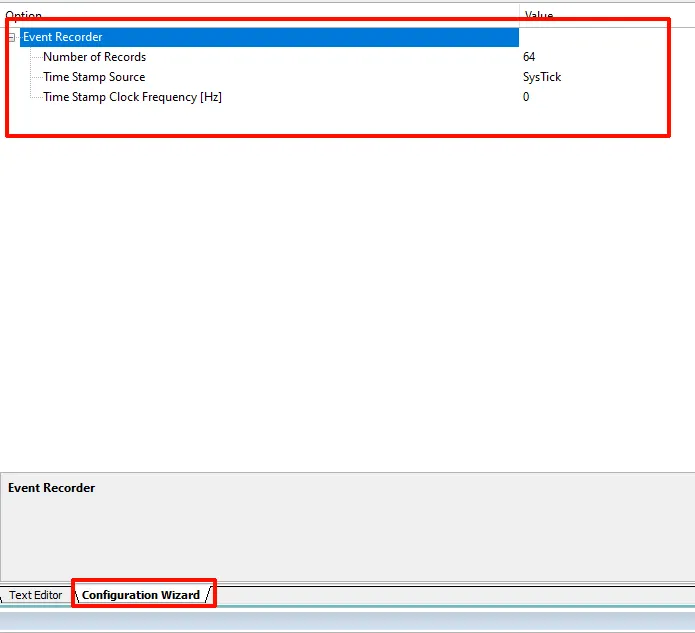
选择Compoler--Event Recorder选择上述两个包就可以了。不过我这里是将他们拷贝到我的工程,转成离线包了,这样方便后期修改。这里由于M0+单片机没有DUT计数器,而且我的滴答定时器用在了RT-Thread中我们需要自己手动修改滴答定时器的中断函数,并且自己实现时间测量获取函数。直接源码/************************************************************************************************//** * @file bsp_system.h * @author MCU Ecosystem Development Team * @brief MCU外设分配头文件,使用宏定义占用外设,方便区分查找 * * **************************************************************************************************/#include"bsp_system.h"#include"bsp_eventRecorder.h"//#include "cmsis_armclang.h"#include"system_ciu32L071.h"#include"mid_log.h"#include"key.h"#include"rthw.h"#include"EventRecorderConf.h"/* SysTick period in cycles */#ifndef SYSTICK_PERIOD#define SYSTICK_PERIOD 16000000/100#endif/* SysTick variables */static volatile uint32_t SysTickCount;static volatile uint8_t SysTickUpdated;voidSysTick_Handler_hook(void){ SysTickCount += SYSTICK_PERIOD; SysTickUpdated = 1U;}/* Setup SysTick */__STATIC_INLINE uint32_tbsp_SysTickSetup(void){ // SysTickCount = 0U; // SysTick->LOAD = SYSTICK_PERIOD - 1U; // SysTick->VAL = 0U; // SysTick->CTRL = SysTick_CTRL_ENABLE_Msk | SysTick_CTRL_TICKINT_Msk | SysTick_CTRL_CLKSOURCE_Msk; return 1U;}/* Get SysTick frequency */__STATIC_INLINE uint32_tbsp_SysTickGetFreq(void){ return (SystemCoreClock); }/* Get SysTick count */__STATIC_INLINE uint32_tbsp_SysTickGetCount(void){ uint32_t val; do { SysTickUpdated = 0U; val = SysTickCount; val += (SYSTICK_PERIOD - 1U) - SysTick->VAL; } while (SysTickUpdated != 0U); return (val);}/** Setup timer hardware \return status (1=Success, 0=Failure)*/#if (EVENT_TIMESTAMP_SOURCE < 3)//__WEAK uint32_t EventRecorderTimerSetup(void)uint32_tEventRecorderTimerSetup(void){#if (EVENT_TIMESTAMP_SOURCE == 0)// #if ((__CORTEX_M >= 3U) && (__CORTEX_M != 23U))// CoreDebug->DEMCR |= CoreDebug_DEMCR_TRCENA_Msk;// DWT->CTRL |= DWT_CTRL_CYCCNTENA_Msk;// return 1U;// #else// TimeStamp = 0U;// return 1U;// #endif#elif (EVENT_TIMESTAMP_SOURCE == 1) return (bsp_SysTickSetup());#elif (EVENT_TIMESTAMP_SOURCE == 2) SysTimerState = 0U; return 1U;#endif}#endif/** Get timer frequency \return timer frequency in Hz*/#if (EVENT_TIMESTAMP_SOURCE < 3)//__WEAK uint32_t EventRecorderTimerGetFreq(void)uint32_tEventRecorderTimerGetFreq(void){#if (EVENT_TIMESTAMP_SOURCE == 0)// #if ((__CORTEX_M >= 3U) && (__CORTEX_M != 23U))// return (SystemCoreClock);// #else// return 0U;// #endif#elif (EVENT_TIMESTAMP_SOURCE == 1) return (bsp_SysTickGetFreq());#elif (EVENT_TIMESTAMP_SOURCE == 2) uint32_t freq; if (SysTimerIsRunning() != 0U) { freq = osKernelGetSysTimerFreq(); } else { freq = 0U; } return (freq);#endif}#endif/** Get timer count \return timer count (32-bit)*/#if (EVENT_TIMESTAMP_SOURCE < 3)//__WEAK uint32_t EventRecorderTimerGetCount(void)uint32_tEventRecorderTimerGetCount(void){#if (EVENT_TIMESTAMP_SOURCE == 0)// #if ((__CORTEX_M >= 3U) && (__CORTEX_M != 23U))// return (DWT->CYCCNT);// #else// return (TimeStamp++);// #endif#elif (EVENT_TIMESTAMP_SOURCE == 1) return (bsp_SysTickGetCount());#elif (EVENT_TIMESTAMP_SOURCE == 2) uint32_t count; if (SysTimerIsRunning() != 0U) { count = osKernelGetSysTimerCount(); } else { count = 0U; } return (count);#endif}#endif
voidSysTick_Handler(void){ /* 进入中断 */ rt_interrupt_enter(); /* 更新时基 */ rt_tick_increase();#if Enable_EventRecorder == 1 SysTick_Handler_hook();#endif /* 离开中断 */ rt_interrupt_leave();}
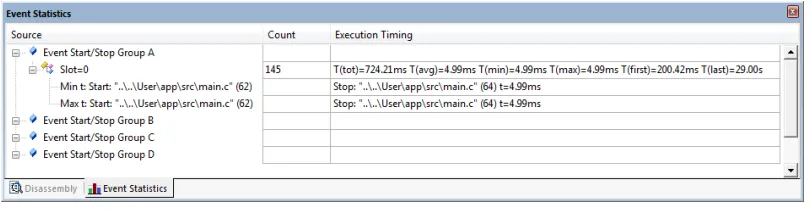
而EventRecorder.c中的中断函数我是注释掉了,防止编译冲突。这里直接编译应该就能通过了,如果有重名函数以自己写的为准。#definemy_EventStartA(a) EventStartA(a)#definemy_EventStopA(a) EventStopA(a)直接放在需要测试时间的代码起始和结束位置。这里可以得到运行时间和平均时间
 夜雨聆风
夜雨聆风