ARTICLE · 1062928
保姆级学习开发安卓手机软件实战(四)--完善Device设备类,启动开关及列表改卡片
把占位的 List<String> 换成真正的 List<Device>,列表改成卡片 + 启用开关。
那首先先建立设备类吧。
一、建 data/model 包
展开到 app > kotlin+java > com > example > jstz1
右键 jstz1 → New → Package→输入data.model再回车(直接创建两级文件夹)
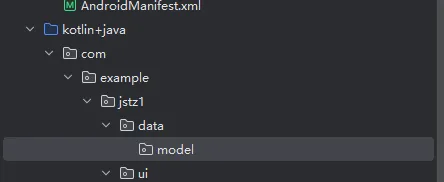
右键 model → New → Kotlin Class/File→ 输入 Device → 选 File → 回车
再右键 model → New → Kotlin Class/File → 输入 ProtocolCode → 选 File → 回车
这里是创建了两个文件,一个文件放设备模型,后一个是放协议码(也就是字节对应内容)
首先是Device 文件内容:
data class Device(val devId: String, // 设备码val enabled: Boolean = true, // 是否启用val online: Boolean = false // 连接状态)data class DeviceState(val devId: String, // 关联键val process: Process, // 当前流程)
其次是ProtocolCode 文件内容:
enum class Process(val code: Int, val label: String) {STOP(0, "停止"),DONE(10, "完成"),MANUAL(20, "手动"),UNKNOWN(-1, "未知");companion object {/** 通信层用:字节码 → 枚举 */funfromCode(code: Int): Process =entries.firstOrNull { it.code == code } ?: UNKNOWN/** 通信层用:中文label → 枚举 */funfromLabel(label: String): Process =entries.firstOrNull { it.label == label } ?: UNKNOWN}}
这两个文件其实就是根据通信协议提取出来的,我只贴出了部分,以供后续流程,大家这里其实就是找到自己软件的数据对象。
例如,如果这个软件是登记人员,那这里数据对象就是人,有性别、年龄、住址等属性,那如果很多信息,需要分别使用,就可以像我一样,分成两个大类。然后第二个文件就是枚举,例如,性别有男女之分。
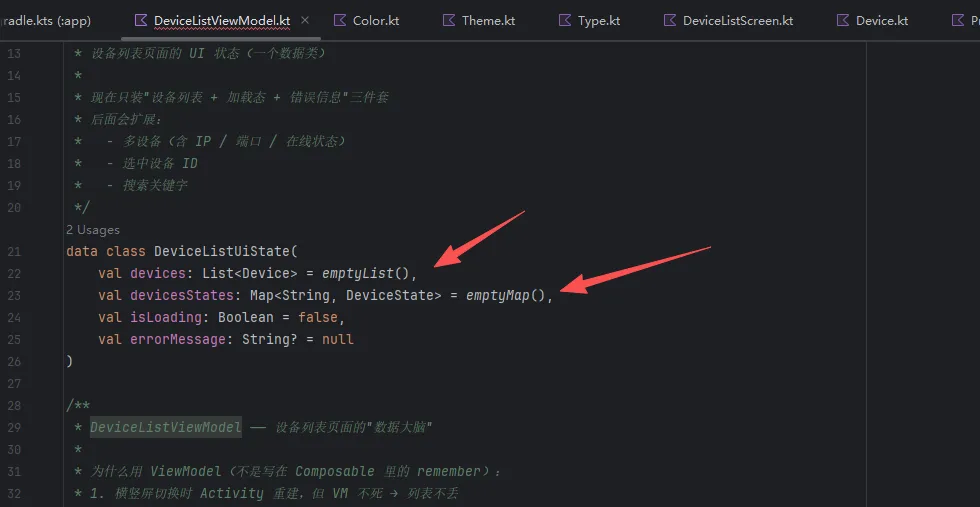
然后就回到之前昨天我们创建的DeviceListViewModel.kt,将之前占位的地方改成我们真实的设备类。
因为有两个类,这里改成两个了:
val devices: List<Device> = emptyList(),val devicesStates: Map<String, DeviceState> = emptyMap(),
下面加载的地方也要改:
private funloadMockDevices() {_uiState.value = _uiState.value.copy(devices = listOf(Device( devId="aaaa0001", enable = true, onLine = true),Device( devId="aaaa0002", enable = false, onLine = true),Device( devId="aaaa0003", enable = true, onLine = false)),devicesStates = mapOf("aaaa0001" to DeviceState(devId = "aaaa0001",process = Process.DONE),"aaaa0002" to DeviceState(devId = "aaaa0002",process = Process.COLLECT_GAS),"aaaa0003" to DeviceState(devId = "aaaa0003",process = Process.STOP),))}
二、Screen 改成卡片样式
先添加引用:
import com.example.jstz1.data.model.AlarmCodeimport com.example.jstz1.data.model.Deviceimport com.example.jstz1.data.model.DeviceStateimport com.example.jstz1.data.model.Processimport androidx.compose.material3.Cardimport androidx.compose.material3.CardDefaultsimport androidx.compose.material3.Switchimport androidx.compose.ui.draw.alphaimport androidx.compose.foundation.backgroundimport androidx.compose.foundation.shape.CircleShapeimport com.example.jstz1.ui.theme.Errorimport com.example.jstz1.ui.theme.Successimport com.example.jstz1.ui.theme.Warning
修改数据在界面上的内容:
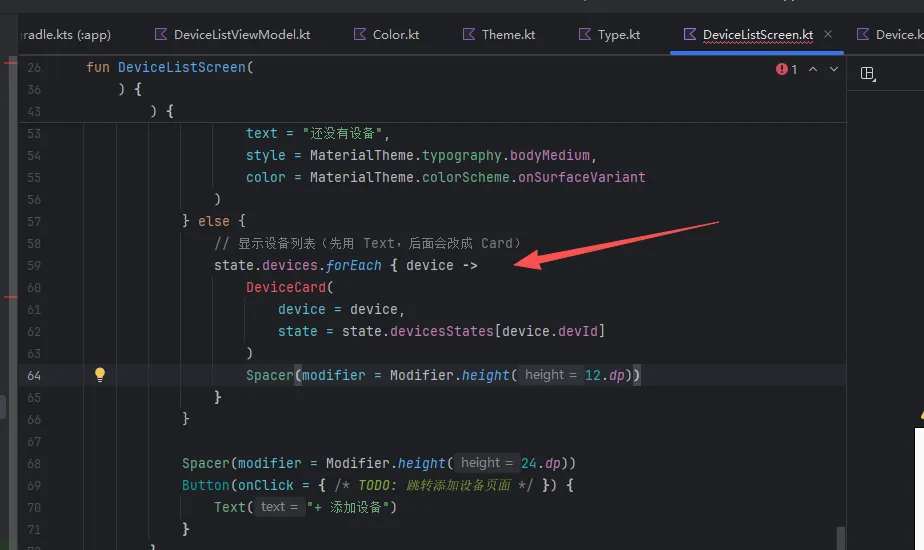
state.devices.forEach { device ->DeviceCard(device = device,state = state.devicesStates[device.devId])Spacer(modifier = Modifier.height(12.dp))}
然后完善DeviceCard(里面有些属性如果报错,你们自己删掉就成)方法:
@Composableprivate funDeviceCard(device: Device,state: DeviceState?) {Card(modifier = Modifier.fillMaxWidth().alpha(if (device.enable) 1f else 0.4f), // 禁用整卡半透明colors = CardDefaults.cardColors(containerColor = MaterialTheme.colorScheme.surface)) {Row(modifier = Modifier.fillMaxWidth().padding(16.dp),verticalAlignment = Alignment.CenterVertically) {// ---- 左:状态圆点 ----Box(modifier = Modifier.size(10.dp).background(color = if (device.onLine) Successelse Warning,shape = CircleShape))Spacer(modifier = Modifier.width(12.dp))// ---- 中:编号 + 状态信息(占满中间剩余空间) ----Column(modifier = Modifier.weight(1f)) {Row(verticalAlignment = Alignment.CenterVertically) {Text(text = device.devId,style = MaterialTheme.typography.bodyLarge,color = MaterialTheme.colorScheme.onSurface)}Text(text = if (device.onLine) "在线" else "离线",style = MaterialTheme.typography.bodySmall,color = MaterialTheme.colorScheme.onSurfaceVariant)// state 不为空才显示真空度+流程(通信没连上时显示"未知")state?.let {//**`.let { ... }`**:Kotlin 标准扩展函数Text(text = "%s".format(it.process.label),style = MaterialTheme.typography.bodySmall,color = MaterialTheme.colorScheme.onSurfaceVariant)}}// ---- 右:启用开关 ----Switch(checked = device.enable,onCheckedChange = { /* TODO: 后续实现 */ })}}}
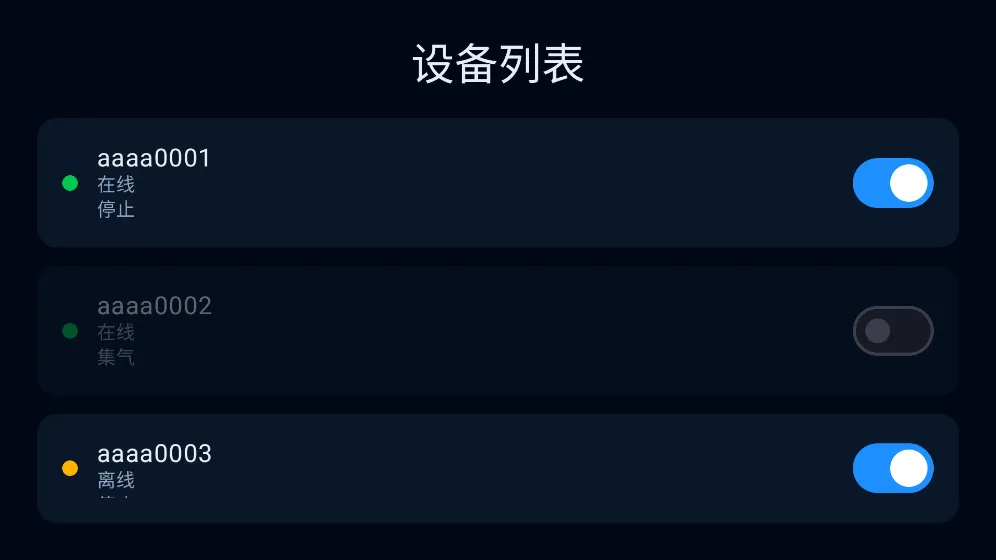
然后我们把最后那个开关代码完善下:
因为要更新数据模型的值,但我们之前设置过,只能内部修改,所以需要在DeviceListViewModel.kt中添加修改启动状态的函数:
funtoggleEnabled(devId: String) {_uiState.value = _uiState.value.copy(devices = _uiState.value.devices.map { device ->if (device.devId == devId) device.copy(enable = !device.enable)else device})}
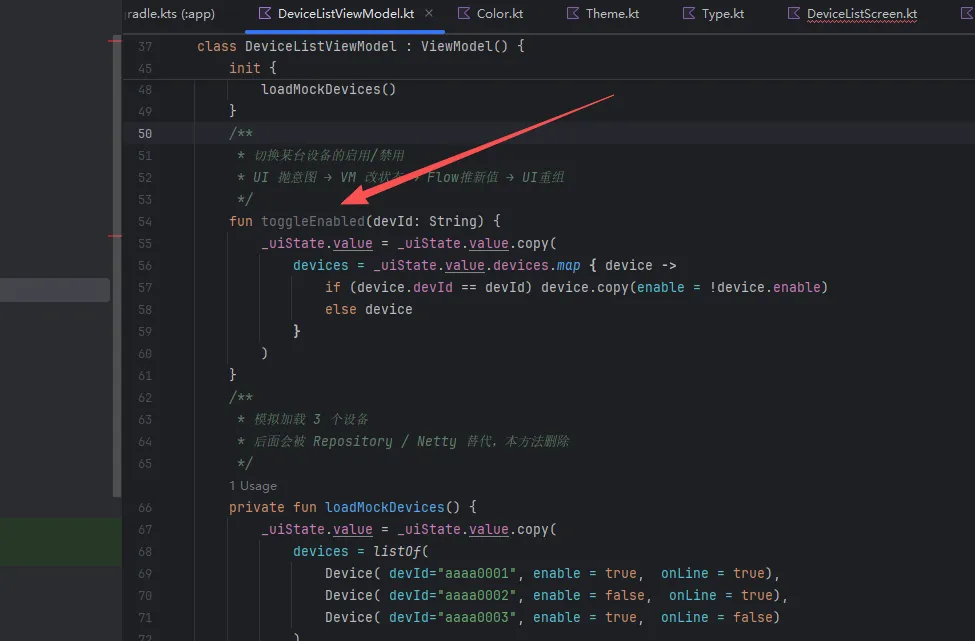
同时在界面上要用到vm来访问(回调):
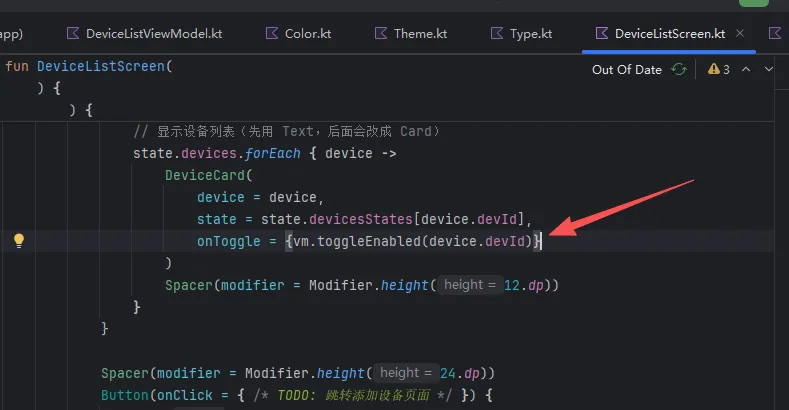
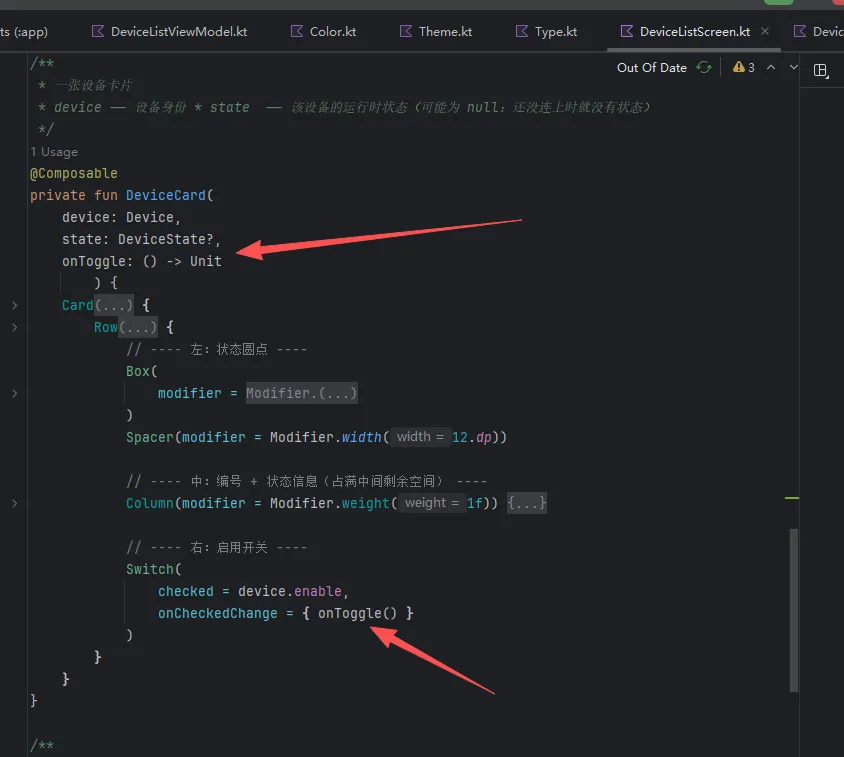
再次运行:
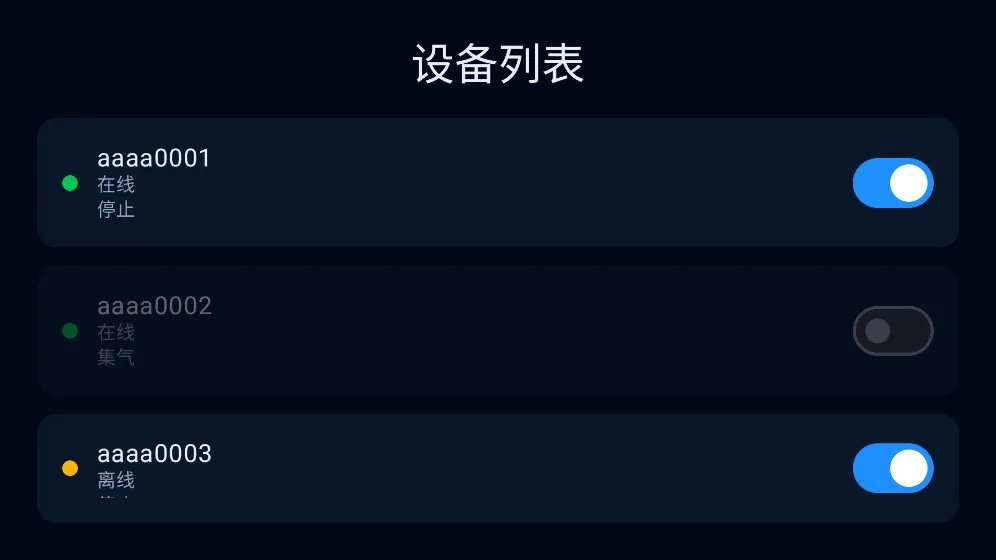
点击第一个开关:
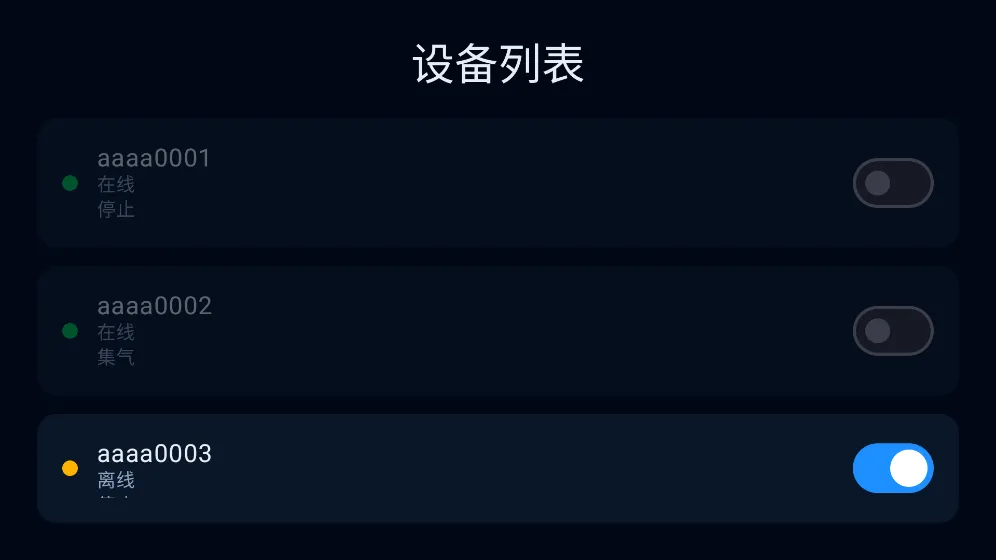
因为我这边设备比较多,所以打算改成卡片的,2*2的网格。
三、修改设备卡片容器为网格(每行两列)
导入:
import androidx.compose.foundation.lazy.grid.GridCellsimport androidx.compose.foundation.lazy.grid.LazyVerticalGridimport androidx.compose.foundation.lazy.grid.items
然后在设备显示位置修改如下:
if (state.devices.isEmpty()) {Text(text = "还没有设备",style = MaterialTheme.typography.bodyMedium,color = MaterialTheme.colorScheme.onSurfaceVariant)} else {LazyVerticalGrid(columns = GridCells.Fixed(2), // ← 2 列modifier = Modifier.weight(1f), // ← 占满"标题下、按钮上"的全部剩余高度verticalArrangement = Arrangement.spacedBy(12.dp),horizontalArrangement = Arrangement.spacedBy(12.dp)) {items(items = state.devices,key = { it.devId } // ← 稳定 key,Compose 知道每张卡的"身份证") { device ->DeviceCard(device = device,state = state.devicesStates[device.devId],onToggle = { vm.toggleEnabled(device.devId) })}}}
然后记得多加几台设备哦,就能看到效果:

鼠标可以上下滑动,查看下面的设备卡。
下节,把数据进行保存吧,本地存储,重启不丢。