ARTICLE · 1120606
从零开始:构建一款 APP 并同时发布为 H5 与小程序形式(已开源)
从零开始:构建一款 APP 并同时发布为 H5 与小程序形式(已开源)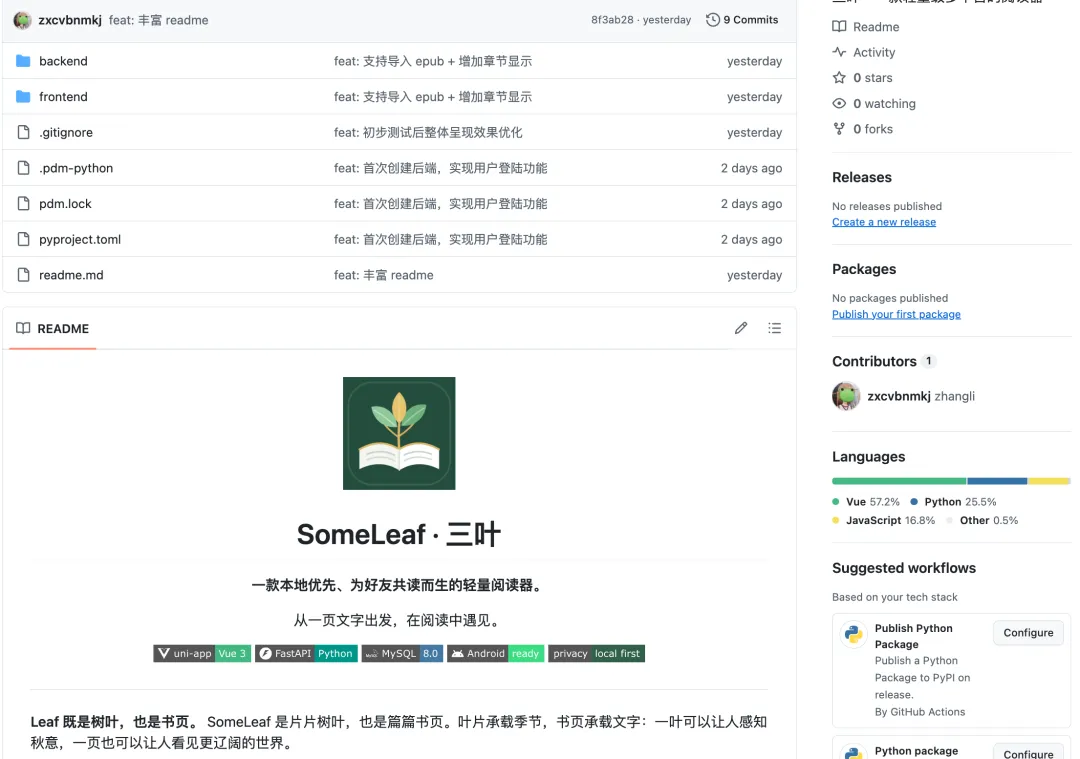
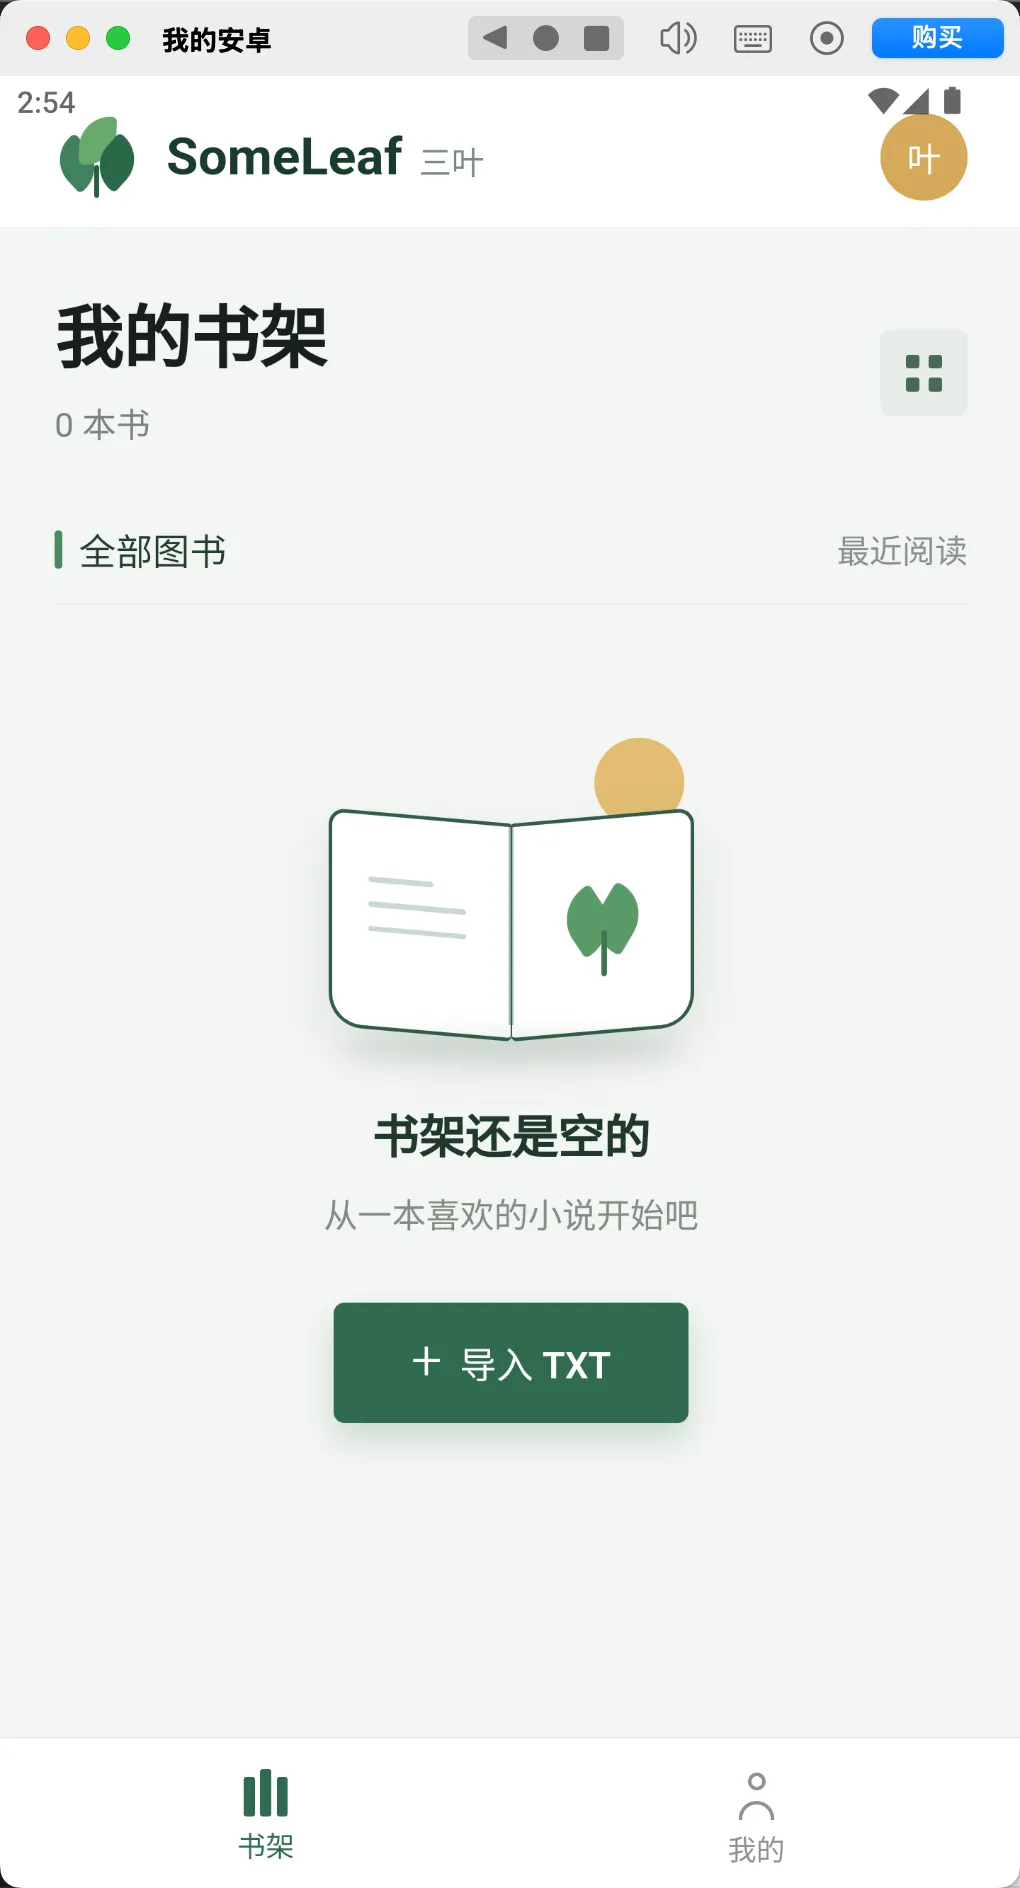
github: https://github.com/zxcvbnmkj/SomeLeaf
一、构建 APP 的框架选择
uniAPP:有网站/小程序开发经验者的最佳选择,它采用前后端分离架构,可用 vue + python flutter: 最全能/做出的APP效果最好,能够支持多种复杂需求。但是它是基于 Dart语言的,这是一种由 Google 开发的面向对象语言react native: 基于 react 框架,它和 vue 一样属于前端框架 taro: 也基于 react 框架
二、模拟调试 APP
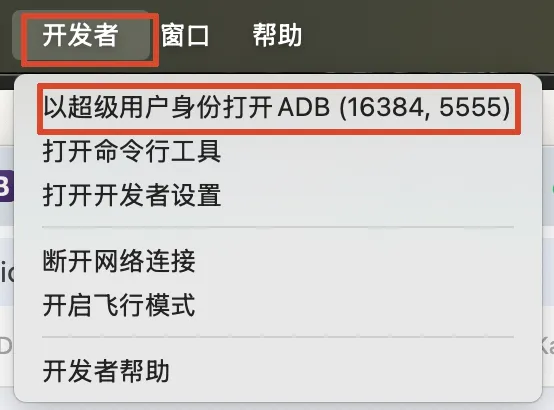
Android Studio 是官方的安卓开发模拟器,但是太大了,有好几个G。因此选择了更轻量级的MuMu模拟器 在 MuMu模拟器的手机实例中点击菜单栏中的开发者-打开adb
随后会弹出终端,其中写到:MuMu 模拟器 12 的 ADB 端口是动态的,一般是 16384,多开会在此基础上加 32。如果端口被占用,会加 1。
Last login: Fri Oct 2 02:46:20 on ttys015/Applications/MuMuPlayer.app/Contents/MacOS/MuMuEmulator.app/Contents/MacOS/tools/adb connect 127.0.0.1:16384 && /Applications/MuMuPlayer.app/Contents/MacOS/MuMuEmulator.app/Contents/MacOS/tools/adb -s 127.0.0.1:16384 unroot && sleep 1 && /Applications/MuMuPlayer.app/Contents/MacOS/MuMuEmulator.app/Contents/MacOS/tools/adb connect 127.0.0.1:16384 && /Applications/MuMuPlayer.app/Contents/MacOS/MuMuEmulator.app/Contents/MacOS/tools/adb -s 127.0.0.1:16384 shell(base) ➜ ~ /Applications/MuMuPlayer.app/Contents/MacOS/MuMuEmulator.app/Contents/MacOS/tools/adb connect 127.0.0.1:16384 && /Applications/MuMuPlayer.app/Contents/MacOS/MuMuEmulator.app/Contents/MacOS/tools/adb -s 127.0.0.1:16384 unroot && sleep 1 && /Applications/MuMuPlayer.app/Contents/MacOS/MuMuEmulator.app/Contents/MacOS/tools/adb connect 127.0.0.1:16384 && /Applications/MuMuPlayer.app/Contents/MacOS/MuMuEmulator.app/Contents/MacOS/tools/adb -s 127.0.0.1:16384 shellconnected to 127.0.0.1:16384restarting adbd as non rootalready connected to 127.0.0.1:16384Welcome! If you need help getting started, check out our developer FAQ page at:We're committed to making our emulator as useful as possible for developers,so if you have any specific requirements or features that you'd like to seein the emulator, please let us know. We're always open to new ideas and suggestions.You can find our contact information on the FAQ page as well.Thanks for using our emulator, happy coding!
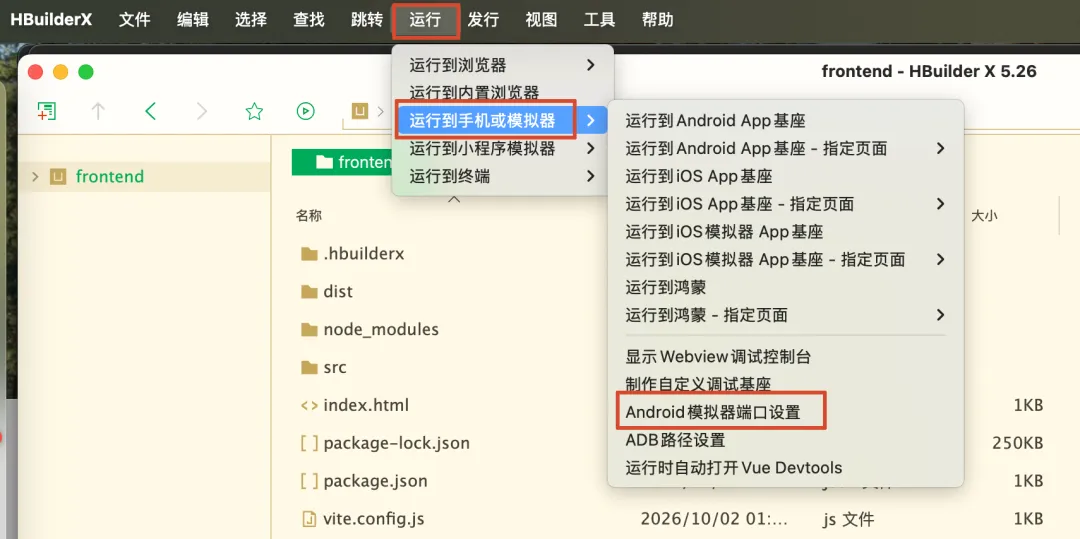
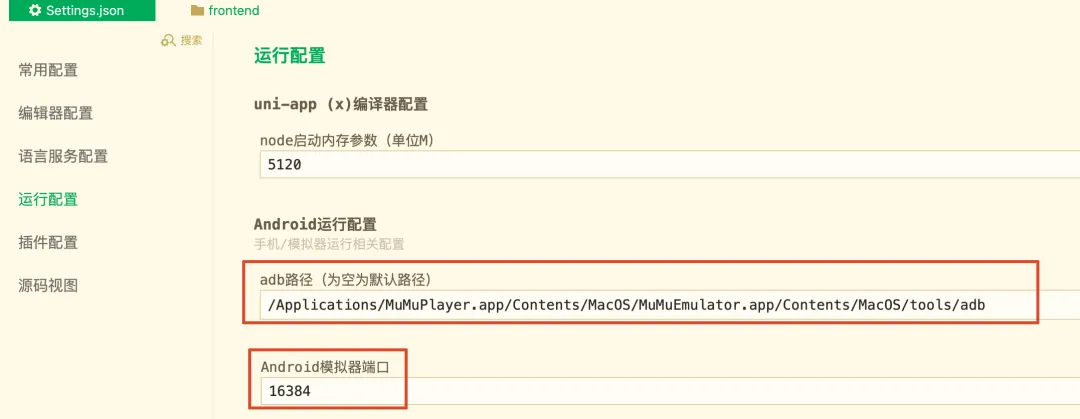
在 HbuilderX 中设置对应的 adb 路径和端口号
随后点击:运行到 Android App 基座,即可打开模拟页面
三、打包为 apk
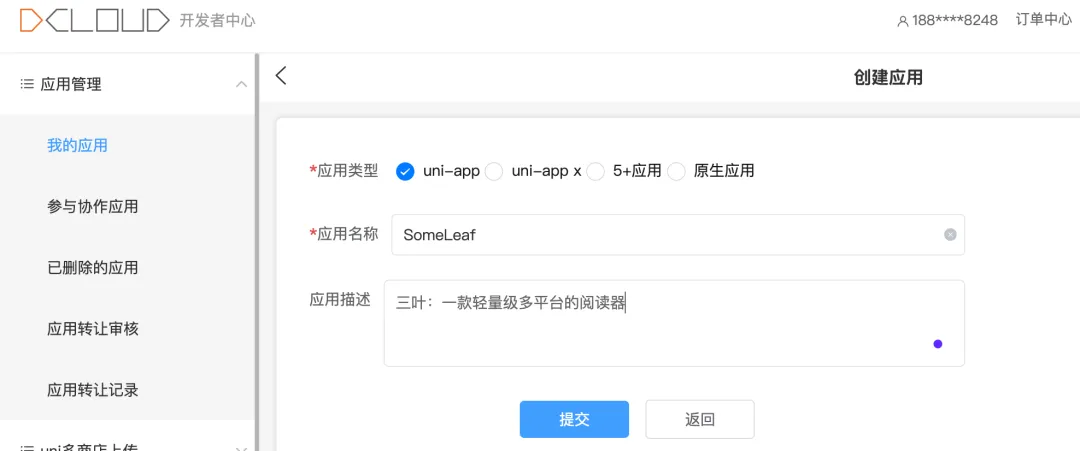
前往 DCloud 开发者中心创建 appid
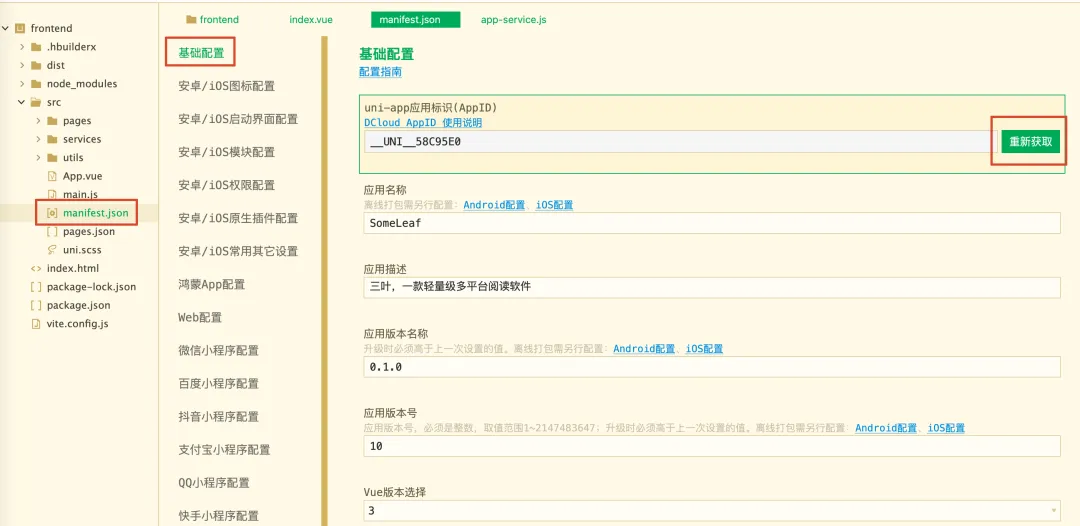
在 HBuilderX 配置 manifest.json文件,使其获取 appid
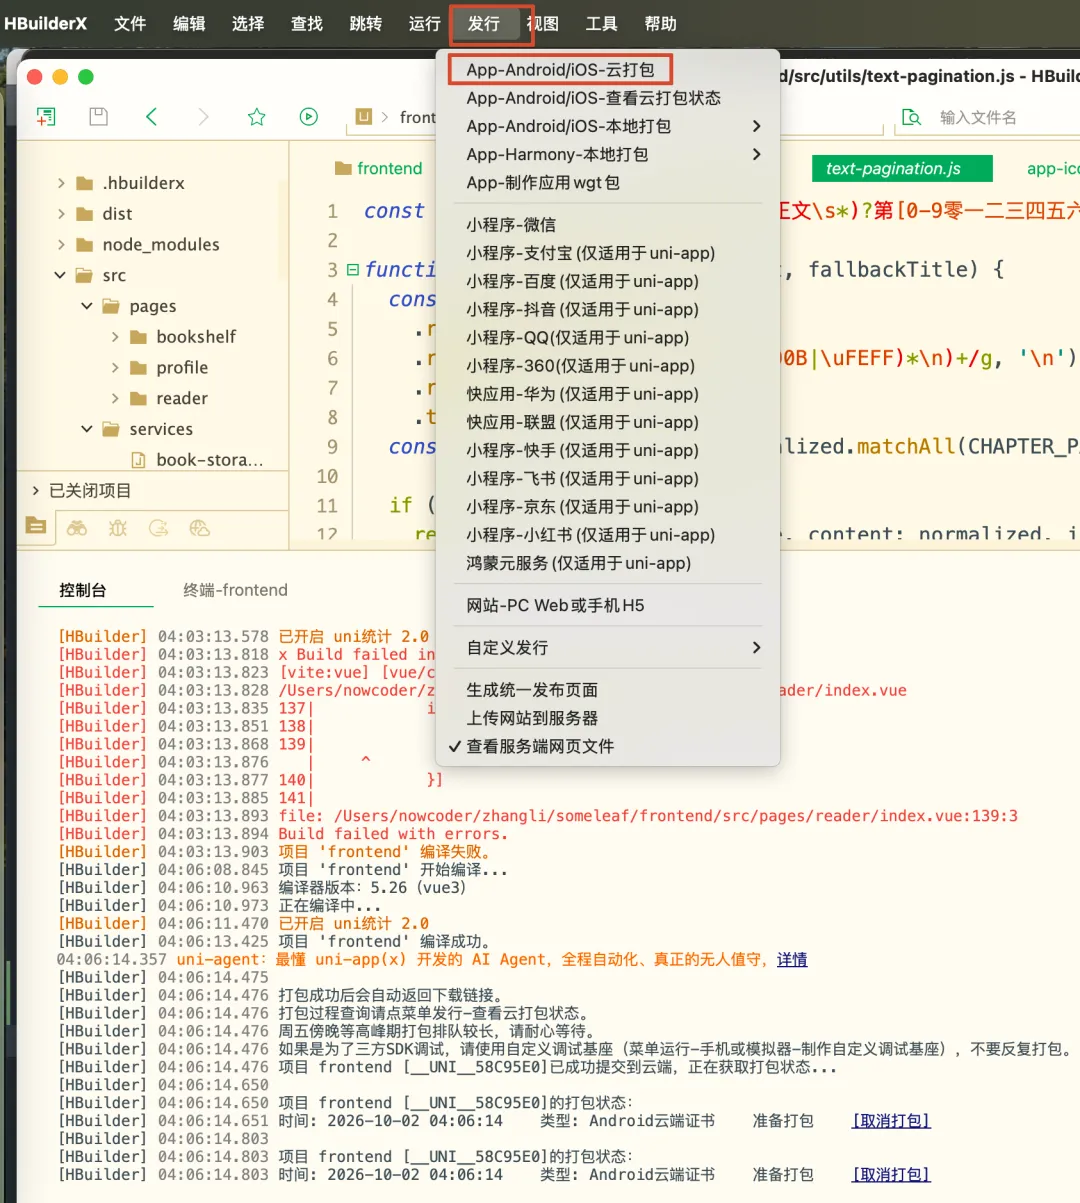
配置完毕后,在 HBuilderX 的菜单栏选择 发行-云打包,可以点击发行菜单栏第二行的查看云打包状态来查询当前进度。
在 HbuildX 中点击运行或者发行按钮会自动执行 npm run dev:app或者npm run build:app命令,从而更新 dist 下对应文件。也可以自己手动执行两个命令,然后仅把 dist 文件导入 HbuildX 中,让其运行或者发行已有的 dist 目录。若有时代码更新了,但模拟APP中没有更新页面,可以手动删除 dist 命令后使用命令手动重新构建。
四、微信小程序
把 apk 文件直接发送给手机即可在本地使用这款软件,然而若要发布为微信公众号则极其麻烦。首先要去微信公众平台用新邮箱注册一个小程序专属账号,随后把 appid 复制到 manifest.json中。再先后执行
npm run dev:mp-weixinnpm run build:mp-weixin
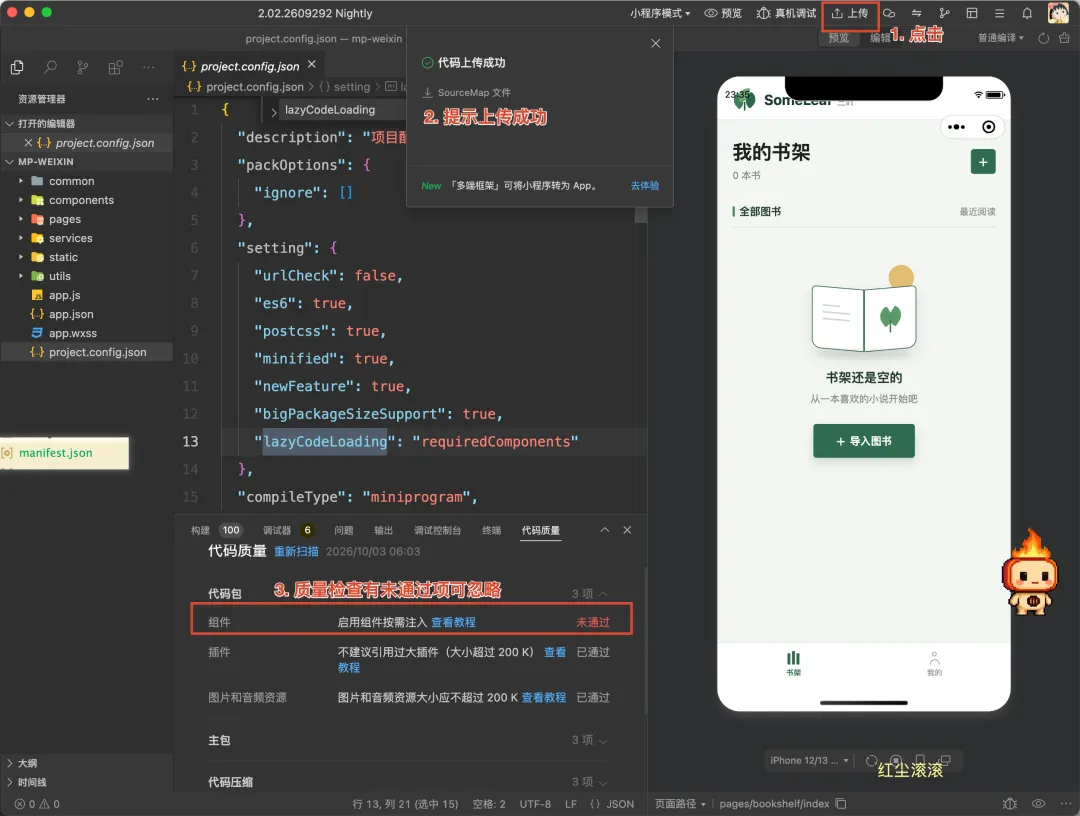
随后下载微信开发者工具,使用这个软件打开刚刚使用 npm run命令构建说得的dist/dev/mp-weixin或者dist/build/mp-weixin文件。即可预览小程序的模拟效果。若没问题则点击上传。
虽然再次前往微信公众平台点击提交代码审核并进行备案,备案通过后小程序内容才可见 如果只是希望私人使用,app 无疑方便很多,免去了所有的认证\审核与备案
五、H5 页面
使用以下命令可以构建出测试与运行两种环境中的页面,随后把 dist/build/h5 文件上传至服务器,用 nginx 托管即可。只是 H5 页面显示时依旧是手机这种竖屏形式,用手机打开 H5 链接不受影响,但在电脑屏幕中看时左右及多留白。
# 本地启动 H5npm run dev:h5# 构建 H5npm run build:h5
六、后端
三种形式的前端共用一个后端,后端建议使用 FastAPI 框架,后端需部署在服务器上并暴露出后端端口。