夜雨聆风
夜雨聆风前言
最近写页面的时候,用webp优化图片大小,就想着有没有相关插件可以开发和打包的时候自动帮我转化和压缩。因为用vite打包工具,就去社区找相关插件,可没找到一个比较符合我要求的,就打算自己工作摸鱼写一个吧👀。(也算是第一次写vite插件吧😂)
仓库
github: github.com/illusionGD/…[1]
需求
能压缩图片,压缩质量能配置 能自动转webp格式,并且打包后能把图片引用路径的后缀改成 .webp支持开发环境和生产环境 不影响原项目图片资源,开发要无感,使用简单
技术栈
sharp:图片压缩、格式转换 @vitejs/plugin-vue:vite插件开发
实现思路
生产环境
生产环境要考虑两个功能:1、压缩图片:这个比较简单,在generateBundle钩子函数里面处理图片的chunk中的buffer就可以了
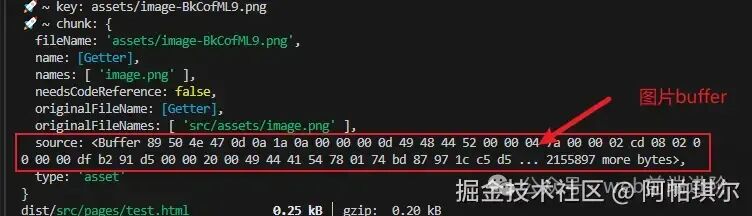
exportdefaultfunctionImageTools() {return {// hookasync generateBundle(_options, bundle) {for (const key in bundle){// 过滤图片keyconst { ext } = parse(key)if (!/(png|jpg|jpeg|webp)$/.test(ext)) {continue }// 处理图片bufferif (chunk.source && chunk.source instanceof Buffer) {// 压缩图片,这里就省略逻辑了,可以去看sharp文档const pressBuffer = await pressBufferToImage(chunk.source) // 替换处理后的buffer chunk.source = pressBuffer } } } }}2、转webp格式: 还是在generateBundle中,直接copy一份图片的chunk,替换chunk的source和fileName,再添加到bundle中输出
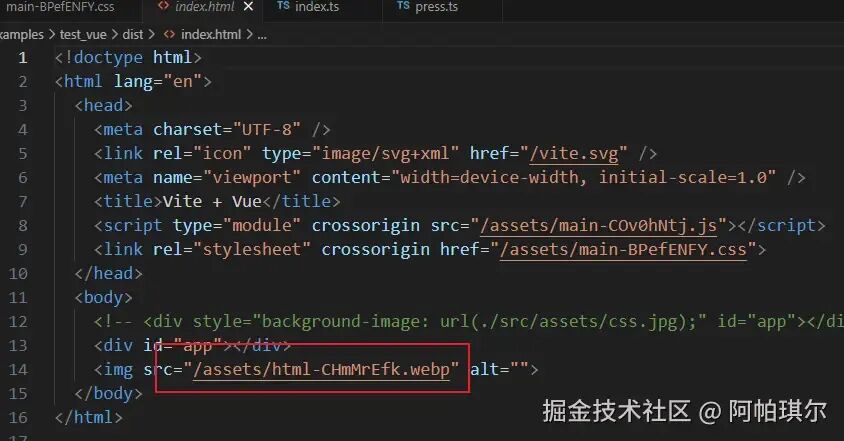
exportdefaultfunctionImageTools() {return {// hookasync generateBundle(_options, bundle) {for (const key in bundle){// 过滤图片key ...// 处理图片buffer .../*webp相关逻辑*/// 克隆原本的chunkconst webpChunk = structuredClone(chunk)// 生成webp的buffer, 逻辑省略const webpBuffer = await toWebpBuffer(chunk.source)// 更改新chunk的source和fileName webpChunk.source = webpBufferconst ext = extname(path)const webpName = key.replace(ext, '.wep') webpChunk.fileName = webpName// 添加到bundle中 bundle[webpName] = webpChunk } } }}3、**替换路径后缀为.webp**:这里就有点麻烦,需要考虑图片的引入方式和打包的产物,解析产物去替换了
引入方式:
css: background、background-image组件、html文件中的标签: img、source、<div style="background-image: url("")"></div>、<div style="background: url("")"></div>import: import 'xxx/xxx/xx.png'
产物, 以vue为例:css中引入的,打包后还是在css中 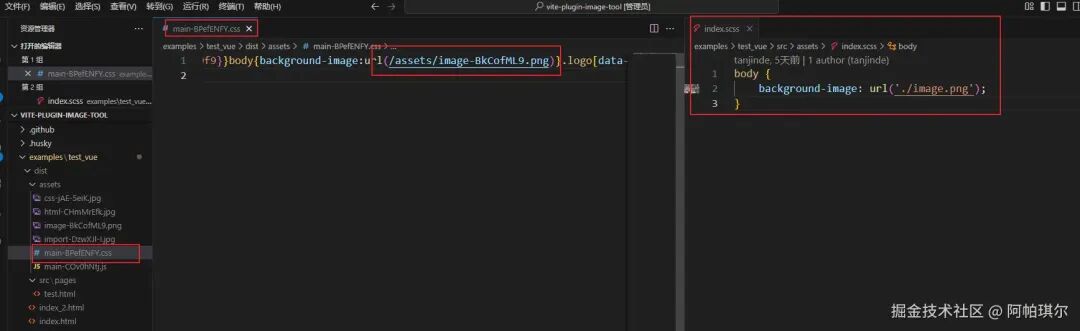
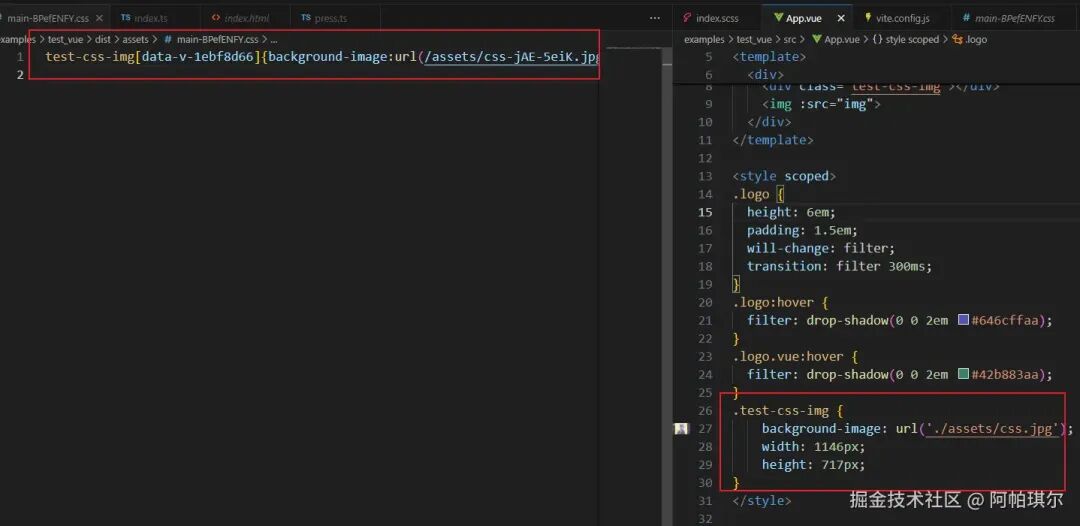
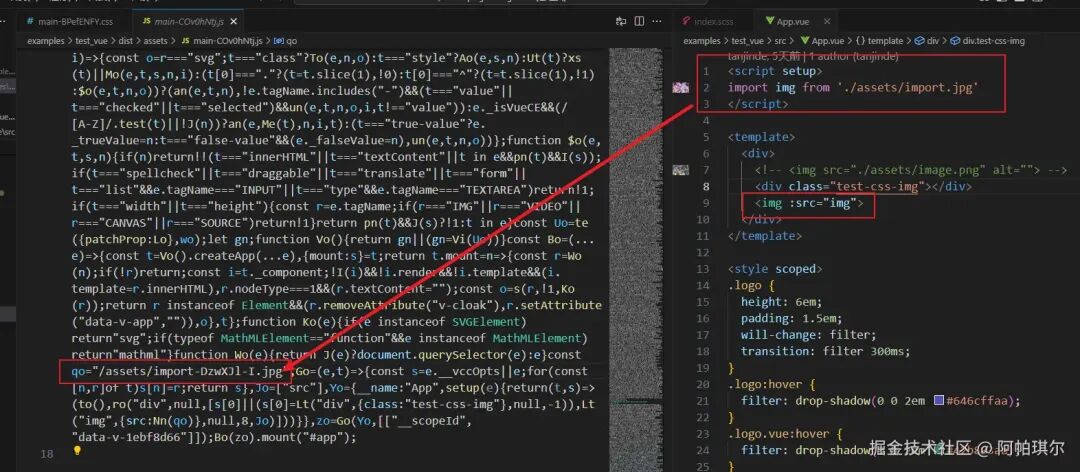
html文件中的标签:就在html中
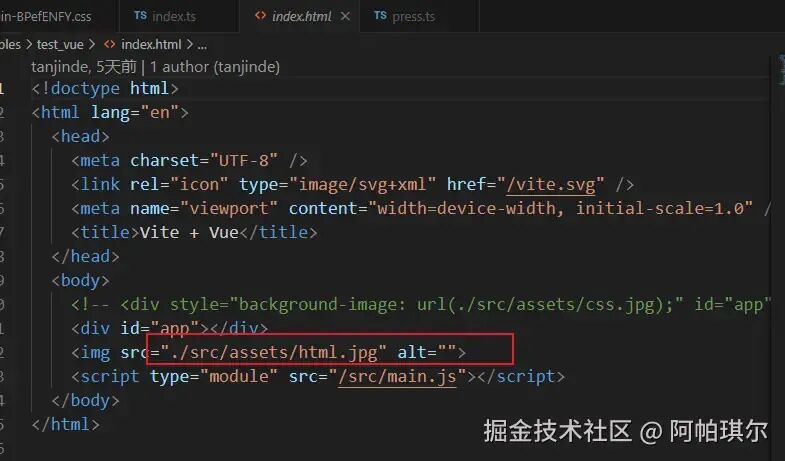
知道产物后就比较好替换了,我这里采用一种比较巧妙的方法,不需要转ast就能精准替换路径后缀:先在generateBundle中收集打包后图片的名称和对应的webp名称:
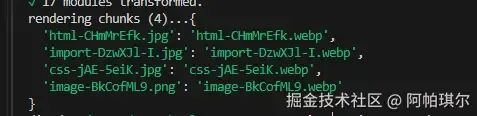
再替换上述产物文件中的图片后缀:
functionhandleReplaceWebp(str: string) {let temp = strfor (const key in map) { // 这里的map就是上述图片中的对象 temp = temp.replace(newRegExp(key, 'g'), map[key]) }return temp}exportdefaultfunctionImageTools() {return {// hookasync generateBundle(_options, bundle) {for (const key in bundle){// 过滤图片key ...// 处理图片buffer ...// 替换js和css中的图片后缀if (/(js|css)$/.test(key) && enableWebp) {if (/(js)$/.test(key)) { chunk.code = handleReplaceWebp(chunk.code) } elseif (/(css)$/.test(key)) { chunk.source = handleReplaceWebp(chunk.source) } } } },// 替换html中的图片后缀async writeBundle(opt, bundle) {for (const key in bundle) {const chunk = bundle[key] asanyif (/(html)$/.test(key)) {const htmlCode = handleReplaceWebp(chunk.source) writeFileSync(join(opt.dir!, chunk.fileName), htmlCode) } } } }}好了,这就是生产环境大概实现思路了,接下来看开发环境中如何转webp
开发环境
有人可能认为,开发环境并不需要压缩和转webp功能,其实不然,开发环境主要是为了看图片处理后的效果,是否符合预期效果,不然每次都要打包才能看,就有点麻烦了.
开发环境主要考虑以下两点:
和生产环境一样,需要做压缩和转webp处理 需要加入缓存,避免每次热更都进行压缩和转webp
压缩和转webp处理这里就比较简单了,不需要处理bunlde,在请求本地服务器资源hook中(configureServer) 处理并返回图片资源就行:
exportdefaultfunctionImageTools() {return {// hook configureServer(server) { server.middlewares.use(async (req, res, next) => {if (!filterImage(req.url || '')) return next()try {const filePath = decodeURIComponent( path.resolve(process.cwd(), req.url?.split('?')[0].slice(1) || '') )// 过滤图片请求 ...const buffer = readFileSync(filePath)// 处理图片压缩和转webp,返回新的buffer,逻辑省略const newBuffer = await pressBufferToImage(buffer)if (!newBuffer) { next() } res.setHeader('Content-Type', `image/webp`) res.end(newBuffer) } catch (e) { next() } }) }}缓存图片这里的思路:
第一次请求图片时,缓存对应图片的文件,并带上hash值 每次请求时都对比缓存文件的hash,有就返回,没有就继续走图片处理逻辑
详细代码就不贴了,这里只写大概逻辑
exportfunctiongetCacheKey({ name, ext, content}: any, factor: AnyObject) {const hash = crypto .createHash('md5') .update(content) .update(JSON.stringify(factor)) .digest('hex')return`${name}_${hash.slice(0, 8)}${ext}`}exportdefaultfunctionImageTools() {return {// hook configureServer(server) { server.middlewares.use(async (req, res, next) => {if (!filterImage(req.url || '')) return next()try {const filePath = decodeURIComponent( path.resolve(process.cwd(), req.url?.split('?')[0].slice(1) || '') )// 过滤图片请求 ...const { ext, name } = parse(filePath)const file = readFileSync(filePath)// 获取图片缓存的key,就是图片hash的名称const cacheKey = getCacheKey( { name, ext, content: file }, { quality, enableWebp, sharpConfig, enableDevWebp, ext } // 这里传生成hash的因子,方便后续改配置重新缓存图片 )const cachePath = join('node_modules/.cache/vite-plugin-image', cacheKey)// 读缓存if (existsSync(cachePath)) {return readFileSync(cachePath) }// 处理图片压缩和转webp,返回新的bufferconst buffer = readFileSync(filePath)// 处理图片压缩和转webp,返回新的buffer,逻辑省略const newBuffer = await pressBufferToImage(buffer)// 写入缓存 writeFile(cachePath, newBuffer, () => {}) ... }) }}效果
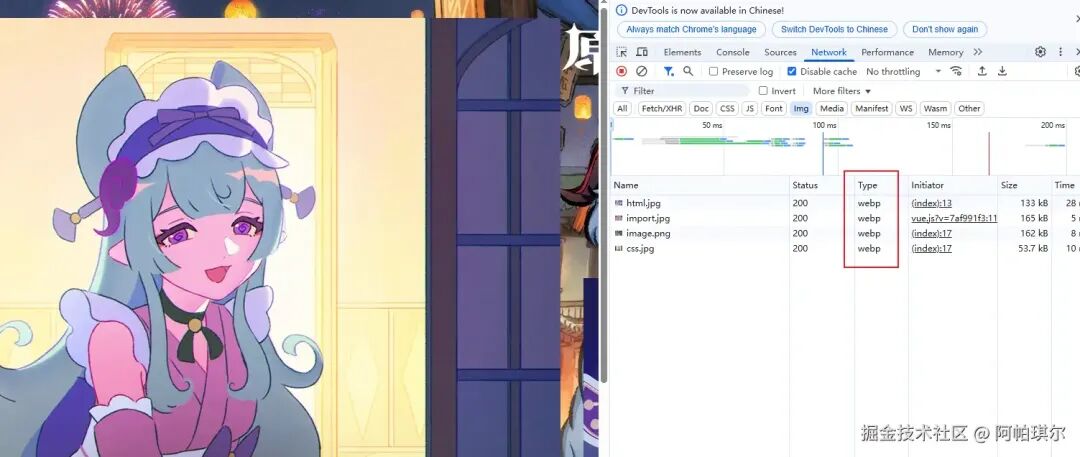
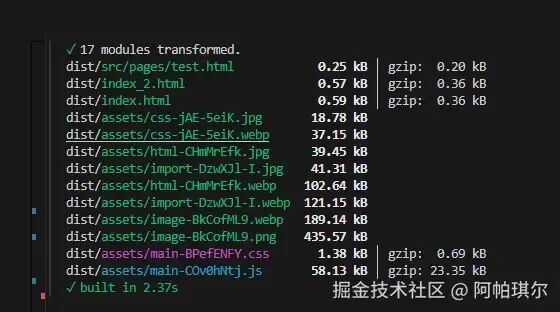
这里就爬几张原神的图片展示了(原神,启动!!)
开发环境:
生产环境:


总结
以上就是大致思路了,代码仅供参考 GitHub: vite-plugin-image-tools[2] 后续打算继续维护这个仓库并更新更多图片相关功能的,有问题欢迎提issue呀~
https://github.com/illusionGD/vite-plugin-image-tools
[2]https://github.com/illusionGD/vite-plugin-image-tools
写在最后
我是悬笔e绝,如果我的文章对你有帮助,请点个赞👍🏻 支持我一下
若有什么疑问,也可以加我微信:
yllg_xbyj,一起交流心得❤️ 看完三件事
如果你觉得这篇内容对你挺有启发,我想邀请你帮我三个小忙:
点个「在看」,让更多的人也能看到这篇内容
关注公众号「悬笔e绝」,持续为你推送精选好文,回复「加群」加入交流群