 夜雨聆风
夜雨聆风OG 教程系列 | 2026-05-12 | 大力

导语:OpenClaw 的强大不仅在于它本身,更在于它可扩展的插件生态。今天这篇教程,带你从零开始,创建一个实用的 OpenClaw 插件。
你将学到:
• 插件的基本结构和原理 • 如何注册插件命令 • 如何调用外部 API • 如何发布到插件市场
预计时间:30 分钟
一、什么是 OpenClaw 插件?
插件的本质
OpenClaw 插件 = 一个 Node.js 模块,它:
• 注册新的命令(如 weather)• 扩展 Agent 的能力 • 与外部服务集成
插件 vs 原生命令
openclaw plugin install | ||
二、准备工作
环境要求
# 1. Node.js 18+ 已安装node --version # v18.20.0+# 2. OpenClaw 已安装openclaw --version # 2026.5.7+# 3. 创建插件目录mkdir -p ~/.openclaw/plugins/my-first-plugincd ~/.openclaw/plugins/my-first-plugin初始化项目
npm init -ynpm install openclaw-plugin-sdk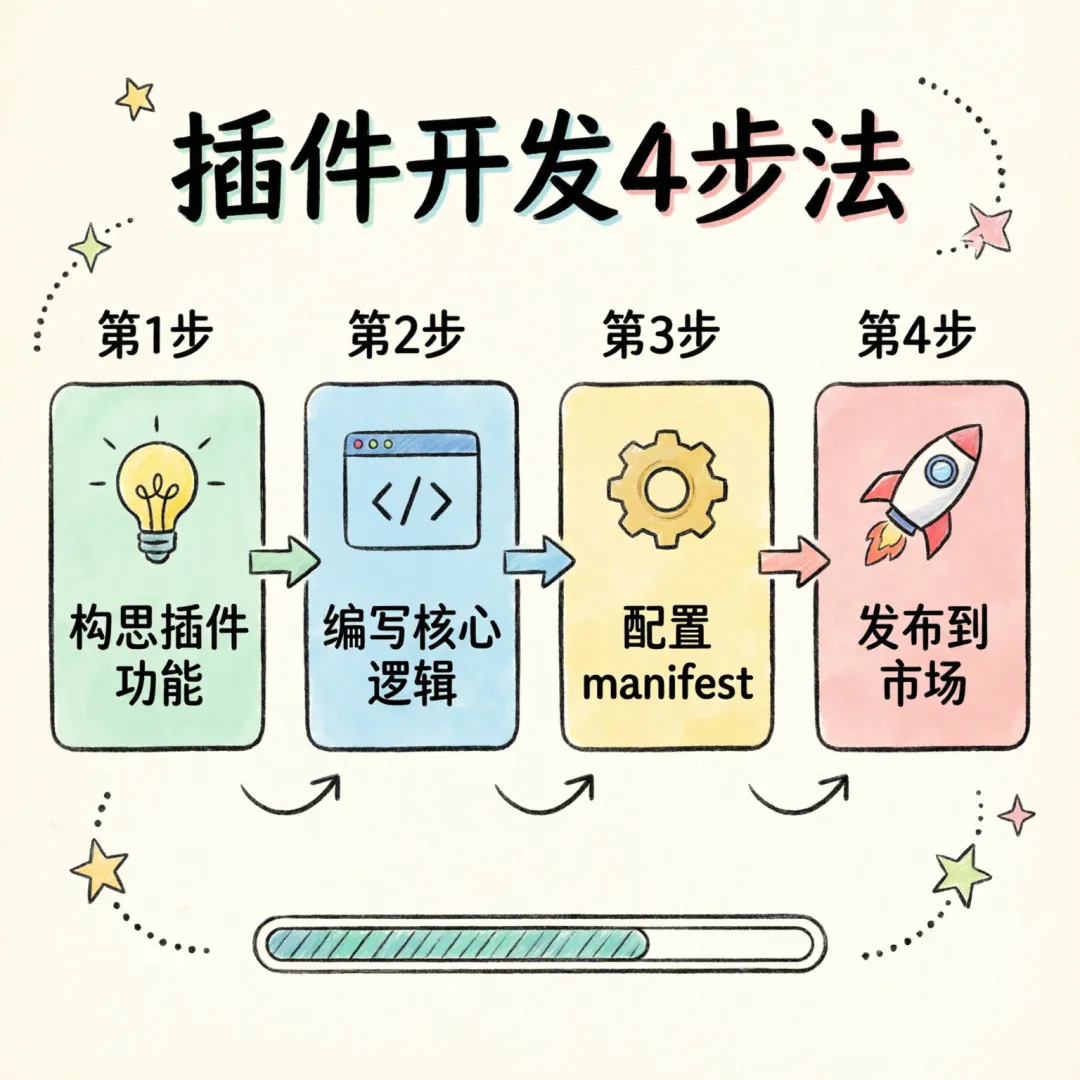
三、插件结构详解
最小插件结构
my-first-plugin/├── package.json # 插件配置├── plugin.json # OpenClaw 插件描述└── index.js # 入口文件1. package.json
{ "name": "openclaw-plugin-weather", "version": "1.0.0", "description": "查询天气的 OpenClaw 插件", "main": "index.js", "keywords": ["openclaw", "plugin", "weather"], "author": "你的名字", "license": "MIT"}2. plugin.json(关键!)
{ "id": "weather", "name": "天气查询", "version": "1.0.0", "description": "查询全球任意城市的实时天气", "commands": [ { "name": "weather", "description": "查询指定城市天气", "args": [ { "name": "city", "description": "城市名称", "required":true } ] } ], "permissions": ["network"]}3. index.js(核心逻辑)
const { PluginBase } = require('openclaw-plugin-sdk');class WeatherPlugin extends PluginBase { async onLoad() { console.log('天气插件已加载!'); } async weather(city) { // 调用天气 API const response = await this.fetch(`https://api.weather.com/v1/current?city=${encodeURIComponent(city)}`); const data = await response.json(); return { city: data.city, temperature: data.temp, condition: data.condition, humidity: data.humidity }; }}module.exports = WeatherPlugin;四、本地测试
1. 注册插件
# 链接到 OpenClawopenclaw plugin link ./my-first-plugin# 验证安装openclaw plugin list2. 测试命令
# 查询北京天气openclaw weather 北京# 预期输出🌤️ 北京天气温度: 25°C状况: 晴湿度: 45%3. 调试技巧
# 开启调试模式OPENCLAW_DEBUG=1 openclaw weather 北京# 查看插件日志tail -f ~/.openclaw/logs/plugin-weather.log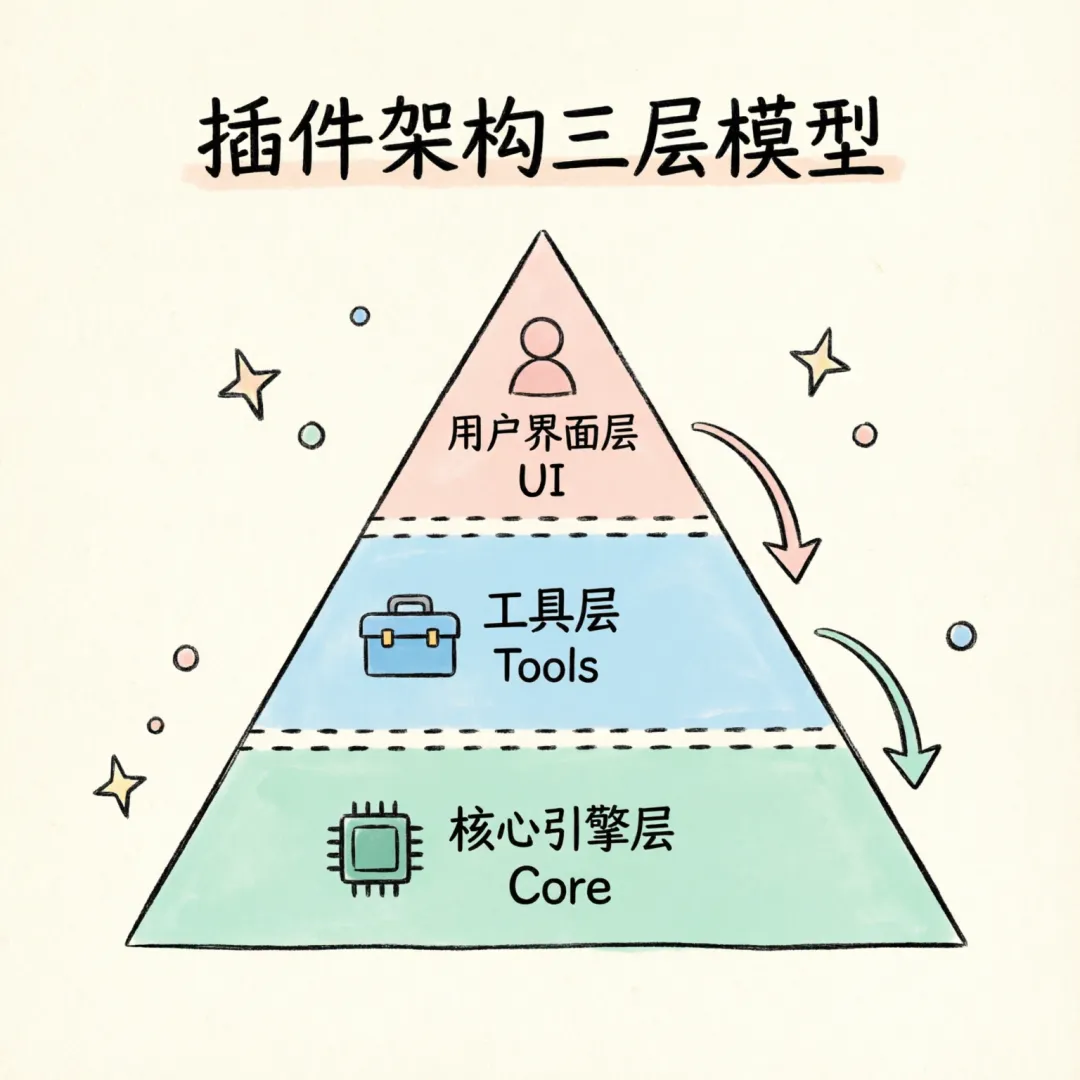
五、进阶:调用外部 API
示例:集成 Tavily 搜索
async search(query) { const response = await this.fetch('https://api.tavily.com/search', { method: 'POST', headers: { 'Authorization': `Bearer ${this.config.apiKey}`, 'Content-Type': 'application/json' }, body: JSON.stringify({ query, max_results: 5 }) }); return await response.json();}配置 API Key
// plugin.json{ "config": { "apiKey": { "type": "string", "description": "Tavily API Key", "required":true } }}六、发布到插件市场
1. 打包插件
# 创建发布包npm pack# 验证包内容tar -tzf openclaw-plugin-weather-1.0.0.tgz2. 提交到 ClawHub
# 登录 ClawHubopenclaw login# 发布插件openclaw plugin publish# 验证发布openclaw plugin search weather3. 版本管理
# 更新版本npm version patch # 1.0.0 -> 1.0.1# 重新发布openclaw plugin publish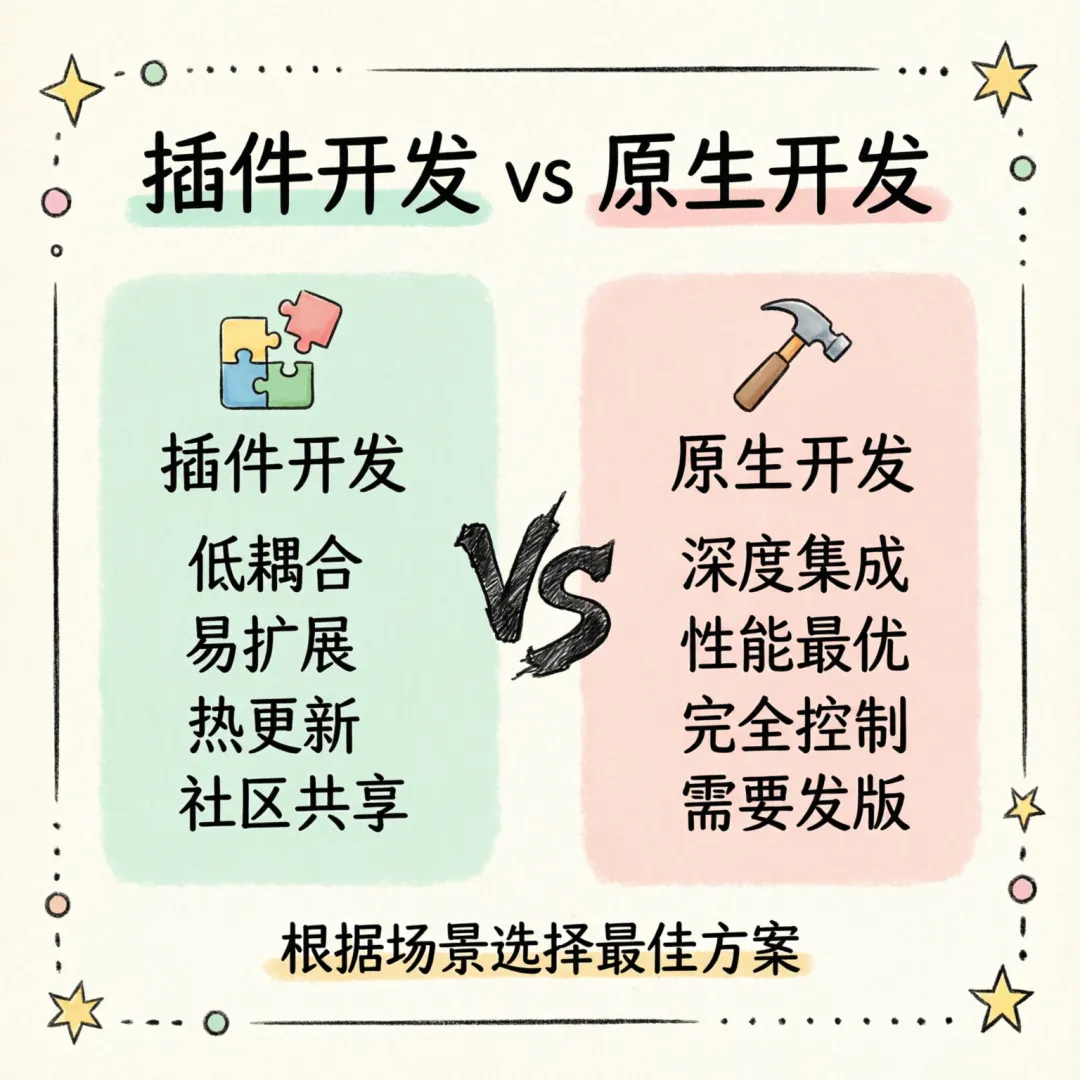
七、最佳实践
1. 命令命名规范
✅ 推荐: weather, translate, summarize❌ 避免: my-weather-plugin, do-something2. 错误处理
async weather(city) { try { const data = await this.fetchWeather(city); return this.formatWeather(data); } catch (error) { if (error.code === 'NETWORK_ERROR') { return '网络连接失败,请检查网络设置'; } if (error.code === 'CITY_NOT_FOUND') { return `未找到城市: ${city},请检查城市名称`; } throw error; // 未知错误,向上抛出 }}3. 配置管理
// 读取用户配置const apiKey = this.config.get('apiKey');const timeout = this.config.get('timeout', 5000); // 默认值 5秒八、实战练习
练习 1:创建待办事项插件
需求:
• 命令: todo add <任务>• 命令: todo list• 命令: todo done <id>• 数据存储:本地 JSON 文件
提示:
// 读取待办列表const todos = JSON.parse(fs.readFileSync('todos.json', 'utf8'));// 保存待办列表fs.writeFileSync('todos.json', JSON.stringify(todos, null, 2));练习 2:集成飞书通知
需求:
• 命令: feishu send <消息>• 功能:发送消息到指定群聊 • 配置:webhook URL
九、常见问题
Q1: 插件安装后命令不生效?
解决:
# 1. 检查插件是否启用openclaw plugin list# 2. 重启 Gatewayopenclaw gateway restart# 3. 重新链接openclaw plugin unlink my-pluginopenclaw plugin link ./my-pluginQ2: 如何调试插件?
解决:
// 在代码中添加日志console.log('调试信息:', data);// 使用 OpenClaw 调试模式DEBUG=openclaw:* openclaw weather 北京Q3: 插件可以访问哪些 API?
回答:
• ✅ 网络请求(需声明 permissions: ["network"])• ✅ 文件系统(插件目录内) • ✅ OpenClaw 内部 API • ❌ 系统命令(默认禁止)
十、总结
今天学到的
1. ✅ 插件 = Node.js 模块 + plugin.json 配置 2. ✅ 三个核心文件:package.json / plugin.json / index.js 3. ✅ 本地测试: openclaw plugin link4. ✅ 发布流程: npm pack→openclaw plugin publish
下一步
• 尝试创建自己的第一个插件 • 查看官方插件示例:github.com/openclaw/plugins[1] • 加入开发者社区,分享你的插件
📌 行动清单
• [ ] 创建插件目录结构 • [ ] 编写 plugin.json • [ ] 实现核心逻辑 • [ ] 本地测试通过 • [ ] 发布到 ClawHub
👇 互动话题你想开发什么功能的插件?评论区聊聊~
如果这篇教程对你有帮助,欢迎「在看」+「转发」给需要的朋友
引用链接
[1] github.com/openclaw/plugins: https://github.com/openclaw/plugins

