 夜雨聆风
夜雨聆风前言
数据备份这件事,说起来简单做起来难。市面上工具虽多,但要么配置复杂,要么速度感人,要么价格劝退。
今天介绍的开源备份工具 Restic,号称”备份界的瑞士军刀”——快速、安全、跨平台、支持多种存储后端,而且完全免费。
这是它的github参考链接,
https://github.com/restic/restic
先看几个亮点:
增量备份 + 去重:只传变化的数据,节省带宽和存储 端到端加密:数据在客户端加密后再上传,服务商也看不到你的数据 多后端支持:本地目录、SFTP、S3、MinIO、主流公有云平台等 恢复灵活:可恢复整个快照,也可挂载为文件系统按需提取 全平台覆盖:Linux、macOS、Windows 统统支持
sudo apt install restic在开始之前,需要理解 Restic 的核心概念——仓库(Repository)。
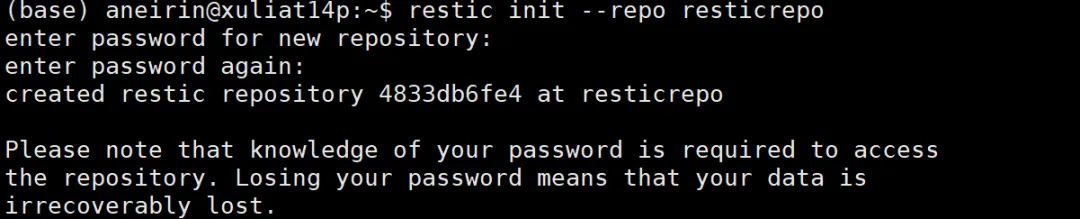
仓库是 Restic 存储备份数据的地方,包含加密后的文件、元数据和索引。访问仓库需要密码——这个密码极其重要,密码丢失 = 数据永远丢失,没有找回途径。
仓库的初始化命令格式:
restic init --repo <仓库位置># 创建仓库在当前目录restic init --repo resticrepo
aneirin@xuliat14p:~$ restic --repo resticrepo backup ./maintainenter password for repository:repository 555939fa opened successfully, password is correctcreated new cache in /home/aneirin/.cache/resticno parent snapshot found, will read all filesFiles: 275 new, 0 changed, 0 unmodifiedDirs: 76 new, 0 changed, 0 unmodifiedAdded to the repo: 1.056 MiBprocessed 275 files, 950.681 KiB in 0:00snapshot ce851018 saved
3,恢复
如果后面误删了目录maintain,使用下面命令恢复,
# 列出快照,因为只备份一次,所以只有一个快照aneirin@xuliat14p:~$ restic --repo resticrepo/ snapshotsenter password for repository:repository 555939fa opened successfully, password is correctID Time Host Tags Paths----------------------------------------------------------------------------------------ce851018 2026-06-09 10:27:19 xuliat14p /home/aneirin/maintain----------------------------------------------------------------------------------------1 snapshots############################################################### 恢复指定快照aneirin@xuliat14p:~$ restic --repo ./resticrepo/ restore ce851018 --target maintainenter password for repository:repository 555939fa opened successfully, password is correctrestoring <Snapshot ce851018 of [/home/aneirin/maintain] at 2026-06-09 10:27:19.616097325 +0800 CST by aneirin@xuliat14p> to maintain
# 只恢复特定目录restic --repo /data/backup/restic-repo restore latest --target /tmp/restore --include /work# 恢复快照中的特定子目录restic --repo /data/backup/restic-repo restore b023d7a3:/work --target /tmp/restore
挂载为文件系统,
mkdir /mnt/resticrestic --repo /data/backup/restic-repo mount /mnt/restic
比较快照差异,
restic --repo /data/backup/restic-repo diff b023d7a3 40dc1520查看仓库状态,
restic --repo /data/backup/restic-repo stats在 MinIO 控制台中创建一个名为 restic-backup 的存储桶(Bucket),或者使用命令行:
mc alias set myminio http://localhost:9000 admin YourPassword123mc mb myminio/restic-backup
2,配置环境变量
export AWS_ACCESS_KEY_ID=adminexport AWS_SECRET_ACCESS_KEY=YourPassword123# 将仓库地址写入环境变量,后续命令更简洁export RESTIC_REPOSITORY=s3:http://localhost:9000/restic-backupexport RESTIC_PASSWORD=your-strong-password
3,初始化MinIO仓库
restic -r s3:http://localhost:9000/restic-backup init4,备份到MinIO
restic -r s3:http://localhost:9000/restic-backup backup /home/user/documents或者使用环境变量简化:
restic backup /home/user/documents5,从MinIO恢复
# 列出快照restic snapshots# 恢复restic restore latest --target /tmp/restore
Restic 是一个真正让人安心的备份工具——安装简单、命令直观、功能强大。无论你是个人用户想备份家庭照片,还是运维人员需要保护服务器数据,Restic 都能胜任。
它的设计哲学值得点赞:加密是你的、数据是你的、控制权也是你的。搭配 MinIO 搭建私有备份方案,既避免了云服务商的锁定,又享受了对象存储的可靠性。
如果你觉得这篇文章有帮助,欢迎点赞、转发!