 夜雨聆风
夜雨聆风1. uni-app框架概述
uni-app是使用Vue.js开发的一个前端框架,基于该框架可以很方便地进行多端项目开发,只需要编写一套代码,即可生成为多个平台项目。uni-app框架支持的平台包括iOS、Android、响应式Web和各种主流的小程序等。
uni-app框架开发项目的4点优势
1、平台能力不受限。使用uni-app框架进行项目开发能做到“一套代码,多端发行”。
2、性能体验优秀。加载新页面速度快,可以自动更新数据。
3、基于通用技术栈,学习成本低。uni-app框架基于前端开发中比较通用的Vue.js技术栈,使开发者不必增加学习成本。
4、具有开放的生态且组件更丰富。例如,支持通过npm安装第三方包,支持微信小程序自定义组件及SDK,支持微信生态的各种SDK。
参考学习官网:
https://uniapp.dcloud.net.cn/quickstart.html
2. HBuilder X开发工具
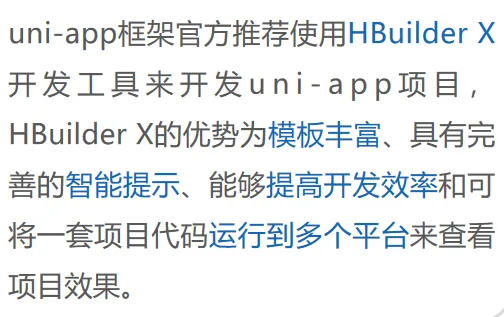
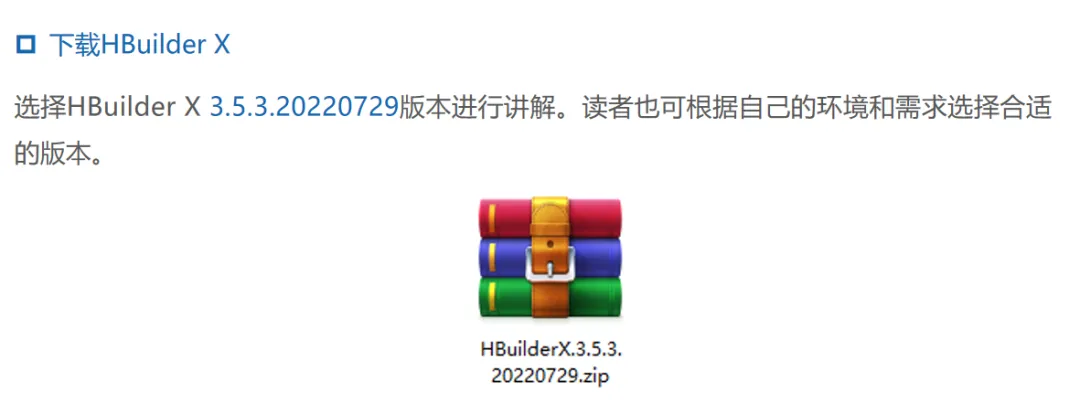
下载:https://dcloud.io/hbuilderx.html
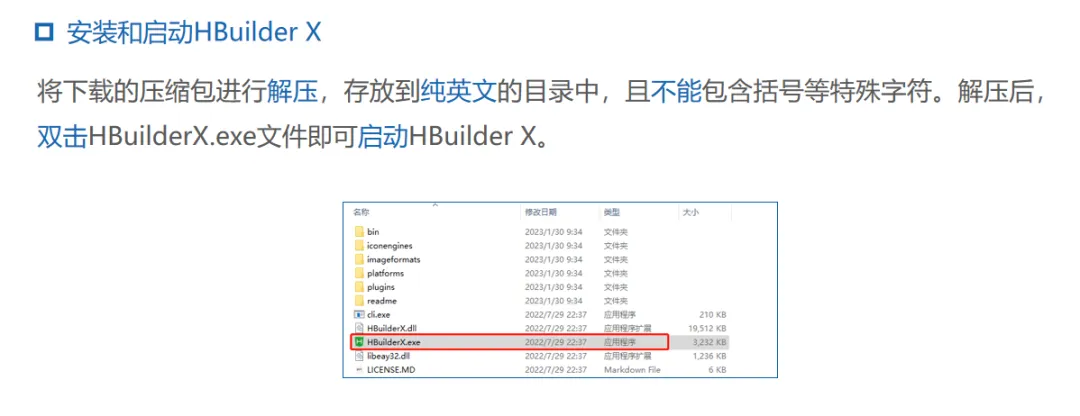
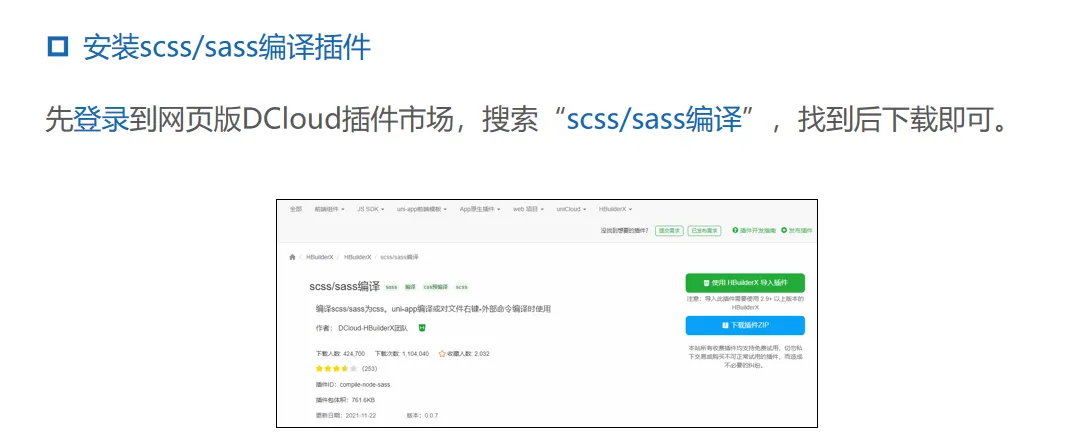
地址:https://ext.dcloud.net.cn/plugin?name=compile-node-sass
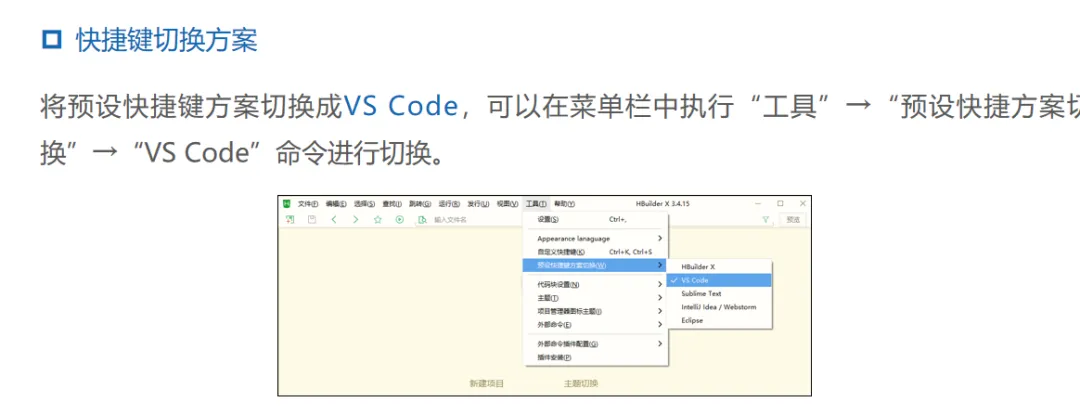
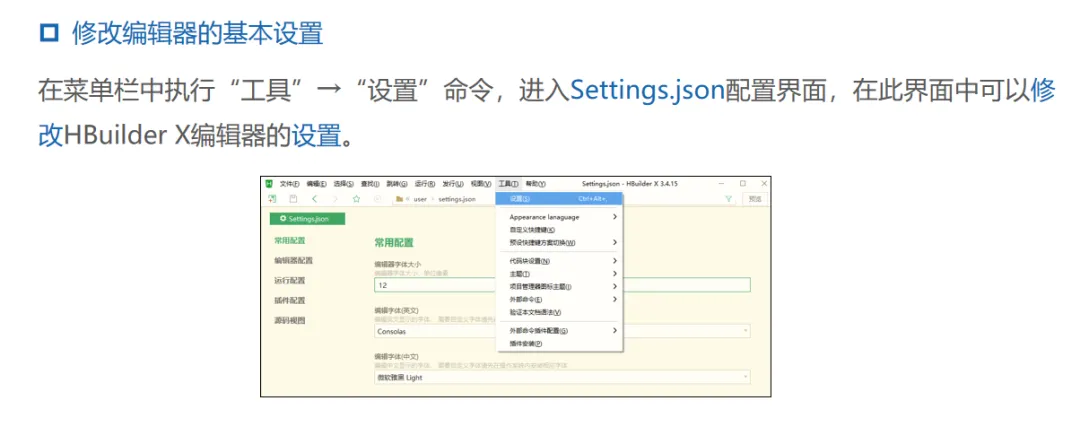
3. 创建uni-app项目
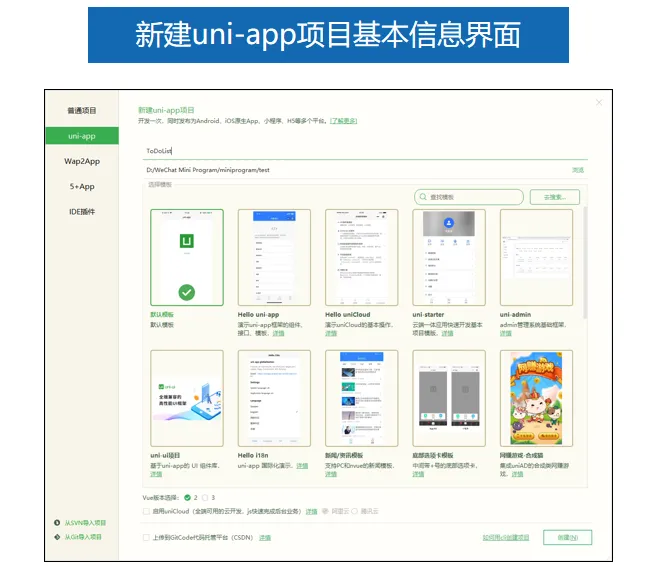
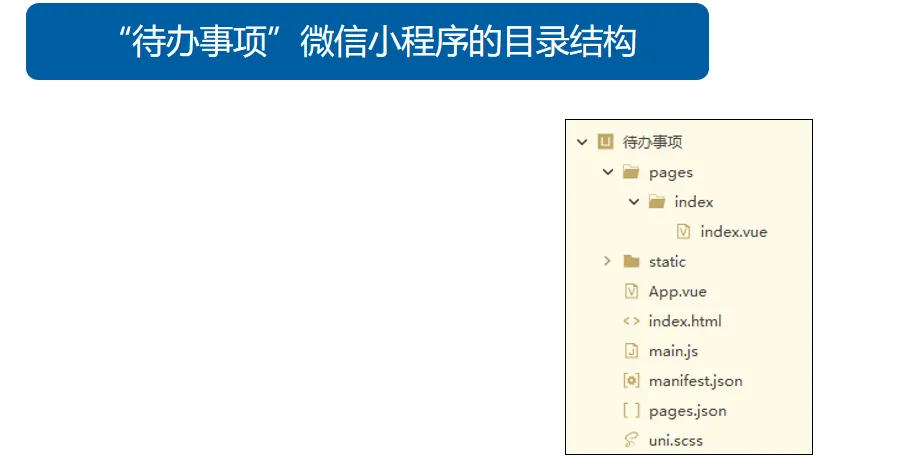
4. uni-app项目的目录结构
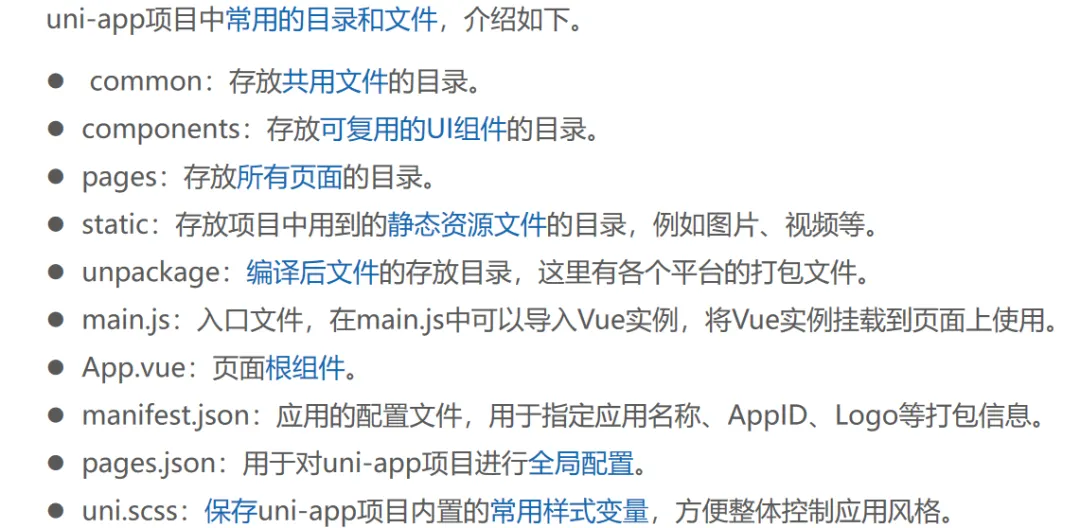
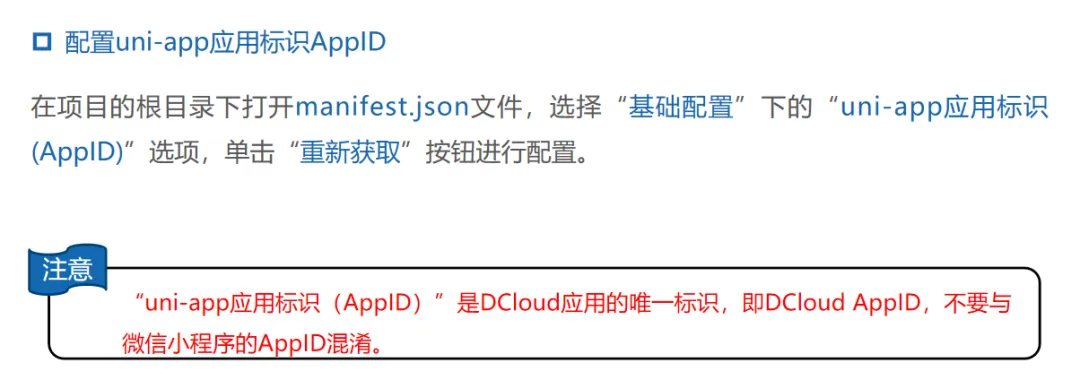
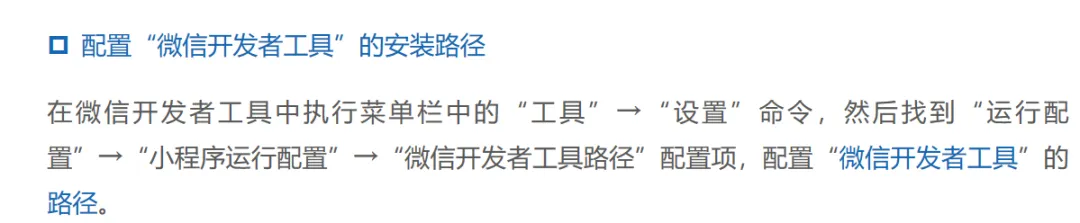
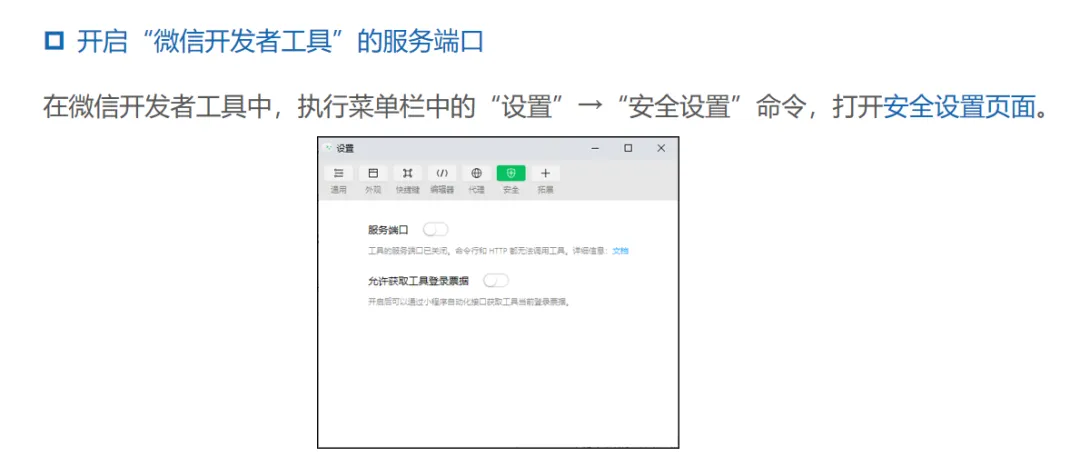
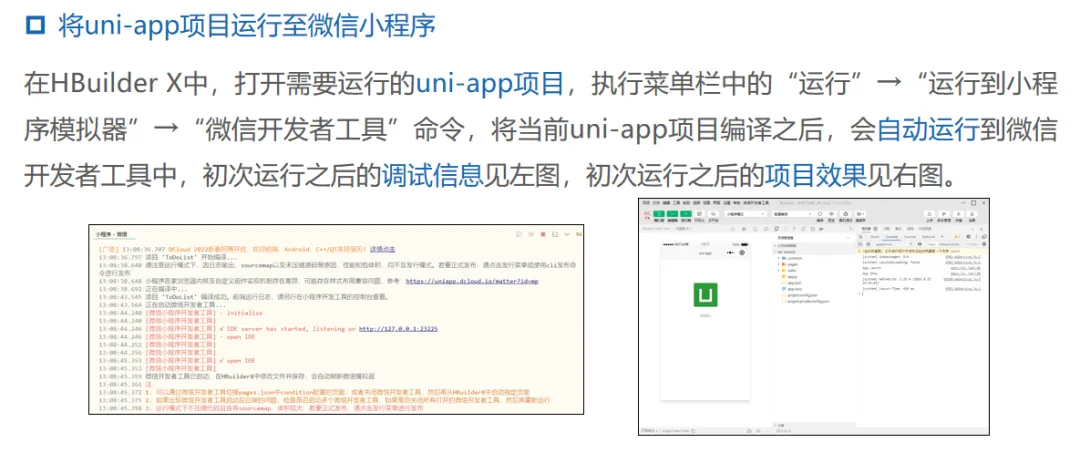
5. 将uni-app项目运行至微信小程序

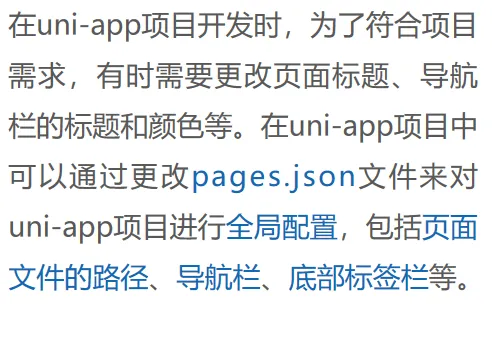
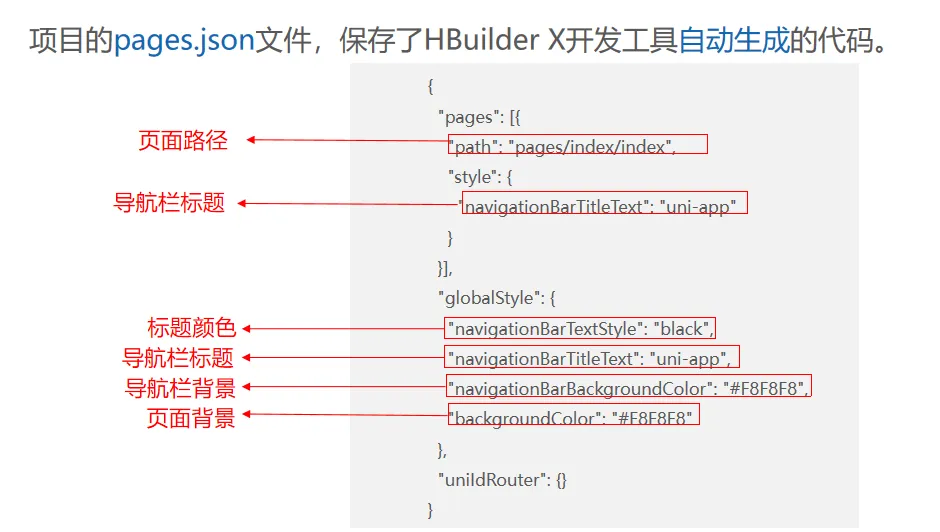
6. uni-app项目的全局配置文件
7.案例准备事项
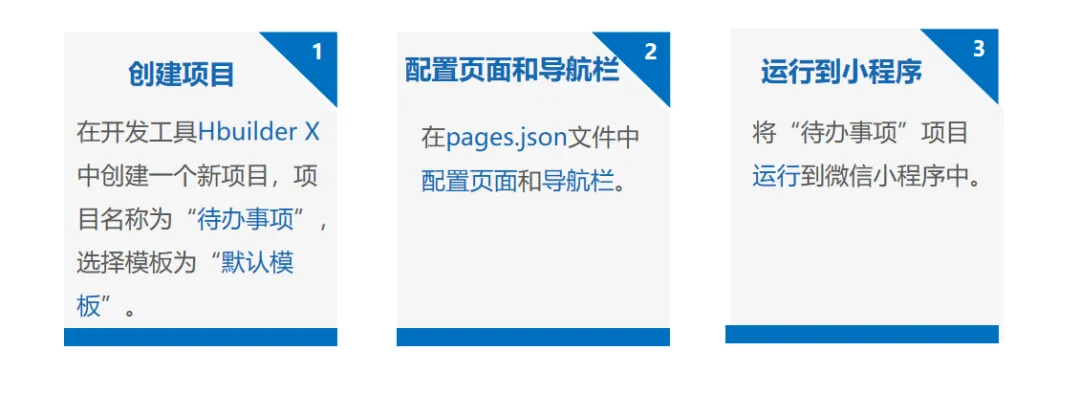
1.项目准备
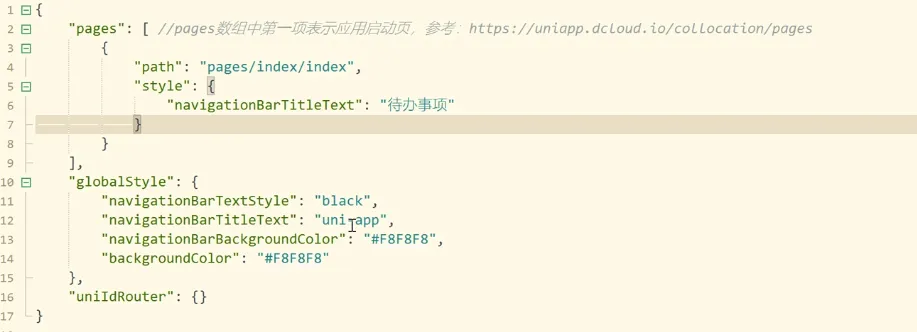
2. 实现添加待办事项的功能
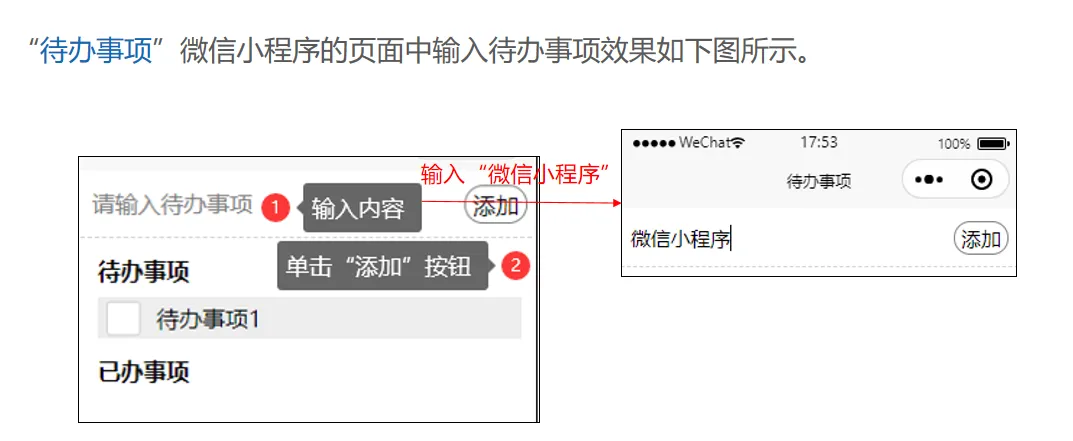
1.初始化数据(index.vue)
<script>export default {data() {return {showList: [],value: '',status: ''}},methods: {}}</script>
2.编写页面实现(index.vue)
<template><view><viewclass="top"><inputtype="text"placeholder="请输入待办事项"v-model="value"><viewclass="createButton" @click="handleClick">添加</view></view></view></template>
<script>export default {data() {return {showList: [],value: '',status: ''}},methods: {handleClick() {this.showList.push({value: this.value,status: 'todo', // 表示待办事项id: new Date().getTime()})console.log(this.showList)this.value = ''},}}</script><style>/* 顶部区域 */.top {width: 100%;height: 80rpx;display: flex;align-items: center;justify-content: space-between;padding: 15rpx 0 15rpx 0;border-bottom: 1px dashed lightgray;}.top input {width: 500rpx;margin-left: 20rpx;}.top .createButton {width: 100rpx;height: 60rpx;display: flex;align-items: center;justify-content: center;border: 1rpx solid gray;border-radius: 50rpx;margin-right: 20rpx;}</style>
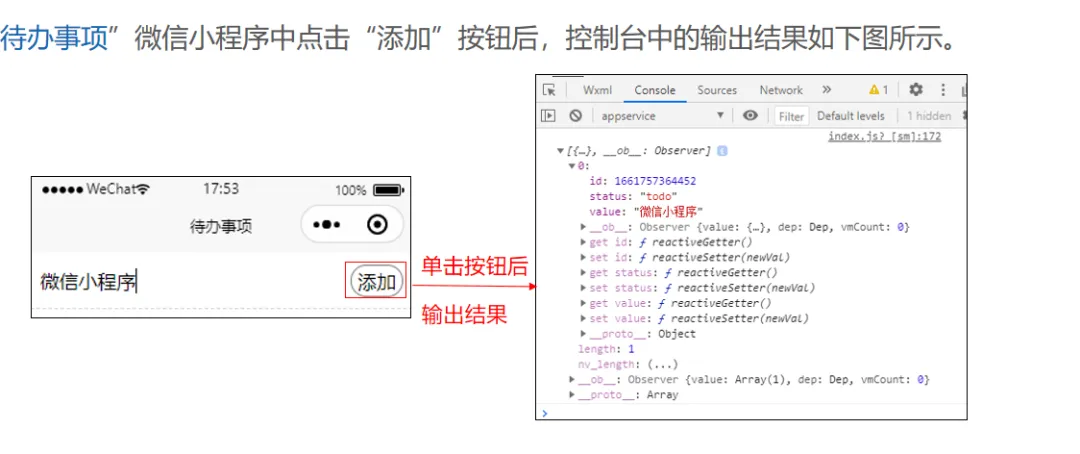
3. 实现列表区域
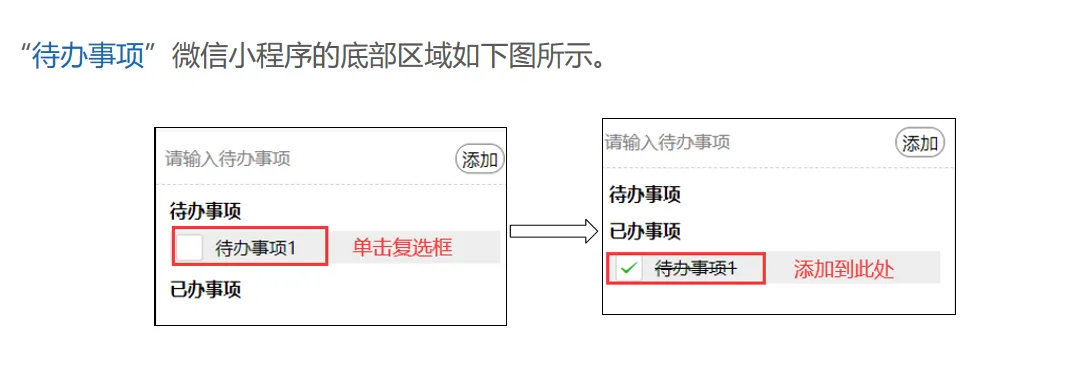
待办事项:
<template><view><viewclass="top"><inputtype="text"placeholder="请输入待办事项"v-model="value"><viewclass="createButton" @click="handleClick">添加</view></view><viewclass="bottom"><viewclass="title">待办事项</view><viewv-for="(item, index) in showList":key="item.id"><viewv-if="item.status === 'todo'"class="doing"><checkboxv-on:click="doingHandle(item.id, index)" />{{ item.value }}</view></view></view></view></template>
<script>export default {data() {return {showList: [],value: '',status: ''}},methods: {handleClick() {this.showList.push({value: this.value,status: 'todo', // 表示待办事项id: new Date().getTime()})console.log(this.showList)this.value = ''},doingHandle(id, index) {const item = this.showList.find((item) => item.id === id)item.status = 'finished'},}}</script>
已办事项
<template><view><viewclass="top"><inputtype="text"placeholder="请输入待办事项"v-model="value"><viewclass="createButton" @click="handleClick">添加</view></view><viewclass="bottom"><viewclass="title">待办事项</view><viewv-for="(item, index) in showList":key="item.id"><viewv-if="item.status === 'todo'"class="doing"><checkboxv-on:click="doingHandle(item.id, index)" />{{ item.value }}</view></view><viewclass="title">已办事项</view><viewv-for="(item, index) in showList":key="item.id"><viewv-if="item.status === 'finished'"class="done"><checkboxv-on:click="doneHandle(item.id, index)"checked="true" /><viewclass="conent">{{ item.value }}</view></view></view></view></view></template>
<script>export default {data() {return {showList: [],value: '',status: ''}},methods: {handleClick() {this.showList.push({value: this.value,status: 'todo', // 表示待办事项id: new Date().getTime()})console.log(this.showList)this.value = ''},doingHandle(id, index) {const item = this.showList.find((item) => item.id === id)item.status = 'finished'},doneHandle(id, index) {const item = this.showList.find((item) => item.id === id)item.status = 'todo'}}}</script>
<style>/* 顶部区域 */.top {width: 100%;height: 80rpx;display: flex;align-items: center;justify-content: space-between;padding: 15rpx 0 15rpx 0;border-bottom: 1px dashed lightgray;}.top input {width: 500rpx;margin-left: 20rpx;}.top .createButton {width: 100rpx;height: 60rpx;display: flex;align-items: center;justify-content: center;border: 1rpx solid gray;border-radius: 50rpx;margin-right: 20rpx;}/* 底部区域 */.bottom {margin: 30rpx;}.bottom .title {margin-top: 30rpx;font-weight: bold;}.bottom .done,.bottom .doing {width: 100%;height: 70rpx;background-color: #EDEDED;display: flex;align-items: center;justify-content: flex-start;margin-top: 20rpx;}.conent {text-decoration: line-through;}checkbox {margin: 0 15rpx 0 15rpx;}</style>
8.uni-app项目——“短视频”微信小程序
1.项目内容
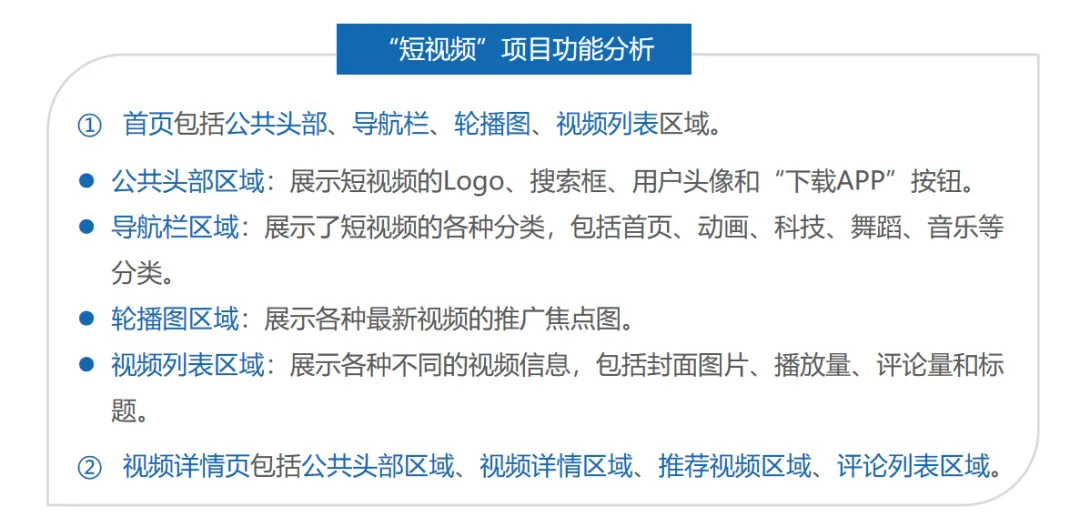
2.项目分析
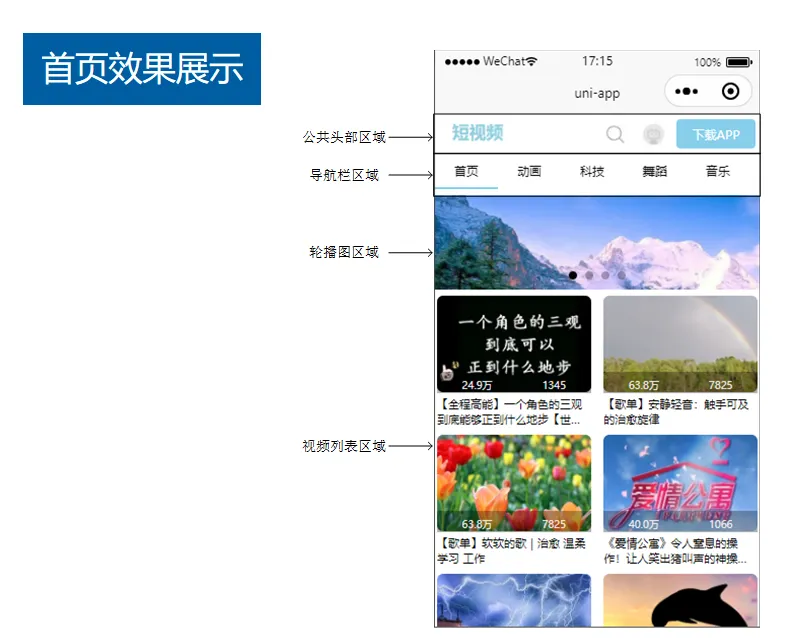
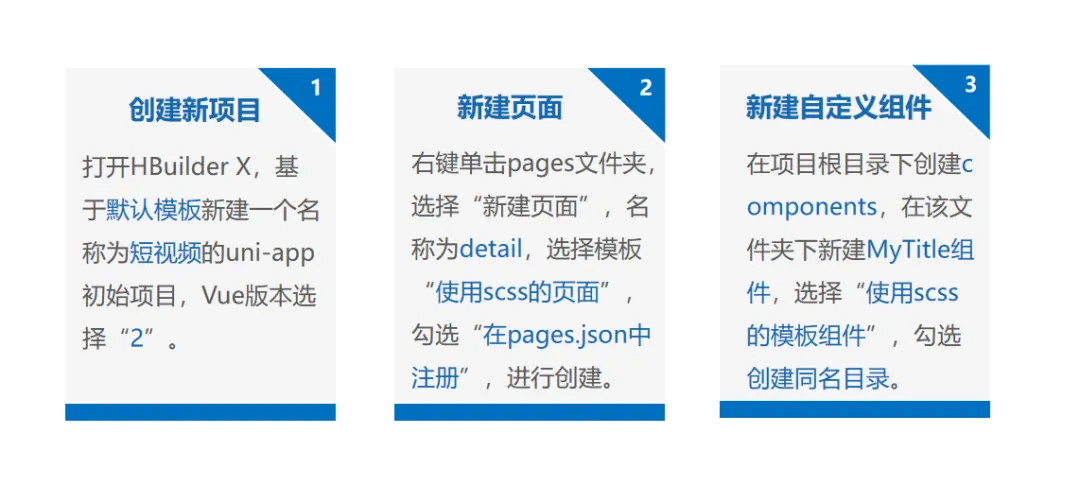
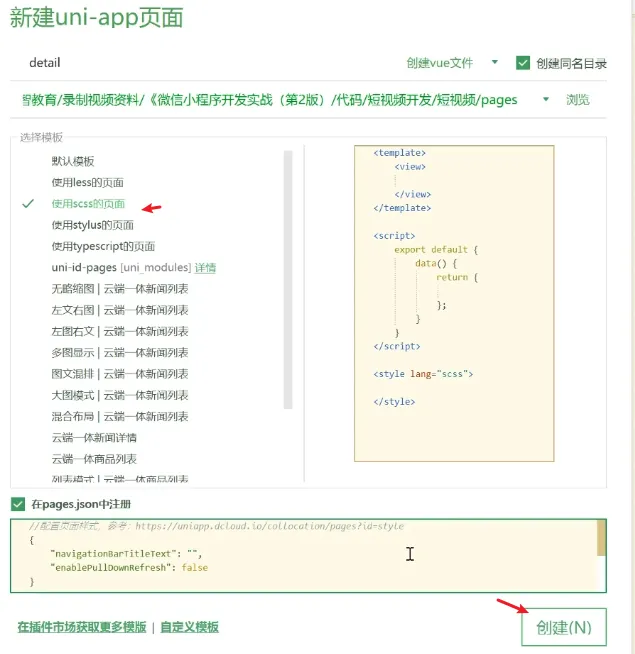
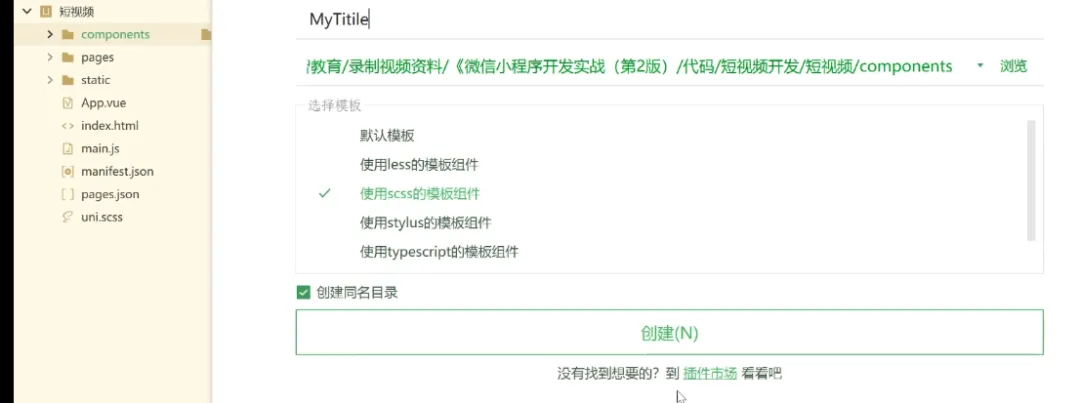
3.项目初始化
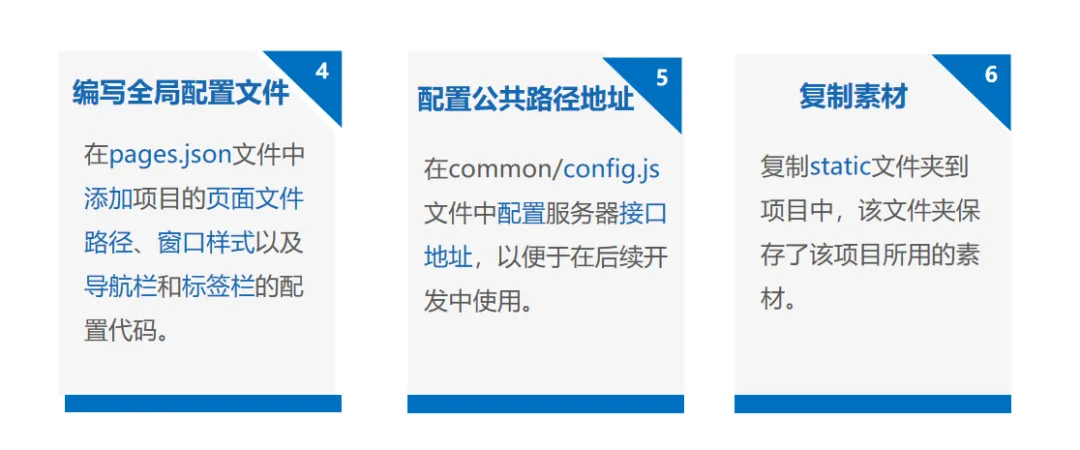
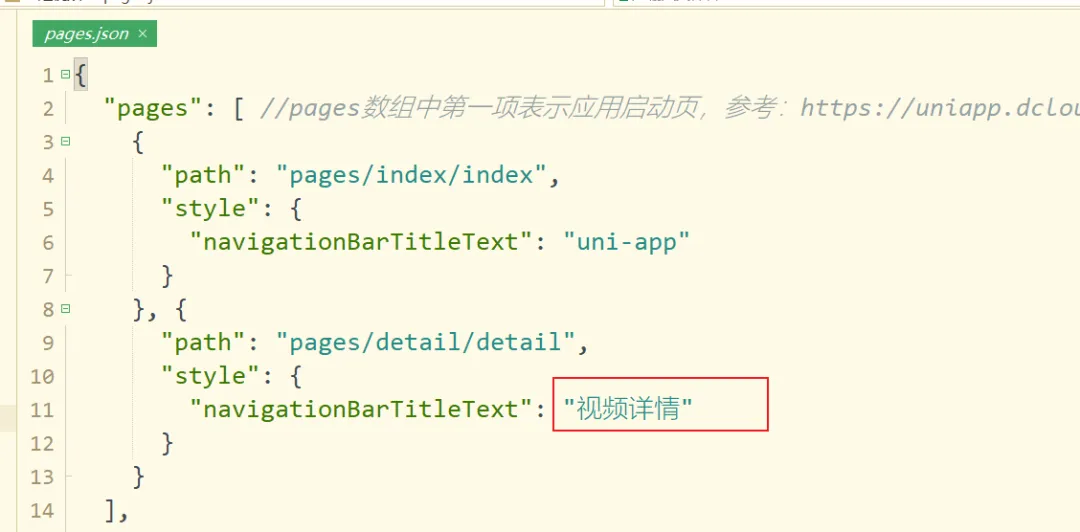
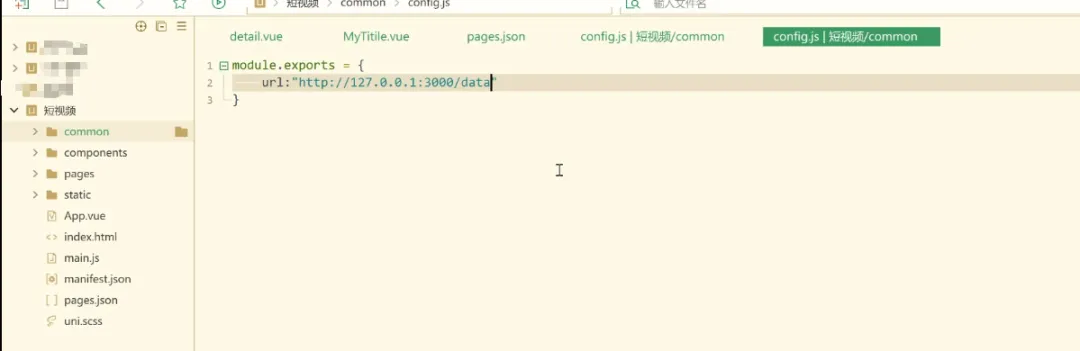
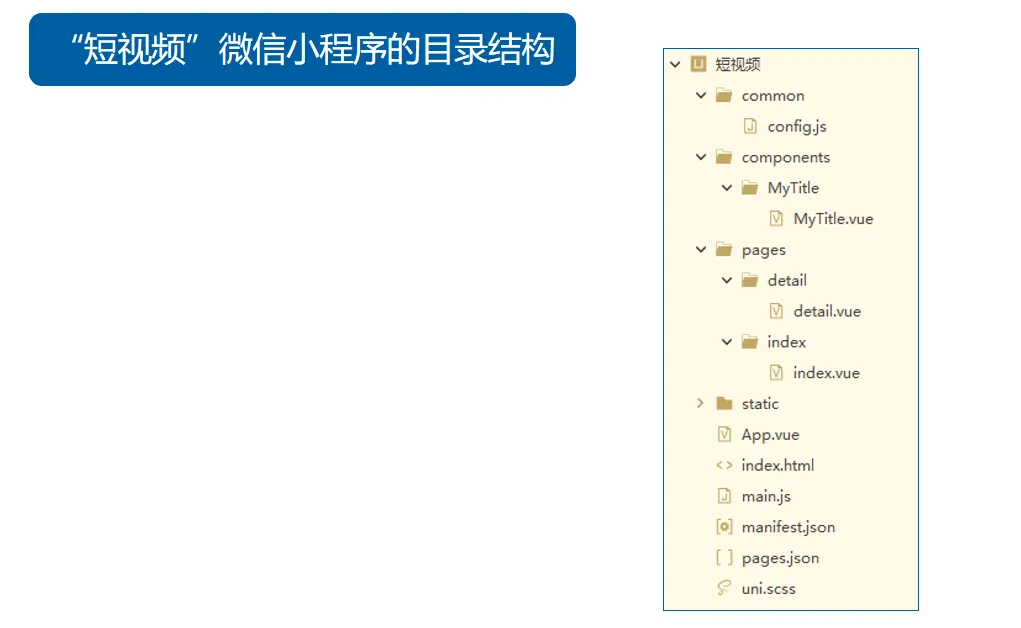
4.公共头部区域
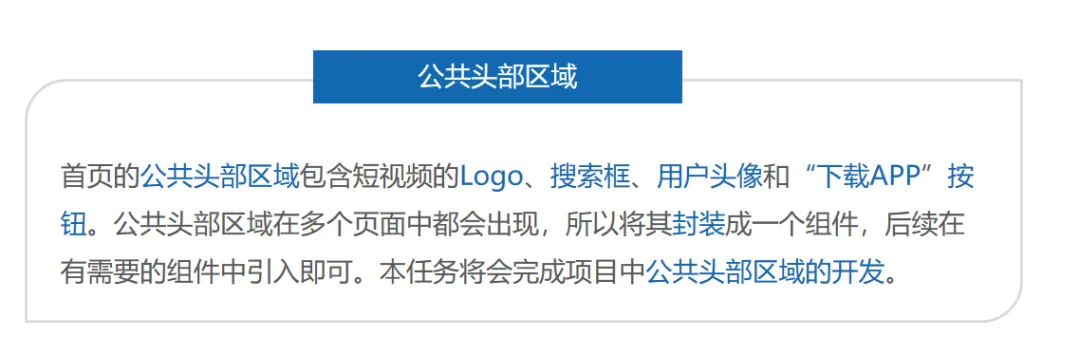
4.1. 实现公共头部区域的页面结构
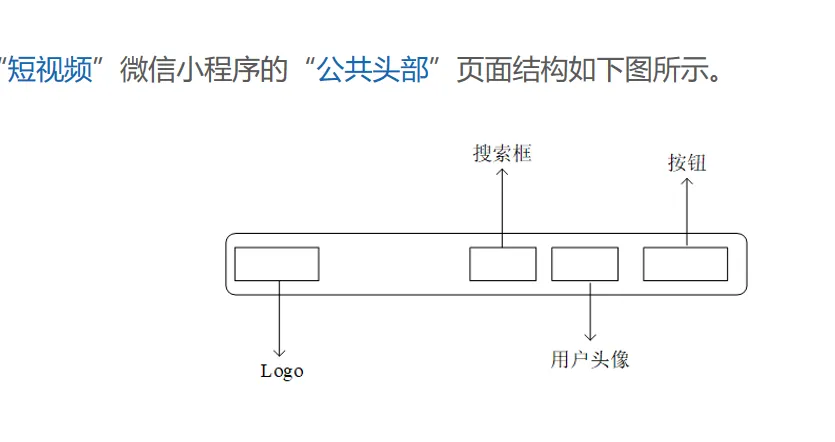
MyTitle.vue
<template><viewclass="my-title"><!-- logo --><navigatorclass="logo"><imageclass="logo-img"src="../../static/logo.png" /></navigator><!-- 搜索框 --><viewclass="search-icon"><imagesrc="../../static/search.jpg" /></view><!-- 用户头像 --><viewclass="user-icon"><imagesrc="../../static/user.jpg" /></view><!-- 下载APP按钮 --><viewclass="down-app">下载APP</view></view></template>
4.2实现公共头部区域的页面样式
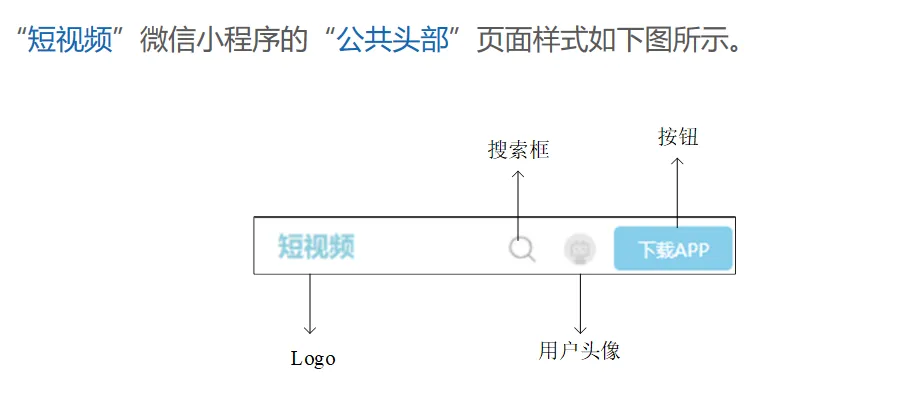
MyTitle.vue
<stylelang="scss">.my-title {display: flex;justify-content: center;align-items: center;padding: 10rpx;background-color: #fff;height: 70rpx;.logo {flex: 7;.logo-img {width: 180rpx;height: 60rpx;}}.search-icon {flex: 1;display: flex;justify-content: center;align-items: center;image {width: 60rpx;height: 44rpx;}}.user-icon {flex: 2;display: flex;justify-content: center;align-items: center;image {width: 54rpx;height: 60rpx;}}.down-app {flex: 3;font-size: 30rpx;display: flex;justify-content: center;align-items: center;background-color: #87CEEB;color: #fff;border-radius: 10rpx;padding: 10rpx;}}</style>
4.3. 在页面中显示公共头部区域
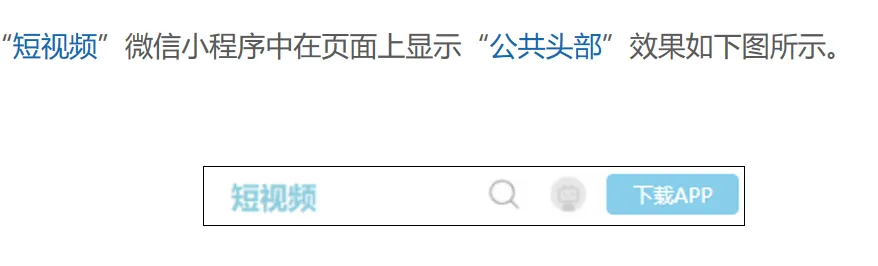
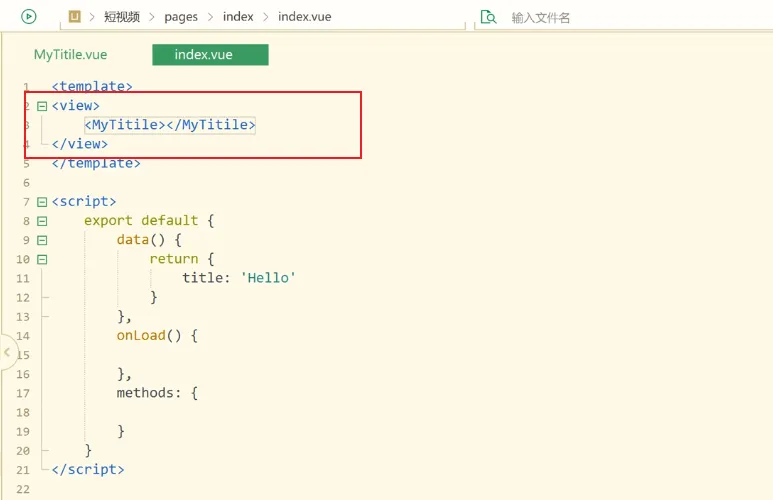
运行看效果。
5.导航栏区域
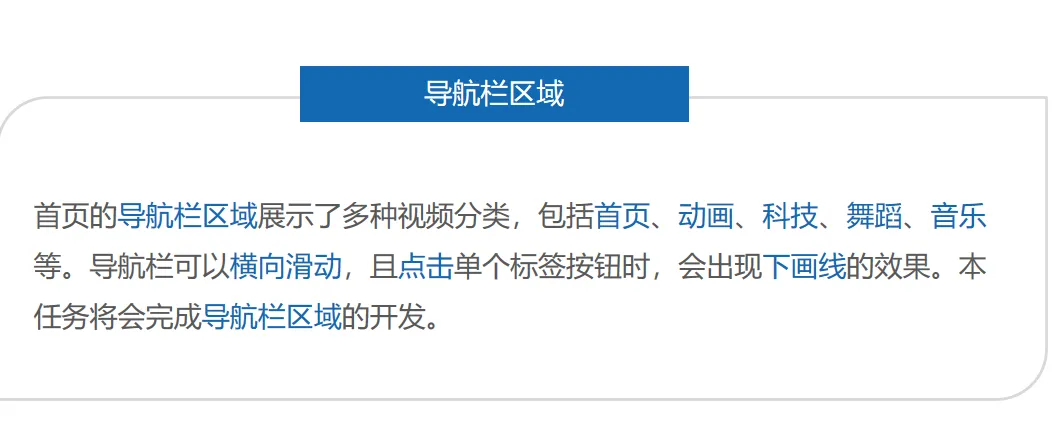
5.1. 加载导航栏数据
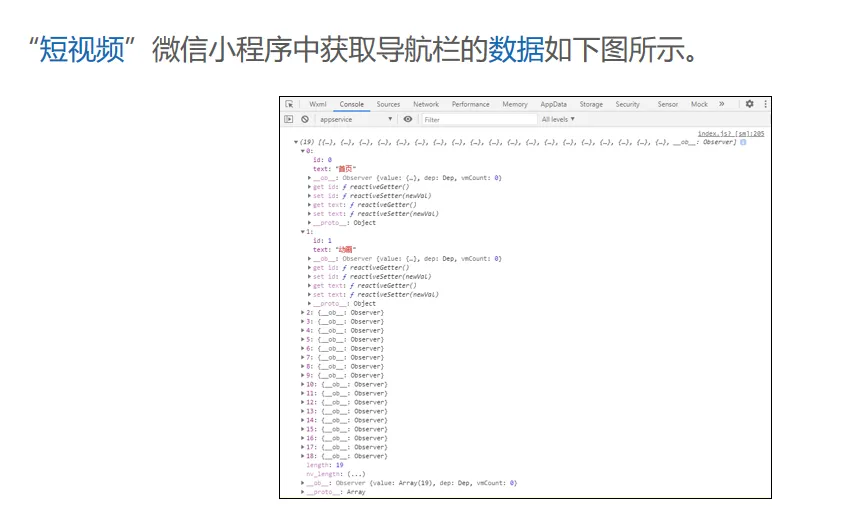
index.vue
<script>import config from '../../common/config.js'export default {data() {return {navList: [],currentIndexNav: 0,}},onLoad() {this.getNavList()},methods: {getNavList() {uni.request({url: config.url + '/navList',success: res => {this.navList = res.data.data.navListconsole.log(this.navList) // 输出到控制台}})},}}</script>
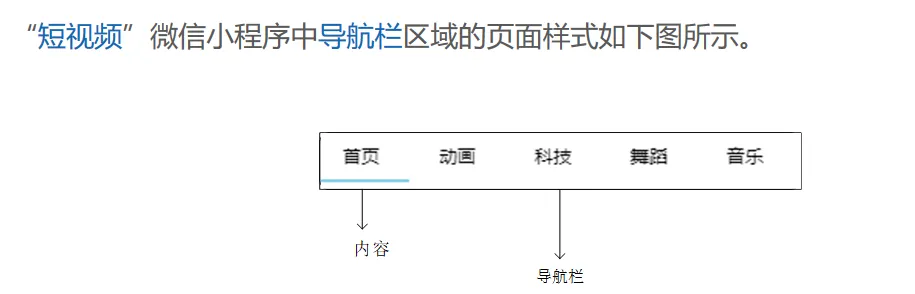
5.2. 实现导航栏区域的页面结构
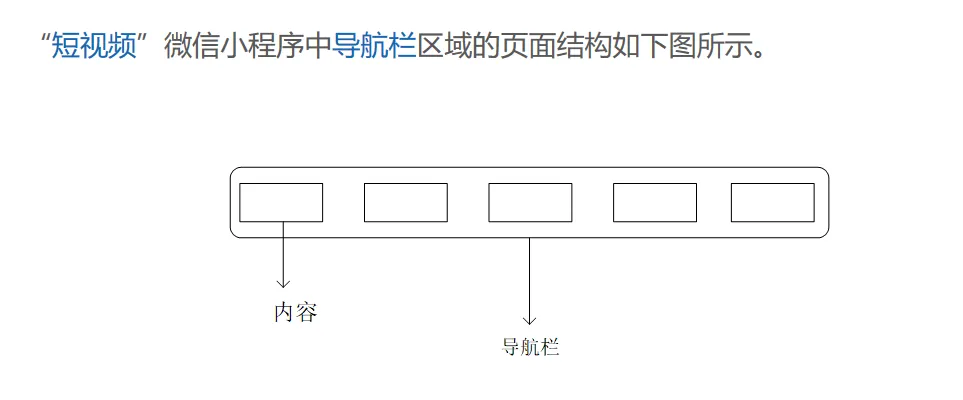
index.vue
<template><view><MyTitle></MyTitle><viewclass="nav_wrap"><scroll-viewclass="nav"scroll-x><view @click="activeNav($event,index)":class="['nav_item',index===currentIndexNav?'active':'']":data-index="index" v-for="(item,index) in navList" :key="item.id">{{item.text}}</view></scroll-view></view></template>
5.3. 实现导航栏区域的页面样式
index.vue
<stylelang="scss">.nav {white-space: nowrap;padding: 5rpx 0;.nav_item {padding: 20rpx 45rpx;font-size: 30rpx;display: inline-block;}.active {border-bottom: 5rpx solid #87CEEB;}}/* #ifdef H5 */.nav ::-webkit-scrollbar {width: 0;height: 0;color: transparent;display: none;}</style>
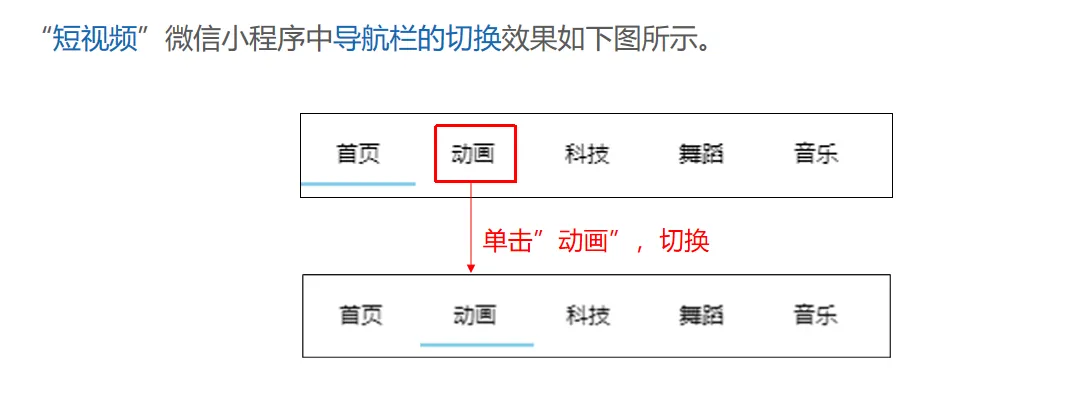
5.4. 实现导航栏的切换效果
index.vue
<script>import config from '../../common/config.js'export default {data() {return {navList: [],currentIndexNav: 0,swiperList: [],videosList: [],}},onLoad() {this.getNavList()this.getSwiperList()this.getVideosList()},methods: {getNavList() {uni.request({url: config.url + '/navList',success: res => {this.navList = res.data.data.navListconsole.log(this.navList) // 输出到控制台}})},activeNav(e) {this.currentIndexNav = e.target.dataset.index},}}</script>
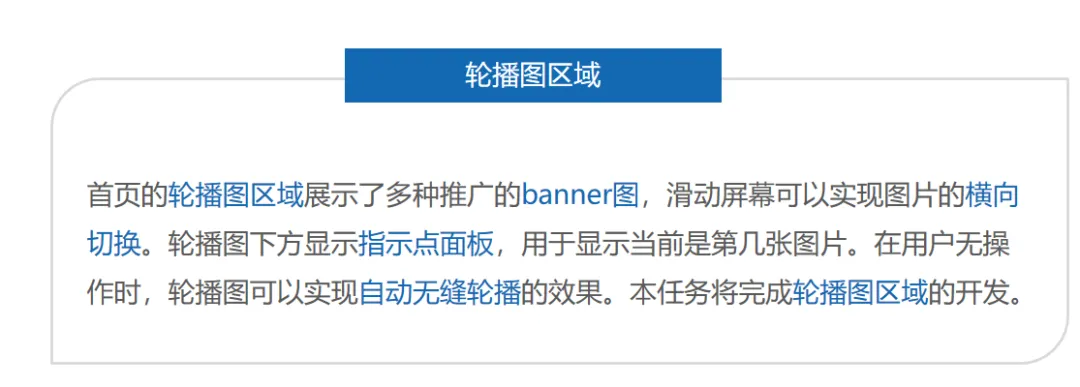
6.轮播图区域
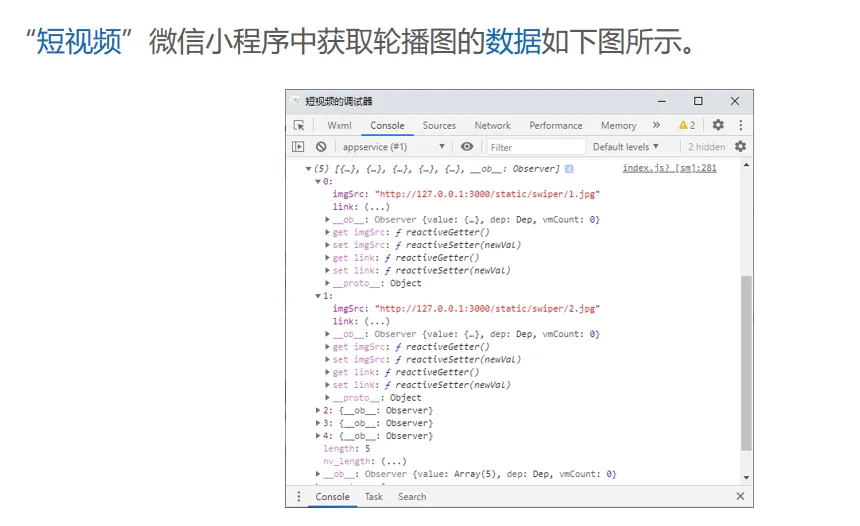
6.1. 加载轮播图数据
index.vue
<script>import config from '../../common/config.js'export default {data() {return {navList: [],currentIndexNav: 0,swiperList: [],}},onLoad() {this.getNavList()this.getSwiperList()},methods: {getNavList() {uni.request({url: config.url + '/navList',success: res => {this.navList = res.data.data.navListconsole.log(this.navList) // 输出到控制台}})},activeNav(e) {this.currentIndexNav = e.target.dataset.index},getSwiperList() {uni.request({url: config.url + '/swiperList',success: res => {this.swiperList = res.data.data.swiperList}})},}}</script>
6.2. 实现轮播图区域的页面结构
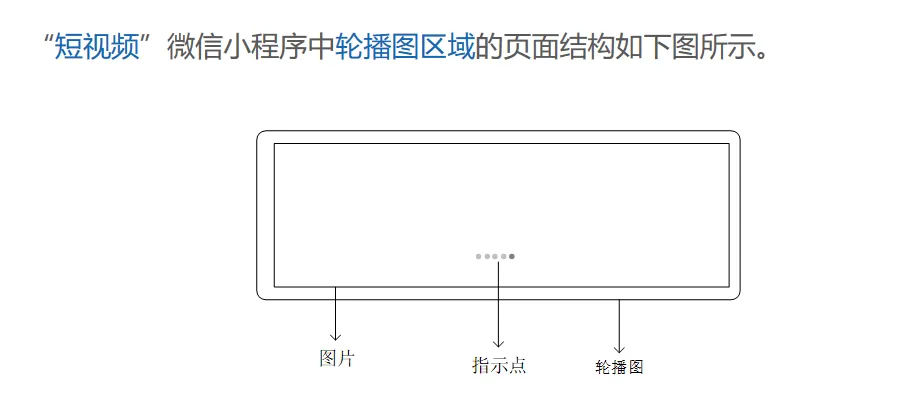
index.vue
<template><view><MyTitle></MyTitle><viewclass="nav_wrap"><scroll-viewclass="nav"scroll-x><view @click="activeNav($event,index)":class="['nav_item',index===currentIndexNav?'active':'']":data-index="index" v-for="(item,index) in navList" :key="item.id">{{item.text}}</view></scroll-view></view><viewclass="slides"><swiperautoplayindicator-dotscircular><swiper-itemv-for="(item,index) in swiperList":key="index"><image:src="item.imgSrc"mode="widthFix"></image></swiper-item></swiper></view></view></template>
6.3. 实现轮播图区域的页面样式
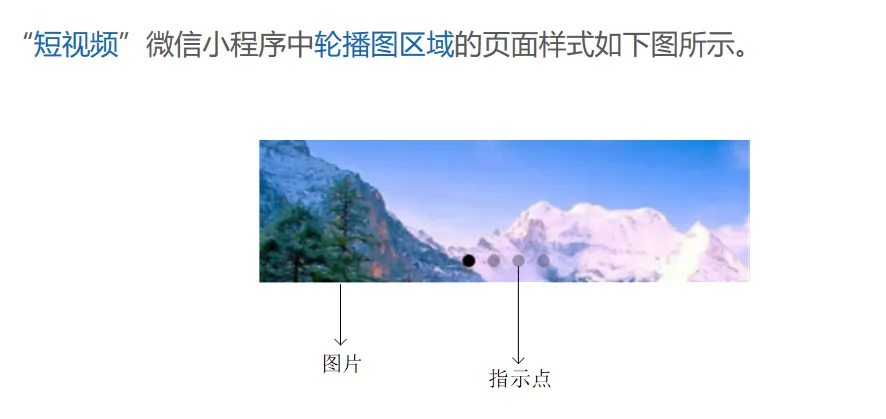
index.vue
<stylelang="scss">.nav {white-space: nowrap;padding: 5rpx 0;.nav_item {padding: 20rpx 45rpx;font-size: 30rpx;display: inline-block;}.active {border-bottom: 5rpx solid #87CEEB;}}/* #ifdef H5 */.nav ::-webkit-scrollbar {width: 0;height: 0;color: transparent;display: none;}/* #endif */.slides {margin: 10rpx 0;swiper {height: 220rpx;}image {width: 100%;height: 100%;}}</style>
7.视频列表区域
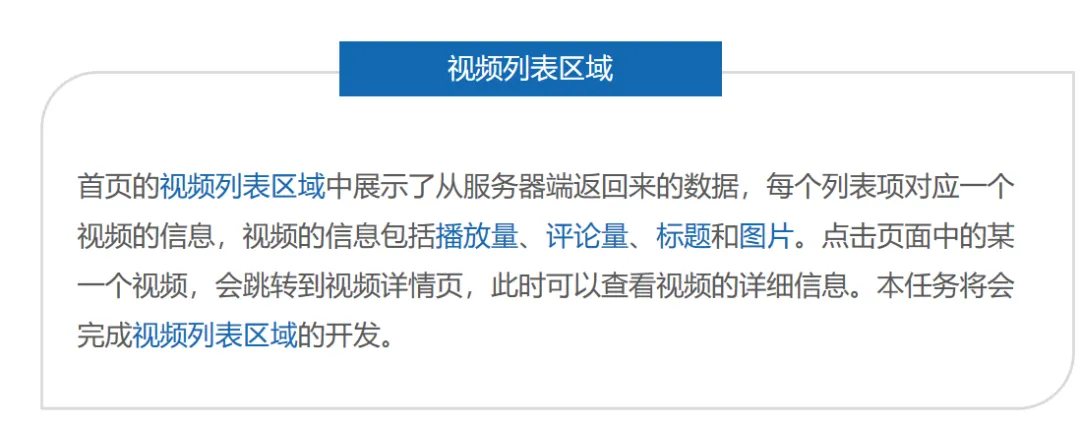
7.1. 加载视频列表数据
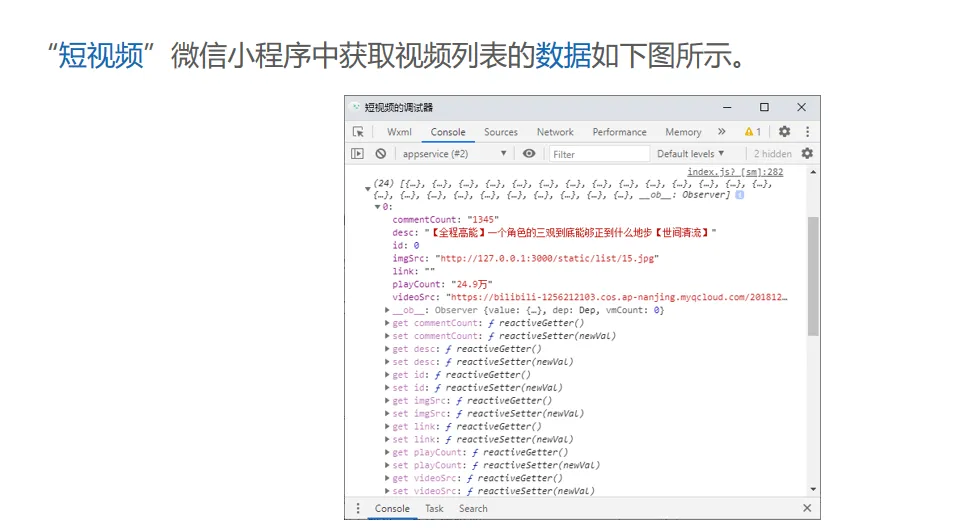
index.vue
<script>import config from '../../common/config.js'export default {data() {return {navList: [],currentIndexNav: 0,swiperList: [],videosList: [],}},onLoad() {this.getNavList()this.getSwiperList()this.getVideosList()},methods: {getNavList() {uni.request({url: config.url + '/navList',success: res => {this.navList = res.data.data.navListconsole.log(this.navList) // 输出到控制台}})},activeNav(e) {this.currentIndexNav = e.target.dataset.index},getSwiperList() {uni.request({url: config.url + '/swiperList',success: res => {this.swiperList = res.data.data.swiperList}})},getVideosList() {uni.request({url: config.url + '/videosList',success: res => {this.videosList = res.data.data.videosList}})},}}</script>
7.2. 实现视频列表区域的页面结构
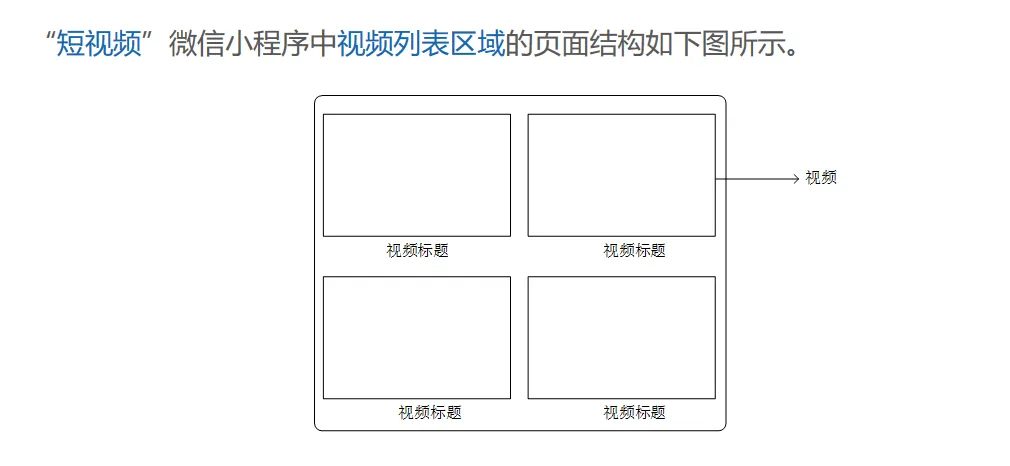
index.vue
<template><view><MyTitle></MyTitle><viewclass="nav_wrap"><scroll-viewclass="nav"scroll-x><view @click="activeNav($event,index)":class="['nav_item',index===currentIndexNav?'active':'']":data-index="index" v-for="(item,index) in navList" :key="item.id">{{item.text}}</view></scroll-view></view><viewclass="slides"><swiperautoplayindicator-dotscircular><swiper-itemv-for="(item,index) in swiperList":key="index"><image:src="item.imgSrc"mode="widthFix"></image></swiper-item></swiper></view><viewclass="video-wrap"><!-- 视频列表中的每一项 --><viewclass="video-item" @click="goVideosDetail(item.id)"v-for="(item,index) in videosList":key="item.id"><!-- 图片容器 --><viewclass="video-img"><image:src="item.imgSrc"mode="widthFix"></image><!-- 播放量 --><viewclass="video-info"><!-- 播放量 --><viewclass="play-count-wrap"><!-- 图标 --><textclass="fa fa-play-circle-o"></text><!-- 数值 --><textclass="play-count">{{ item.playCount }}</text></view><!-- 评论量 --><viewclass="comment-count-row"><!-- 图标 --><textclass="fa fa-commenting-o"></text><!-- 数值 --><textclass="comment-count">{{ item.commentCount }}</text></view></view></view><!-- 标题 --><viewclass="video-title">{{ item.desc }}</view></view></view></view></template>
7.3. 实现视频列表区域的页面样式
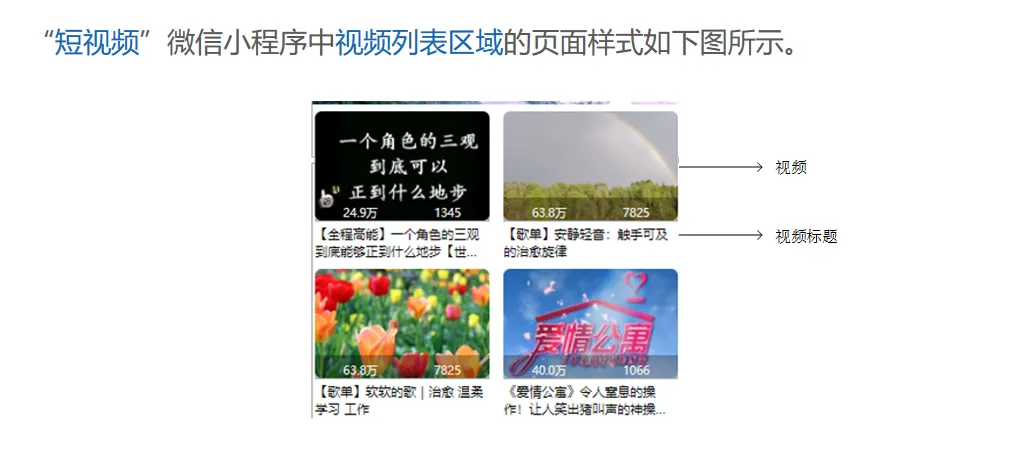
index.vue
<stylelang="scss">.nav {white-space: nowrap;padding: 5rpx 0;.nav_item {padding: 20rpx 45rpx;font-size: 30rpx;display: inline-block;}.active {border-bottom: 5rpx solid #87CEEB;}}/* #ifdef H5 */.nav ::-webkit-scrollbar {width: 0;height: 0;color: transparent;display: none;}/* #endif */.slides {margin: 10rpx 0;swiper {height: 220rpx;}image {width: 100%;height: 100%;}}.video-wrap {display: flex;flex-wrap: wrap;justify-content: space-between;padding: 5rpx;}.video-item {width: 48%;margin-bottom: 20rpx;}.video-img {position: relative;image {width: 100%;border-radius: 15rpx;}.video-info {position: absolute;bottom: 8rpx;left: 0;width: 100%;display: flex;justify-content: space-around;background: rgba(0, 0, 0, 0.3);}.video-info text {margin-right: 5rpx;font-size: 24rpx;color: #efefef;}}.video-title {font-size: 28rpx;/* 将对象作为弹性伸缩盒子模型显示 */display: -webkit-box;/* 超出部分隐藏 */overflow: hidden;/* 显示的行数 */-webkit-line-clamp: 2;/* 从上到下垂直排列子元素 */-webkit-box-orient: vertical;}</style>
7.4. 实现跳转到视频详情页
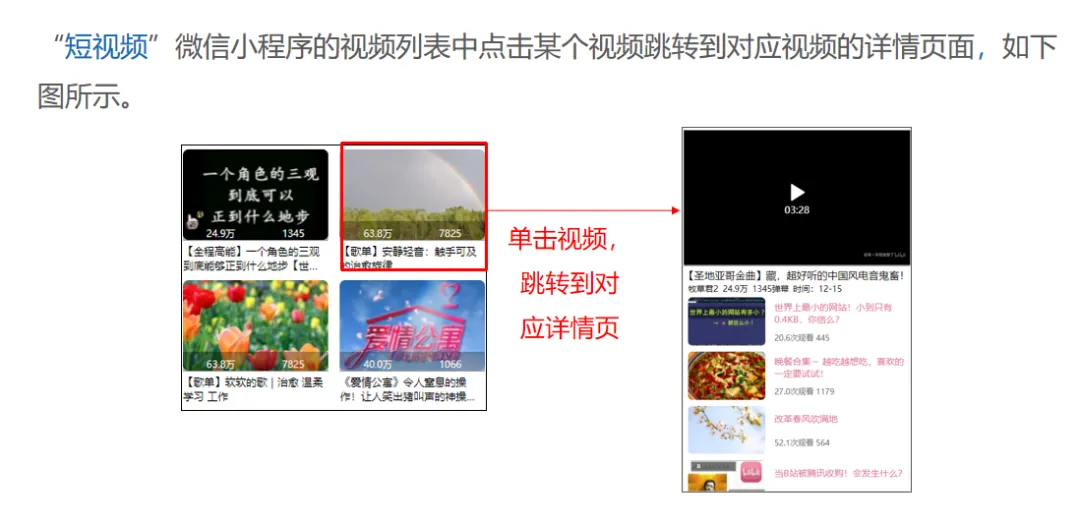
index.vue
<script>import config from '../../common/config.js'export default {data() {return {navList: [],currentIndexNav: 0,swiperList: [],videosList: [],}},onLoad() {this.getNavList()this.getSwiperList()this.getVideosList()},methods: {getNavList() {uni.request({url: config.url + '/navList',success: res => {this.navList = res.data.data.navListconsole.log(this.navList) // 输出到控制台}})},activeNav(e) {this.currentIndexNav = e.target.dataset.index},getSwiperList() {uni.request({url: config.url + '/swiperList',success: res => {this.swiperList = res.data.data.swiperList}})},getVideosList() {uni.request({url: config.url + '/videosList',success: res => {this.videosList = res.data.data.videosList}})},goVideosDetail(id) {uni.navigateTo({url: '/pages/detail/detail?id=' + id})},}}</script>
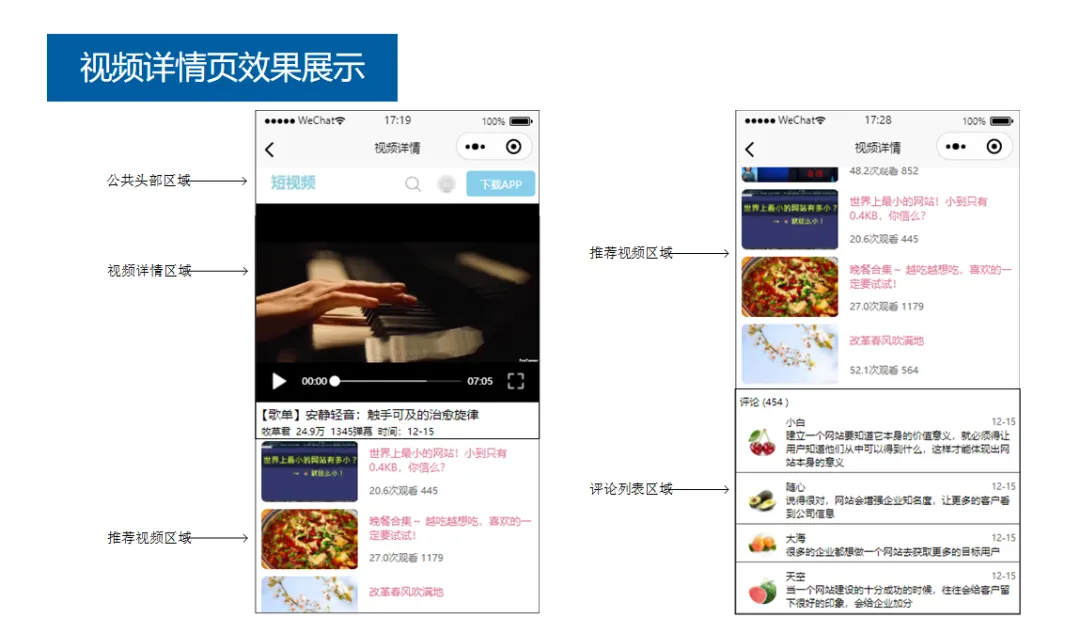
8.视频详情页
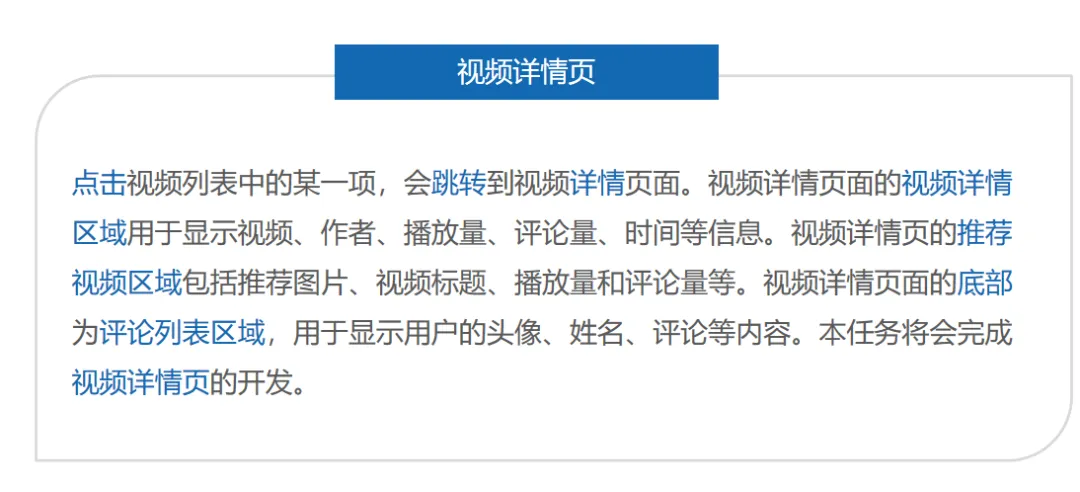
8.1. 实现整体页面结构
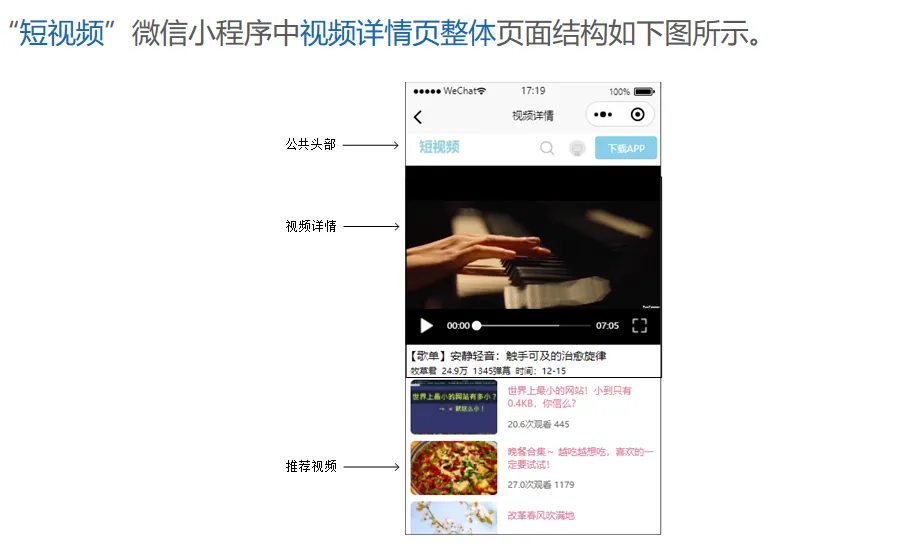
detail.vue
<template><view><MyTitle></MyTitle><!-- 视频详情 --><viewclass="video-info"v-if="videoInfo"></view><!-- 推荐视频 --><viewclass="other-list"></view><!-- 评论列表 --><viewclass="comment-wrap"></view></view></template>
8.2. 实现视频详情区域
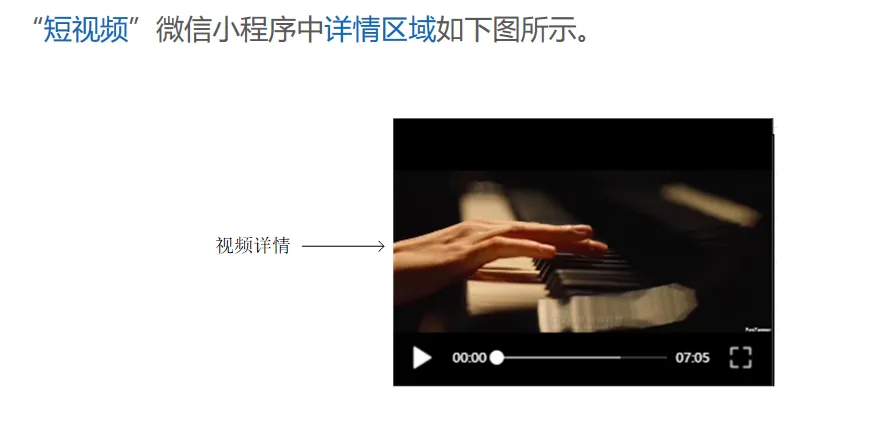
detail.vue
<script>import config from "../../common/config.js"export default {data() {return {// 视频详情videoInfo: null,}},onLoad(options) {let videoId = options.idthis.getCurrentVideo(videoId)},methods: {// 页面加载时获取视频信息getCurrentVideo(videoId) {uni.request({url: config.url + '/videoDetail?id=' + videoId,success: res => {console.log(res.data.data)if (res.data.code === 0) {this.videoInfo = res.data.data.videoInfo}}})},}}</script>
detail.vue
<template><view><MyTitle></MyTitle><!-- 视频详情 --><viewclass="video-info"v-if="videoInfo"><!-- 视频 --><video:src="videoInfo.videoSrc"controlsclass="video"></video><!-- 视频标题 --><viewclass="video-title"><text>{{ videoInfo.videoTitle }}</text><textclass="fa fa-angle-down"></text></view><!-- 视频详细信息 --><viewclass="video-detail"><!-- 作者 --><textclass="author">{{ videoInfo.author }}</text><!-- 播放量 --><textclass="play-count">{{ videoInfo.playCount }}</text><!-- 评论量 --><textclass="comment-count">{{ videoInfo.commentCount }}弹幕</text><!-- 时间 --><textclass="date">时间:{{ videoInfo.date }}</text></view></view><!-- 推荐视频 --><viewclass="other-list"></view><!-- 评论列表 --><viewclass="comment-wrap"></view></view></template>
8.3. 实现推荐视频区域
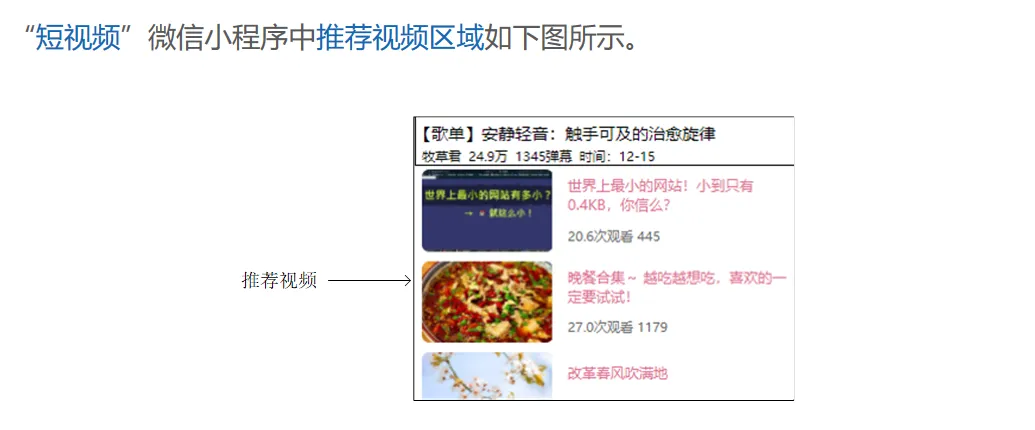
detail.vue
<stylelang="scss">.video-info {margin-top: 10rpx;.video {width: 100%;}.video-title {display: flex;justify-content: space-between;font-size: 35rpx;}.video-detail {margin-top: 5rpx;font-size: 28rpx;text {margin-left: 15rpx;}.author {color: #000;}}}</style>
detail.vue
<script>import config from "../../common/config.js"export default {data() {return {// 视频详情videoInfo: null,othersList: [],}},onLoad(options) {let videoId = options.idthis.getCurrentVideo(videoId)this.getOthersList()},methods: {// 页面加载时获取视频信息getCurrentVideo(videoId) {uni.request({url: config.url + '/videoDetail?id=' + videoId,success: res => {console.log(res.data.data)if (res.data.code === 0) {this.videoInfo = res.data.data.videoInfo}}})},getOthersList() {uni.request({url: config.url + '/othersList',success: res => {if (res.data.code === 0) {this.othersList = res.data.data.othersList}}})},}}</script>
detail.vue
<!-- 推荐视频 --><viewclass="other-list"><viewv-for="item in othersList":key="item.id"class="item_other"><!-- 图片容器 --><viewclass="other-img-wrap"><image:src="item.imgSrc"mode="widthFix"></image></view><!-- 视频详情 --><viewclass="other-info"><!-- 标题 --><viewclass="other-title">{{ item.title }}</view><!-- 播放量 --><viewclass="other-detail"><!-- 播放量 --><textclass="play-count"> {{ item.playMsg }}次观看 </text><!-- 评论 --><textclass="comment-count">{{ item.commentCount }}条评论</text></view></view></view></view>
detail.vue
<stylelang="scss">.other-list {margin-top: 10rpx;.item_other {display: flex;justify-content: space-between;margin-bottom: 20rpx;.other-img-wrap {width: 38%;display: flex;justify-content: center;align-items: center;.other-img-wrap image {width: 90%;border-radius: 15rpx;}}.other-info {width: 60%;display: flex;flex-direction: column;justify-content: space-around;.other-title {font-size: 30rpx;color: #e06f93;}.other-detail {font-size: 26rpx;color: #666;}}}}</style>
8.4. 实现评论列表区域
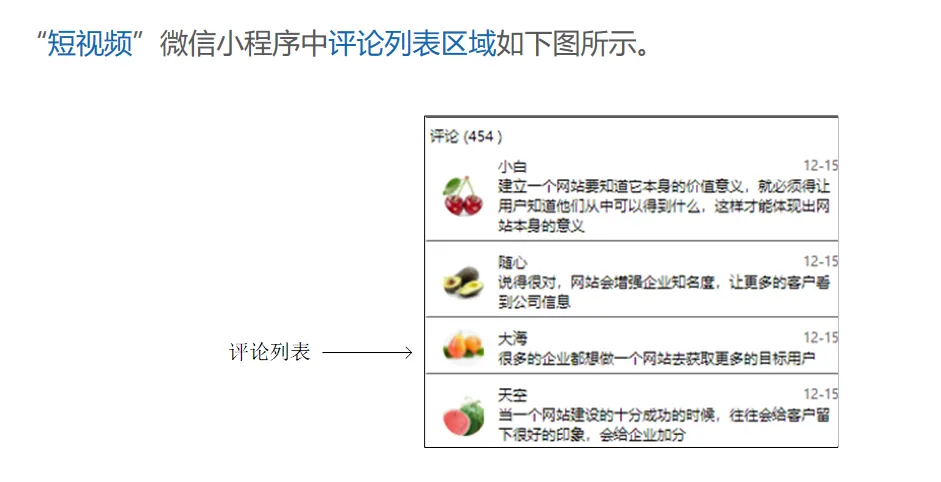
detail.vue
<script>import config from "../../common/config.js"export default {data() {return {// 视频详情videoInfo: null,othersList: [],commentData: [],}},onLoad(options) {let videoId = options.idthis.getCurrentVideo(videoId)this.getOthersList()this.getCommentList(videoId)},methods: {// 页面加载时获取视频信息getCurrentVideo(videoId) {uni.request({url: config.url + '/videoDetail?id=' + videoId,success: res => {console.log(res.data.data)if (res.data.code === 0) {this.videoInfo = res.data.data.videoInfo}}})},getOthersList() {uni.request({url: config.url + '/othersList',success: res => {if (res.data.code === 0) {this.othersList = res.data.data.othersList}}})},getCommentList(videoId) {uni.request({url: config.url + '/commentsList?id=' + videoId,success: res => {if (res.data.code === 0) {this.commentData = res.data.data.commentData;}}})},}}</script>
detail.vue
<!-- 评论列表 --><viewclass="comment-wrap"><viewclass="comment-title">评论 ({{ commentData.commentTotalCount }} )</view><viewclass="comment-list"><viewclass="comment-item"v-for="(item, index) in commentData.commentList":key="index"><!-- 左侧用户 --><viewclass="comment_user"><image:src="item.userIconSrc"mode="widthFix"class="comment_user_image" /></view><!-- 右侧评论 --><viewclass="comment-info"><viewclass="comment-detail"><textclass="author">{{ item.username }}</text><textclass="date">{{ item.commentDate }}</text></view><viewclass="comment-content">{{ item.commentInfo }}</view></view></view></view></view>
detail.vue
<stylelang="scss">.comment-wrap {margin-top: 10rpx;.comment-title {padding: 10rpx;font-size: 28rpx;}.comment-list {.comment-item {margin-bottom: 10rpx;padding: 10rpx;display: flex;justify-content: space-between;border-bottom: 1px solid #666;}.comment_user {flex: 1;display: flex;justify-content: center;align-items: center;.comment_user_image {width: 60%;border-radius: 50%;}}.comment-info {flex: 5;display: flex;flex-direction: column;justify-content: space-around;.comment-detail {display: flex;justify-content: space-between;.comment-detail .author {font-size: 28rpx;color: #000;}.comment-detail .date {color: #666;font-size: 24rpx;}}}.comment-content {font-size: 28rpx;color: #000;}}}</style>